How To Restart Your Node.js Apps Automatically with Nodemon on AccuWeb.Cloud?
When developing Node.js applications, restarting the server manually after every code change can become a repetitive and time-consuming task. With Nodemon, you can automate this process. Nodemon is a command line utility that monitors your files for changes and restarts your Node.js application automatically, streamlining your workflow. In this guide, we’ll cover how to set up and configure Nodemon on AccuWeb.Cloud to restart your Node.js apps automatically.
Why Use Nodemon?
Node.js applications require restarting to reflect any code changes. Manually restarting adds an extra step to your workflow, which can slow down development. Nodemon solves this problem by:
- Automatically detecting changes in the file system.
- Restarting the server whenever files are updated.
- Reducing development time and effort.
Let’s dive into how to install, configure, and use Nodemon effectively.
Step 1: Before using Nodemon, ensure you have a Node.js environment set up. AccuWeb.Cloud provides a streamlined dashboard to configure your development environment.
Log in to the AccuWeb.Cloud Dashboard and create a new Node.js container for your application. This container provides a virtual environment where your application can run and interact seamlessly with services like databases.
Step 2: Connect to your Node.js container securely using the Web SSH Gateway available on AccuWeb.Cloud. This gateway simplifies managing your virtual environment where Node.js and any related services (like databases) are deployed.
Step 3: You can install Nodemon globally or locally using npm or yarn.
Install Globally: To use Nodemon across multiple projects, install it globally:
npm install nodemon --globalOR
yarn global add nodemonInstall Locally: To use Nodemon only within a specific project, add it as a development dependency:
npm install nodemon --save-devOR
yarn add nodemon --devAfter installation verify it by running:
nodemon --versionStep 4: Let’s create an example Node.js application using Express and integrate Nodemon.
Create a Basic Express Server and Initialize your project:
mkdir nodemon-example
cd nodemon-example
npm init -y
Install Express:
npm install expressCreate a file named ‘server.js‘ and add the following code:
const express = require('express');
const app = express();
const port = 3000;
app.listen(port, () => console.log('Your app is listening on port ${port}!'));
Start the Application by running the application using Nodemon:
nodemon server.jsNodemon monitors the file for changes and automatically restarts the application whenever you save the file.
Demonstrating Nodemon in Action
- Run ‘nodemon server.js’. The output will display:
Your app is listening on port 3000!
- Modify the ‘server.js’ file. For instance update the message to:
console.log(‘Your NodeJS app is now listening on port ${port}!’);
- Save the file. Nodemon detects the change, restarts the server, and displays:
[nodemon] restarting due to changes…
[nodemon] starting ‘node server.js’
Your NodeJS app is now listening on port 3000!
You can also manually restart the server at any time by typing ‘rs’ in the terminal and pressing Enter.
Customizing Nodemon Behavior
Nodemon provides several options to customize its behavior. Here are some commonly used switches:
- –exec: Specify a binary to execute the file with.
- –ext: Define file extensions to watch.
- –delay: Set a delay before restarting.
- –watch: Specify files or directories to watch.
- –ignore: Ignore specific files or directories:
- –verbose: Enable verbose output to debug changes.
For example:
nodemon --exec ts-node server.tsFor example:
nodemon --ext js,ts,json server.jsFor instance:
nodemon --delay 2.5For example:
nodemon --watch srcFor example:
nodemon --ignore logs/For example:
nodemon --verboseTo view all available options and run:
nodemon --helpConfiguring Nodemon for Your Project
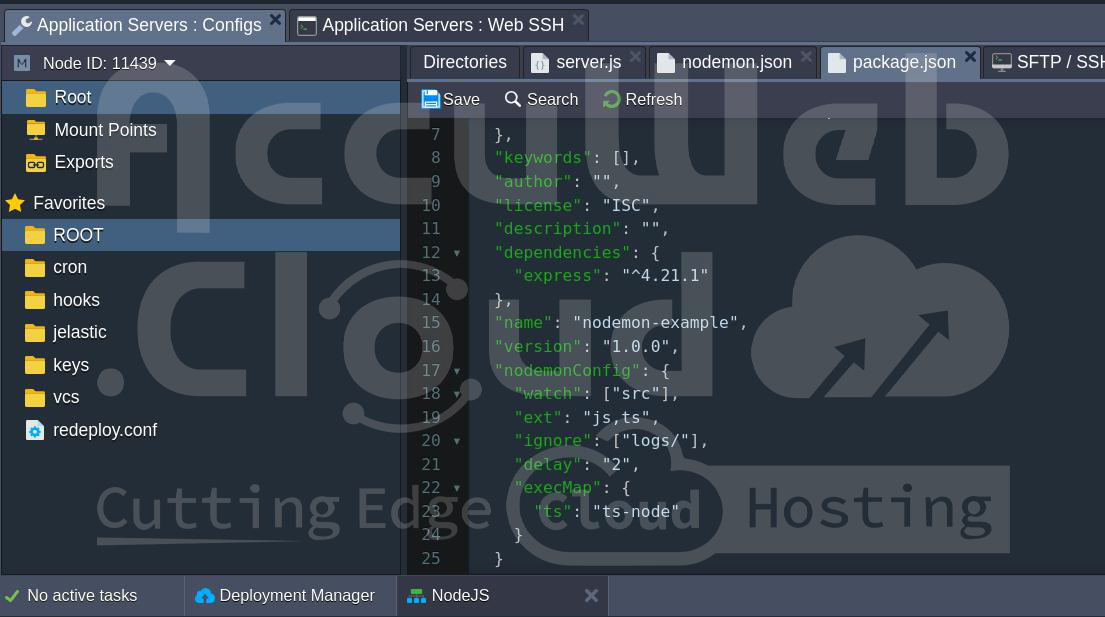
Adding configurations manually via command line switches can be tedious. Instead, you can define configurations in a ‘nodemon.json‘ file or in the ‘package.json‘ file.
Example nodemon.json Configuration:
Create a ‘nodemon.json’ file:
{
"watch": ["src"],
"ext": "js,ts",
"ignore": ["logs/"],
"delay": "2",
"execMap": {
"ts": "ts-node"
}
}
Example package.json Configuration: Alternatively, include a ‘nodemonConfig‘ key in your ‘package.json‘ file:
{
"name": "nodemon-example",
"version": "1.0.0",
"nodemonConfig": {
"watch": ["src"],
"ext": "js,ts",
"ignore": ["logs/"],
"delay": "2",
"execMap": {
"ts": "ts-node"
}
}
}
Nodemon will automatically detect and use these configurations.
Running Nodemon with Configurations
To start the application with the configurations, run:
nodemon server.jsConclusion
Nodemon is an essential tool for Node.js developers, significantly simplifying the development process by automating server restarts. On AccuWeb.Cloud, you can set up and utilize Nodemon seamlessly to accelerate your workflow.
By following this guide, you’ve learned how to Install and configure Nodemon, use it in a real-world Node.js application, and customize its behavior to suit your needs. With Nodemon in your toolkit, you can focus on writing code without worrying about restarting your server manually.


