One Click Installation of Odoo Community Edition from Marketplace
Odoo is an open-source ERP (Enterprise Resource Planning) software that provides a wide range of business management applications, from CRM to accounting and inventory management. The Odoo Community Edition is a free version of this software, offering essential features suitable for many small to medium-sized businesses. Installing Odoo on a cloud server allows you to access your Odoo system from anywhere, which increases flexibility and scalability for your business.
AccuWeb.Cloud offers a simple, cost-effective, and reliable platform to install and host Odoo Community Edition. In this guide, we will walk you through the process of installing Odoo Community Edition on AccuWeb.Cloud. Whether you’re new to cloud hosting or just unfamiliar with AccuWeb, this step-by-step guide will make the process clear and straightforward.
Steps to Install Odoo Community Edition
Step 1: The first step in installing Odoo Community Edition on AccuWeb.Cloud is to log into the AccuWeb.Cloud dashboard.Open your web browser and go to https://app.cp-accuweb.cloud/. Enter your login credentials (username and password) to access your cloud dashboard.
Once logged in, you will be able to access various cloud management options, including installing software from the AccuWeb Marketplace.
Step 2: AccuWeb.Cloud offers a marketplace with pre-configured applications, including Odoo Community Edition, which makes installation straightforward. Here’s how to access the marketplace:
In the dashboard, locate and click on the Marketplace option from the top menu.
The Marketplace page will load, where you will find a variety of applications available for installation. In the marketplace, you will find multiple software solutions for managing different aspects of your business. Among these, you will find the Odoo Community Edition.
 Step 3: Now that you’re in the AccuWeb.Cloud Marketplace, the next step is to find the Odoo Community Edition installation option.
Scroll through the available applications or use the search bar to search for Odoo Community Edition. When you find Odoo Community Edition, you will see its description and installation options.
Click on the Install button next to Odoo Community Edition to begin the installation process.
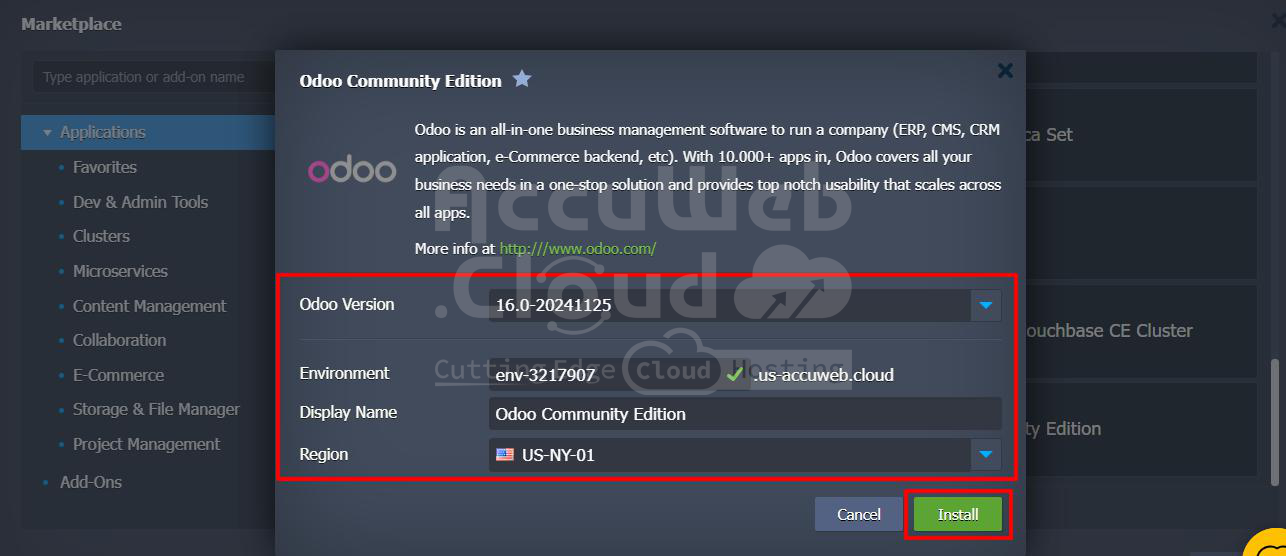
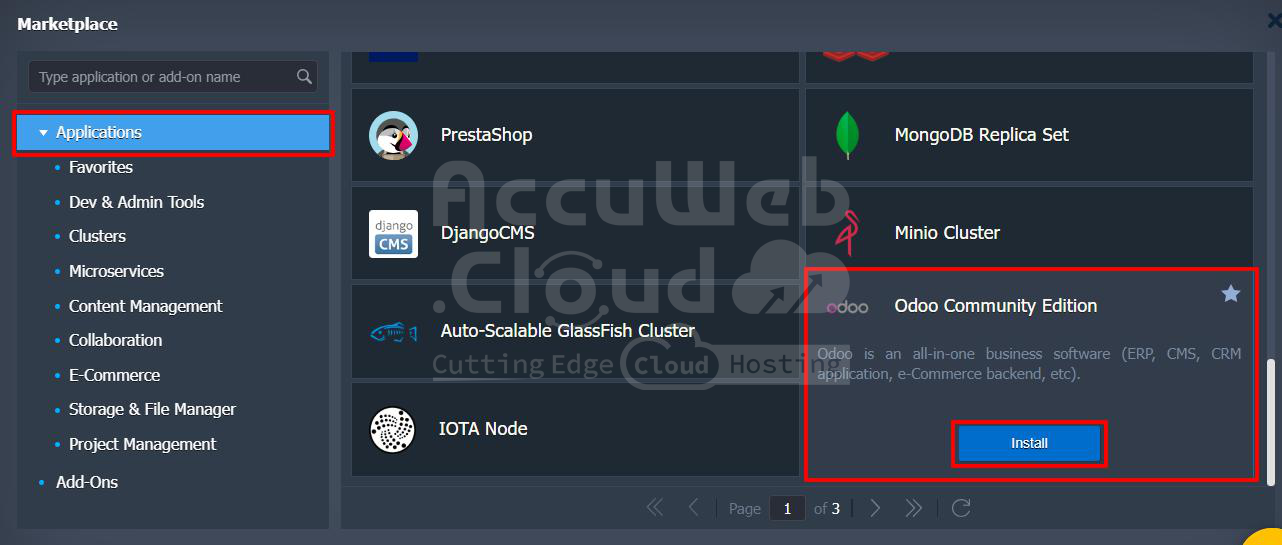 Step 4: Once you click the Install button, a pop-up window will appear, asking for basic configuration details for your Odoo installation. These details are necessary for setting up your instance correctly. Here’s what you need to fill out:
Odoo Version: Select the Odoo Version you wish to install. You can choose from different versions depending on your requirements. You will go with the latest stable release, but you can select an older version if needed.
Environment URL: This is the URL where you will access your Odoo instance. For example, you might use something like https://my-odooinstance.accuweb.cloud. This will be your unique URL to access the Odoo application after installation.
Display Name: This will be the name displayed on the dashboard for your Odoo instance. You can give it any name that reflects the purpose of your Odoo instance (e.g., “My Odoo Application”).
Region: Choose the region closest to your location or your business operations. This ensures that the server providing your Odoo instance is physically closer, which can improve performance. AccuWeb.Cloud offers multiple regions.
After entering the required information, click the Install button to start the installation process.
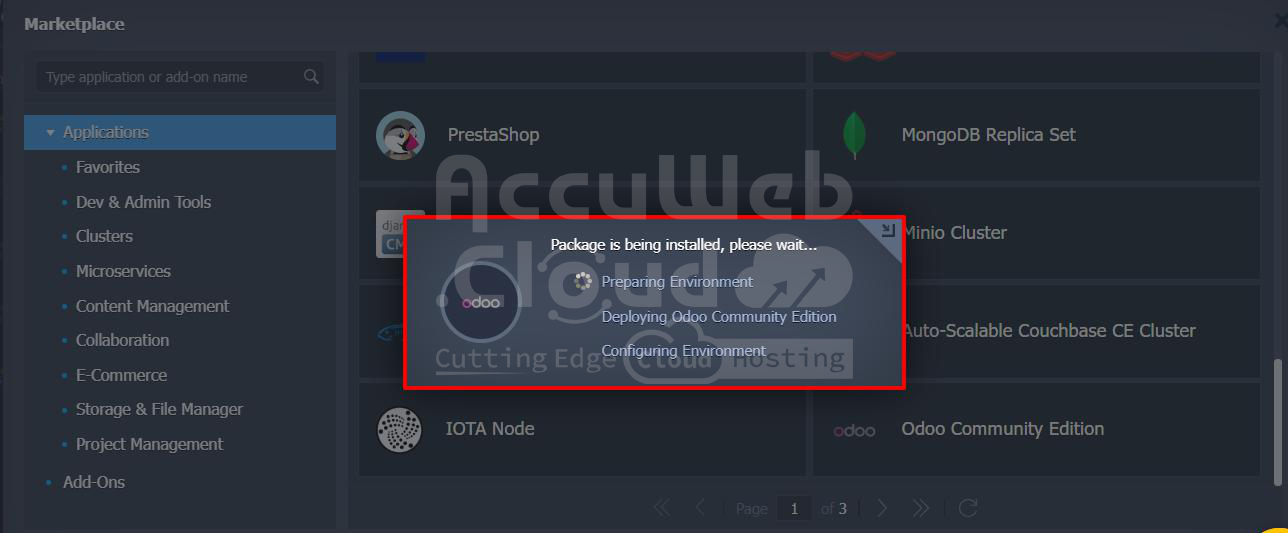
 Step 5: The AccuWeb platform will automatically begin the installation process once you click the Install button. This may take a few minutes. During this time, the platform will set up the necessary server configurations and deploy Odoo Community Edition for you.
You will see a progress bar or an indicator showing that the platform is working on your installation.
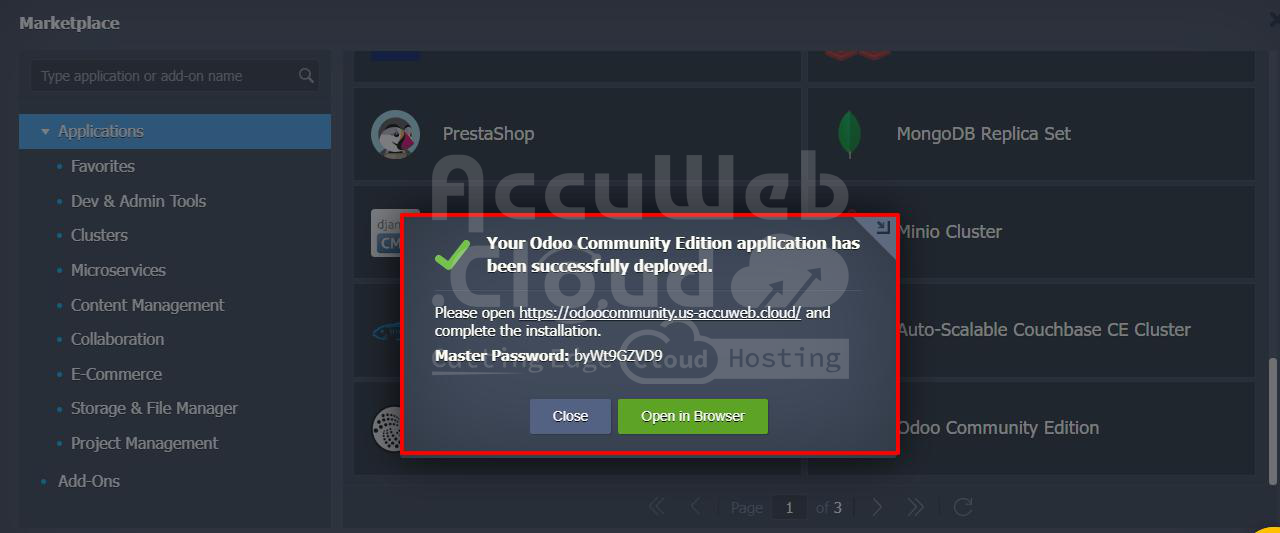
 Step 6: Once the process is finished, you will receive a confirmation message indicating that the installation was successful.
The message will contain the following information:
- Your Odoo Community Edition application has been successfully deployed.
- Please open the provided URL to complete the installation.
- Master Password: The message will provide you with a master password (e.g., byWt9GZVD9). Keep this password safe, as it will be needed to configure your Odoo instance.
 Step 7: After the installation is complete, the next step is to open the provided Environment URL to finish the installation process. Follow these steps:
- Open a web browser and navigate to the URL provided in the installation message (e.g., https://odoocommunity.us-accuweb.cloud/).
- You will be taken to the Odoo database manager screen, where you can either create a new database or restore an existing one.
Create a New Database:
To create a new Odoo database, you will need to fill out the following fields:
- Master Password: Enter the master password provided in the installation message (e.g., byWt9GZVD9).
- Database Name: Enter the desired name for your new database (e.g., my_database). This name will represent your Odoo database.
- Email: Enter the email address of the administrator. This email address will be used for logging in and receiving notifications from Odoo.
- Password: Set a password for the admin user of your database. You will use this password to log into your Odoo instance.
- Phone Number (Optional): If required, enter a phone number. This is optional.
- Language: Choose the default language for your Odoo database (e.g., English (US)).
- Country: Select the default country for the database.
- Demo Data (Checkbox): If you want to load sample data into your new database for testing, check this box. This can help familiarize yourself with Odoo.
- Create Database: Once all fields are filled out, click the Create Database button.
Restore an Existing Database: If you already have an Odoo database that you would like to restore, click on the “or restore a database” link below the Create Database button. You will be prompted to upload and restore a backup file of your existing database.
 Step 8: Log into Your Odoo Community Edition Instance.
Once you’ve created the database, the system will set up the necessary configurations, and you will be redirected to the Odoo login screen. Here’s what you need to do:
- On the login screen, enter the Email and Password you provided earlier during the database setup.
- Click the Login button.

Congratulations! You have successfully installed and logged into Odoo Community Edition.

Conclusion
Following these steps, you can easily install Odoo Community Edition on AccuWeb.Cloud. This cloud-based ERP system will help streamline your business processes, providing you with powerful tools for managing everything from customer relationships to financials. With AccuWeb.Cloud’s easy-to-use platform and Odoo’s extensive capabilities, you’re ready to begin optimizing and automating your business operations.


