How To Install and Use the Yarn Package Manager for Node.js?
Yarn is a fast, reliable, and secure package manager that helps developers manage JavaScript packages and dependencies for Node.js projects. It is an alternative to npm(Node Package Manager), with various enhancements in the way it operates, such as faster package installation, deterministic dependency resolution, and many others.
In this article, we will guide you through the installation of Yarn and its usage in the management of Node.js dependencies on AccuWeb.Cloud. AccuWeb.Cloud offers reliable and scalable cloud hosting solutions. Whether you work on a development project or deploy a production app, AccuWeb.Cloud will provide you with a stable platform for your Node.js applications.

What is Yarn?
Yarn is a JavaScript package manager that aims to address some of the shortcomings of npm, the default package manager for Node.js. Thus, Facebook developed Yarn to be faster, more reliable, and more secure than npm.
Here are some of the key advantages of Yarn:
Performance: Yarn is known for its speed, especially when installing packages. It can install dependencies in parallel, which significantly reduces the time it takes to set up a project.
Deterministic Dependency Resolution: Yarn ensures that your project’s dependency tree is always the same across all environments. This is achieved by using a ‘yarn.lock’ file, which locks the exact version of every dependency.
Offline Mode: Once a package is installed, Yarn stores it in a local cache. It means you can install all packages using Yarn even if you are offline.
Security: Yarn verifies the integrity of each package by using checksums, hence ensuring that the package hasn’t been tampered with.
Setting Up Your AccuWeb.Cloud Instance
Before installing Yarn, you require an up-and-running cloud environment where you can host your Node.js application. You can create an instance using the following procedure:
Step 1. Login into Accuweb.Cloud Dashboard and click the New Environment button from the top left area of the Environments Dashboard.
 Step 2. The Topology Wizard will pop up, from where you can configure the settings of your environment. After setting everything as desired, set the name of your environment and click the **Create** button.
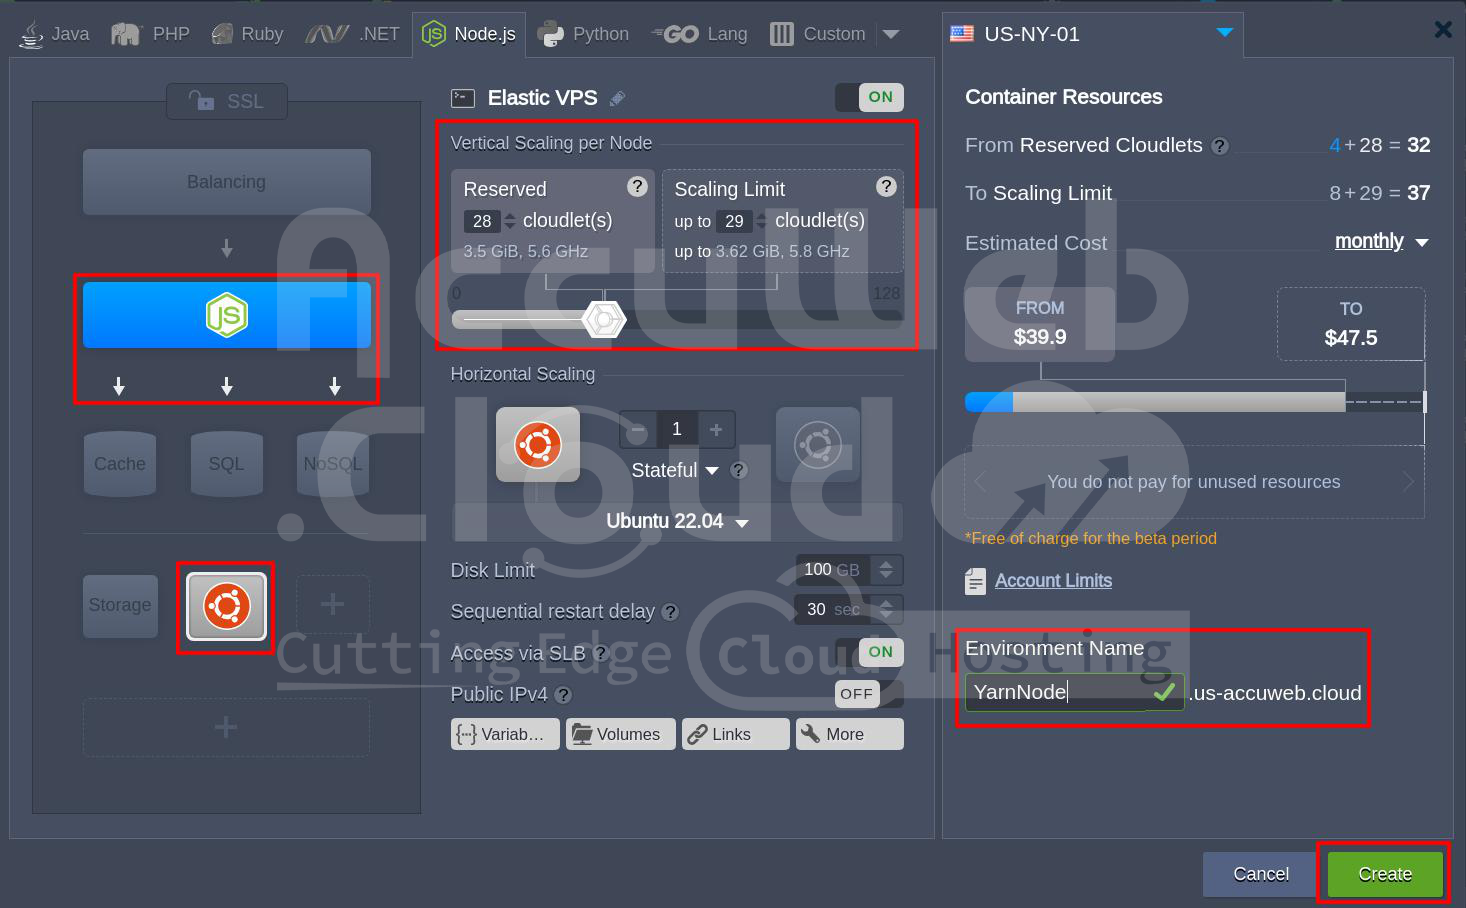 Step 3. When created, all the environments will appear on the dashboard’s central panel.
Step 4. Connect to your Node.js application server within the AccuWeb.Cloud environment using Web SSH. After that, you can proceed to install Yarn.

Prerequisites to Install Yarn on AccuWeb.Cloud
To install Yarn, the following are the pre-requisites:
1. Node.js Installed: Yarn depends on Node.js, so you must have it installed on your server.
2. A Non-root User: It’s recommended to install Yarn as a non-root user with sudo privileges to maintain security.
To check if Node.js is installed, use:
node -v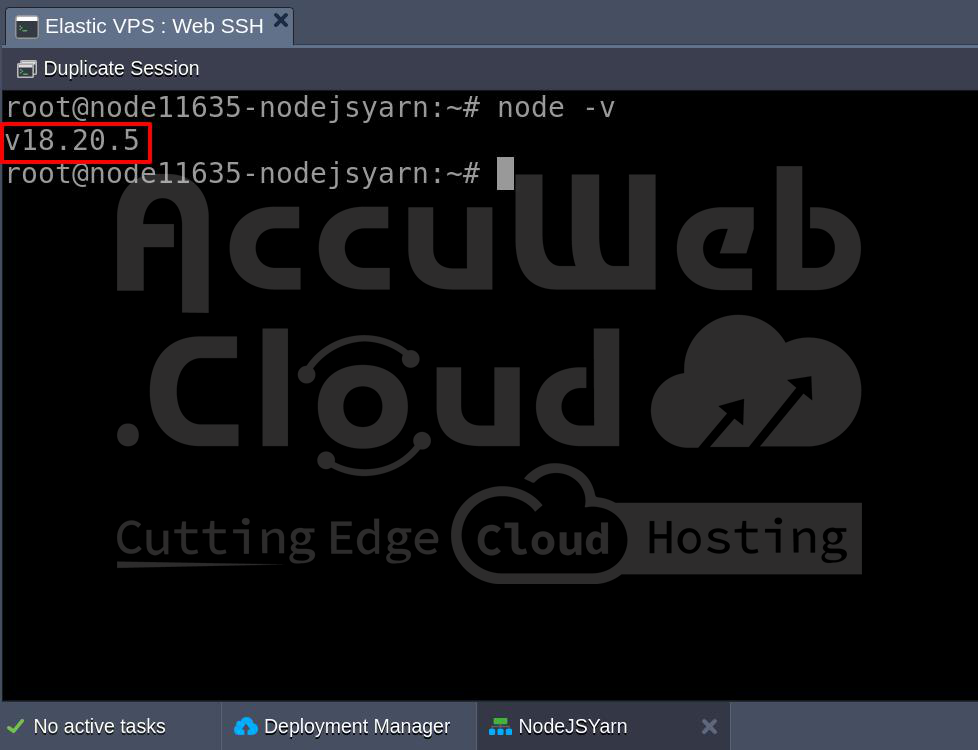 If Node.JS is not installed on the server, you can install using the below command,
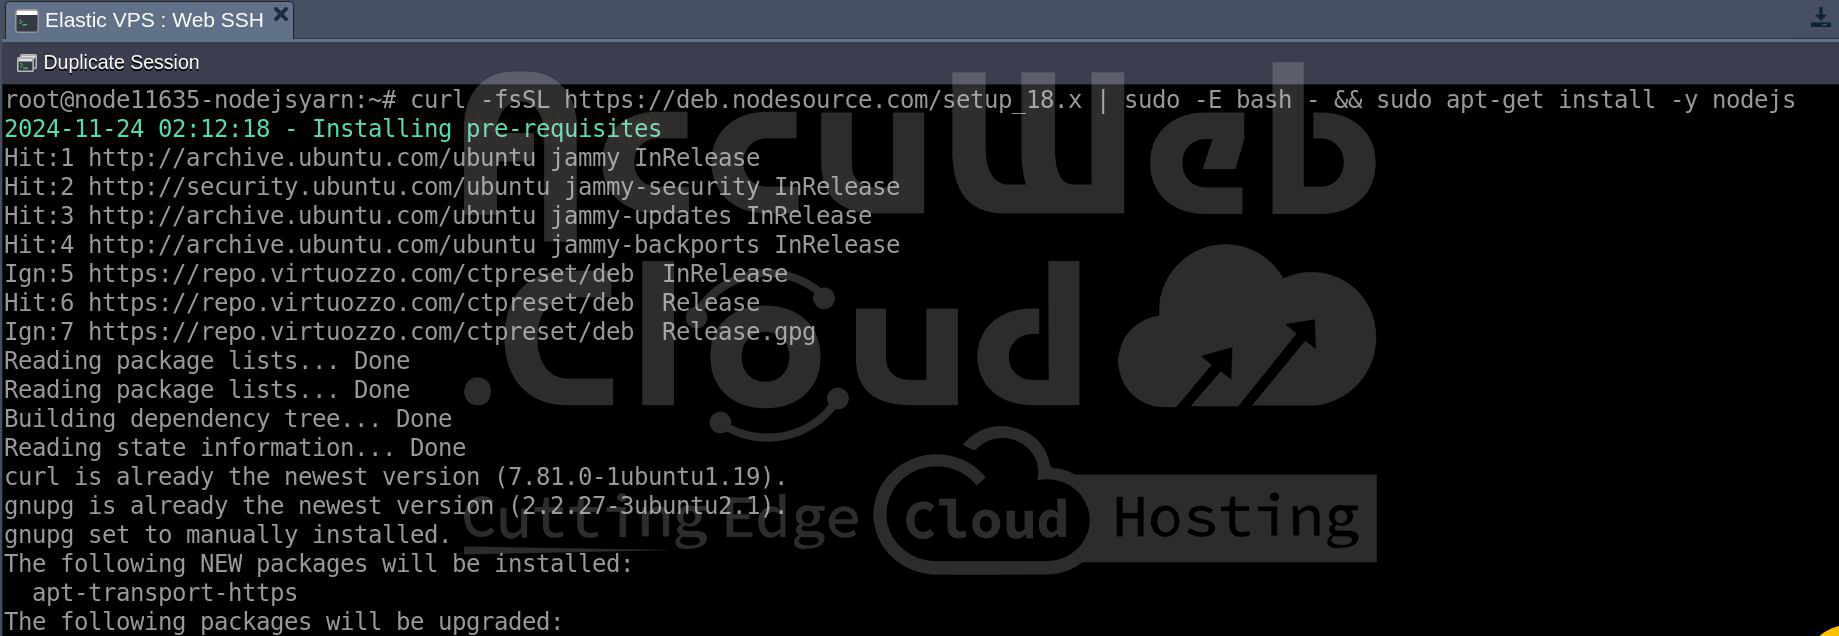
curl -fsSL https://deb.nodesource.com/setup_18.x | sudo -E bash - && sudo apt-get install -y nodejsInstalling Yarn on AccuWeb.Cloud
There are several ways of installing Yarn on your AccuWeb.Cloud server, but we will look into two major ways of installation.
Method 1: Using the Official Yarn Repository: You can install Yarn using the official Yarn repository. This ensures that one has the latest stable version of Yarn installed.
Step 1. Add the Yarn APT Repository: First, add the Yarn package repository to your system. You also need to install ‘curl’ to fetch the repository signing key.
sudo apt install curl
curl -sS https://dl.yarnpkg.com/debian/pubkey.gpg | sudo apt-key add -
Step 2. Add Repository to Your System: Now, add the Yarn repository to your system’s package list.
echo "deb https://dl.yarnpkg.com/debian/ stable main" | sudo tee /etc/apt/sources.list.d/yarn.list Step 3. Installing Yarn: After adding the repository, update your local package list and install Yarn.
sudo apt updatesudo apt install yarn Step 4. Verify Installation: You can check the version of Yarn installed to verify the installation:
yarn --version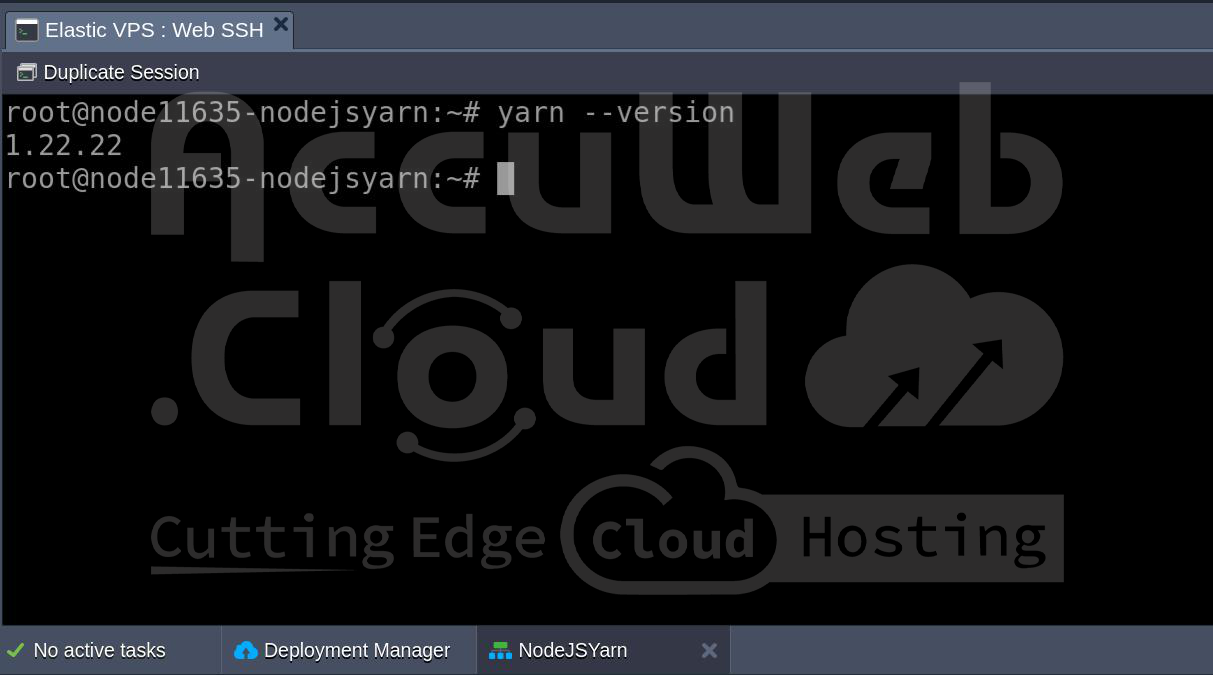 Method 2: Install Yarn with npm: With npm already installed, you can install Yarn globally using npm.
sudo npm install -g yarn –force After that, verify the installation using: yarn –version
Both ways, you should have Yarn installed on your AccuWeb.Cloud server.
Verify the Installation
After the installation of Yarn is complete, it is very important to check that everything is installed correctly. You will use the following command to check on the version of Yarn installed:
yarn –version
If everything is set up right, you will see in your terminal the version number of the Yarn installed.
How to Use Yarn in Your Node.js Projects?
Now that you have installed Yarn, the next thing is to see how you can use it in your Node.js project. Below are some common tasks you are most likely going to want to do with Yarn.
1. Initialising a New Node.js Project: If you are starting a new Node.js project, you can initialize it with Yarn.
yarn initThis command will prompt you to fill in details like the project name, version, description, entry point, and more. It will generate a ‘package.json’ file that will track your project’s dependencies.
Alternatively, you can initialize the project with default values using:
yarn init -y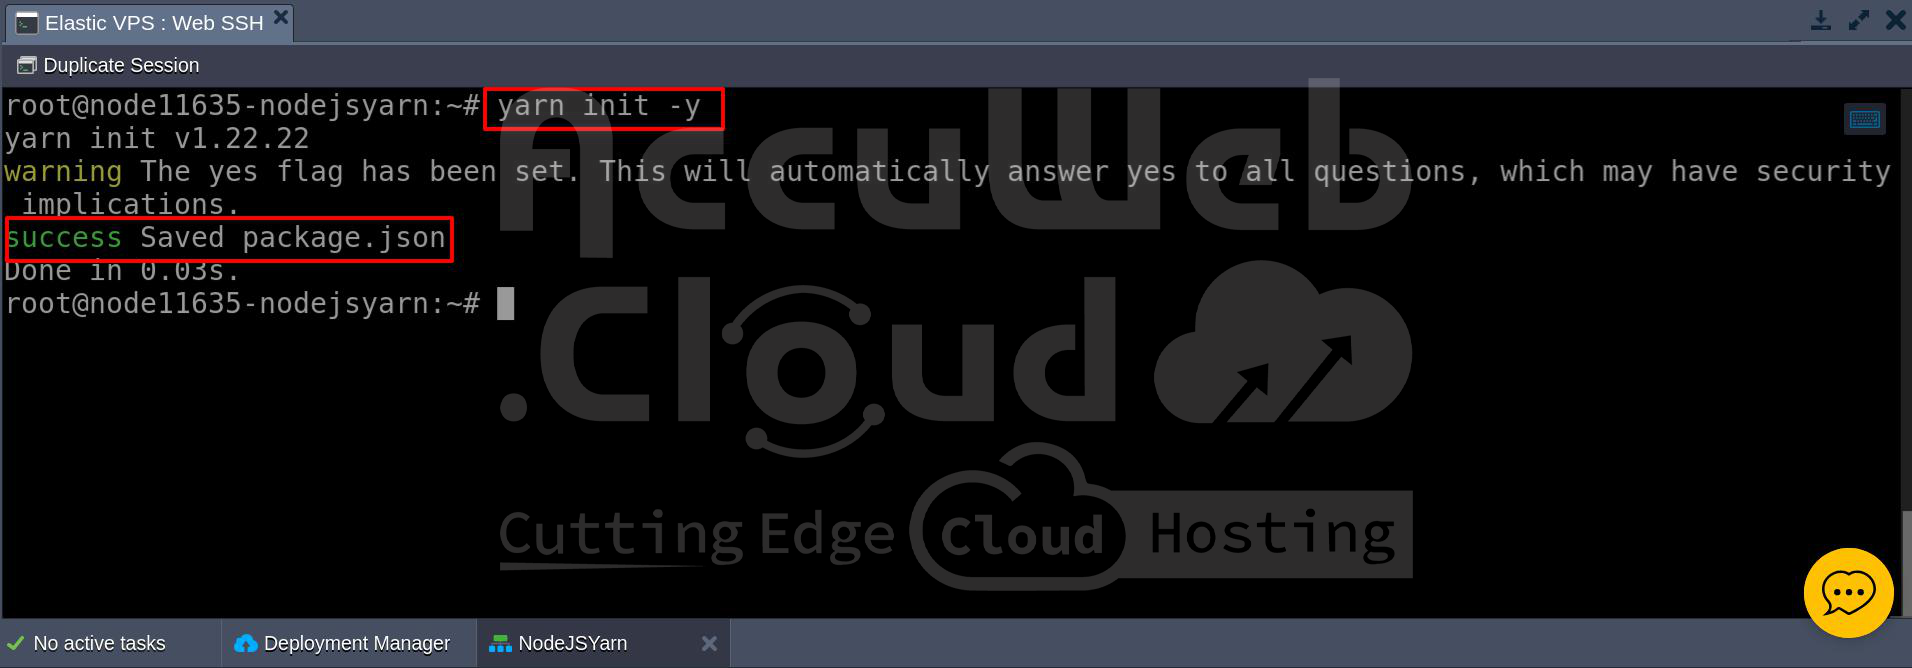 2. Adding and Installing Dependencies: One of the core features of Yarn is managing your project’s dependencies.
To add a new dependency: yarn add [package-name]
For instance, to include Express, you can execute:
yarn add express To install as a dev dependency: yarn add [package-name] –dev
For example, to install Nodemon as a development dependency:
yarn add nodemon --dev To install dependencies from a ‘package.json’ file: yarn install
3. Running Scripts with Yarn: You can execute scripts defined in your ‘package.json’ using Yarn. Suppose you have a script for starting up your Node.js application; you can execute:
yarn startThis will execute the ‘start’ script in your ‘package.json’.
 4. Updating and Removing Packages:
Upgrade a specific package: yarn upgrade [package-name]
Remove a package: yarn remove [package-name]
Managing Node.js Versions with nvm
If you are working on many Node.js versions, using ‘nvm’ is the right way to manage different Node.js versions on your AccuWeb.Cloud server.
1. Install nvm: curl -o- https://raw.githubusercontent.com/nvm-sh/nvm/v0.39.3/install.sh | bash
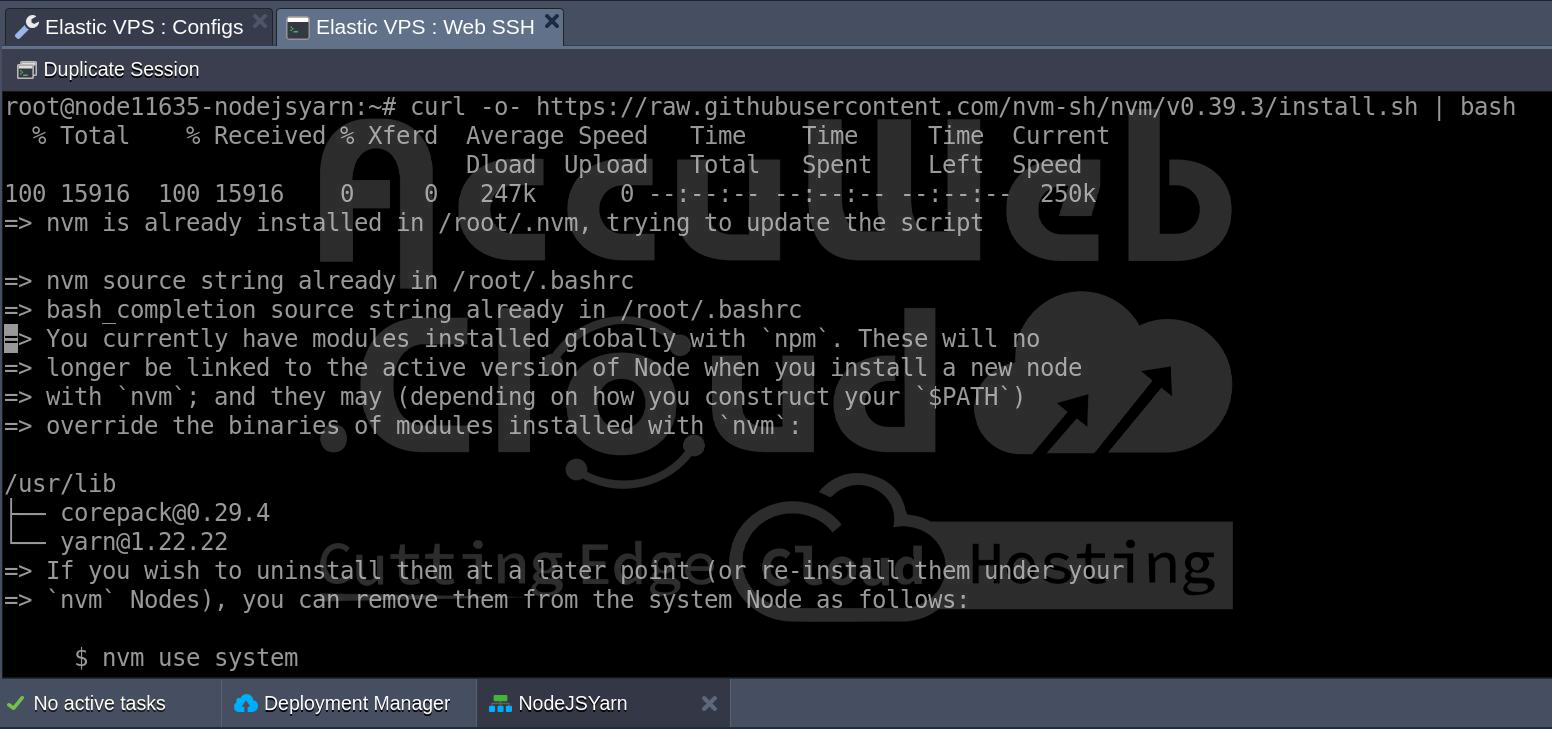 2. Install Node.js via nvm: Once you have installed nvm, it becomes easy to install and switch between Node.js versions:
nvm install 16
nvm use 16
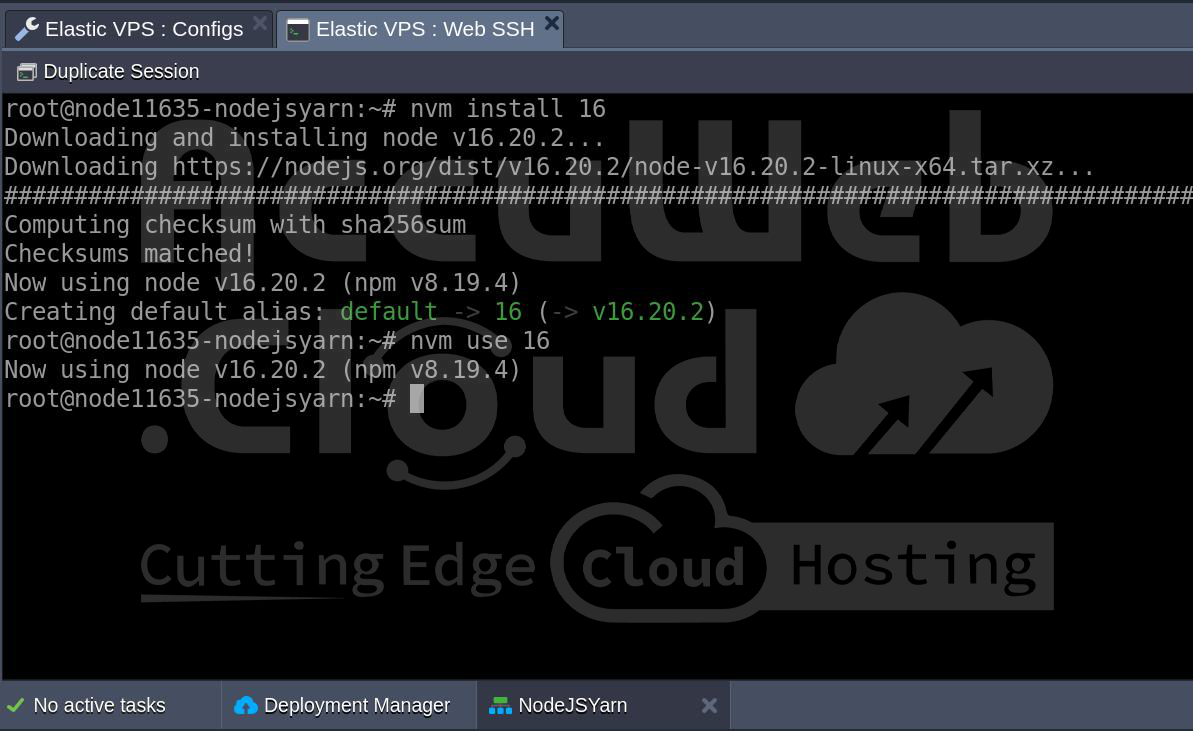 In this way, you will be able to work on different projects requiring different Node.js versions.
Conclusion
Yarn is a powerful package manager for Node.js that offers a variety of advantages, such as being fast, reliable, and secure. You should be able to download Yarn and work with it effectively on your server by the end of this tutorial. Yarn will help make your job of creating a new Node.js project, and managing your project’s dependencies easier and more efficient. Now that you have Yarn up and running, the next step is to handle your Node.js projects with ease. Be sure to explore all the features of Yarn, like Workspaces, Offline mode, and so on, to make your development process more efficient.
