Import and Export Dump Files to PostgreSQL
Make two database environments and establish a connection to them using any desktop client (pgAdmin4 is used as an example).
Exporting a Dump from PostgreSQL
Step 1. In pgAdmin4, organize your environments by adding remote-postgres.us-accuweb.cloud to the backupsource server group and destination.us-accuweb.cloud to the destination server group.
Step 2. Right-click on the database you want to back up (for instance, SQLdb) and select Backup from the context menu.
Step 3. In the dialog that appears, enter a name for your dump file (e.g.,backupdump) and choose the desired format for the output file, such as Tar.
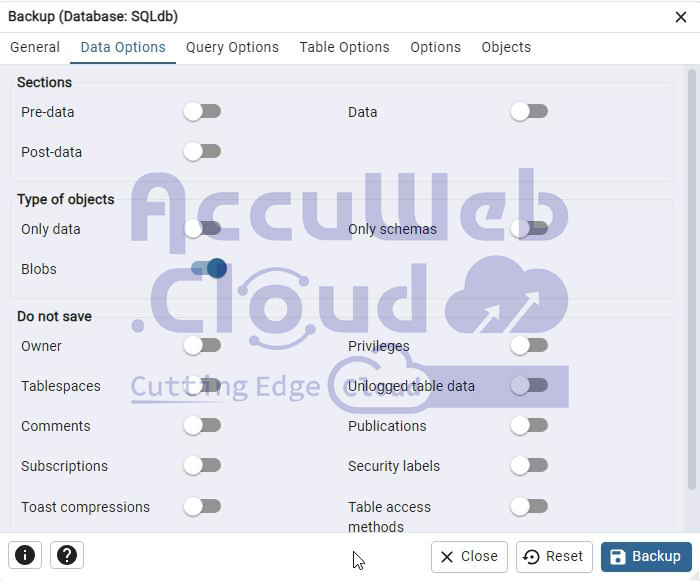
Step 4. Navigate to the Data Options tab and select the specific backup options for the database objects you wish to include.
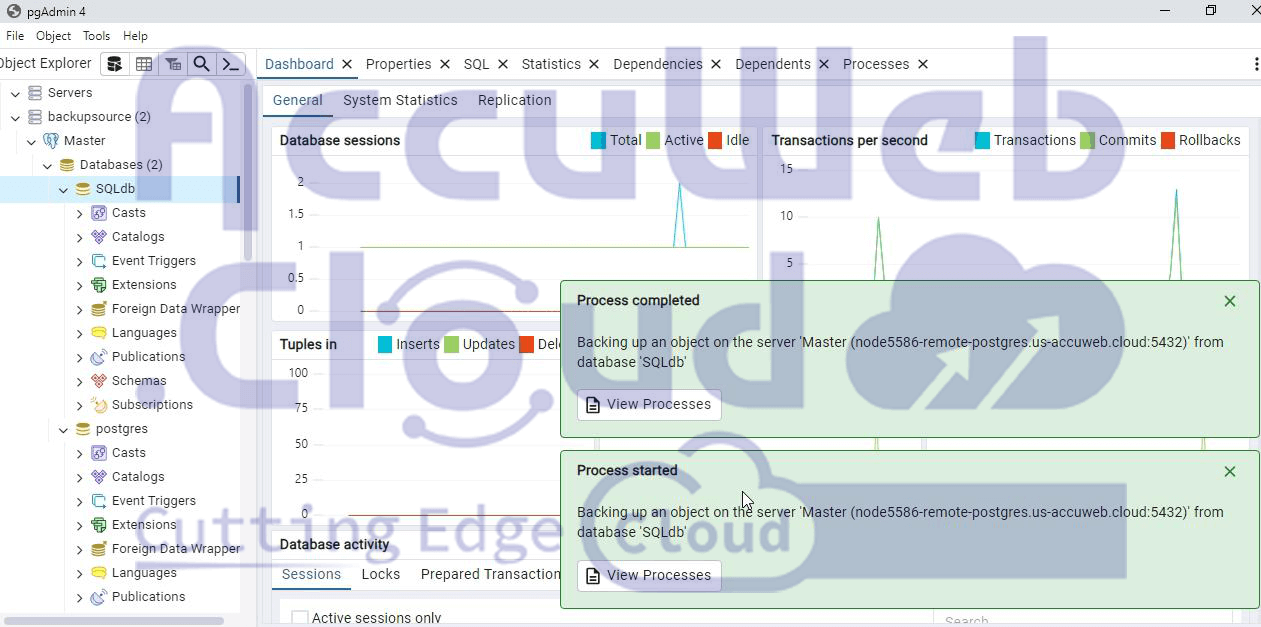
Step 5. Click the Backup button to initiate the process. A confirmation window should appear if the backup is successful.
Your dump file will be saved in your home directory or at the specified path where pgAdmin4 is installed.
Dump import to PostgreSQL
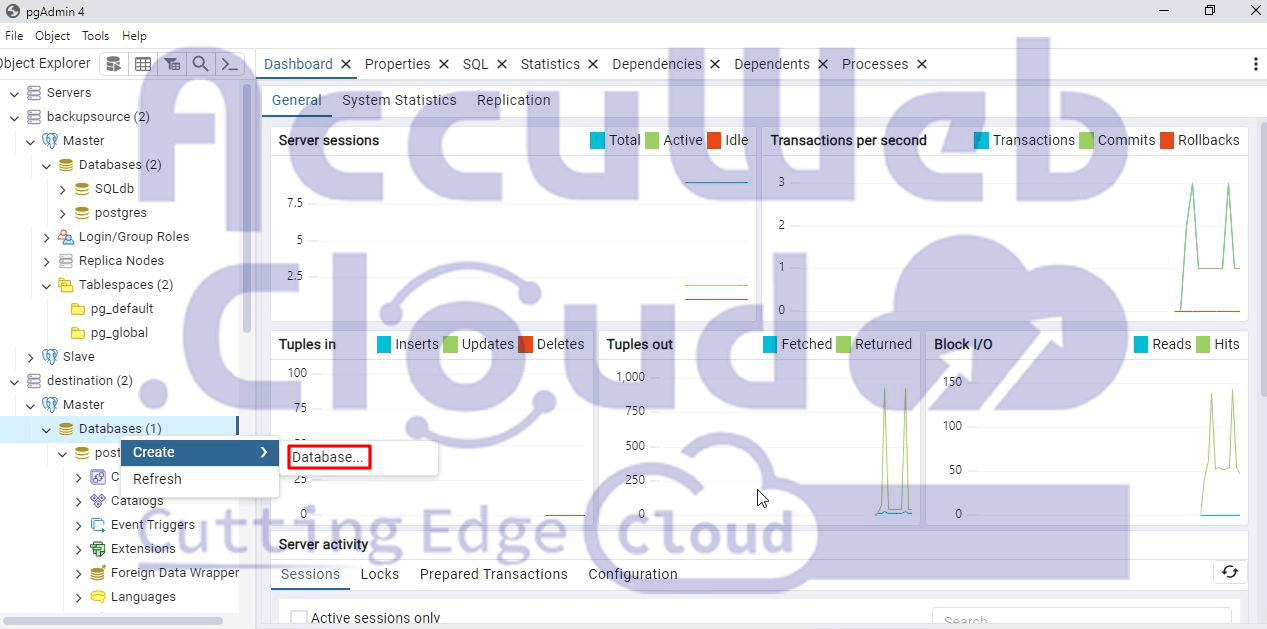
Step1. Begin by creating an empty database on the destination server.
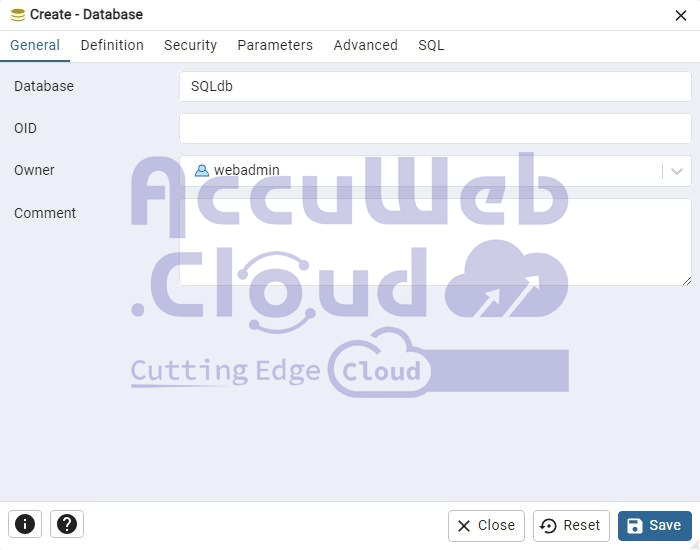
Step 2. In the Database field, you can either use the same name (e.g., SQLdb) or choose any name you prefer.
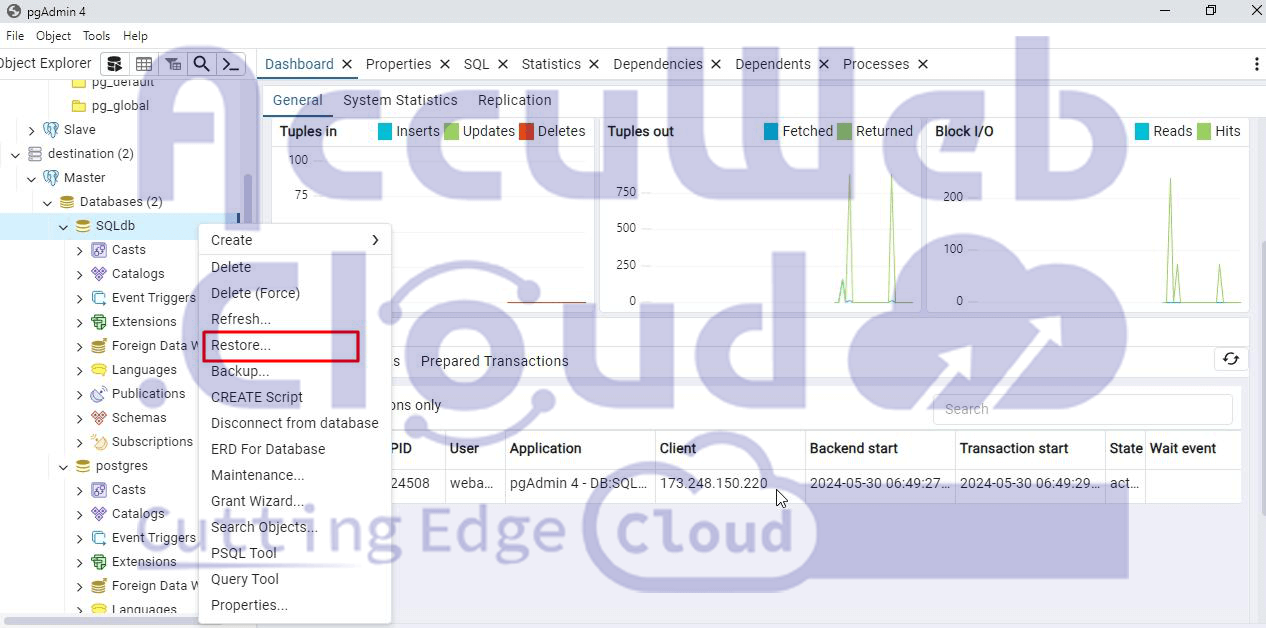
Step 3. To import the database dump into PostgreSQL, right-click on the new database and select Restore.
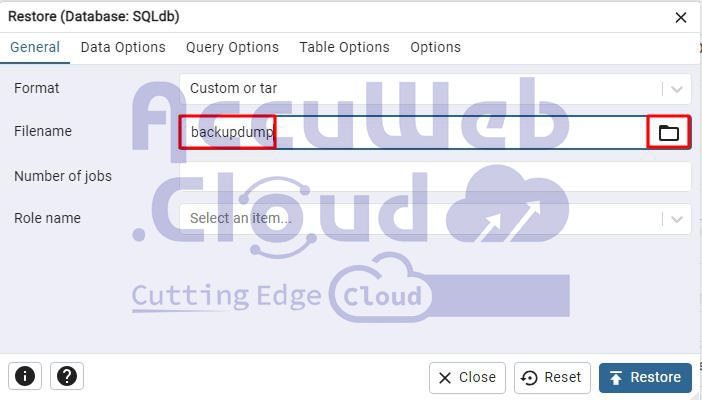
Step 4. Choose the file format that was used during the backup. In our example, we used the tar format. Specify the name of the backup file, or use the file open dialog next to the Filename field to select the appropriate file.
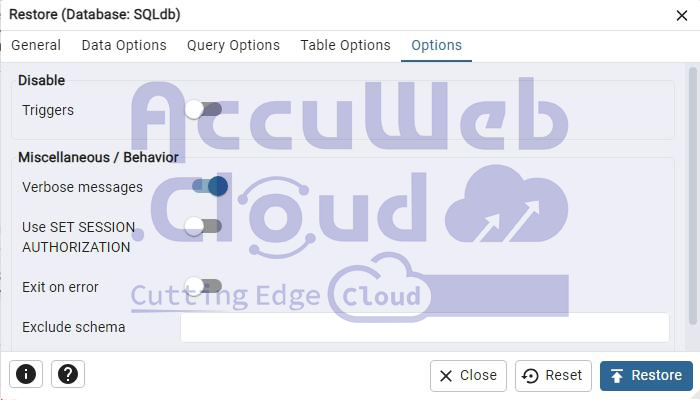
Step 5. If needed, configure any advanced restore options.
Step 6. Click the Restore button to proceed.
Step 7. Go back to the SQLdb database in the destination server group and verify that the database has been successfully restored with all its content on both the Master and Slave servers.
That’s it! We hope you found this guide helpful.


