Platform CLI Overview
The platform command-line interface (CLI) makes it easy to manage your Cloud Platform account from your computer’s terminal. It allows you to perform most operations remotely, complementing the features available on the dashboard and through the platform API.
The main advantage of the CLI is its powerful and simple automation tools. You can group text commands into scripts to automate tasks, monitor apps, and manage complex DevOps processes.
Let’s start with installing the platform CLI and learning the basics before exploring more detailed tutorials on specific operations.
CLI Installation
To install the platform CLI on your local machine, run this single line of code in your terminal:
curl -s ftp://ftp.jelastic.com/pub/cli/jelastic-cli-installer.sh | bash- Make sure you have Java 8 or higher installed first.
- If you are using Windows, install a Unix-like environment (e.g., Cygwin) and run the commands there.
The platform CLI will be installed in a folder named Jelastic in your home directory. The folder structure and scripts mirror the platform API, making it easy to use.
Getting Started
The platform CLI consists of an executable .jar file and pre-configured commands (bash scripts) for managing your environment. With these commands, you can monitor, control, and automate your environment’s lifecycle.
1. Authentication
To start, you need to authenticate. The necessary file is already installed on your local system. You need to run the below-mentioned command to authenticate the account.
# ~/jelastic/environment/control/getenvsFollow the prompts and enter the required information:
- Platform URL: AccuWeb.Cloud dashboard URL (e.g., app.cp-accuweb.cloud)
- Email: Your account email (login)
- Password: Your account password
If the information is correct, you’ll see the platform logo and version.
# ~/jelastic/users/authentication/signin --login {email} --password {password} --platformUrl {platformUrl}Replace the values in braces with your account details.
If the operation is successful, you’ll see “result”: 0 in the response.
2. Session Information
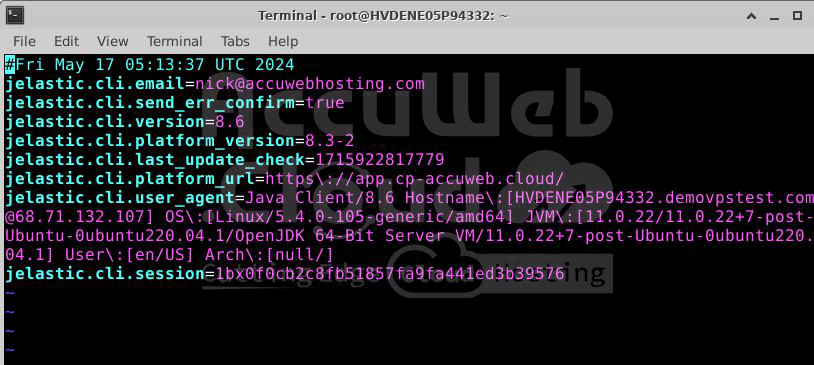
Your session details (platform address and credentials) are stored in the ~/.config/jelastic/jelastic.properties file. This file is used automatically, so you don’t need to re-authenticate each time.
By default, the CLI command is considered successful even if the API method returns an error. You can change this by adding the jelastic.non_zero_exit_code parameter to the configuration file. Set it to true to make the CLI return a non-zero code for errors.
3. Help
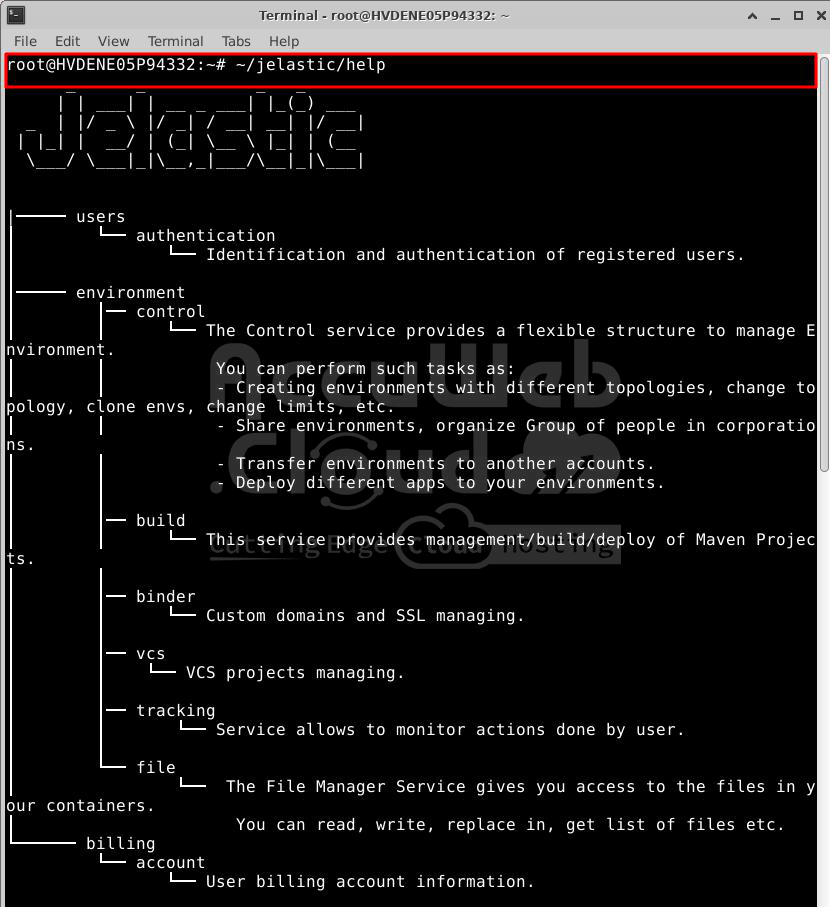
If you need help with the command-line interface structure, use the help command:
~/jelastic/helpThis shows a list of available command types (methods). Each method has a corresponding folder with scripts (functions) inside.
4. List Operations
To list all operations for a particular method, use the ls command for the appropriate directory, for example:
ls ~/jelastic/environment/controlEach function can be called using its full path.
5. Operation Details
For more information on an operation, run it without parameters to see the required inputs. You can also refer to the API documentation for additional details.
6. Silent Mode
By default, a loading animation is shown while waiting for command execution. If you need to save the response to a file for automation purposes, you can hide the animation by adding this argument:
--silent trueThis makes the output ready for use in scripts without additional editing.
Now that you have some basic knowledge of the platform CLI, you can explore it further on your own.


