WordPress Deployment Guide: Configuring Environment, Domain Binding, and SSL Setup
Manually configuring WordPress in the cloud may seem daunting, but don’t worry! This guide is designed to simplify the process. We’ll provide step-by-step instructions, whether you’re an experienced user looking to customize every detail or a beginner eager to learn.
You will learn
- how to install and configure WordPress on your server,
- set up and connect your WordPress site to a database using phpMyAdmin,
- bind a custom domain to your WordPress environment, and
- install Let’s Encrypt Free SSL for your custom domain.
By the end, not only will your WordPress site be running smoothly in the cloud, but you’ll also have a deeper understanding of the entire setup.
1. Installing and configuring WordPress on your server
These steps cover setting up a PHP environment and installing WordPress on your server. It covers steps from uploading WordPress files to configuring your web server and ensuring the correct URL structure.
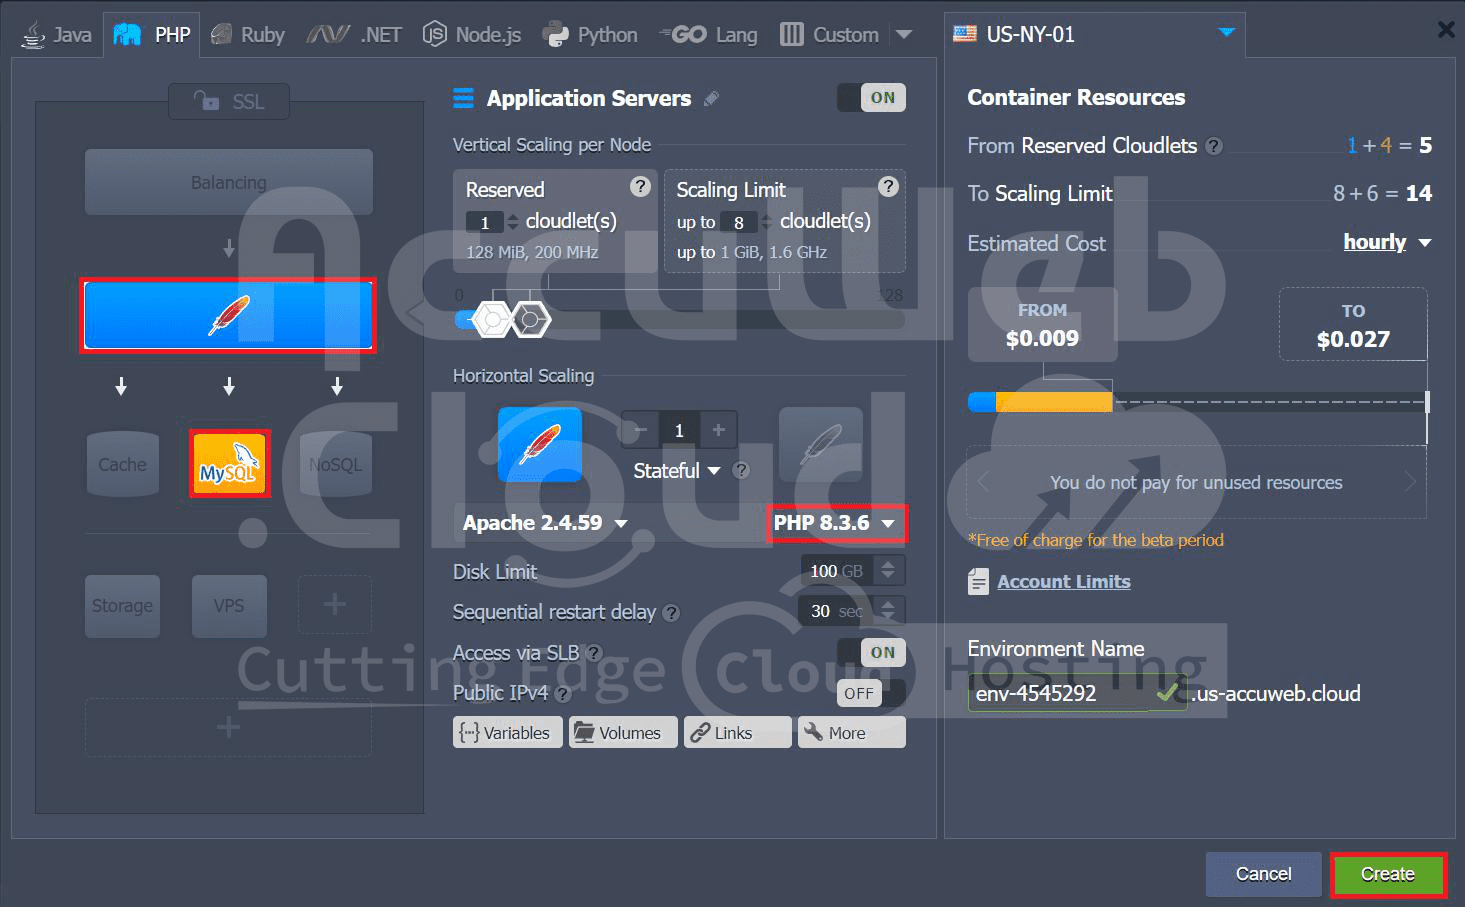
Step 1 Click on “Create New Environment,” select PHP as the language, and choose the required server and database. The PHP environment and its version required for server installation will be displayed alongside the server name and version.
Step 2. Click on config
Step 3. Navigate to the directory `/var/www/webroot/ROOT`.
Step 4. Upload your WordPress file or you can download WordPress and upload it.
For example, here, we are uploading the downloaded WordPress files. Upload your WordPress files to the directory /var/www/webroot/ROOT.
Step 5. Click on the Web SSH icon.
Step 6. In the terminal, navigate to /var/www/webroot/ROOT using the command
cd /var/www/webroot/ROOT
Step 7. When listing the files, if you see a zip file of WordPress uploaded, use the following command to unzip it
unzip filename.zip
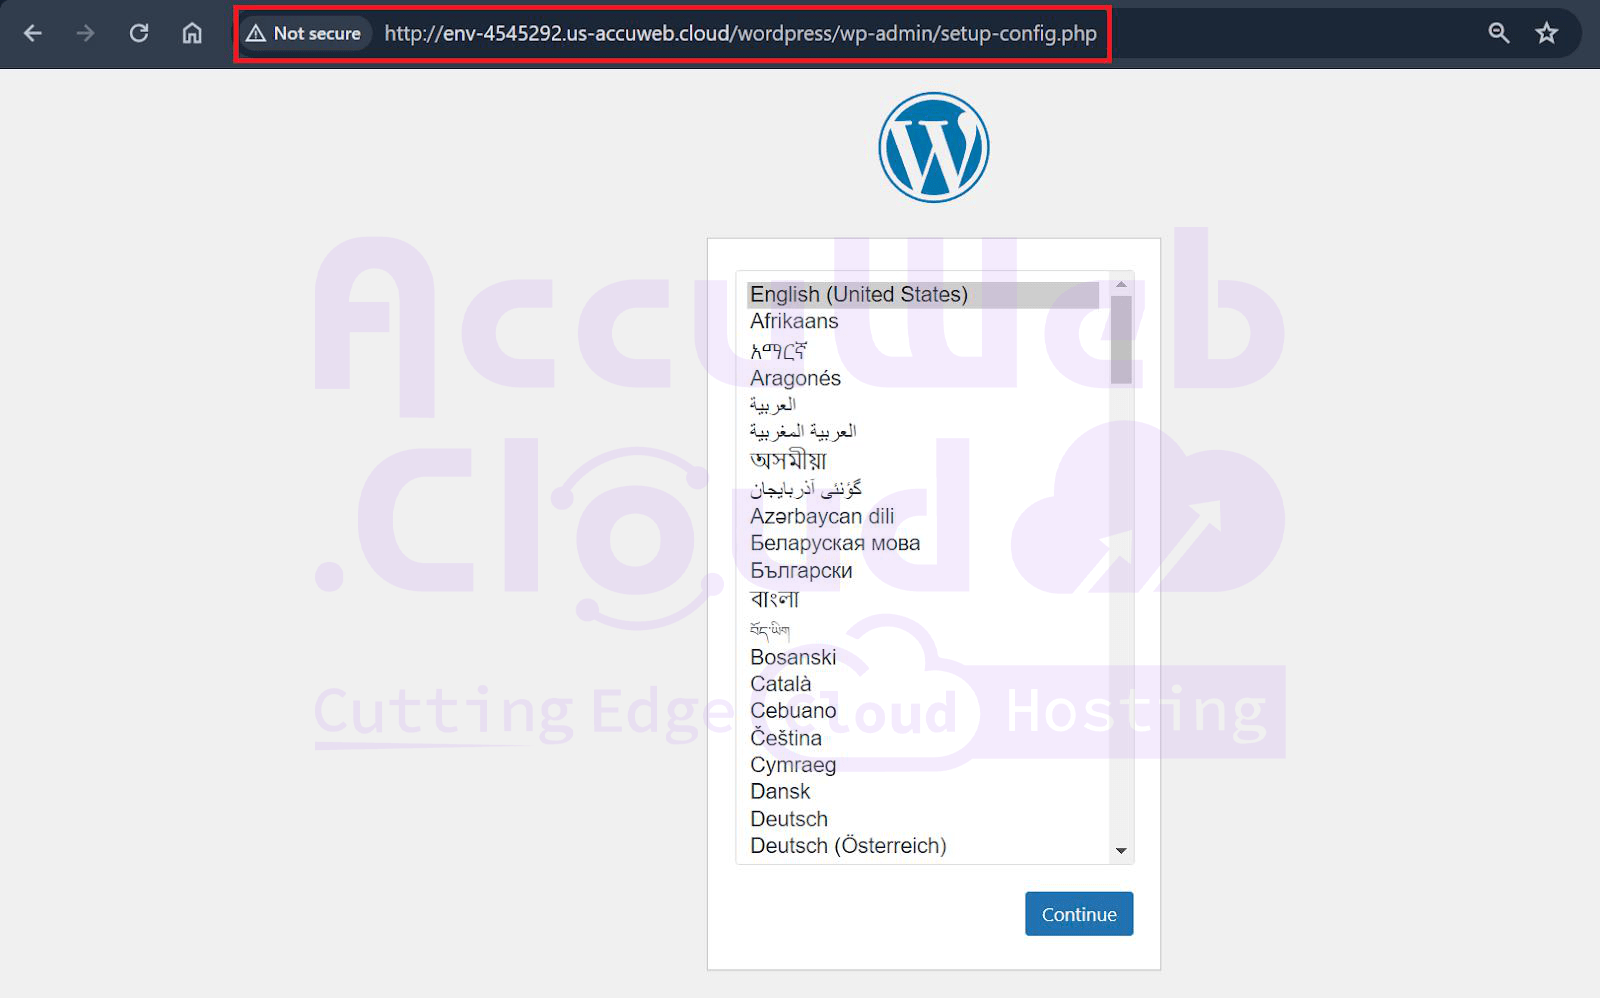
Step 8. When accessing WordPress, if you see /wordpress in the URL before wp-admin, it indicates that WordPress is installed in a subdirectory.
Step 9. To resolve this issue, you may need to adjust your web server configuration or move the WordPress files to the root directory of your web server. To move WordPress files to the root directory, use the command
mv * /var/www/webroot/ROOT
Step 10. When you list the directory’s contents, you should see all WordPress files.
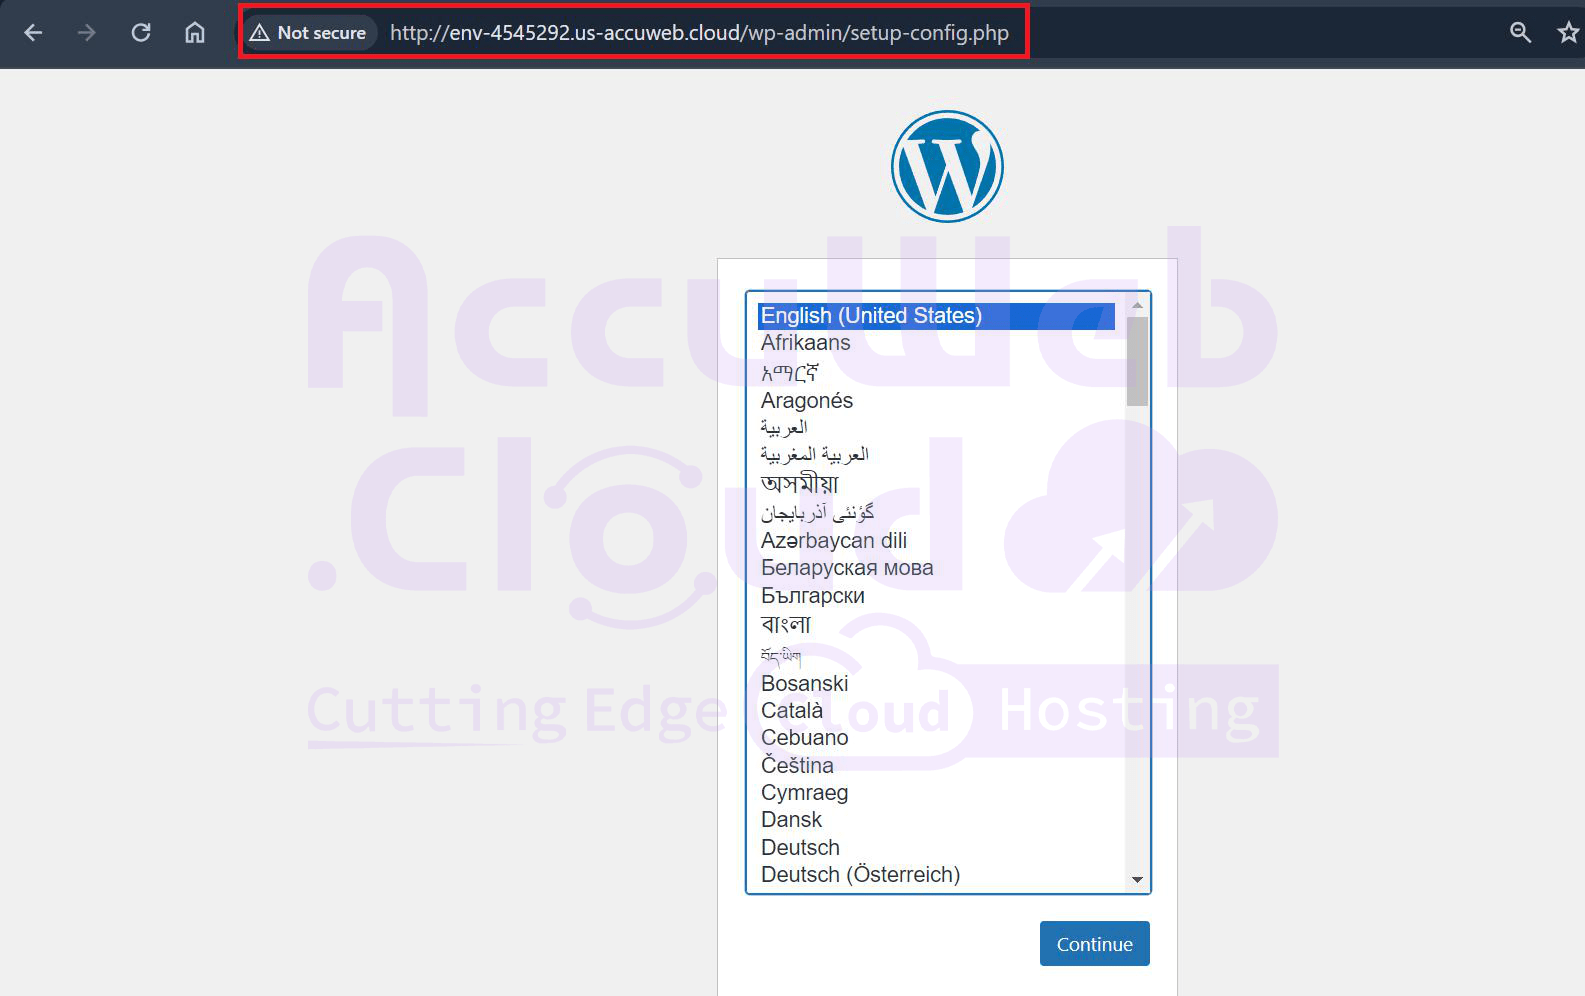
Step 11. If you access the URL now, you will see that `/wordpress` is removed from the URL.
2. Setting Up and Connecting Your WordPress Site to a Database Using phpMyAdmin
These steps cover how to create a new database in phpMyAdmin and connect it to your WordPress site. It also covers entering necessary database details and completing the WordPress installation process.
Step 1. Log in to your phpMyAdmin account using the password and credentials received on your registered email ID.
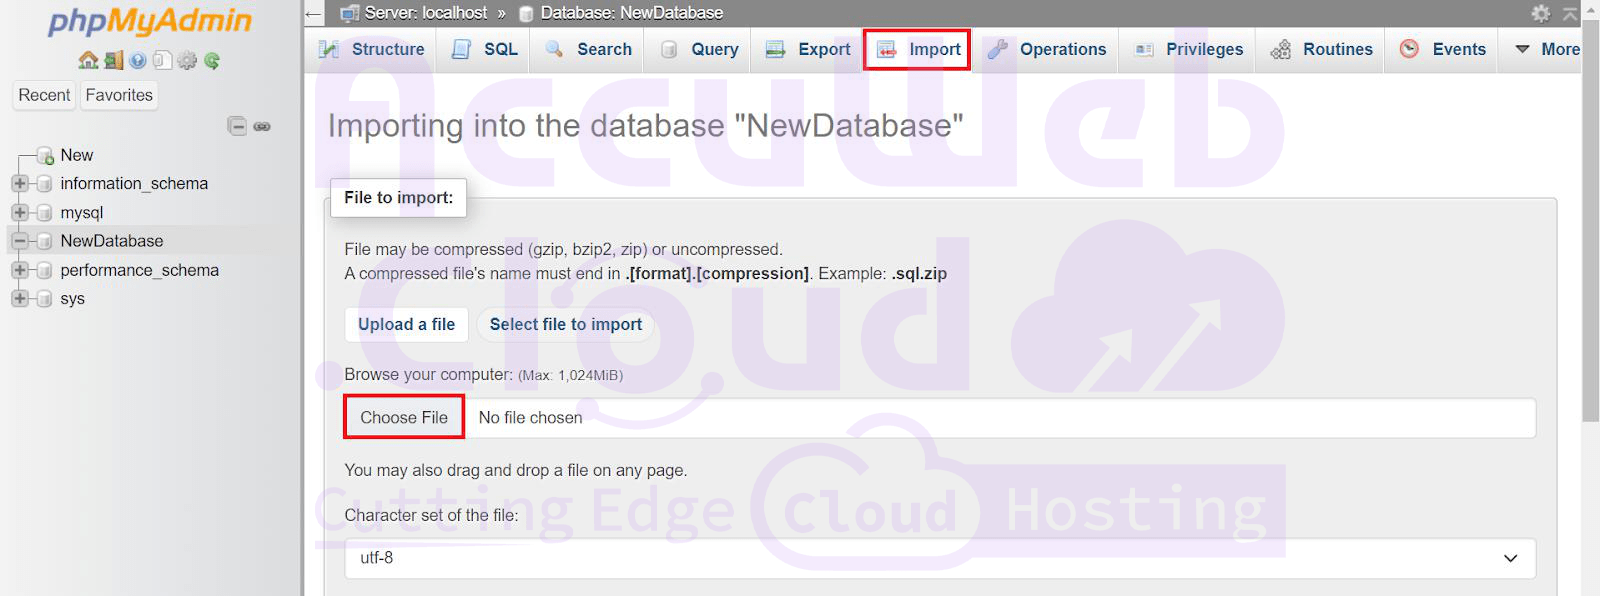
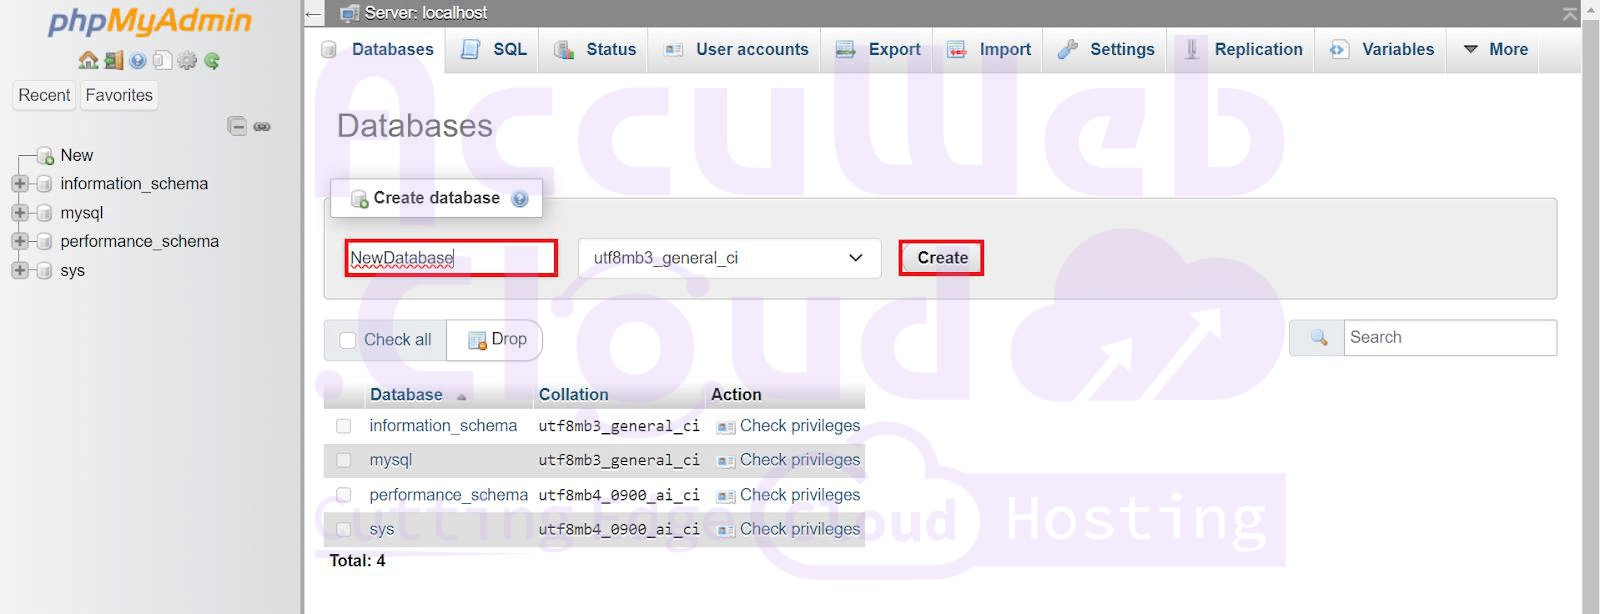
Step 2. You can create a new database or import an existing one into phpMyAdmin.For example, here, we are creating a new database.
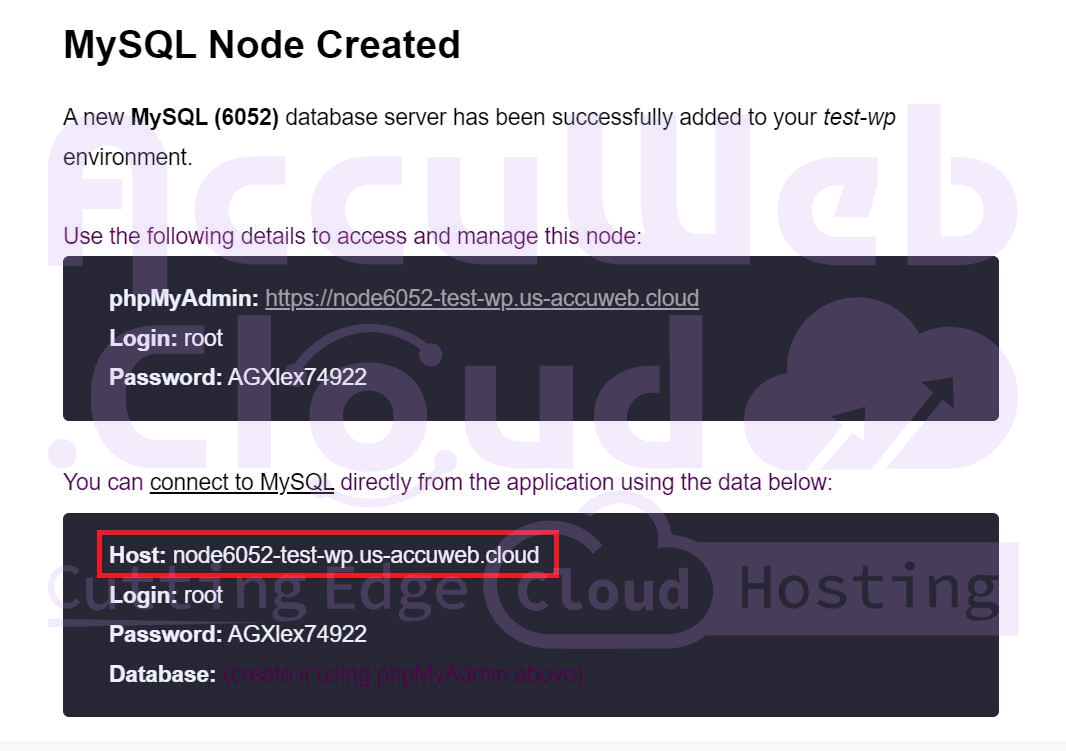
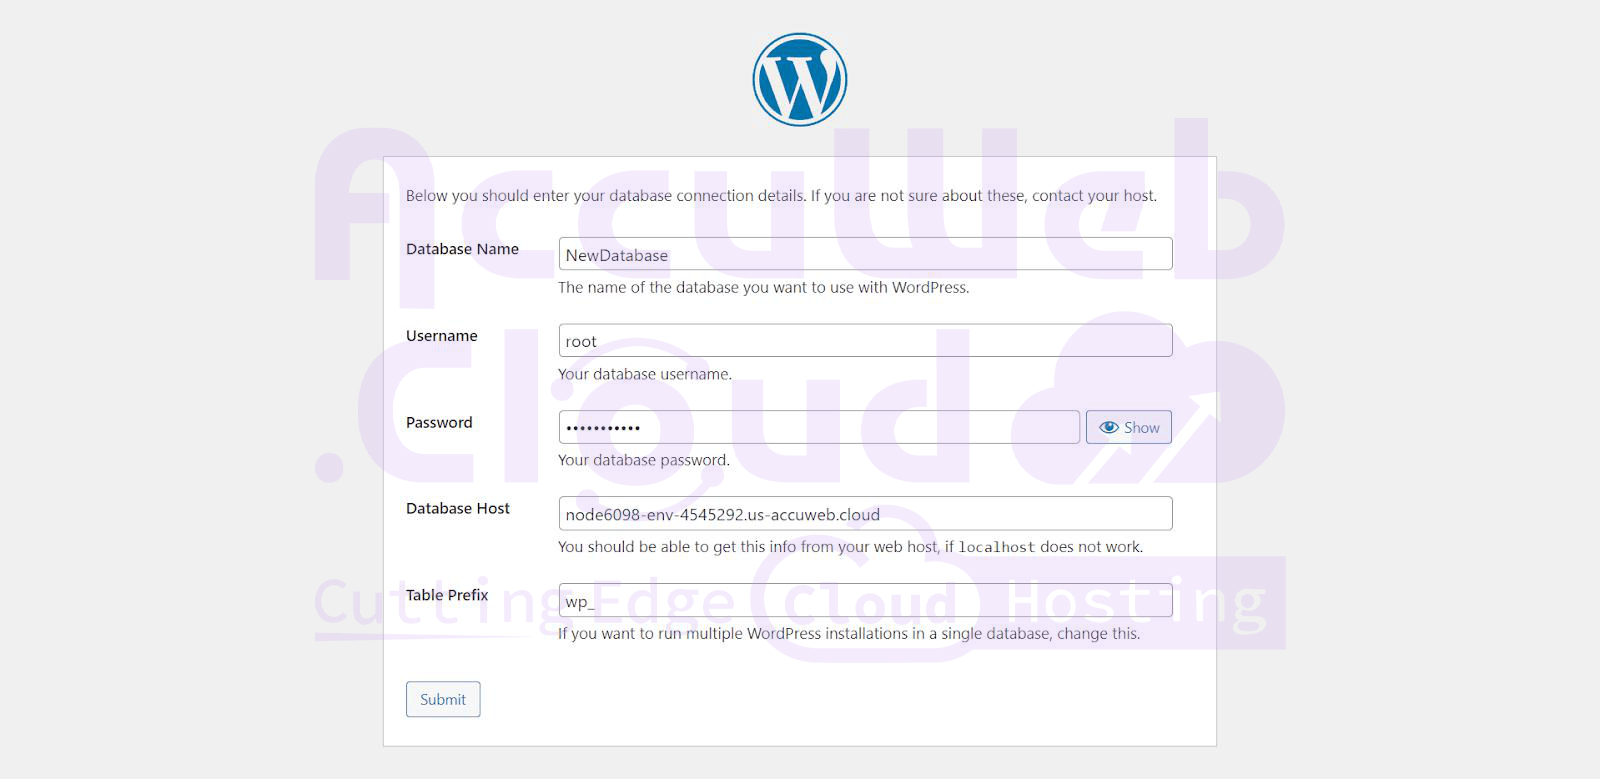
Step 3. Enter your database connection details in WordPress: database name, username, password, and host. You can find your username, password, and database host information in the email you received when the database node was created.
Step 4. This indicates that WordPress can now communicate with your database, meaning everything is set up for WordPress. Click on “Run Installation.”
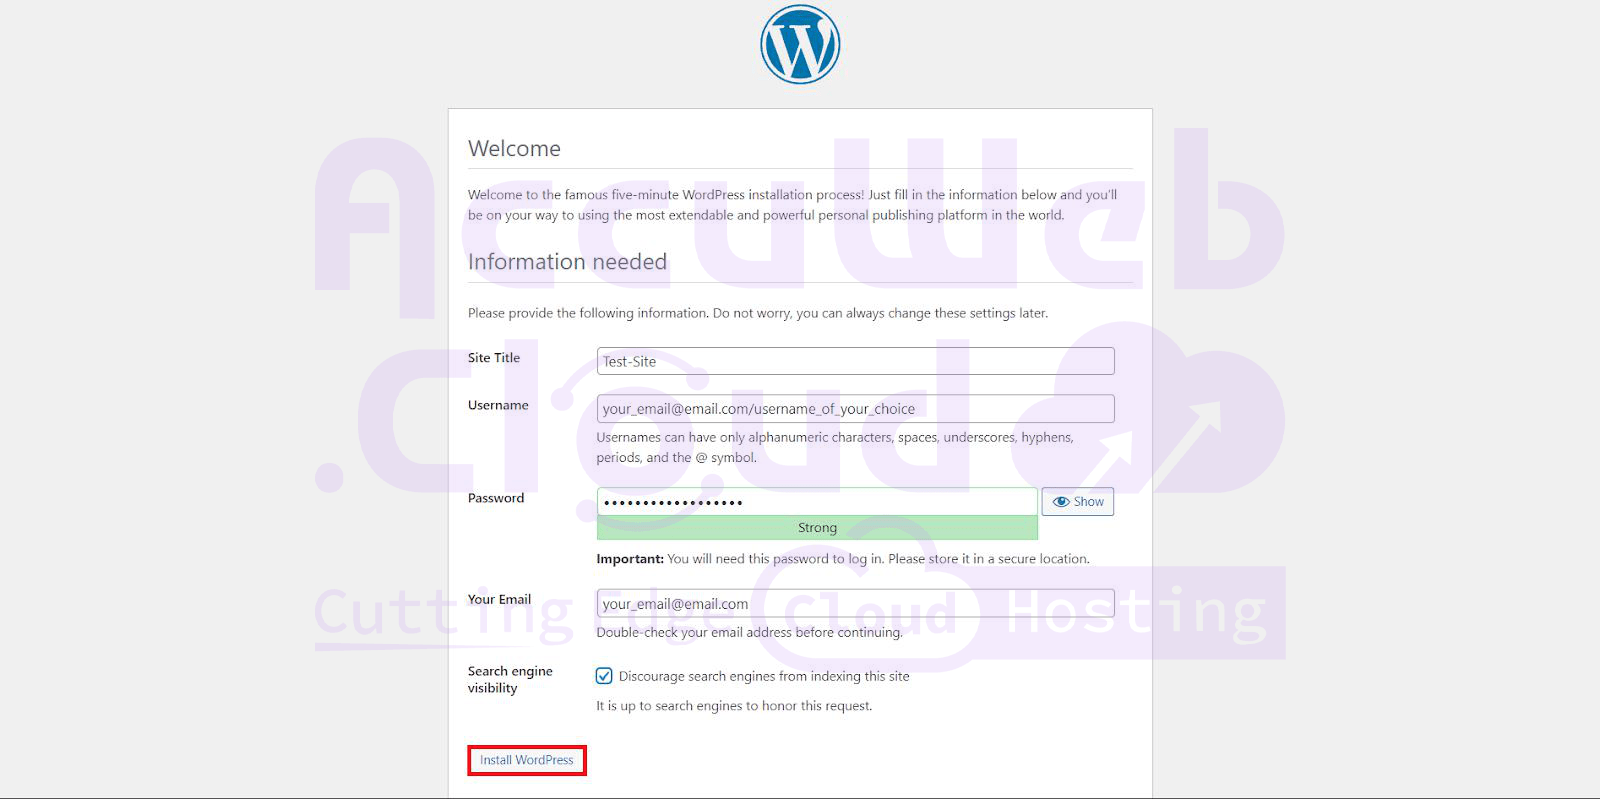
Step 5. During the WordPress installation process, you will need to provide several details including the site title, username, password, and email address. It is important to choose a strong password to ensure the security of your site.
Step 6. Log in to your WordPress account using the username and password you set.
3. Binding a Custom Domain to Your WordPress Environment
Domain binding involves linking your domain name to the environment created on your account, allowing your website to be accessible through your chosen domain. This process ensures that visitors can reach your site by typing your domain name into their browser. Here, we will bind the domain of the current environment created(WordPress) with your custom domain. For example, we are using a testing domain – ‘stptraining.in’
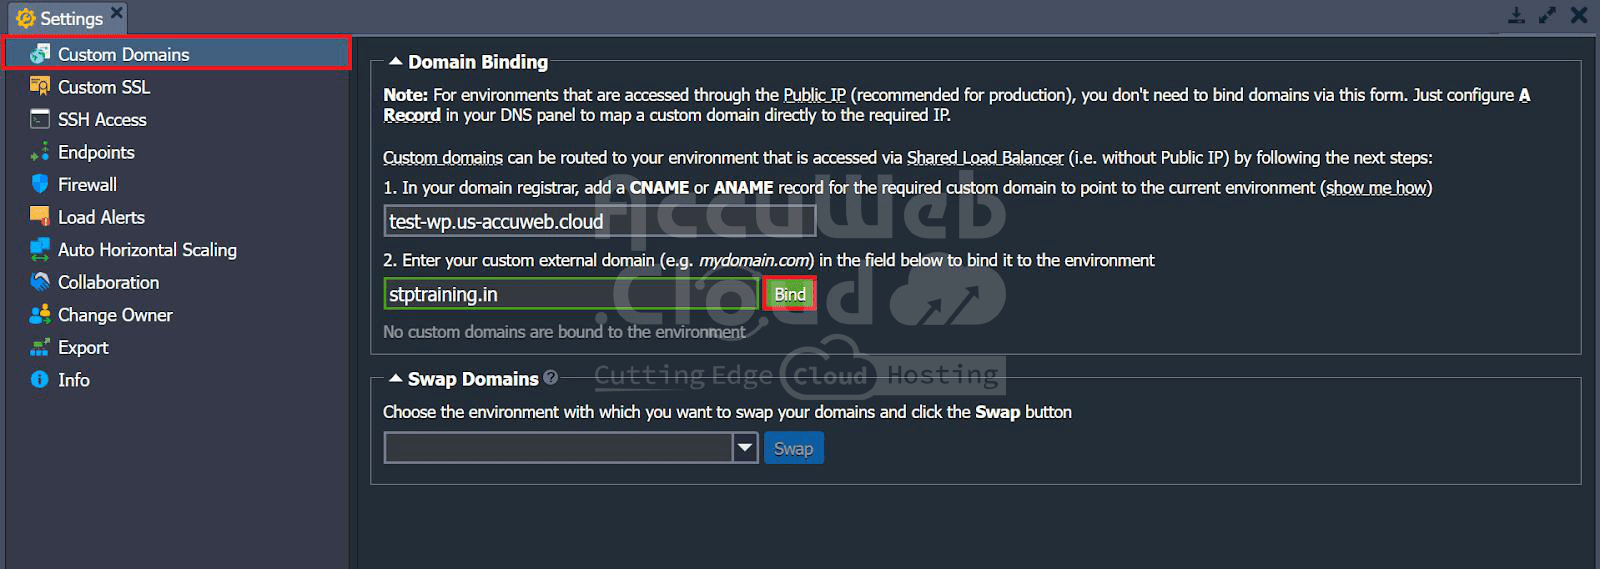
Step 1. In the “Settings” tab, select “Custom Domains”. Enter the name of your custom domain.
Step 2. Click on “Bind” to bind the domain.
Step 3. In the RDM, select “Manage DNS”.
Step 4. If you have purchased a new IP from AccuWeb, you need to alter A Records in RDM by adding a record pointing to that particular IP.
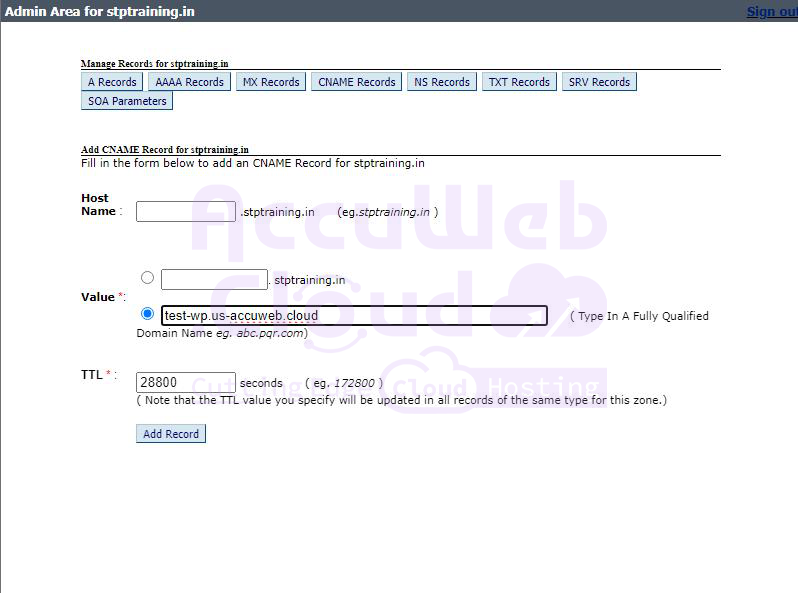
Step 5. Otherwise, you have to alter CNAME Records. Click on CNAME Records tab and then click on “Add CNAME Records”.
Step 6. Enter the domain name referring to your environment to make the testing domain point to the new environment.
Step 7. Now, our testing domain is bound to our new environment.
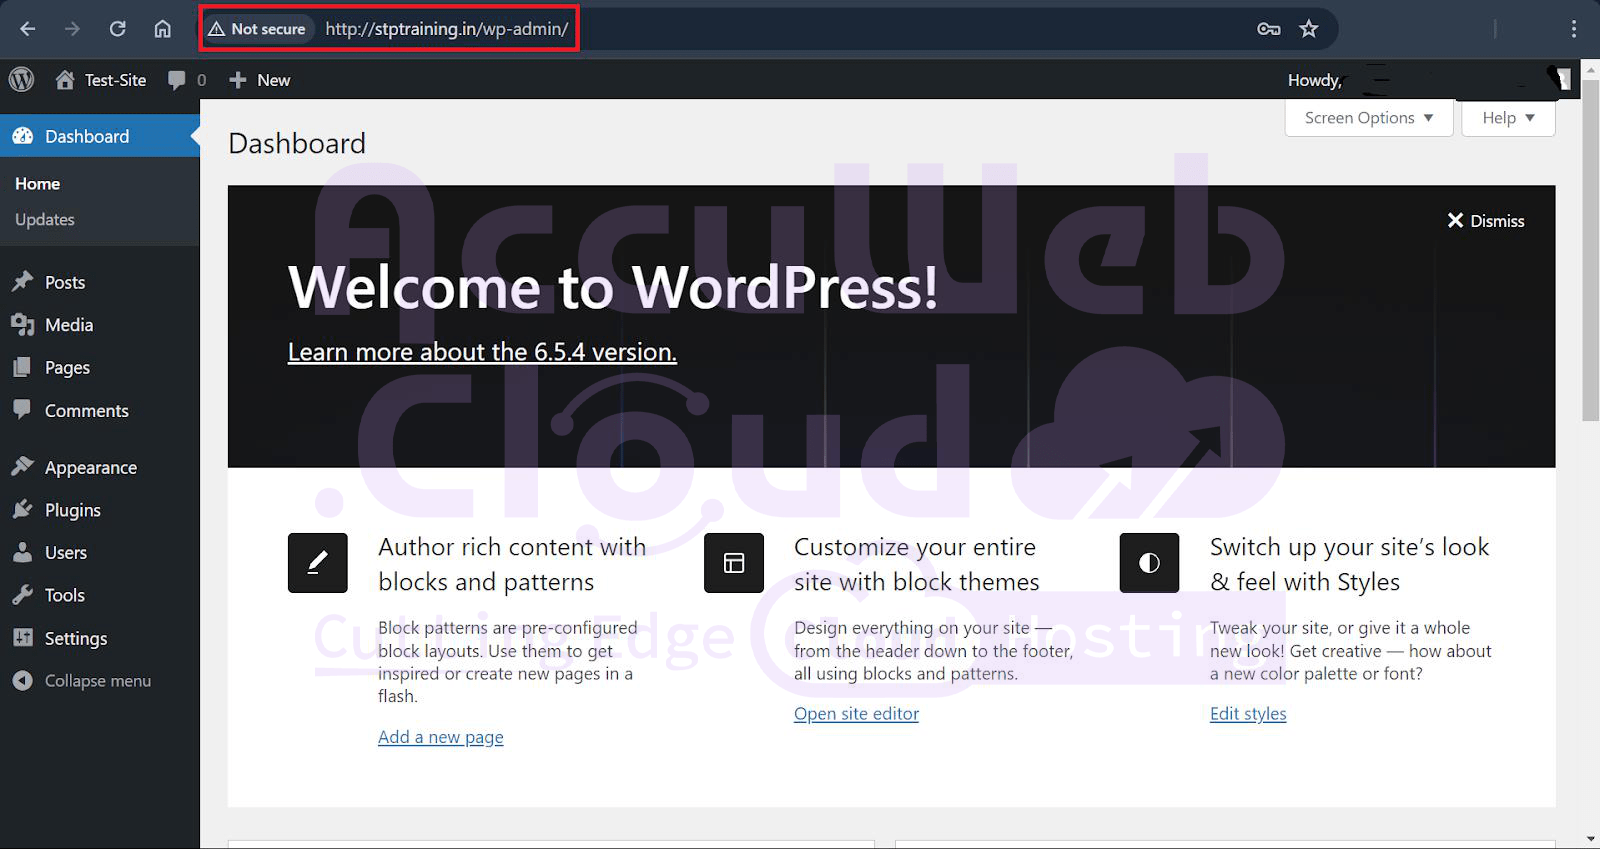
Step 8. We can see that by accessing the URL:”stptrainning.in”, we can see our sample WordPress.
4. Installing Let’s Encrypt Free SSL for Your Custom Domain
An SSL certificate is a need, if you want to maintain the security and reliability of your website. Luckily, getting one is simple and cost-free thanks to Let’s Encrypt.
We’ll walk you through installing a Let’s Encrypt SSL certificate on your website in this article, enabling users to browse safely and feel secure sharing personal information. If you’re not a tech expert, don’t worry; we’ll guide you through each step of the procedure.
Step 1. For example, we take “stptaining.in” before the installation of Let’s Encrypt Free SSL. The site cannot be reached since the https is not secured.
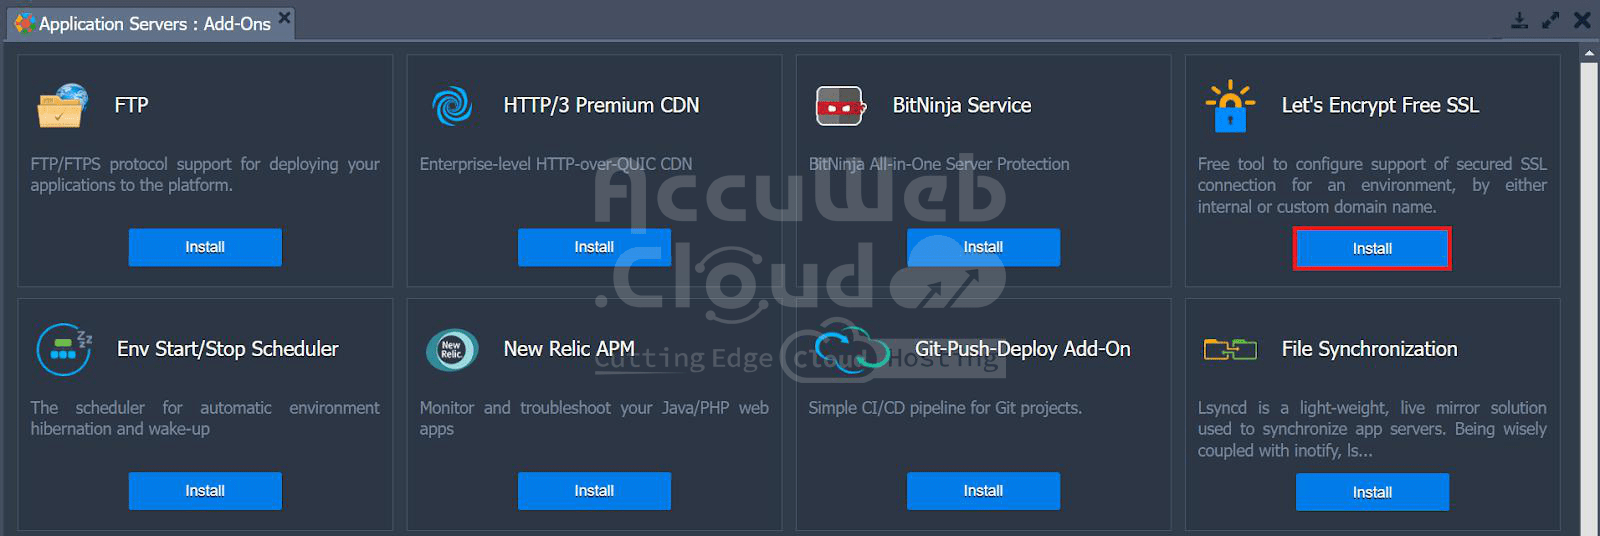
Step 2. Select “Add-Ons” from your selected application server.
Step 3. Navigate the “Let’s Encrypt Free SSL” and click on “install”.
Step 4. Enter your external domain. For example, we will end our testing domain – “stptraining.in”
Step 5. You will see the following dialogue box after the successful installation of the SSL
Step 6. Now on opening the URL of your testing domain, you can see that the “https” is secure.


