Redis Cluster: Setup, Auto Clustering, Alerts, and Horizontal Scaling
Redis is an open-source, in-memory data structure store used as a database, cache, and message agent. It supports a variety of data structures including strings, hashes, lists, and sets, and enables high-performance and real-time analysis.
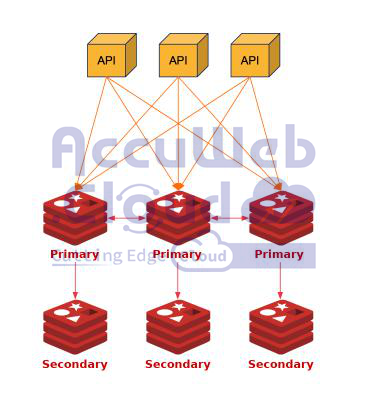
Redis Auto Clustering is an added benefit for Redis configuration. Your data is automatically arranged among several Redis instances, so you won’t need to continuously adjust settings and everything will function as it should.
This indicates that, regardless of how many nodes you add or remove from the cluster, your data is always balanced. It replicates your data across multiple nodes to keep it safe, meaning that even if one fails, your service will continue uninterrupted.
1. Importing the Redis Cluster Package and Enabling Auto Clustering
- You can import the Redis Cluster package manifest or locate it in the dashboard’s Marketplace.

- Here are the details you need to provide:
- Select the desired number of Redis nodes for your cluster. Half of the nodes can be primary, while the other half can be secondary. You can have between 6 and 12.
- Choose whether or not to activate automatic scaling. This functionality modifies your cluster’s size in response to specific events. The data is automatically balanced by the system when a principal node is added or removed.
- Turn on the external IP address option if you want your Redis nodes to have public IP addresses. This restricts access to your cluster to public IP addresses only.
- Name your environment and, if desired, select a display name.
- Select the area in which you wish to have your environment.
- After selecting your options, click “Install.” Following installation, a dialogue box containing a username and password and a link to the admin panel will appear.
- Alternatively, Automatic installation and setup can be achieved using the Redis Auto-Clustering option in the topology wizard in “New environment”. Select the Redis database and enable auto-clustering.
- The nodes will be automatically set up to 6, as a minimum of 6 nodes is required to perform scaling via the Primary-Secondary pairs.
The minimal number is 6 (3 Primary and 3 Secondary nodes) and the maximum is 12 (6 Primary and 6 Secondary). Click on “Create” to create a new environment.
2. Setting Up Load Alerts for Redis
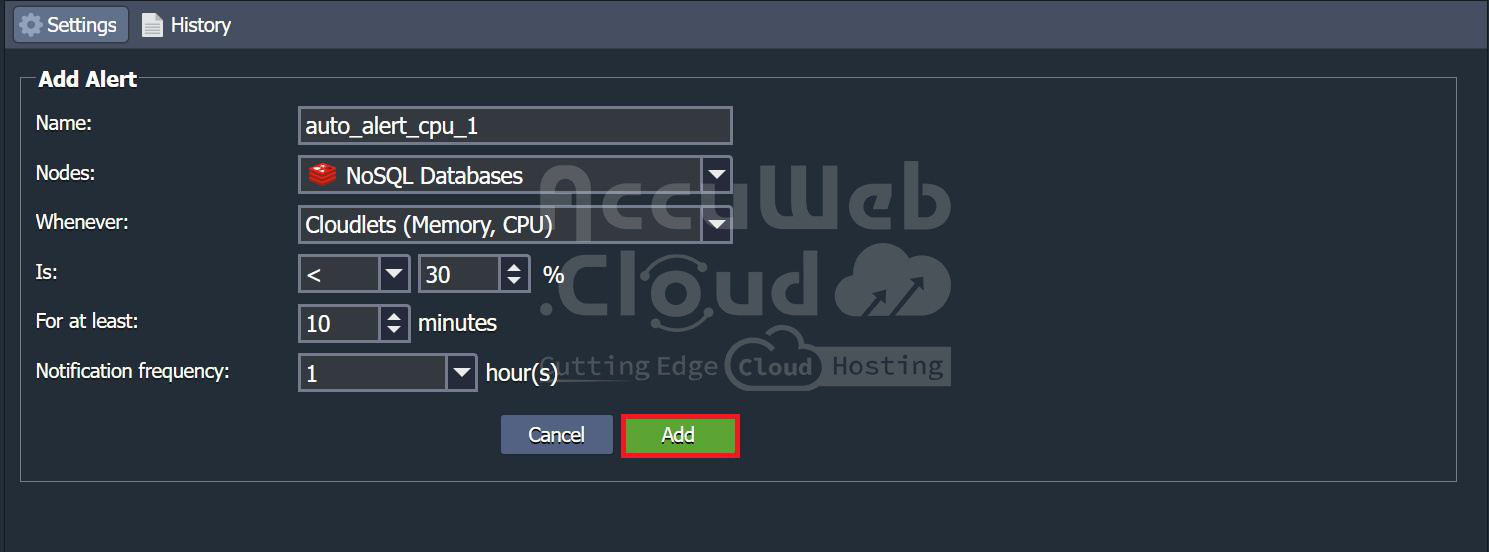
- Navigate to the settings and click on ‘Load Alerts.’ By default, you will see the following load alerts.
- You can add new alerts by specifying the alert name, the node to which it will apply, the entity to be measured, the condition, the duration for which the condition must be satisfied, and the frequency of notifications if the condition is met.
- The new alert can be seen in the alert list.
3. Configuring Horizontal Scaling for Redis
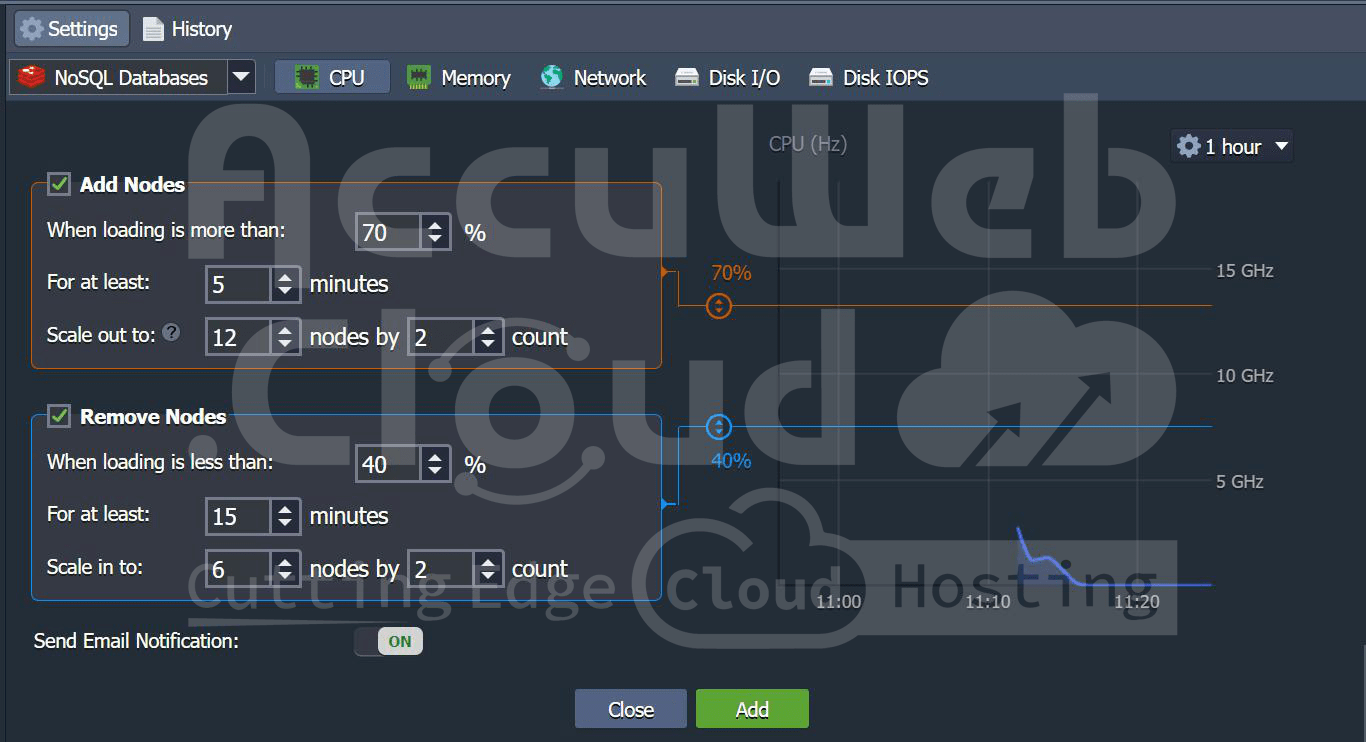
- In setting, navigate to ‘Horizontal Scaling’. You can add a trigger for auto horizontal conditions.
- For example, we have added scale-out conditions
- If the CPU usage is greater than 70% for 5 minutes, it is scaled out to 12 nodes
- If the Memory used is less than 40% for 15 minutes, it is scaled in to 6 nodes
- You can see the scale out and in conditions in the auto horizontal scaling window.
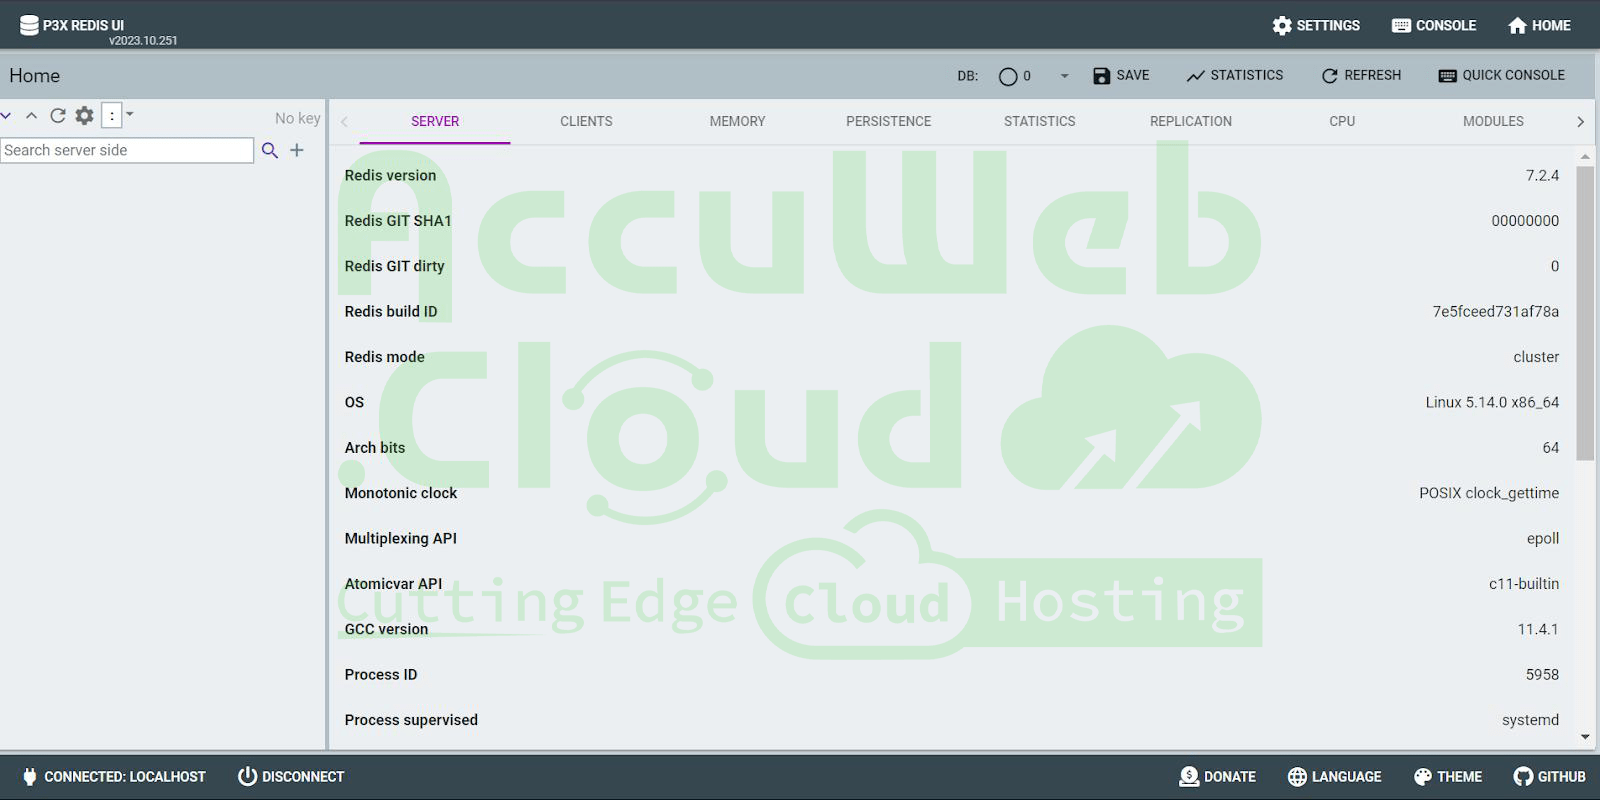
- Now the Redis cluster can be accessed in two ways
- Directly by the admin panel URL, where you will enter your username and password.
- You can access the Redis cluster using Web SSH
- After logging in, click on “Connect” on the bottom left corner and select “localhost”
Your Redis cluster is good to go! With Redis Auto Clustering, your data is balanced across instances automatically, ensuring smooth operation without the need for constant adjustments, so you can focus on what matters most.


