How to Increase Max Upload Size in WordPress
So, I tried uploading high-resolution videos or a large plugin to my WordPress site. You will receive an error message that says, “xyz.mp4 exceeds the maximum file size for this site.” PHP limits the maximum file processing size to certain limits. Therefore, there are several methods you can try to Increase Max Upload Size in WordPress.
This article guides you on increasing the maximum file size for uploads in WordPress.
Step 1. First, how do you check your website’s default upload file size?
Step 2. Go to Media > Add New in the WordPress sidebar menu to do this.
Step 3. The default file upload size for PHP is displayed in WordPress, as shown in the screenshot below. The php.ini file stores information about this standard file upload size. This article will later explain this.
How To Increase Max Upload Size in WordPress
There may be several ways to do this, but we have listed three ways to change the maximum file upload size here.
Method 1. Adding code to the .htaccess file
Step 1. If you can access your server, you can use an FTP Client software like Filezilla or Cpanel File Manager to update the .htaccess file.
Step 2. For this demonstration, I am using FileZilla.
Step 3. Follow the below steps to update the .htaccess file
Step 4. Open your website directory in Filezilla and locate the .htaccess file.
Step 5. Once you have found the .htaccess file, select the file and right-click to open the context menu. Click on the View/Edit option.
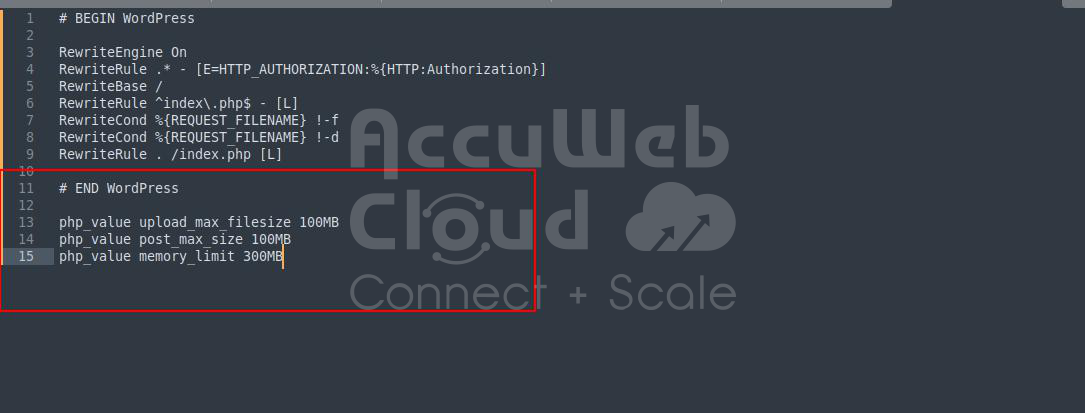
Step 6. Open the file using a text editor(probably Notepad++), and place the following code at the end of the code.
php_value upload_max_filesize 100MB
php_value post_max_size 100MB
hp_value memory_limit 300MB
Step 7. The Upload_max_filesize variable indicates the maximum file upload size. The post_max_size variable describes the maximum size that will be processed in a POST request. And “memory_limit” describes PHP’s memory limit.
Step 8. You can define your custom values. However, note that memory_limit must be greater than or equal to upload_max_filesize. Therefore, be sure to enter the correct values.
Step 9. A sample .htaccess file is shown in the screenshot below.
Step 10. As you can see, we increased the file upload size from the default 50MB to 100 MB.
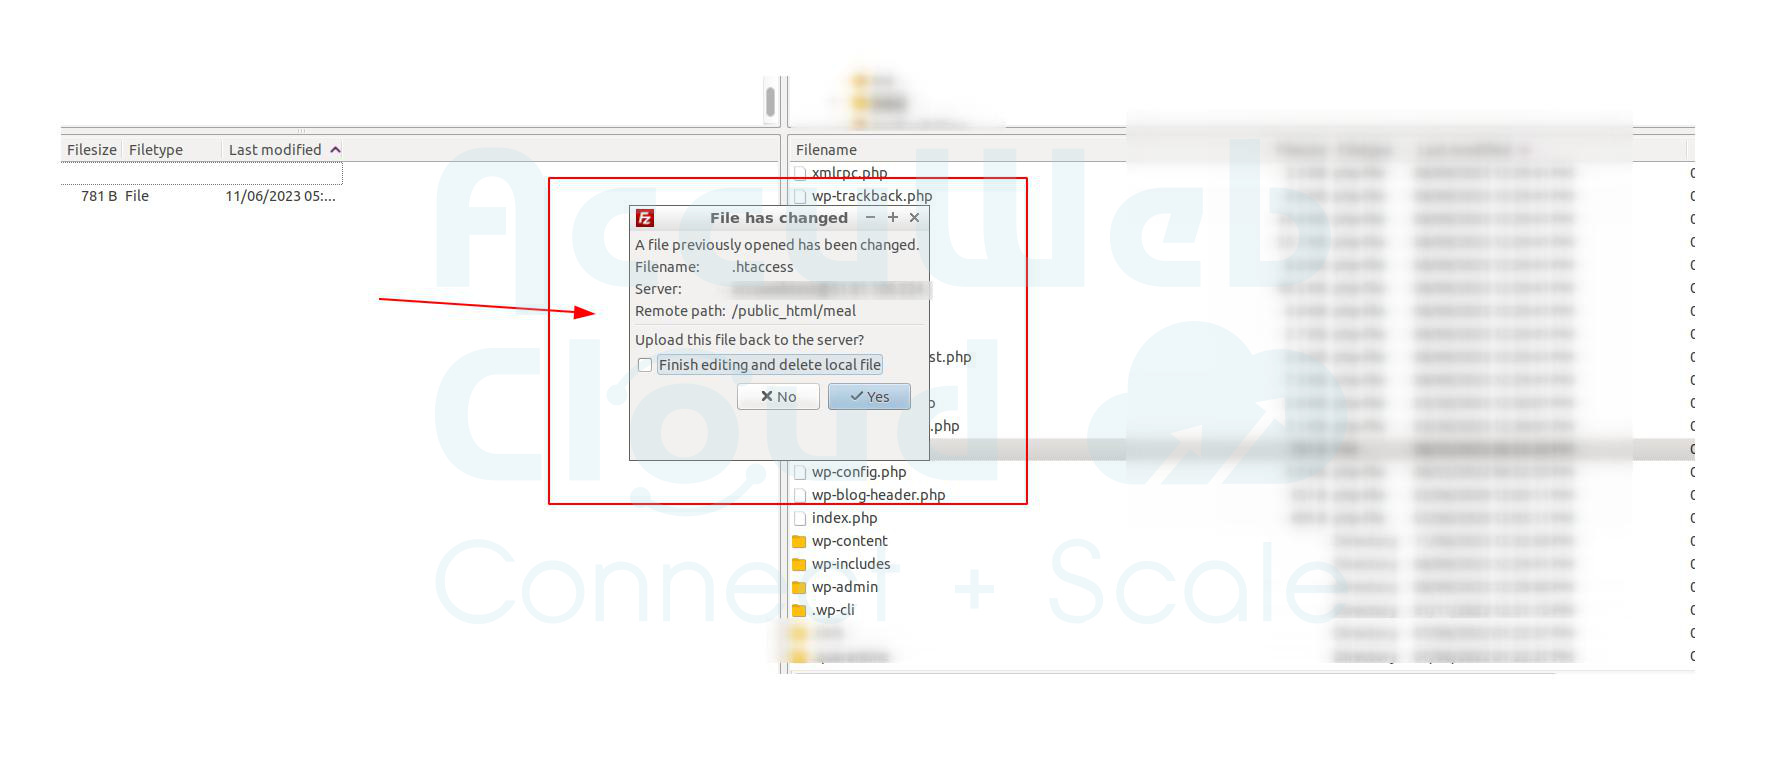
Step 11. If you save the file and return it to the FTP client software, you will be prompted to upload (or overwrite) the updated file. Click Yes to continue.
An example screenshot is shown below.
Step 12. Go to Media > Add New and reload the page to see the updated file upload size.
Method 2. Adding code to the php.ini file
This method is recommended to change your site’s file size and storage. Again, FTP client software is the best way to update the php.ini file.
Step 1. Browse to the php.ini file located in the root directory of the hosting server. Depending on your server, this file can be located anywhere. However, it is usually stored in /etc.
upload_max_filesize = 100M
post_max_size = 100M
max_execution = 300
Step 2. The following screenshot shows the code added to the php.ini file.
Please save the file and upload it again to your server. Next, restart the server to see the applied settings in the Media Upload Dashboard. Without this, the file size in the php.ini file will not be updated.
Method 3. Adding code to Theme Functions
Although you can access the theme functions file (functions.php) using FTP client software (the steps are the same as in the two methods above), a more straightforward approach is to use the WordPress dashboard. However, editing theme function files requires to write access from the server.
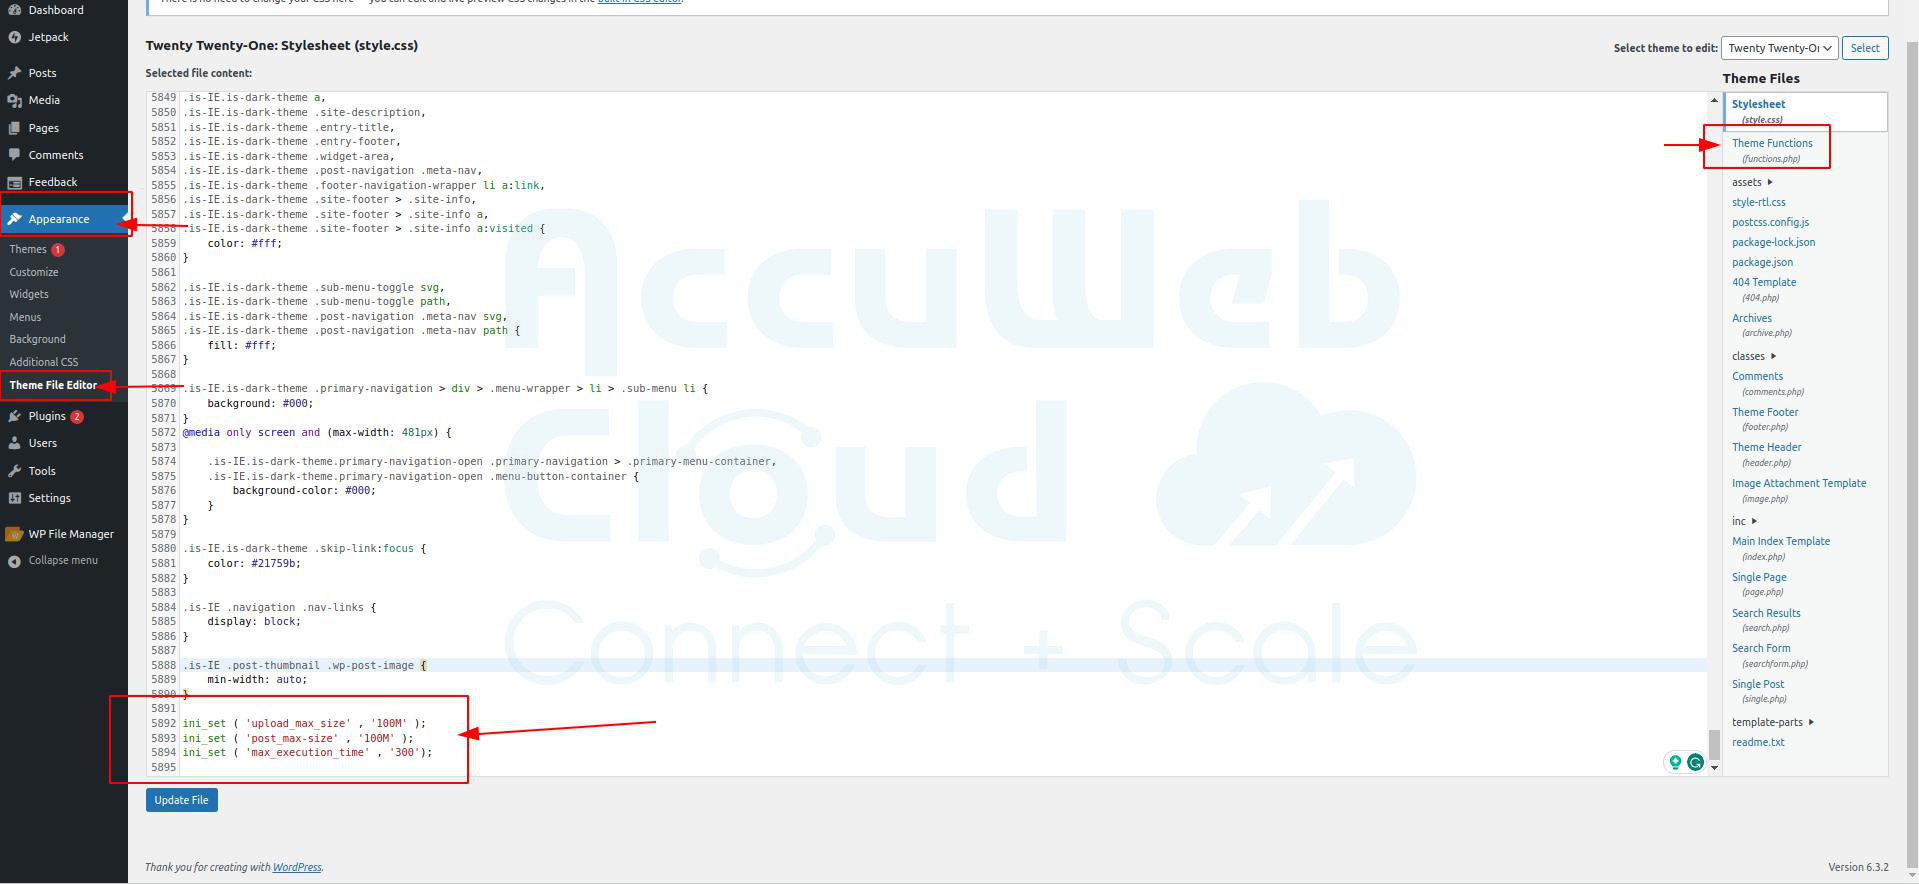
Step 1. In the WordPress sidebar menu, go to View > Editor.
Step 2. Open theme functions (functions.php) and paste the following code at the bottom of the page.
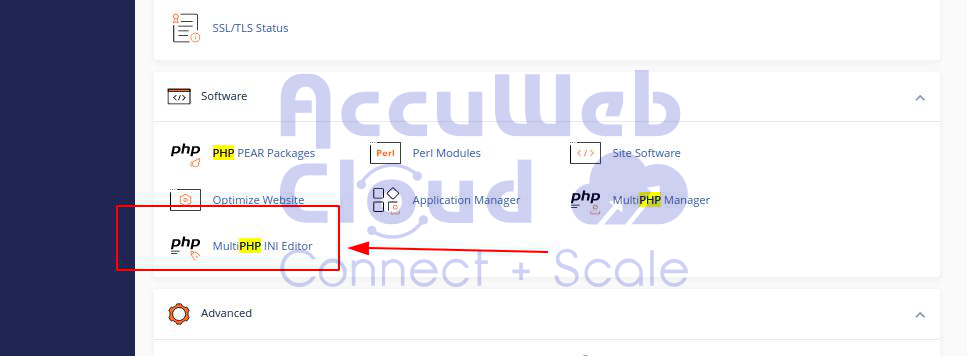
Additional Method. From Web Hosting Cpanel
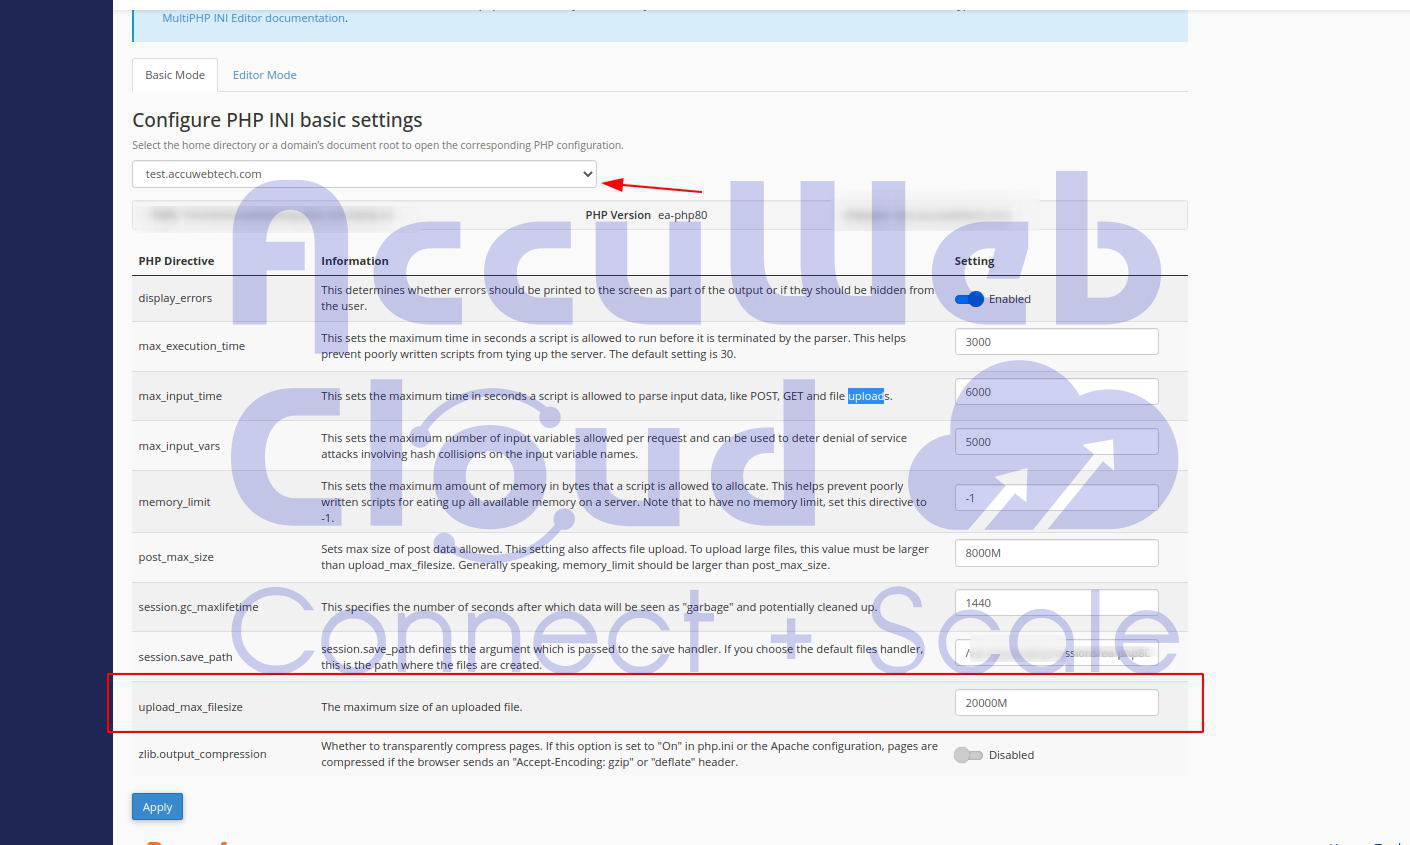
Your hosting provider may have restrictions if the above methods don’t work. If you have Cpanel access for your website hosting, you can increase your memory limit by simply updating PHP INI EDITOR.
Conclusion
You can increase the file size you upload using any of the three methods described in this article. Method 1st and 3rd method is the most recommended. If none of these methods work, as a last resort, contact your hosting service provider.
As you can see, you can solve the problem yourself with some understanding. We hope this AccuWeb.Cloud article was useful enough to increase max upload size in WordPress.


