How to deploy Laravel application with AccuWeb.Cloud Dashboard?
Laravel is a free and open-source PHP framework that uses the Model-View-Controller (MVC) design pattern. It offers tools and features to help you create robust and modern PHP applications. Some of its key features include Eloquent ORM, MVC support, a template engine, built-in libraries, and support for different back-ends for session and cache storage.
While there are many PHP frameworks, some make it hard to read or document the application’s source code, which can be a challenge.
This article will guide you on deploying a Laravel application using the AccuWeb.Cloud dashboard.
Table of Contents
- Steps to deploy a Laravel application
- Clone a Repository in Your AccuWeb.Cloud Environment
- Run the Composer Create-Project Command
- Move the Project Directory to the Apache Web Root Directory
- Configure the App’s Virtual Host in Apache
- Create a Database for the Laravel App
- Edit the App’s Environment Variables
- Seed the App’s Database
- Test the Laravel Application
- Conclusion
Steps to deploy a Laravel application
Here are the steps to deploy a Laravel application using the AccuWeb.Cloud dashboard:
Install Laravel Application from the Marketplace
AccuWeb.Cloud allows you to install a Laravel application with just one click from the Marketplace. You only need to provide details, like the environment name and location, and then click the Install button to set up the Laravel application.
Steps to Install Laravel Application
Step 1: Log in to your AccuWeb.Cloud dashboard.
Step 2: Click on Marketplace at the top left of the screen.
Step 3: In the Marketplace window, go to Dev & Admin Tools. Find Laravel in the list of applications and click the Install button.
Step 4: In the Laravel window, enter a name in the Environment field. This name will act as a temporary URL to access the Laravel application.
Step 5: In the Display Name field, enter a name to display in the AccuWeb.Cloud dashboard. This name is only for display and won’t appear on the website.
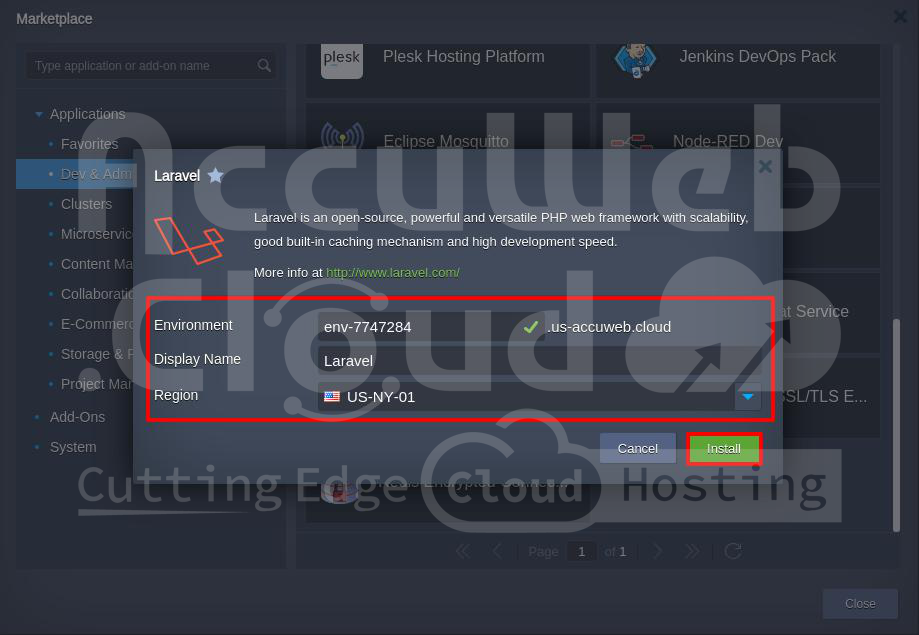
Step 6: Choose the Region where you want to install the Laravel application, and then click the Install button.
Install a Database for the Laravel Application
There are two ways to install a database for your Laravel application:
- Install the database in the existing Laravel environment using the Change Environment Topology option.
- Install the database in a new environment.
The first option is better because the database stays within the existing environment, making it easier to manage.
In this guide, we’ll show you how to install the database using the Change Environment Topology option.
Steps to Install the Database
Step 1: Go to the Laravel environment and click on the Change Environment Topology icon.
Step 2: In the Topology window, go to the SQL section and choose a database based on your needs. For this example, we are selecting MySQL 8.
Step 3: Set up the cloudlets for the database. In this example, we selected 8 cloudlets for Reserved and 16 cloudlets for the Scaling limit.
Step 4: After assigning the cloudlets, click the Apply button to install the database in the existing environment.
Step 5: Once the installation is complete, the MySQL database will be installed, and the login details will be sent to your registered email address.

Your database is now ready to use!
Clone a Repository in Your AccuWeb.Cloud Environment
If you have a GitHub account with a Laravel application, you can easily pull that project into your AccuWeb.Cloud environment. Follow these steps to clone your Laravel project:
Steps to Clone the Laravel Project
Step 1: Select the environment where you have installed the Laravel application.
Step 2: Go to the Application Servers section and click on the Web SSH option.
The Web SSH window will open at the bottom of the screen.
Step 3: Enter the following command in the Web SSH terminal to clone your Laravel project:
$ git clone https://github.com/f1amy/laravel-realworld-example-app.git
This command will copy the Git repository into your AccuWeb.Cloud environment.
Step 4: Go to the project directory by running the following command:
$ cd laravel-realworld-example-appThis will change the directory to the laravel-realworld-example-app folder.
Your Laravel project is now cloned and ready to use in your AccuWeb.Cloud environment.
Run the Composer Create-Project Command
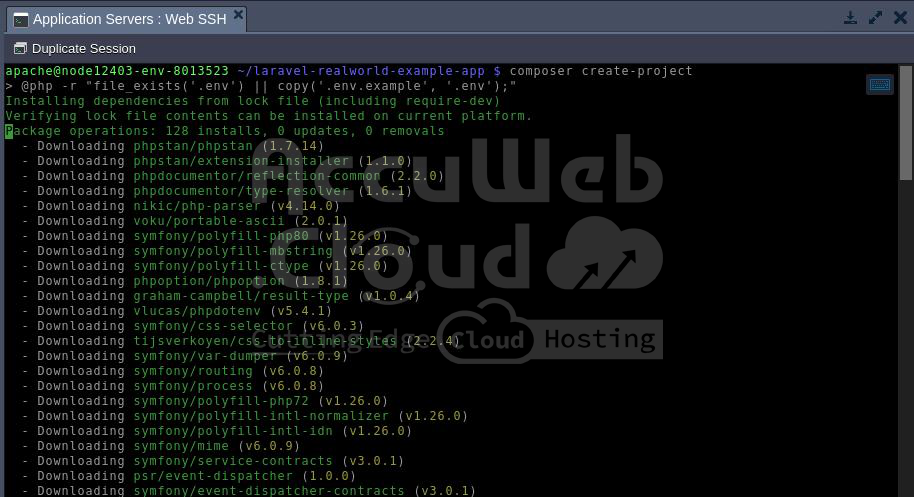
Once you are in the project folder, you need to run the composer create-project command in the Web SSH terminal.
This command is used to create a new project by downloading a template or package (like a framework), installing its required dependencies, and setting up the project directory.
Steps to Run Composer Create-Project
Step 1: Run the following command in the Web SSH terminal to set up your project and install its dependencies:
$ composer create-projectIf you are creating a new Laravel project, the command would be:
$ composer create-project --prefer-dist laravel/laravel laravelSince this is an existing project with a composer.json file, running composer create-project is enough. The composer.json file contains all the app’s dependencies.
To install the specific versions listed in the composer.lock file, run the following command in the web SSH terminal:
$ composer installTo update and get the latest versions of dependencies, use:
$ composer updateStep 2: After the dependencies are installed, go back to the parent directory by running:
$ cd ..This command will take you back to the parent folder.
Your project is now ready with all its required dependencies!
Move the Project Directory to the Apache Web Root Directory
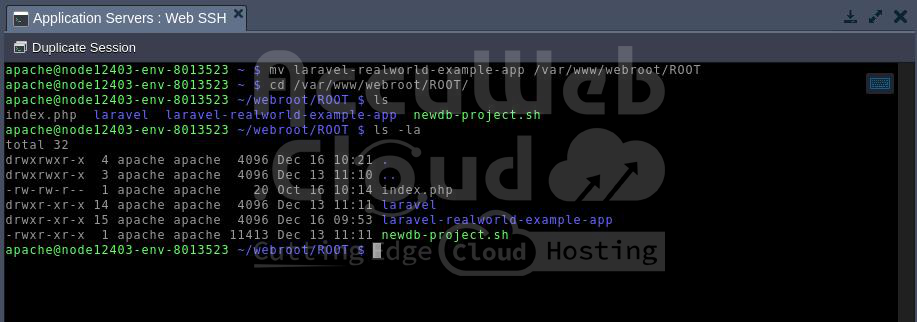
After installing the project dependencies, you need to move your project directory to the Apache web root directory (/var/www/webroot/ROOT).
Steps to Move the Project Directory
Step 1: Run the following command in the Web SSH terminal to move the project directory:
$ mv laravel-realworld-example-app /var/www/webroot/ROOTStep 2: Go to the Apache web root directory to confirm the project has been moved. Use the following commands:
$ cd /var/www/webroot/ROOT/$ ls$ ls -laThese commands will show the list of files in the Apache web root directory, and you can check if your project folder is there.
Your project directory is now successfully moved to the Apache web root!
Configure the App’s Virtual Host in Apache
To configure the Laravel app’s Virtual Host in the Apache configuration file, follow these steps in the Web SSH terminal:
Steps to Configure the Virtual Host
Step 1: Navigate to the Laravel environment in the AccuWeb.Cloud dashboard. Then, go to Application Servers and click on the Config option.
Step 2: In the Application Servers Configs tab, click on the “conf” folder on the left side of the screen.
Step 3: Find the httpd.conf file, click on the Settings icon and select Open to edit the file.
Step 4: Scroll to the end of the httpd.conf file, where you’ll find the VirtualHost section. Update the DocumentRoot path to point to your Laravel application folder.
For example, the path should look like this:
DocumentRoot /var/www/webroot/ROOT/laravel-realworld-example-app/publicStep 5: After updating the DocumentRoot, click the Save button at the top of the screen to save the changes.
Your Laravel app’s Virtual Host is now configured!
Create a Database for the Laravel App
You can create a database for your Laravel app using either Web SSH or phpMyAdmin. Here, we will use phpMyAdmin to create the database.
Steps to Create a Database with phpMyAdmin
Step 1: Log in to phpMyAdmin using the MySQL database login details. The MySQL Login details and the phpMyAdmin access link are sent to your registered email when MySQL is installed in your environment.
Step 2: At the top of the phpMyAdmin window, click on the Databases option.
Step 3: In the Create Database field, enter a name for your database (e.g., LaravelApp).
- Leave the Collation dropdown as it is if you want to use the default MySQL schema collation.
- Click the Create button.
Step 4: After clicking Create, the new database will be created. You will see it listed on the right side under the available databases.

Your database is now ready to use!
Edit the App’s Environment Variables
After creating the database, you need to update the app’s environment variables. Follow these steps to edit the .env file:
Steps to Edit the Environment Variables
Step 1: Go to the project directory by running this command in the terminal:
$ cd /var/www/webroot/ROOT/laravel-realworld-example-app/Step 2: Open the .env file using a text editor like nano:
$ nano .envStep 3: The default database settings in the .env file may look like this:
DB_CONNECTION=pgsql

DB_HOST=pgsql

DB_PORT=5432

DB_DATABASE=laravel-realworld

DB_USERNAME=sail

DB_PASSWORD=password
Update these settings to match your MySQL database configuration:
DB_CONNECTION=mysql

DB_HOST=Database hostname or IP address

DB_PORT=3306

DB_DATABASE=LaravelApp

DB_USERNAME=root

DB_PASSWORD=Database-password- DB_DATABASE: Use the name of the database you created earlier (e.g., LaravelApp).
- DB_USERNAME: The default MySQL user is root. You can also create a new MySQL user and use it here.
- DB_PASSWORD: Leave it blank if there is no password for root. If you set a password or created a new MySQL user, enter the password here.
After making the changes, save the file and exit the editor.
- Press Ctrl + O to save the file.
- Press Ctrl + X to exit.
Your environment variables are now updated!
Seed the App’s Database
When setting up a new application, you might need some default data in the database, like admin users, roles, or categories.
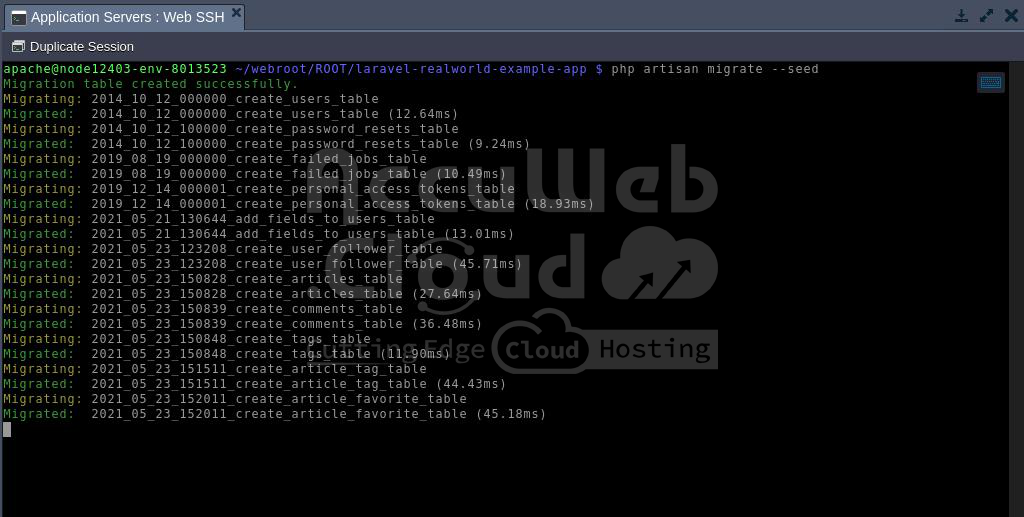
Database seeding is the process of adding initial data to the database. It is useful for development, testing, or pre-populating production data.
Run the following command in the terminal to add the initial data:
$ php artisan migrate --seedTest the Laravel Application
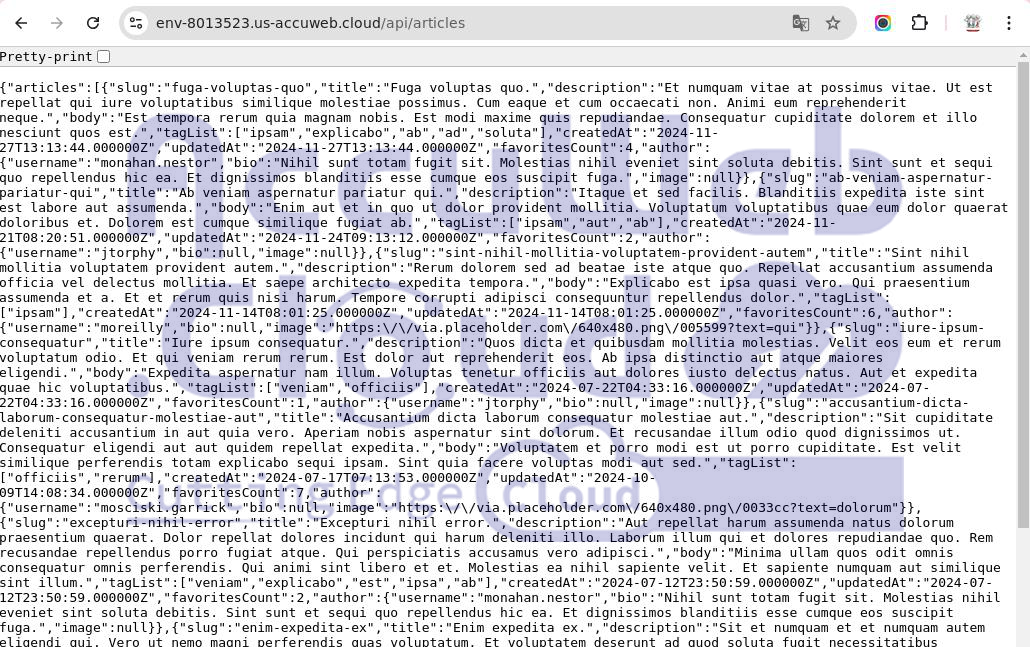
Once the database is seeded, you can test the application in your browser by visiting these URLs:
- https://env-8013523.us-accuweb.cloud/api/articles
- https://env-8013523.us-accuweb.cloud/api/tags

If you get a JSON response, as shown in the image above, then you are done.
Conclusion:
Deploying a Laravel application on AccuWeb.cloud is simple. Just follow the steps to install Laravel, set up the database, configure the environment, and add initial data. AccuWeb.cloud’s easy-to-use interface and reliable hosting make it a great choice for Laravel projects, offering strong performance and scalability for your web apps.


