CLI Tutorial: Mount Points
Mount points facilitate the connection between a data storage server and a client, enabling seamless access to shared remote files just like local ones. Using the platform’s command-line interface (CLI), you can configure these mounts via the terminal and integrate them into custom scripts for automation.
In the next sections, we will look at all of the commands available for managing mount points.
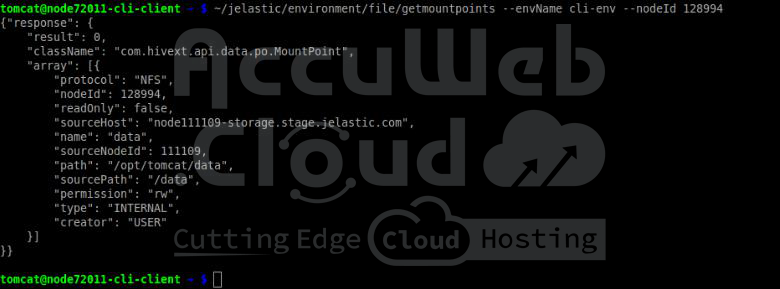
1. First of all, you can get the list of existing mount points with the corresponding GetMountPoints CLI command:
~/jelastic/environment/file/getmountpoints --envName {env_name} --nodeId {node_ID}Where…
- {env_name} – The domain name of the environment where you intend to verify mount points.
- {node_ID} – Unique identification of the node to be examined.
2. You can also review the list of exports by employing the suitable GetExportedList method, utilizing the same parameters as those for the earlier command.
~/jelastic/environment/file/getexportedlist --envName {env_name} --nodeId {node_ID}3. To assign a mount point to a specific node, we utilize the AddMountPointById CLI method.
~/jelastic/environment/file/addmountpointbyid --envName {env_name} --nodeId {node_ID} --path {local_path} --protocol {protocol} --sourcePath {source_path} --sourceNodeId {source_node_ID} --readOnly {true/false}Where…
- {env_name}: This is the name of your environment where you want to set up the mount point.
- {node_ID}: Each node within your environment has a unique identifier. Specify the ID of the node where you want to mount the data.
- {local_path}: This is the folder path on your client node where the data will be displayed.
- {protocol}: You must specify the protocol to be used, and ‘nfs’ is the required one.
- {source_path}: Provide the path to the files on your data storage server.
- {source_node_ID}: This is the identifier of the source node.
- {true/false} – By default, the mounted data on the client node has read-only access, but you can also enable read and write permissions if needed.
~/jelastic/environment/file/checkcrossmount --envName {env_name} --nodeId {env_name} --sourceNodeId {source_node_ID}In the above screen capture, you’ll notice that there’s a cross mount happening. What that means is, if we attempt to mount from our storage node (111109) to node 128994, it’s going to be successful because the data is already shared the other way around, from 128994 to 111109. However, if you’re getting a false value, then you might need to add a mount point between the nodes.
4. The process of removing mount points (RemoveMountPointById) doesn’t require any additional parameters compared to the method used for adding them.
~/jelastic/environment/file/removemountpointbyid --envName {env_name} --nodeId {node_ID} --path {local_path}5. You can also attach mount points to the entire environment layer, saving the hassle of having to issue individual commands for each node
~/jelastic/environment/file/addmountpointbygroup --envName {env_name} --nodeGroup {env_layer} --path {local_path} --protocol {protocol} --sourcePath {source_path} --sourceNodeId {source_node_ID} --readOnly {true/false}Where…
- {env_name} – Refers to the domain name of the environment where you wish to establish a mount point.”
- {env_layer} – Represents the name of the environment layer to which the data will be attached.”
- {local_path} – Specifies the path to the folder on a client node where the data will be displayed.”
- {protocol} – Denotes the protocol to be used; please ensure that the nfs protocol is selected as it is mandatory.”
- {source_path} – Indicates the path to the files on the data storage server.”
- {source_node_ID} – Serves as the identifier of the source node.”
- {true/false} – Specifies whether the mounted data on the client node should have read-only ({true}) or read-and-write ({false}) permissions, with read-only being the default option.”
6. You can also detach data from all nodes in the layer by using the right method, RemoveMountPointByGroup.
~/jelastic/environment/file/removemountpointbygroup --envName {env_name} --nodeGroup {env_layer} --path {local_path}That’s it! Now, you know how to manage your mount points using the platform’s command-line interface.


