How to Perform Connection Pooling in JDBC with GlassFish Application Server?
Java application servers, such as GlassFish and Payara, use JDBC connection pooling to speed up database access. This means they reuse existing database connections from a pool instead of creating new ones each time.
Setting up a JDBC connection pool on your server helps reduce delays and resource use, which boosts database performance, especially for dynamic applications.
Here are easy steps to set up JDBC for GlassFish with AccuWeb.cloud.
Create Environment
Step 1. Log into your Accuweb.cloud dashboard and click “New environment.”
Step 2. In the topology wizard, go to the Java tab, select GlassFish as your application server, and add the required database (like MySQL). Set the resource limits for your containers and choose an environment name.
Step 3. Click “Create.” Wait a few minutes for your new environment to be ready, then proceed to create the JDBC connection pool.
Setting Up Database
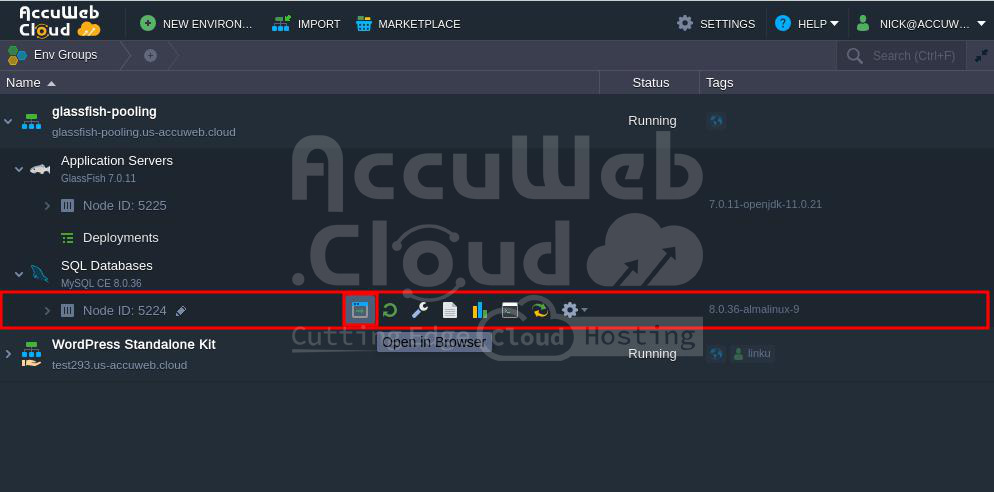
Step 1. Open your MySQL node in the browser by clicking “Open in browser.” Use the email you received with database credentials to log into the phpMyAdmin panel.
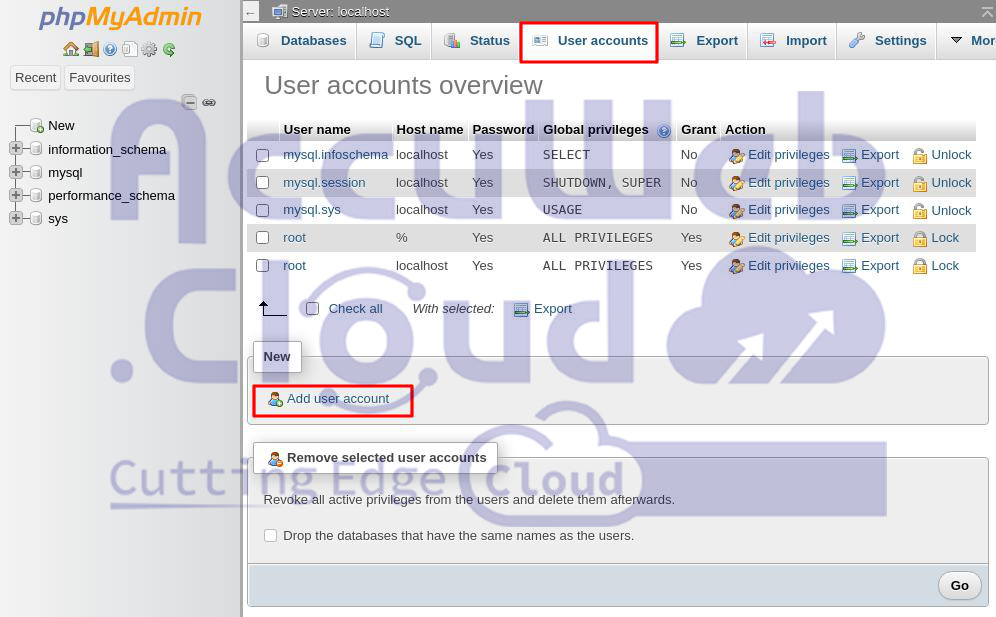
Step 2. Once logged in, go to the User Accounts tab and click “Add user account.”
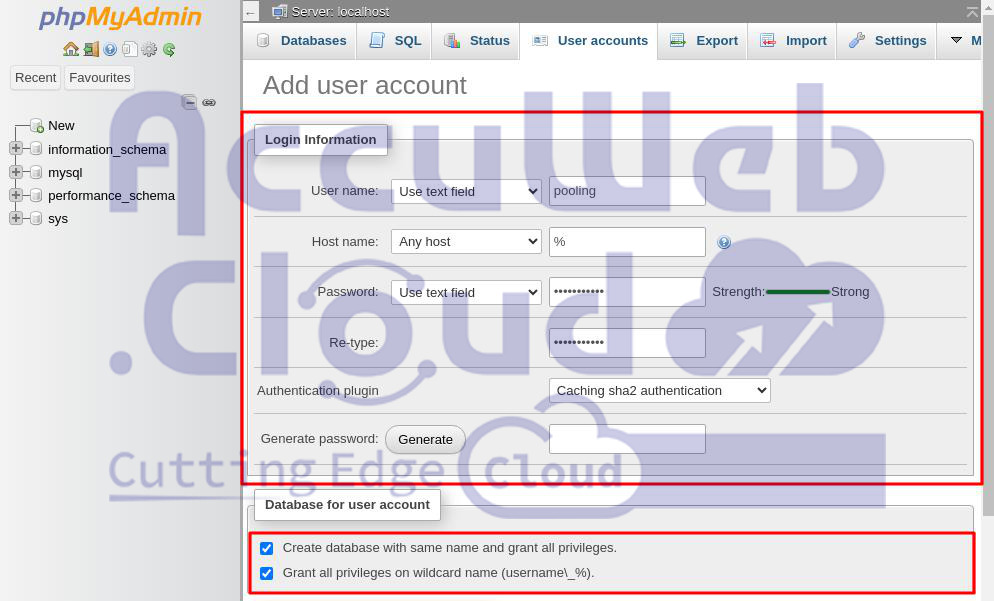
Step 3. Fill in the form, and check “Create a database with the same name and grant all privileges.”
Step 4. Finally, click “Go” to add the database and user for connection pooling.
Setting Up Java Application Server
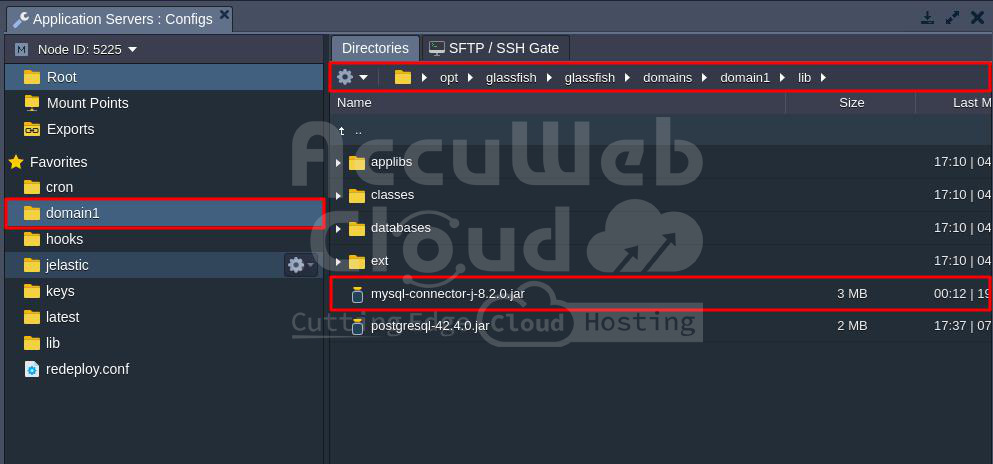
Step 1. The JDBC MySQL connector is already included in the stack, located in the /opt/glassfish/glassfish/domains/domain1/lib directory on your GlassFish server.
Step 2. Log in to the GlassFish Admin panel using the credentials provided in your email.
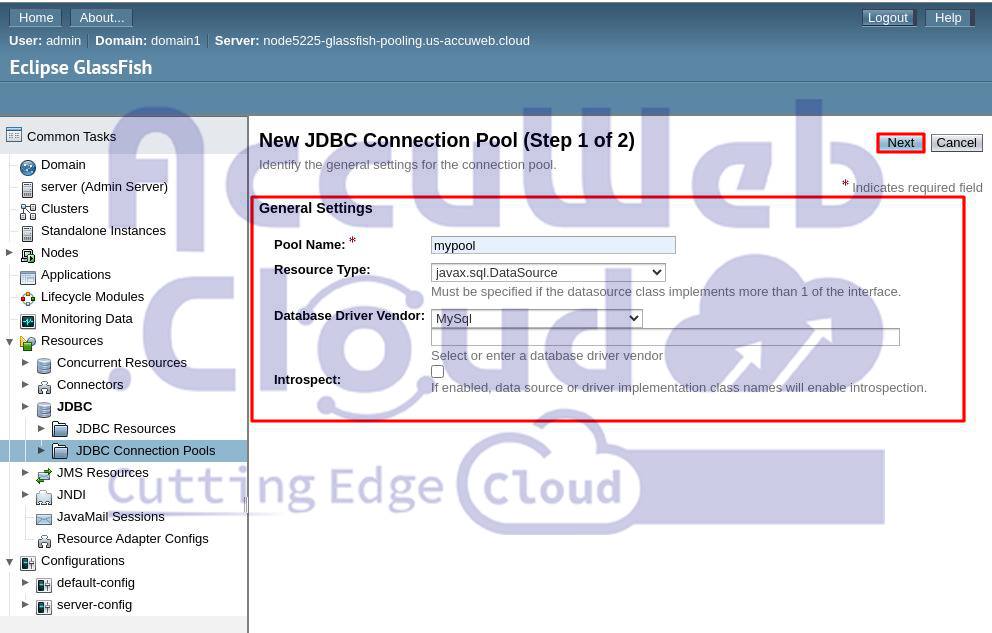
Step 3. Go to Resources > JDBC > JDBC Connection Pools and click the “New” button.
Fill in The Form with These Details
- Pool Name: Any name you prefer.
- Resource Type: Select javax.sql.DataSource.
- Database Driver Vendor: Choose MySQL.
Click “Next” to continue.
Step 4. Modify these Additional Properties:
- User: Your database login.
- ServerName: Your database host (e.g., node5225-glassfish-pooling.us-accuweb.cloud).
- Port: 3306.
- DatabaseName: Your database name.
- Password: Your database user password.
- URL or Url: jdbc:mysql://{db_host}:3306/. Replace {db_host} with your node hostname or IP address.
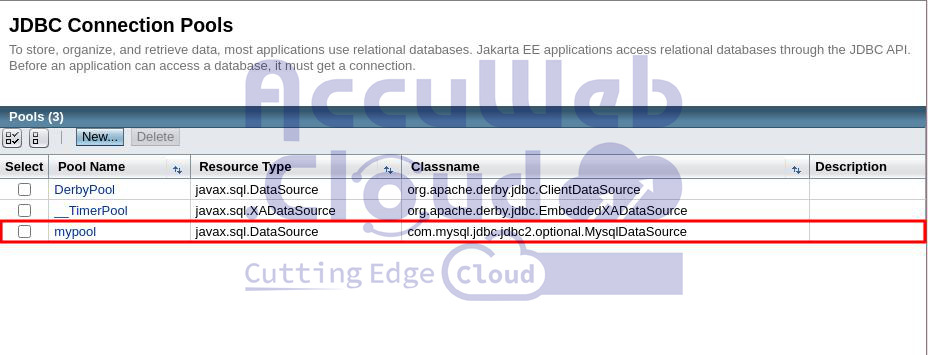
Click “Finish” to add the new pool.
Once you click on the finish button, the new pool will be added and shown in the Pools section.
Step 5. Select the new connection pool and click the “Ping” button to check if the pool is working. A “Ping Succeeded” message should appear.
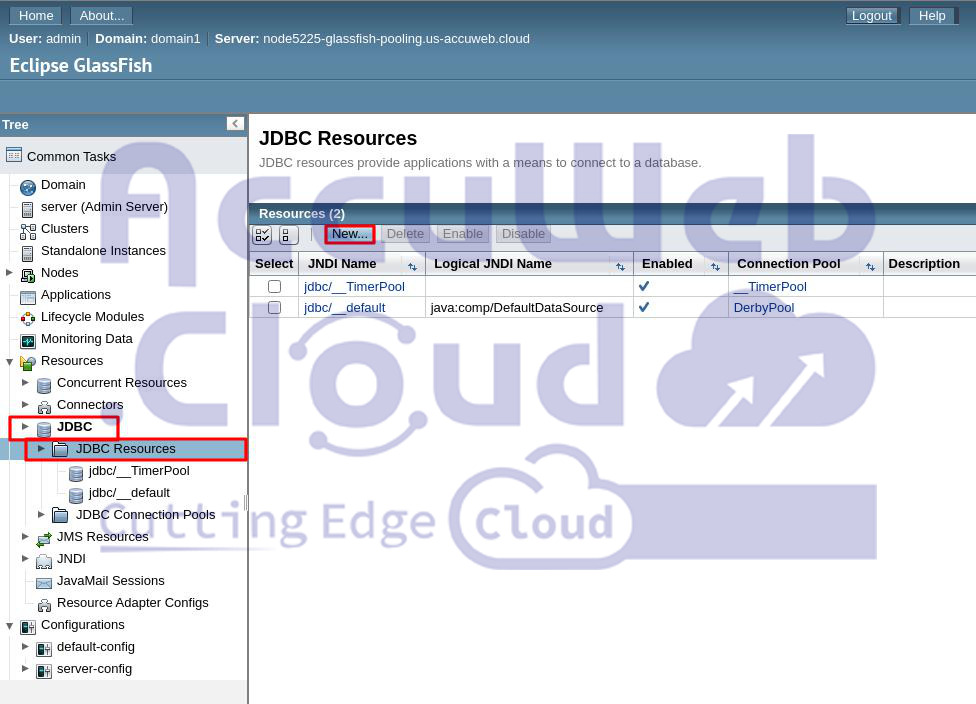
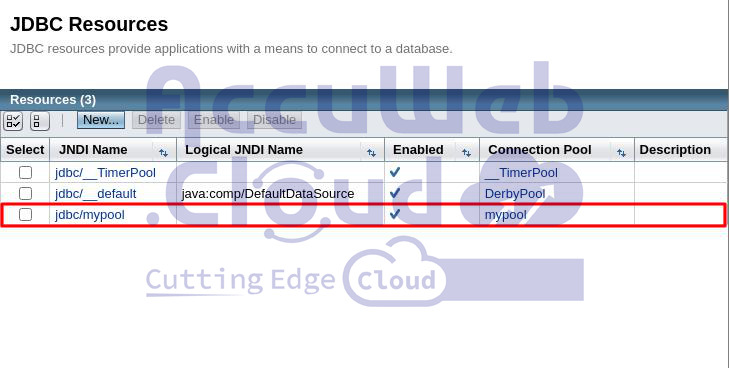
Step 6. Go to Resources > JDBC > JDBC Resources and click “New” to create JDBC resources for pooling.
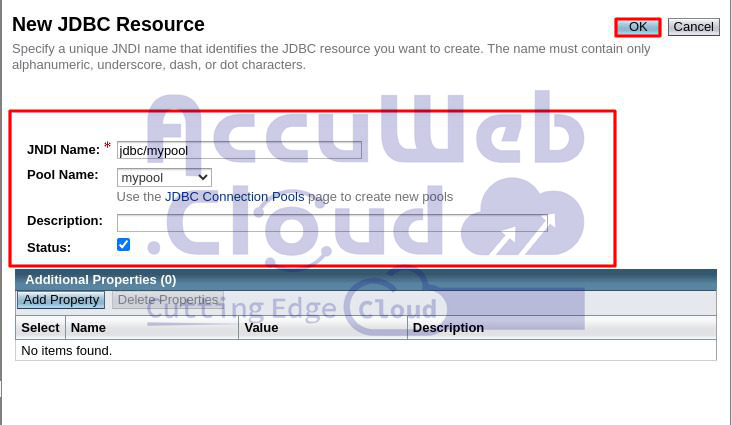
Step 7. In the form that appears, enter a JNDI Name and choose your Pool Name from the drop-down list. Click “OK” to create the resources.
Step 8. The new resource will be added and shown in the Resources section.
Connecting from Java Code
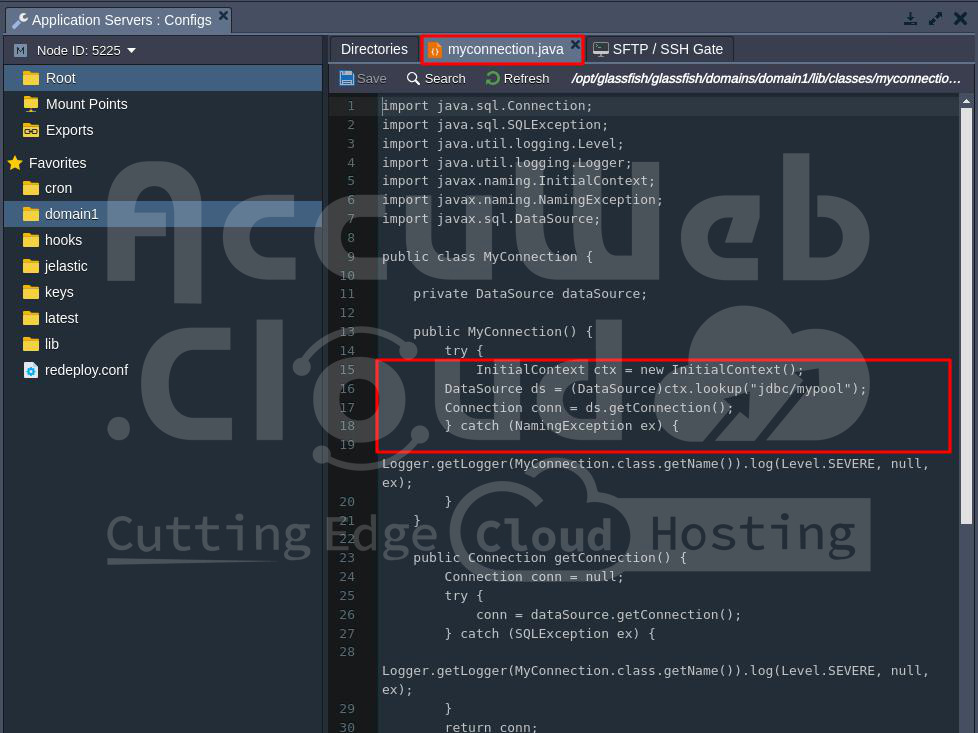
Add these lines to your Java class:
- InitialContext ctx = new InitialContext();
- DataSource ds = (DataSource) ctx.lookup(“{resources}”);
- Connection conn = ds.getConnection();
Replace {resources} with your JNDI name (e.g., jdbc/mypool).
Now you can deploy your Java application to the Accuweb.cloud environment and use GlassFish connection pooling!
Conclusion
In conclusion, connecting a GlassFish app to MySQL is crucial for database operations. Setting up JDBC drivers and connection details enables smooth communication between your app and the database.
Setting up a JDBC connection pool on your server helps reduce delays and save resources, improving database performance, especially for dynamic applications.


