How Can I Reduce A Node From An Existing Environment?
Removing a node from an environment is important to optimize resource utilization, improve performance, and reduce costs. By eliminating unused or unnecessary nodes, organizations can streamline operations, enhance scalability, and ensure efficient allocation of computing resources.
There are two ways to reduce a node in the environment.
1. Remove the node from the Environment Topology
Step 1: Login into the AccuWeb.Cloud dashboard.
Step 2: Select the environment in which you want to reduce the node. Here, we have selected accuwebcloud.us-accuweb.cloud as an example.
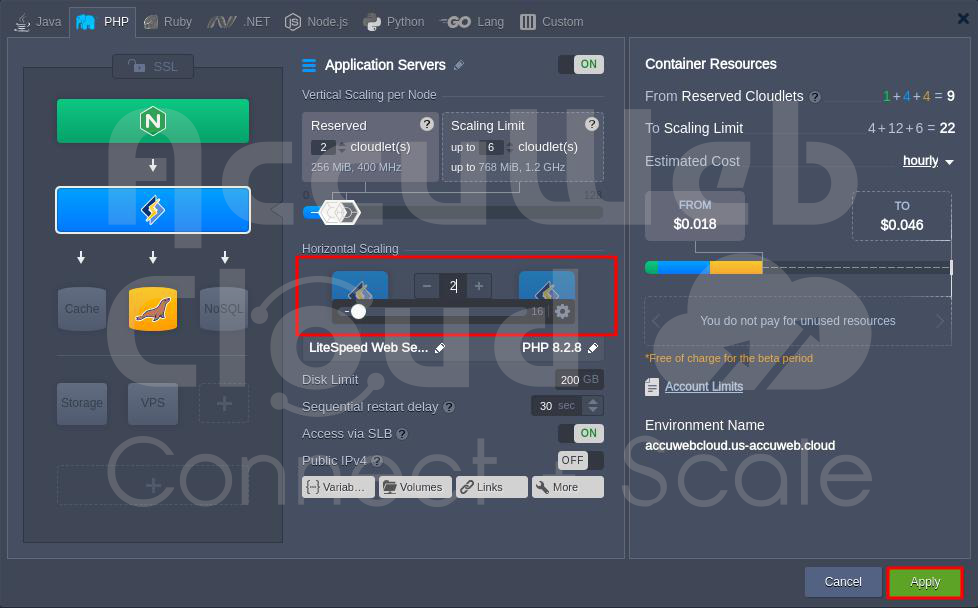
Step 3: Click the Change Environment Topology icon to open the Topology window.

Step 4: Select the application on which you want to reduce the node. Here, we have selected Application Server as an example.
The application server currently has 3 nodes, and we want to remove 1 node.

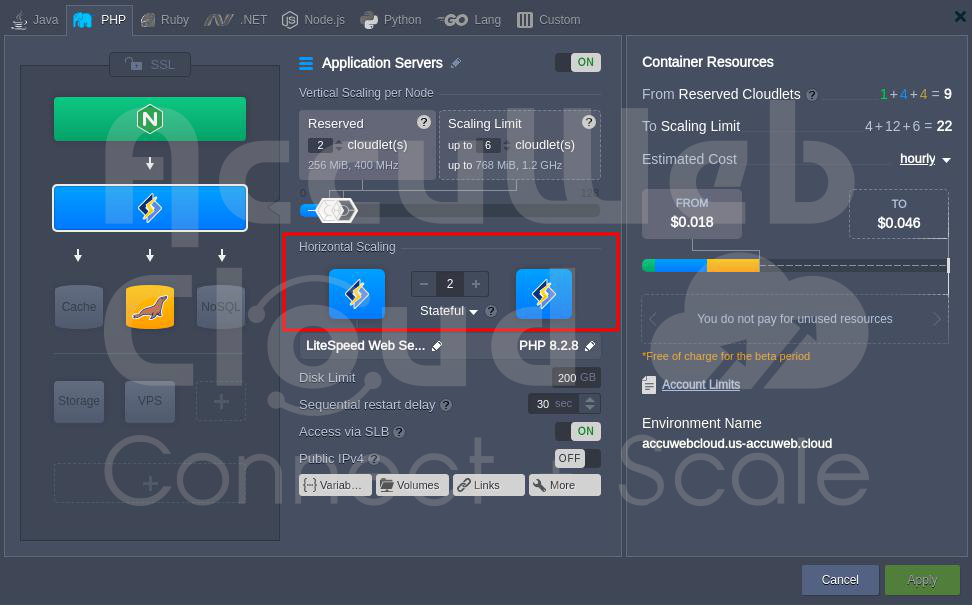
Click on the minus (-) button to reduce the node in the application server. You can see that we have reduced the node from 3 – 2 in the Application Server. After then click on the Apply button to save the changes.
Step 5: After clicking, a warning message will appear. Click “Yes” to remove a node from the application servers.

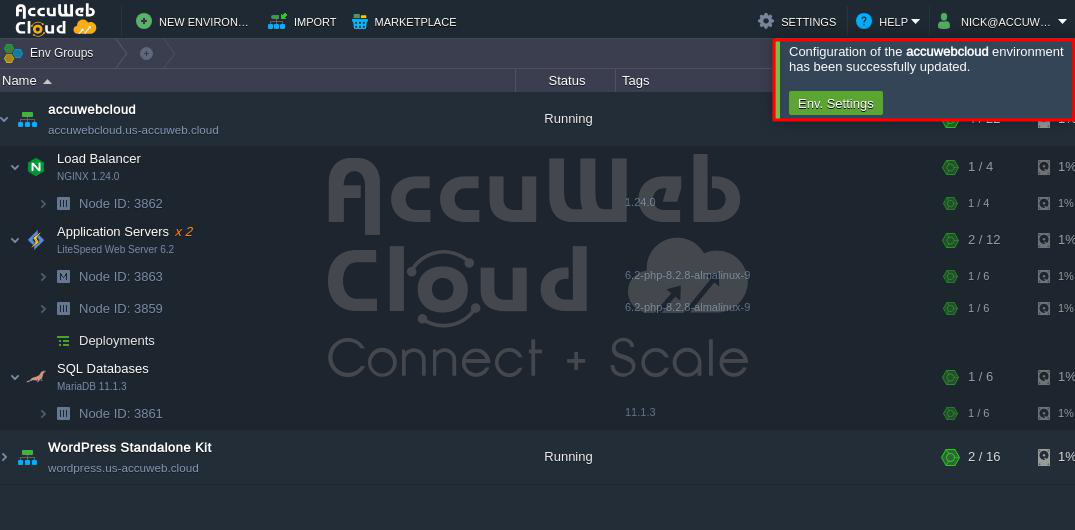
Step 6: The removal may take a few minutes. Once done, you’ll be notified on the dashboard that the Configuration of the environment has been successfully updated.

Step 7: To verify, go back to the environment and click the Change Environment Topology icon again.
Step 8: You can see that 1 node has been removed from the Application server. Now, there are only 2 node in the application server.
2. Remove the node from the Environment Dashboard
Step 1: Login into the AccuWeb.Cloud dashboard.
Step 2: Select the environment in which you want to reduce the node. Here, we have selected accuwebcloud.us-accuweb.cloud as an example.
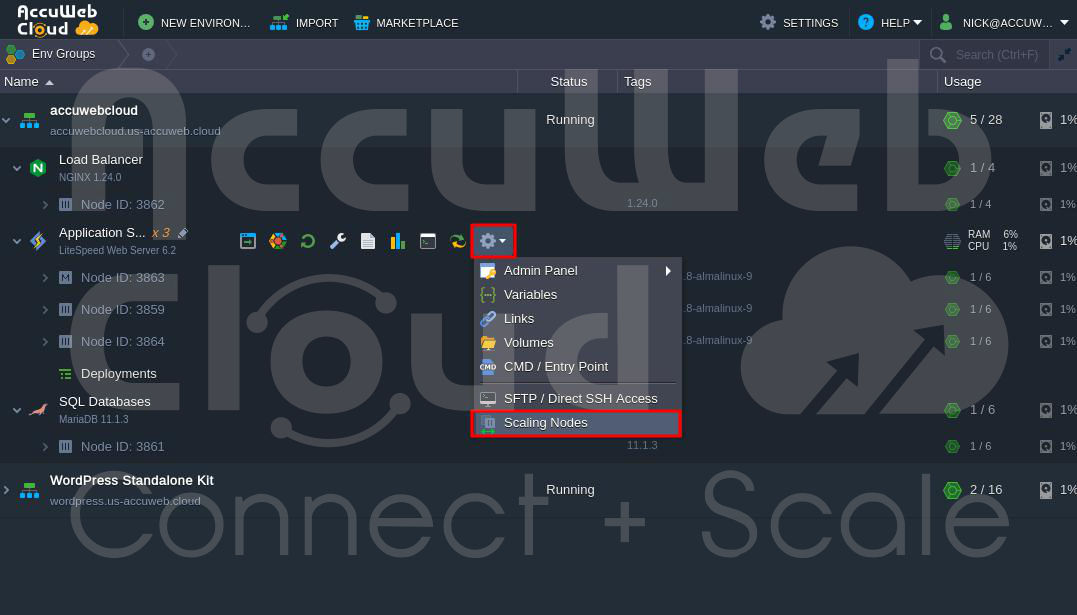
Step 3: Go to the application or cluster on which you want to reduce the node. Here, we have selected Application Server as an example. The application server currently has 3 nodes, and we want to remove 1 node.

Step 4: Click on the Settings icon. After that click on the Scaling Nodes option.
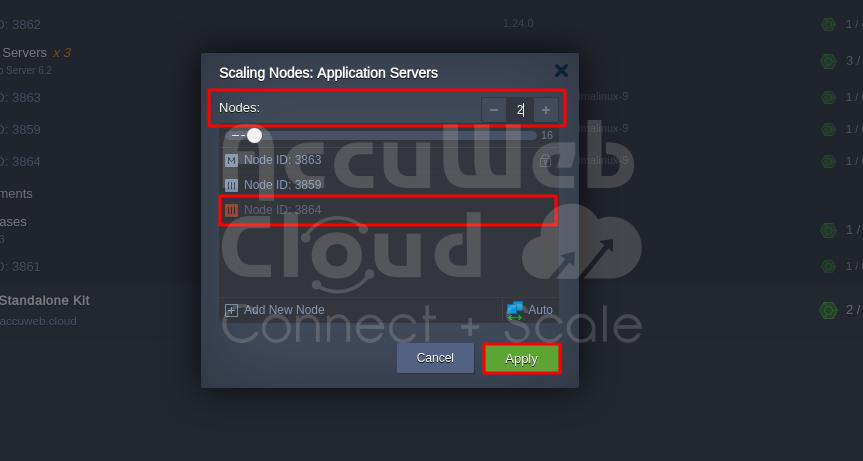
Step 5: In the Scaling Nodes window, you will get the list of the node you have added in your application or cluster server.

Step 6: Select the node you want to remove and click the Delete button just opposite it. Please be informed that you can’t delete the main node. However, you can delete the slave node anytime.
Step 7: Once you click on the delete button, the node icon color will be changed to Red from Grey and in the above Nodes section, one node will be removed from the counter. Previously, it was 3 and now it is 2. Click on the Apply button to remove the node.
Step 8: After clicking, a warning message will appear. Click “Yes” to remove a node from the application servers.

Step 9: The removal may take a few minutes. Once complete, you’ll be notified on the dashboard that the environment’s configuration has been successfully updated.
Step 10: To verify, go back to the environment and click on the Application Server. You can see that 1 node has been removed from the Application server, and now there are only 2 nodes in it.

That’s all.
Conclusion
In conclusion, reducing a node in AccuWeb.Cloud involves carefully managing and decommissioning virtual instances to optimize resource allocation. Users can efficiently streamline their cloud environment and ensure optimal performance and resource utilization by following precise steps to stop, remove, and reallocate resources.