Concrete CMS Cluster
Concrete CMS is a free content management system (CMS) that is easy to use, even for beginners with little technical knowledge. You can edit your site directly on the page instead of using a separate admin interface or web editors.
In this guide, we’ll show you not only how to deploy the Concrete CMS app simply (details on that are in another document) but also how to set up a high-availability cluster for it.
To make the service more available and reliable, we’ll configure a setup with 2 Apache servers, 2 replicated MySQL databases, a Memcached node, and an NGINX load balancer.
In this setup:
- Memcached backs up the Apache server sessions, so if one server fails, the second server can continue using the sessions from Memcached.
- NGINX balances the traffic within the cluster.
- Replicated MySQL primary and secondary databases improve performance, data security, and fail-over capabilities.
Let’s get started!
Create Environment and Deploy Concrete CMS
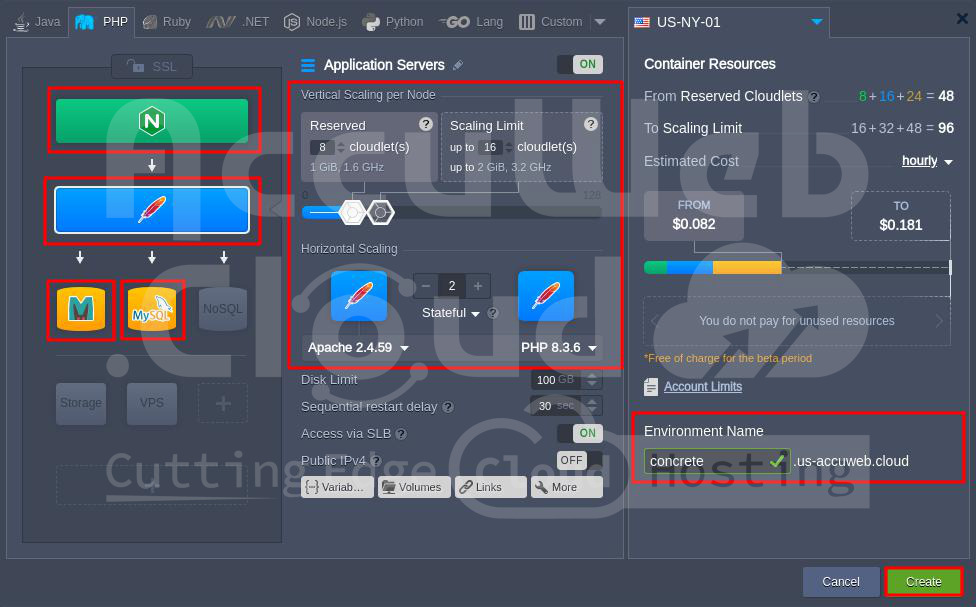
First, you need to create a new environment with one Apache server and one MySQL database to deploy the Concrete CMS application.
Step 1. Log into the Accuweb dashboard and click the “Create environment” button at the top. The topology wizard will open.
Step 2. Go to the PHP tab and select the following nodes:
- Apache application server
- MySQL database
- Memcached node
Also, choose PHP version 8.3 from the dropdown list.
Step 3. Set the number of cloudlets for each node, give your environment a name (e.g.,
“concrete”), and click Create.
In a minute or so, your environment will appear on the dashboard.
Step 4. Go to the official Concrete CMS website and download the latest stable version.
Step 5. Switch back to the platform dashboard and click the Upload button in the Deployment Manager panel. In the window that opens, choose the .zip archive you downloaded.
Step 6. Once the package is uploaded, click the “Deploy to” button next to it, and select the environment you just created.
In the window that opens, specify the context for Concrete CMS (or leave it blank) and click the Deploy button.
Congratulations! Your application is now deployed. Let’s continue.
Configure Session Storage
Let’s set up session clustering to ensure high availability for our cluster.
Step 1. Click the “Config” button for the Apache node.
In the Configuration Manager that opens, navigate to the /etc/php.ini file and activate the PHP Memcached module by adding this line:
extension=memcached.soStep 2. In the same php.ini file, find the Session block and enable session support by editing these two lines:
session.save_handler = memcached
session.save_path = ":11211"Step 3. Save your changes and restart the Apache server to apply the new settings.
That’s it! Now, if one application server in the cluster fails, the user’s session will automatically be picked up and served by another Apache instance.
Database Configuration
Next, we’ll configure primary-secondary (master-slave) database replication to protect your data in the Concrete CMS cluster.
Step 1. Create another environment with a single MySQL node to use as the secondary database. The primary database will be the MySQL server in the environment
where Concrete CMS is deployed.
Which type of
Follow the instructions in the MySQL/MariaDB Primary-Secondary Replication document to set up replication between these databases.
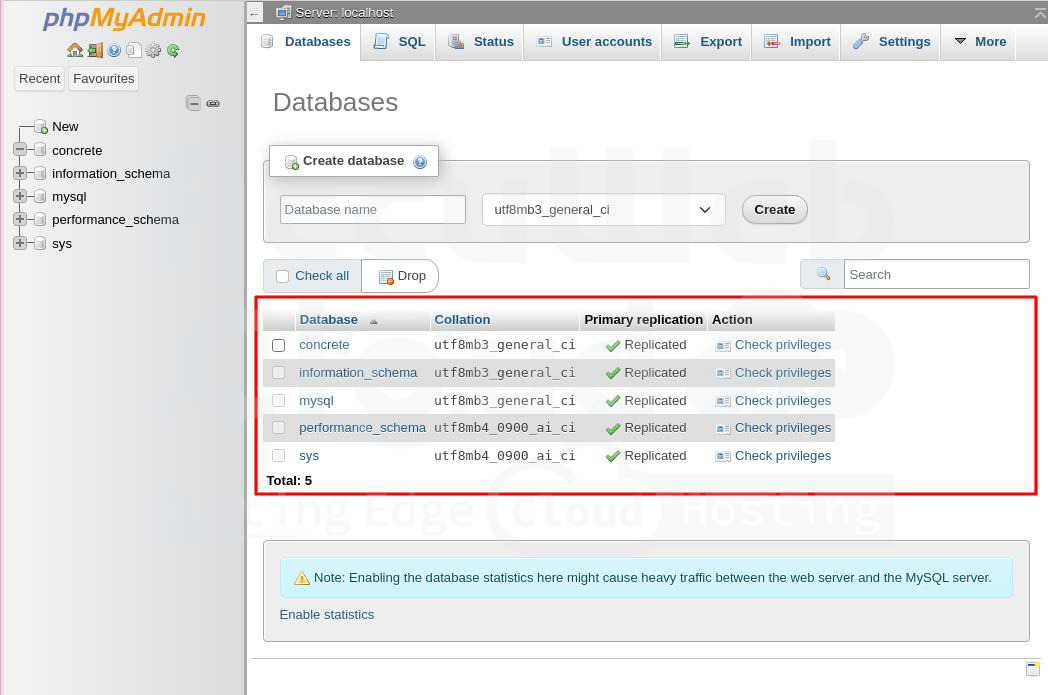
Step 2. After setting up database clustering, go to the phpMyAdmin panel of the primary database and create a new concrete database.
Step 3. To verify the database replication is working, go to the admin panel of your secondary MySQL server. You should see the newly created and replicated concrete database listed.
That’s it! Your database replication is now configured.
Concrete CMS Installation
Now, let’s finish installing Concrete CMS. Click the “Open in browser” button next to the environment where the application is deployed.
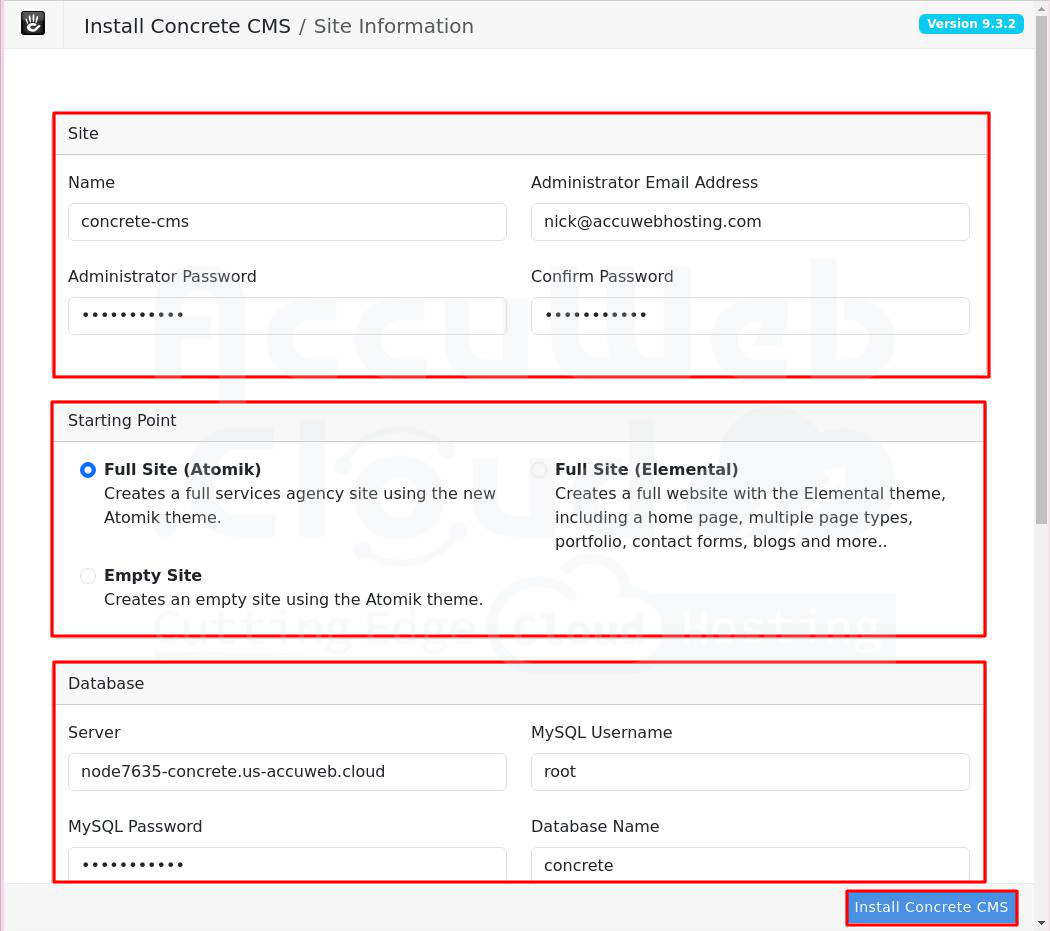
 A new tab will open with an installation wizard. The steps are straightforward. Focus on setting up the main settings.
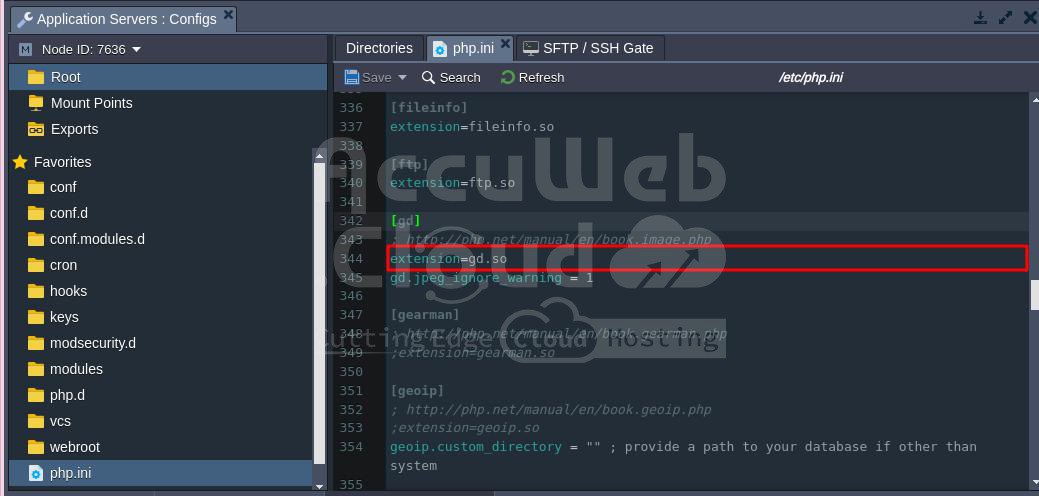
To fix this, enable the GD extension in the php.ini file by removing the semicolon (;) before the GD extension line. Below is a screen capture showing how it looks when the GD extension is enabled in the php.ini file.
Fill in these fields:
- Name Your Site: Enter the desired name for your site.
- Email Address: Type the email of the administrator user.
- Password: Specify the password for the administrator user.
- Server: Paste the link to the primary database (without http://).
- MySQL Username: Enter the login you received in the email with credentials for the primary database during environment creation (default is root).
- MySQL Password: Enter the password from the same email.
- Database Name: Specify the name of the database you created after configuring database replication (e.g., “concrete” in our case).
Choose whether your site will contain sample content or be blank, and complete the installation process. Click on the Install Concrete CMS button to start the installation process.
Once the installation is completed, you will get a message on the screen Installation Complete.
Cluster Configuration
Finally, let’s configure the cluster itself.
Step 1. Click the “Change environment topology” button for the environment where Concrete CMS is deployed.
Step 2. Increase the number of Apache application servers by clicking the corresponding button. Note that an NGINX load balancer node will be automatically added to your environment. Click Apply.
This ensures that all data between application server instances is synchronized, eliminating the need for double installation and configuration.
Step 3. Now you can open your Concrete CMS and start working with it.
That’s it! Your highly available and reliable Concrete CMS application is now up and running.


