How to Install and Configure Ingress Controller using Nginx on AccuWeb.Cloud?
Setting up Kubernetes clusters and configuring an Ingress controller is crucial when deploying applications in the cloud. An Ingress controller is responsible for managing external access to services within a Kubernetes cluster, often providing features like load balancing, SSL termination, and URL routing. In this guide, we will walk you through the steps on how to install and configure a Nginx Ingress controller on AccuWeb.Cloud, leveraging their Kubernetes infrastructure.

Steps to Install and Configure Ingress Controller using Nginx
Step 1: First, you need to access the AccuWeb.Cloud platform. Visit the AccuWeb.Cloud website https://app.cp-accuweb.cloud/ and enter your credentials to access the dashboard.
Once you have successfully logged in, you’ll be directed to your Cloud Dashboard, where you can manage your cloud services, including Kubernetes clusters.
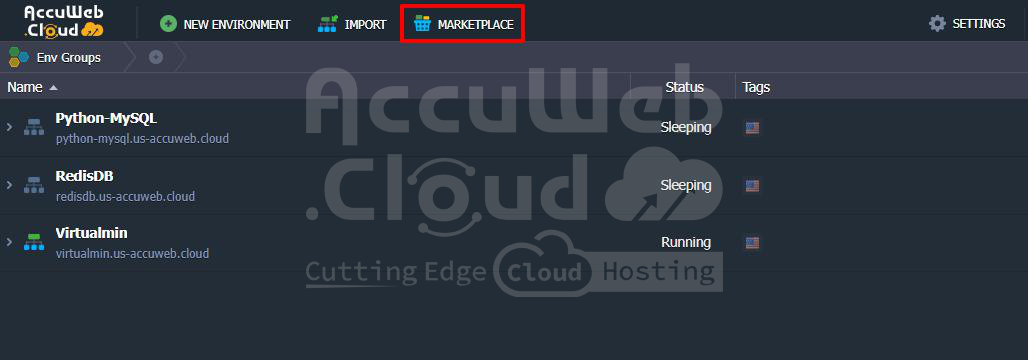
Step 2: Once logged into the AccuWeb.Cloud dashboard, you’ll need to navigate to the Marketplace to access the Kubernetes service: From the main dashboard, look for the Marketplace option in the top sidebar and click on it.
 Step 3: Within the Marketplace, you’ll find various application stacks and Kubernetes services available for deployment. You need to look for the Kubernetes Cluster in the Marketplace, which allows you to deploy a fully managed Kubernetes environment.
Step 4: Now that you have found the Kubernetes Cluster service in the Marketplace, click on the Install button to begin the process of creating your Kubernetes environment.
 Step 5: Once you click the Install button, a window will pop up with several customization options. Here’s what you need to configure:
Version: Select the Kubernetes version you want to install. AccuWeb.Cloud offers multiple Kubernetes versions; you should choose the one that meets your requirements or select the latest stable version.
K8s Dashboard: You can choose between v2 and Skooner dashboard options. Note that Skooner has some limitations when used with the HAProxy Ingress controller, so if you intend to use NGINX, the dashboard version shouldn’t be a critical issue.
Topology:
- Development: One control plane (1) and one scalable worker (1+). This is suitable for development purposes but not recommended for production due to limited fault tolerance.
- Production: A multi-control-plane setup (3 control planes) with API balancers (2+) and scalable workers (2+). This configuration is ideal for production environments where high availability and scalability are essential.
Note: It is advised not to choose the development topology for production workloads due to its single control-plane design, which cannot handle high traffic efficiently.
Ingress Controller: Here you can choose the Ingress controller for your Kubernetes cluster. For this guide, we will select NGINX because it offers excellent flexibility and performance.
Deployment Type:
- Clean Cluster: This option deploys a fresh cluster with a basic HelloWorld application for testing purposes.
- Custom Cluster: Choose this option if you want to deploy your custom applications via Helm charts or other shell commands. This is the preferred choice if you are deploying specific applications that require custom configurations.
NFS Storage: If you want to use dedicated NFS storage with dynamic volume provisioning, enable this option. This may require deeper knowledge of Kubernetes storage mechanisms.
Modules:
- Prometheus & Grafana: Enable this to install these monitoring tools. Prometheus and Grafana are critical for tracking your cluster’s health and performance.
- Jaeger Tracing Tools: Enable Jaeger if you want to implement distributed tracing for troubleshooting complex, multi-service applications.
- Remote API Access: Enable this if you need remote API access for interacting with your Kubernetes cluster using the kubectl command-line tool.
Environment and Region: Name your environment and select a region closest to your users for better performance.
Step 6: After you’ve configured your Kubernetes cluster according to your needs, click Install. The platform will start provisioning the resources, which may take a few minutes. Once completed, your Kubernetes cluster will be up and running.
 Step 7: Finally, after the Kubernetes cluster is up and running, you should be able to access your application by navigating to http://myapp.example.com in a web browser. If everything is set up correctly, you should see your application responding to HTTP requests through the NGINX Ingress controller.

Maniging the Ingress Controller using NGINX from the Kubernetes Dashboard
Configuring an Ingress Controller using NGINX from the Kubernetes Dashboard involves several steps, including deploying the Ingress Controller, creating the necessary resources (like services, and deployments), and setting up an Ingress resource for your applications.
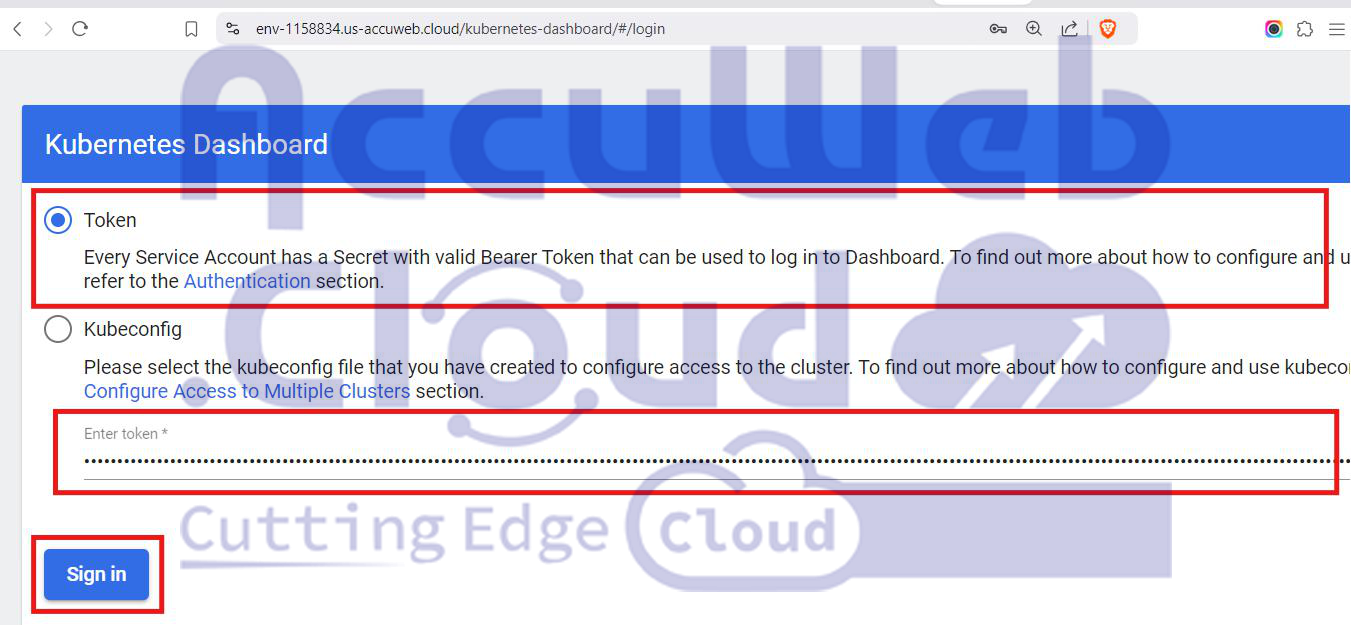
Step 1: Open the URL of the Kubernetes Dashboard and log in using a service account token or kubeconfig file.
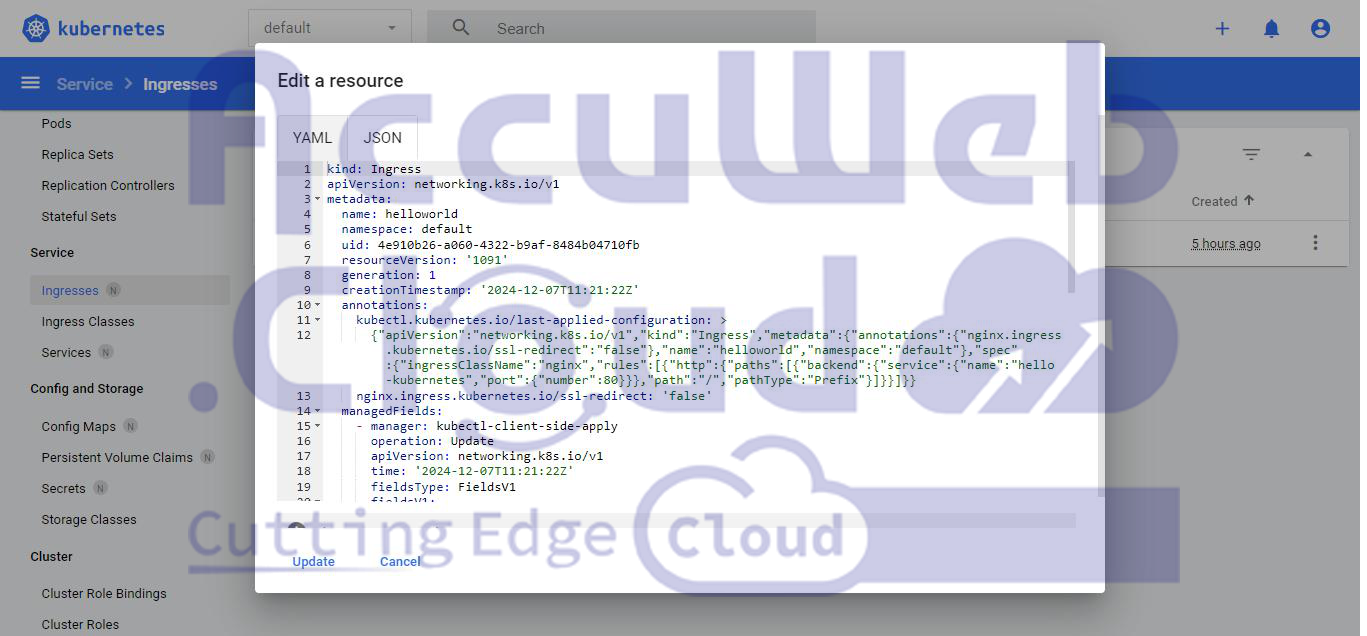
 Step 2: From the main page of the Dashboard, navigate to the “Workloads” section, then click on Ingresses under the “Services and Networking” category.
 Step 3: Click on the Edit button to edit the Ingress resource as you need.
 By following these steps, you can configure the NGINX Ingress Controller via the Kubernetes Dashboard to manage external HTTP and HTTPS traffic routing to your services.
Conclusion
In this tutorial, we’ve walked through the process of setting up a Kubernetes cluster on AccuWeb.Cloud and configuring the NGINX Ingress controller to manage external traffic to your applications. We discussed everything from selecting the right Kubernetes topology to installing and verifying the NGINX Ingress controller.
By following these steps, you should now have a powerful, scalable, and flexible Kubernetes environment ready to deploy and manage applications efficiently.


