How to export and Import Joomla Application on AccuWeb.Cloud?
Importing and Exporting Your Environment
Whether you’re upgrading, migrating, or just rearranging your resources, exporting your old environment and importing it into a new environment on AccuWeb.Cloud is a crucial step for guaranteeing smooth transitions.
You can guarantee that your processes run smoothly by taking careful control of these steps and maintaining data integrity and application functionality.
Exporting Your Old Environment And Importing It To A New Environment
Step 1. In your dashboard, navigate to the marketplace and search for the Joomla application, and click on install.
Step 2. Give the name of your choice to your environment, select the region of your choice, and click on install again.
Step 3. Now to export your environment, click on settings.
Step 4. In Settings, navigate to the export tab and click on export.
Step 5. Click on export in the dialogue box, as shown below.
Step 6. You will see a JSON file created for your environment. Click on it, to save it to your local system.
Step 7. Save the JSON file with your name of choice, and click on save.
Step 8. Now to import the file, go to the import button in your dashboard.
Step 9. Now click on the local file and then on browse to select the JSON file you want to import.
Step 10. Select your file and click on import.
Step 11. Name your imported environment, select the region for your environment, and click on install.
Step 12. A dialogue box will be displayed as soon as your environment is done being imported.
One of the most important steps in ensuring continuity and reducing downtime on AccuWeb.Cloud is exporting your old environment and importing it into a new one.
You may guarantee a seamless transfer with exporting your environment configuration and then importing it into the new configuration.
With this strategy, you may migrate or upgrade your environment in an efficient and safe manner while still maintaining the functionality and settings of your application.
Backup and Restore for Joomla
Backing up and restoring your Joomla application on AccuWeb.Cloud is essential for data protection and quick recovery in case of issues.
Making safe backups of your website’s files and database is part of this procedure, which makes sure your data is secure and easily restored.
You can protect your Joomla site against data loss and downtime by adhering to a few simple steps that will ensure its availability and integrity.
Taking Backup Of Your Files From Your Environment And Restoring It To Another Environment
Step 1. In your main environment, navigate to the directory where your files are stored. For eg: our files are stored in var/www/webroot/ROOT.
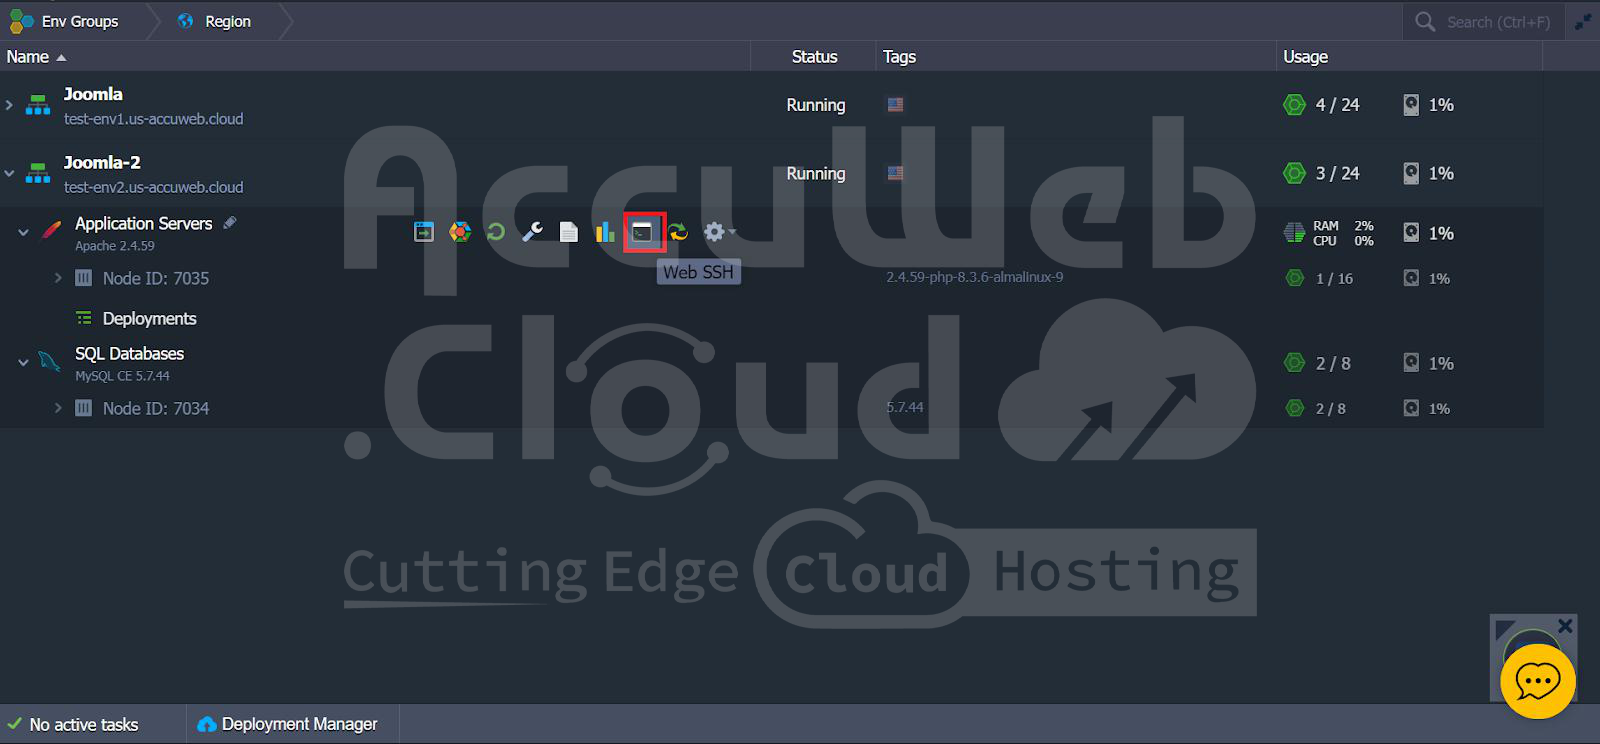
Step 2. Now, click on the web ssh of the application server of your main environment.
Step 3. Navigate to the directory where your files are stored and whose backup you want to keep.
For eg: we want to take backup of root files then:
cd /var/www/webroot
ls
zip -r ROOT .
Step 4. Now to see if your zip file is ready, type ‘ls’ again.
Step 5. Now click on config on the main environment.
Step 6. Navigate to the directory where your zip file is stored. Click on the settings button and then click on download, to download the file.
Step 7. Now to restore your files to another environment, navigate to your second environment and click on config.
Step 8. Now, select the path where you want to restore the files. For eg: we are restoring files in var/www/webroot. Then click on settings button and click on upload to upload your zip file.
Step 9. Select the file and then click on upload.
Step 10. You can delete the old ROOT files of your second environment which comes by default when installing an environment.
Step 12. Now, click on web SSH on the application server of your second environment.
Step 13. Navigate to the directory where your zip file is uploaded in order to unzip the files.
For eg: we will unzip the files inside the webroot folder.
cd /var/www/webroot
ls
unzip ROOT.zip
Step 14. Type ‘ls; again to check whether your files are unzipped.
Step 15. You can also check whether your files are restored by going to config, and then navigating to where your files are unzipped and check whether all your files are restored or not.
Taking A Backup Of The Database From Your Environment And Restoring It To A Database Of Another Environment
Step 1. From the marketplace, purchase the backup storage service for the backup of the database.
Step 2. Name the backup storage as per your choice and click on install.
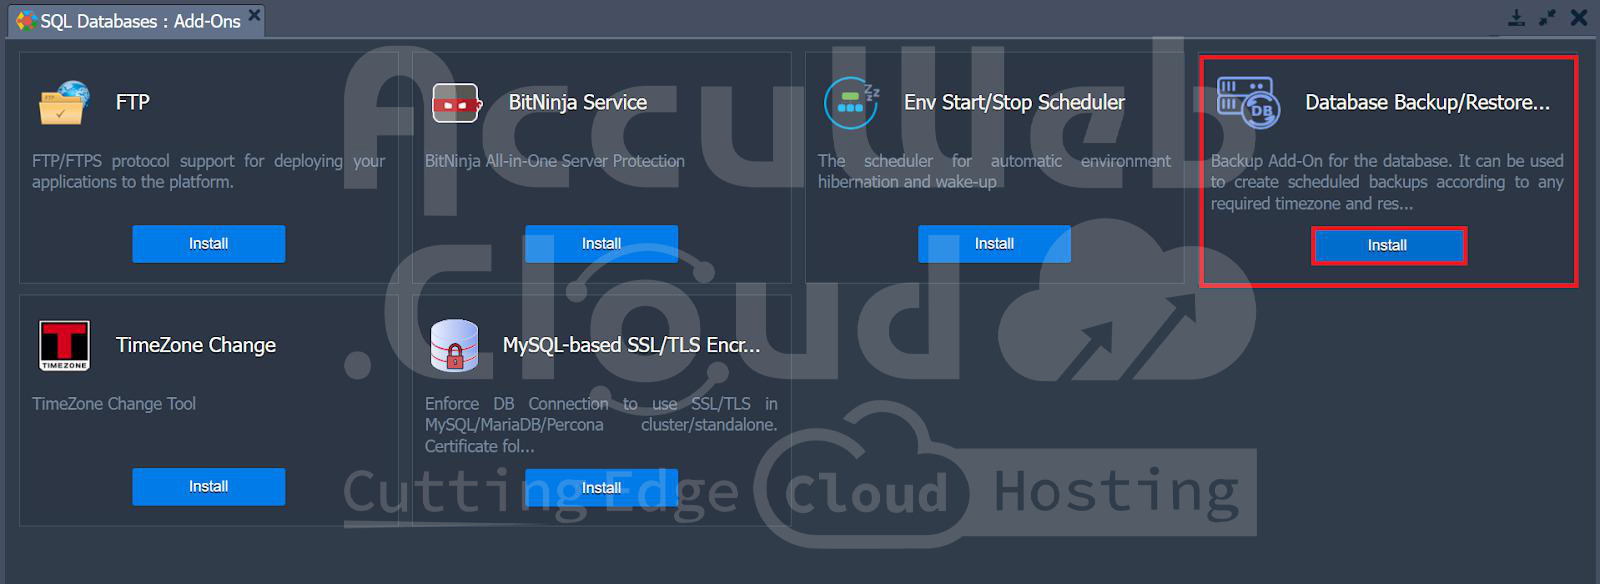
Step 3. Now click on Add-Ons in the database section of your main environment.
Step 4. Install the backup storage add-on from the list.
Step 5. Now you can choose which backup environment you want for this particular backup.
Enter the database credentials you receive from the email. Customize the backup settings as per your requirements.
Step 6. After configuring the backup settings, click on Backup Now to take the backup.
Step 7. You will receive a dialogue box for the confirmation of the same.
Step 8. Now click on add-ons for your second environment, where you want to restore the previously backed-up data.
Step 9. Again configure the settings as per your requirement.
Step 10. Now click on restore, to restore the previously backed-up data.
Step 11. Select the data which you want to restore.
Step 12. You will get a confirmation dialogue box for the same. Click on yes and the data will be restored.
In summary, there are a few basic stages involved in backing up and restoring a Joomla application on AccuWeb.Cloud
Safely gaining access to the server, compressing the Joomla files, and using add-ons to export the database, Move these backups to a safe place on a regular basis, Decompress the files, and import the database into a fresh Joomla installation to restore.
This procedure guarantees a speedy recovery of your Joomla website in the event of an emergency.


