How to install and use Object Storage with AccuWeb.Cloud?
A free, open-source cloud storage option called Object Storage is perfect for synchronizing, sharing, and safely keeping your documents.
This guide covers everything you need to know about installing and using the Minio Cluster (Object Storage) on AccuWeb.Cloud.
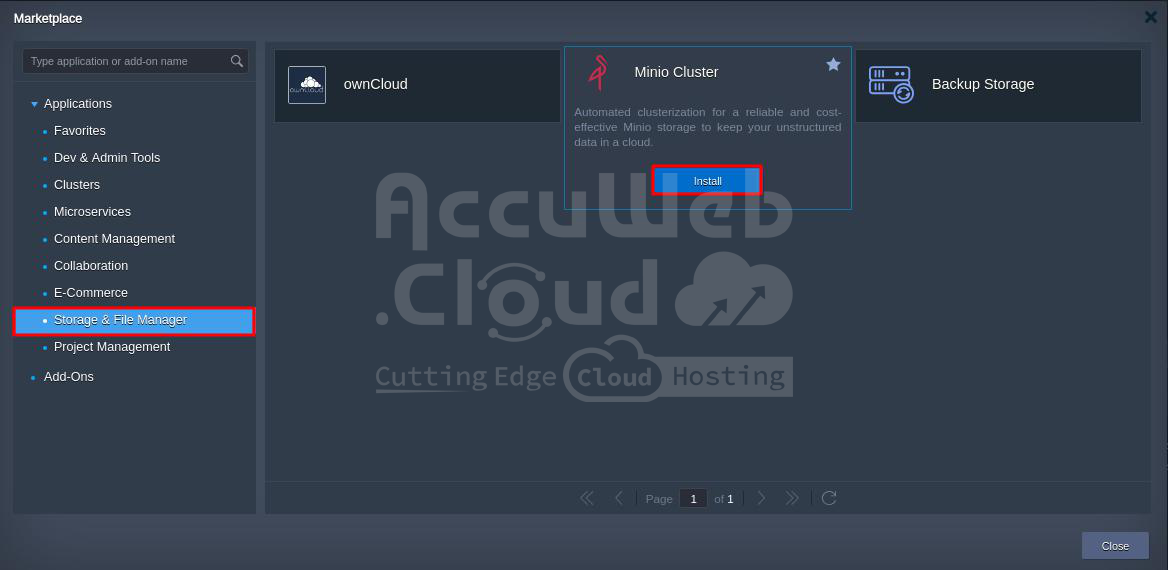
Step 1. To open the object storage, click the Marketplace option at the dashboard’s top.
Step 2. In the opened window, Go to the Storage and File Manager tab and locate the MiniO Cluster.
Click on the Install button to install the Minio Cluster (term used for Object Storage).
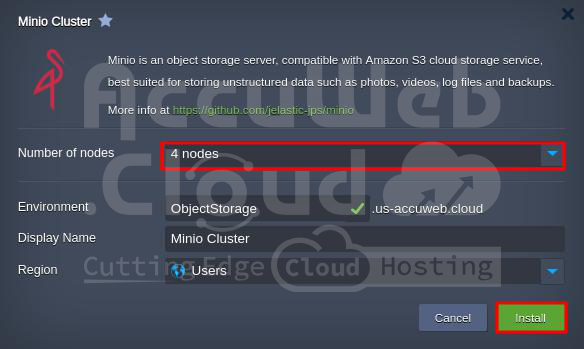
Step 3. Now select the Number of Nodes you need from the list. Provide a name for your MinIO Cluster, then click Install to begin the process.
You might be wondering how to determine the number of nodes to select. Let us explain the criteria for making that decision:
You can choose the number of nodes based on your specific needs.
For example,
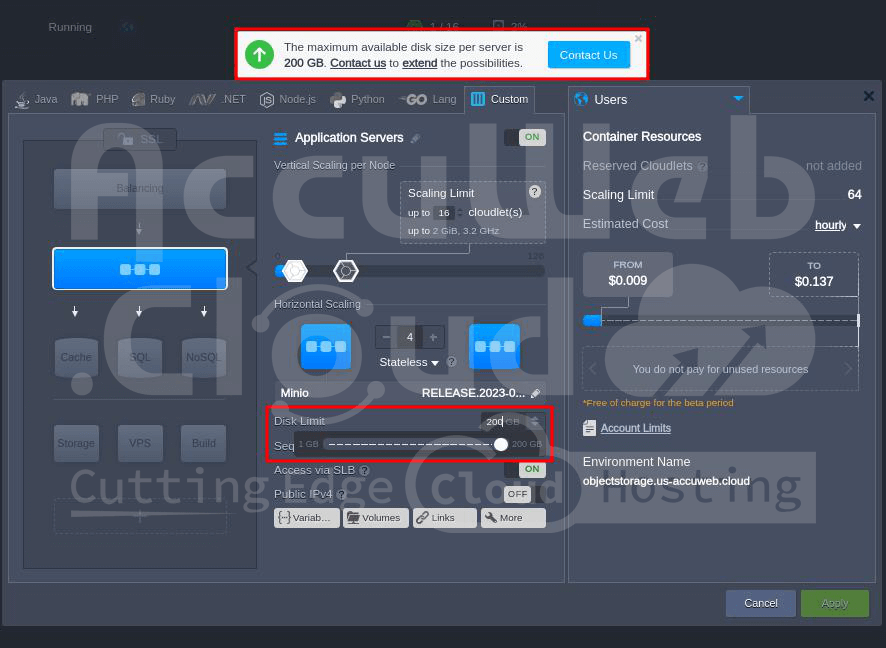
- if your Disk space requirement is up to 200 GB, you can select the 1 node.
- If your Disk space requirement is up to 800 Gb, you can select the 4 nodes.
- If your Disk space requirement is up to 1600 Gb, you can select the 8 nodes.
- If your Disk space requirement is up to 3200 Gb, you can select the 16 nodes.
So this is all how to decide on the number of nodes to select during the Minio Cluster installation.
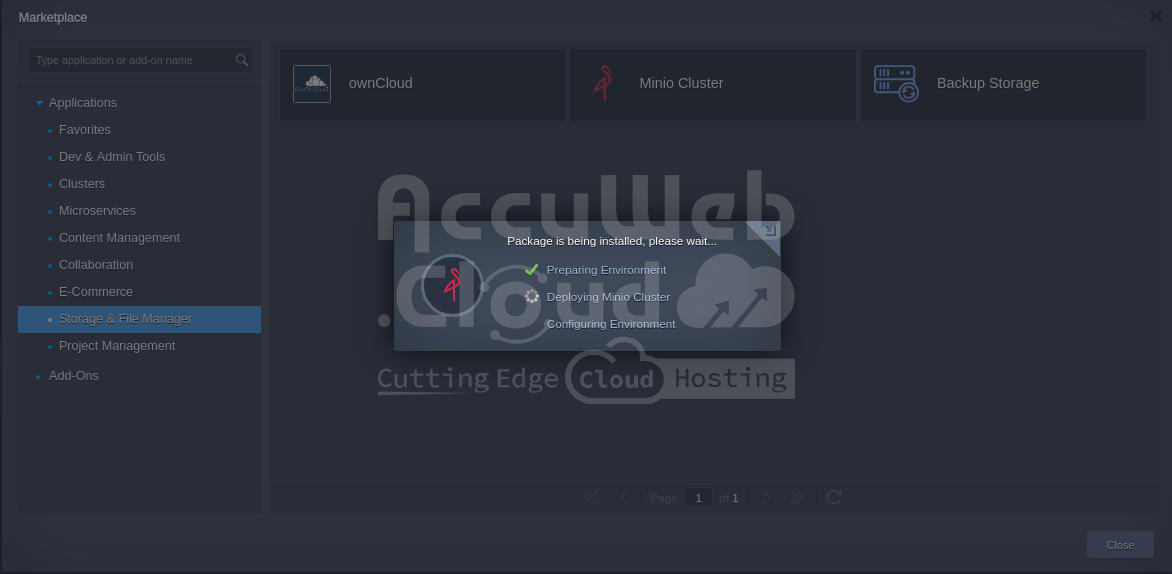
The installation process might take a while, so please be patient till then.
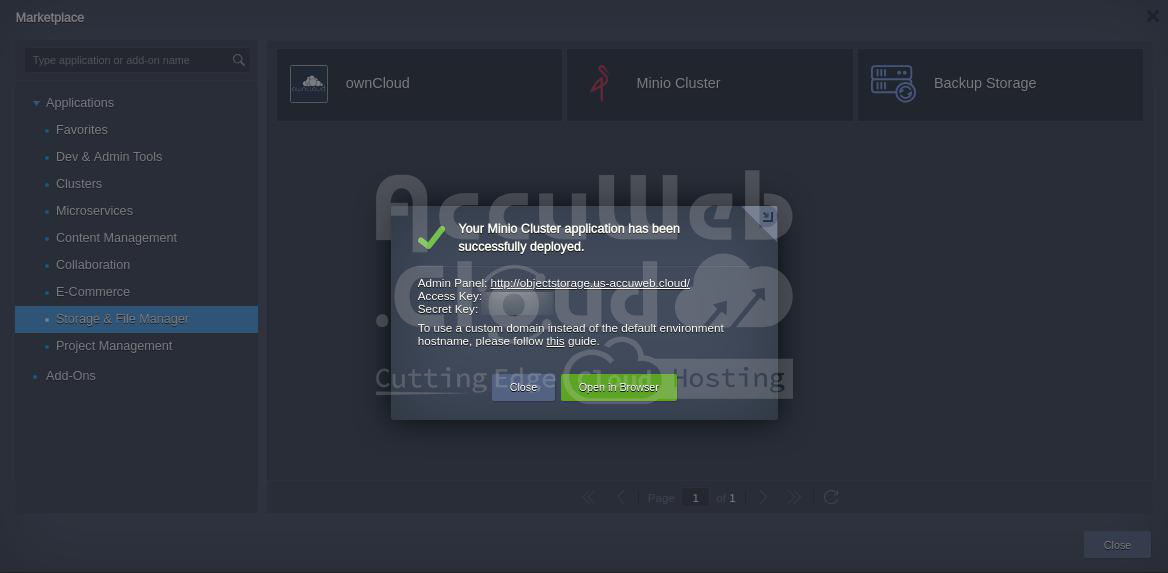
Step 4 . After the installation finishes, you’ll see your login details displayed on the screen, and they’ll also be sent to you by email.
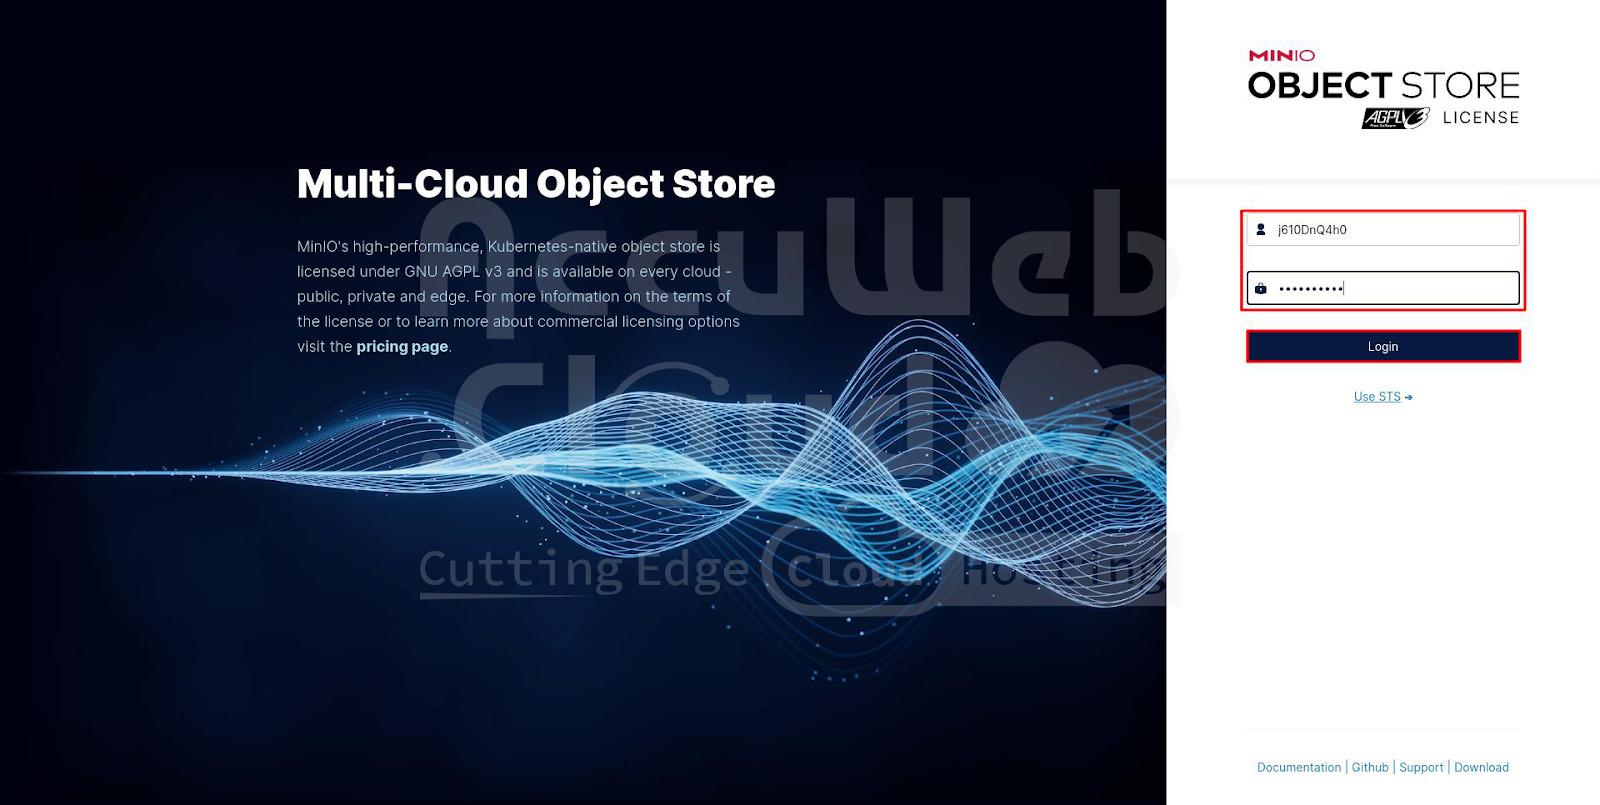
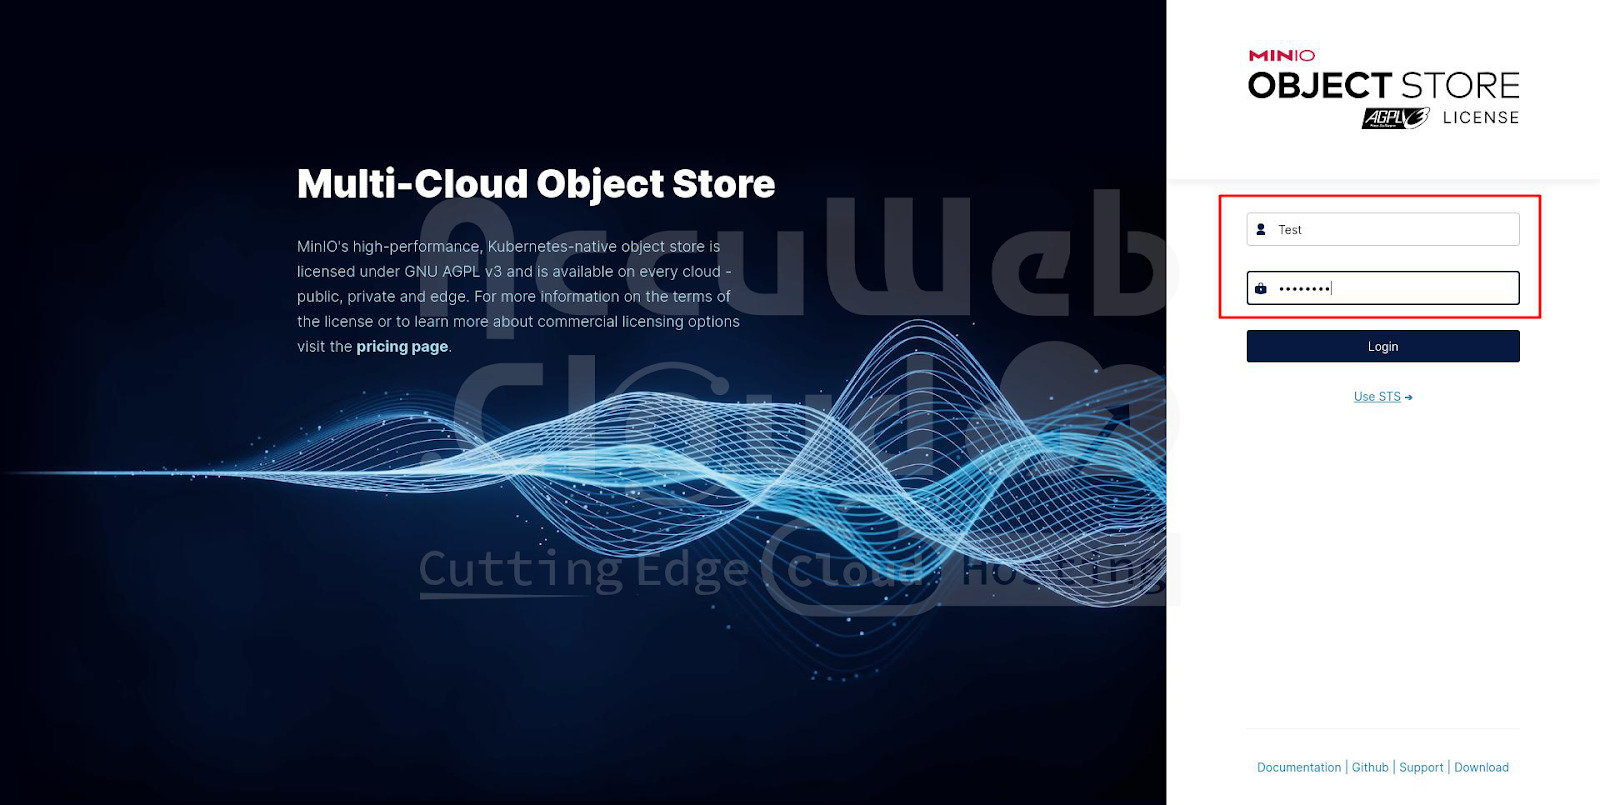
Step 5. Now, open your web browser, navigate to the URL included in the email, and log in using the provided Access key and Secret key.
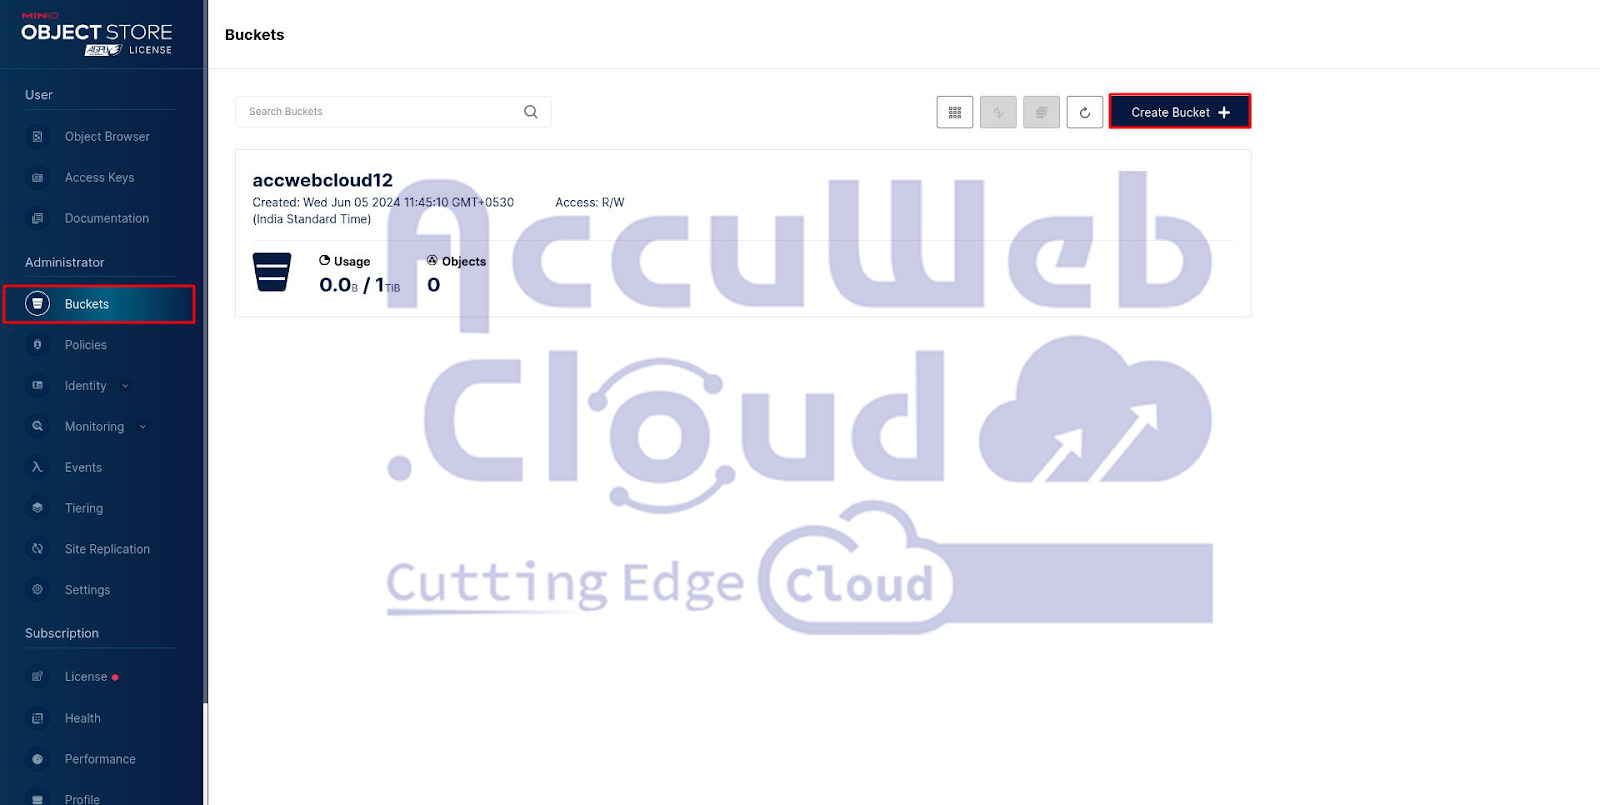
Step 6. Using this web interface, you can effortlessly handle your files. For example, click the + button to create a new bucket and upload your files.
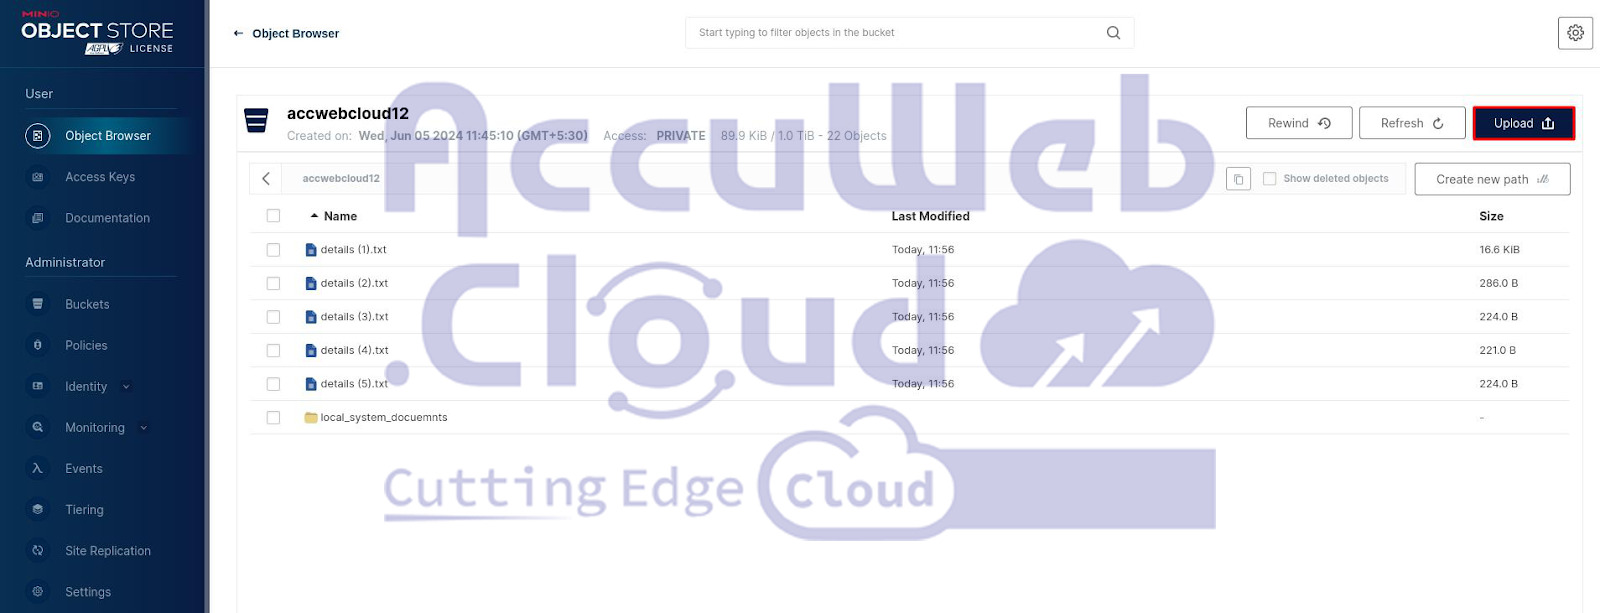
Step 7. Head over to the website you use to access the admin panel. Log in with your username and password to enter the bucket. Once you’re in the panel, you’ll be able to access the bucket online. You can also upload files or folders by using the Upload option.
Create Users
If you need to set up more MiniO user accounts for your clients or coworkers, you can do it right from your MiniO admin dashboard.
Plus, you have the flexibility to customize their access levels, whether it’s full admin rights, read-only privileges, or something in between.
Just follow these steps to add users and tailor their permissions to fit your needs.
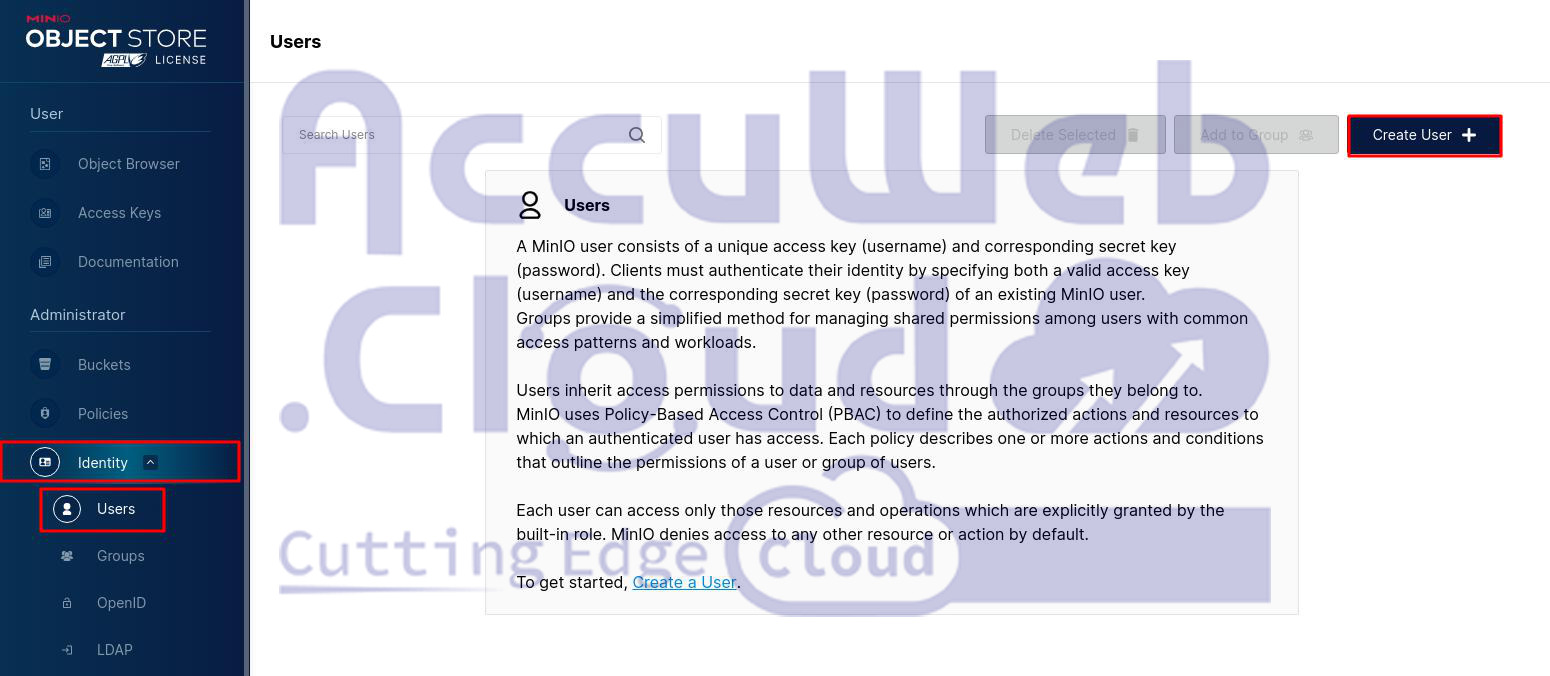
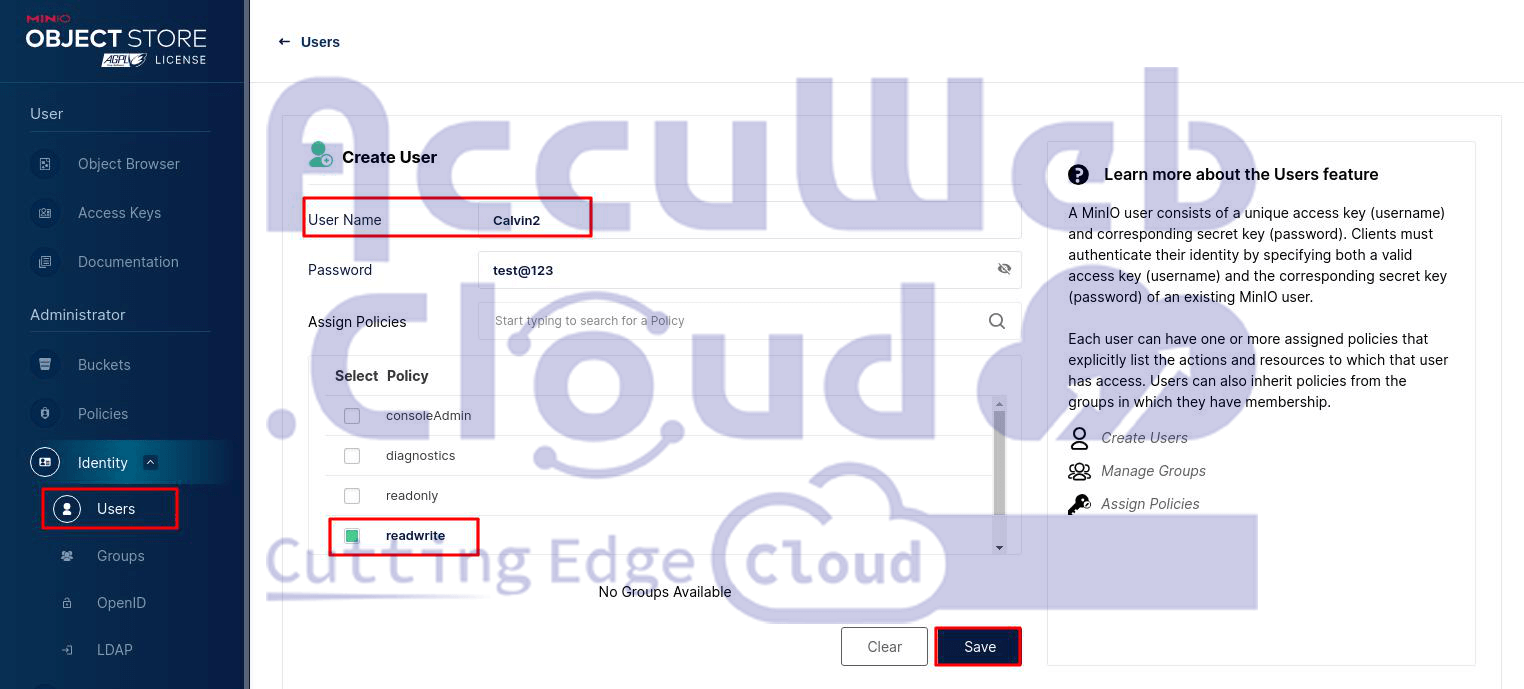
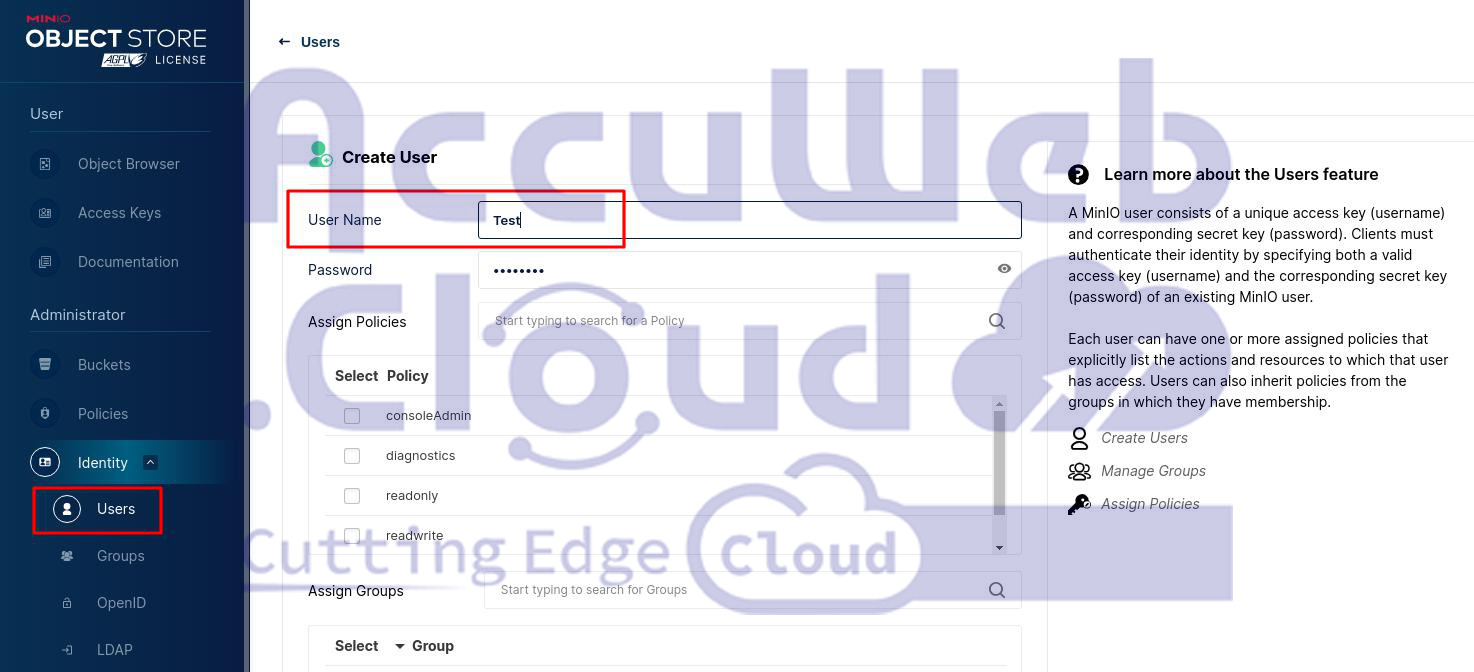
Step 1. Head to the Identity section on the left-hand side of your dashboard and give it a Click to reveal the sub-options.
Inside, you’ll find the Users option nestled in the same tab. Give it a click, and you’ll be taken to the Users dashboard, where you can kickstart by creating your first user. Simply hit the Create User button.
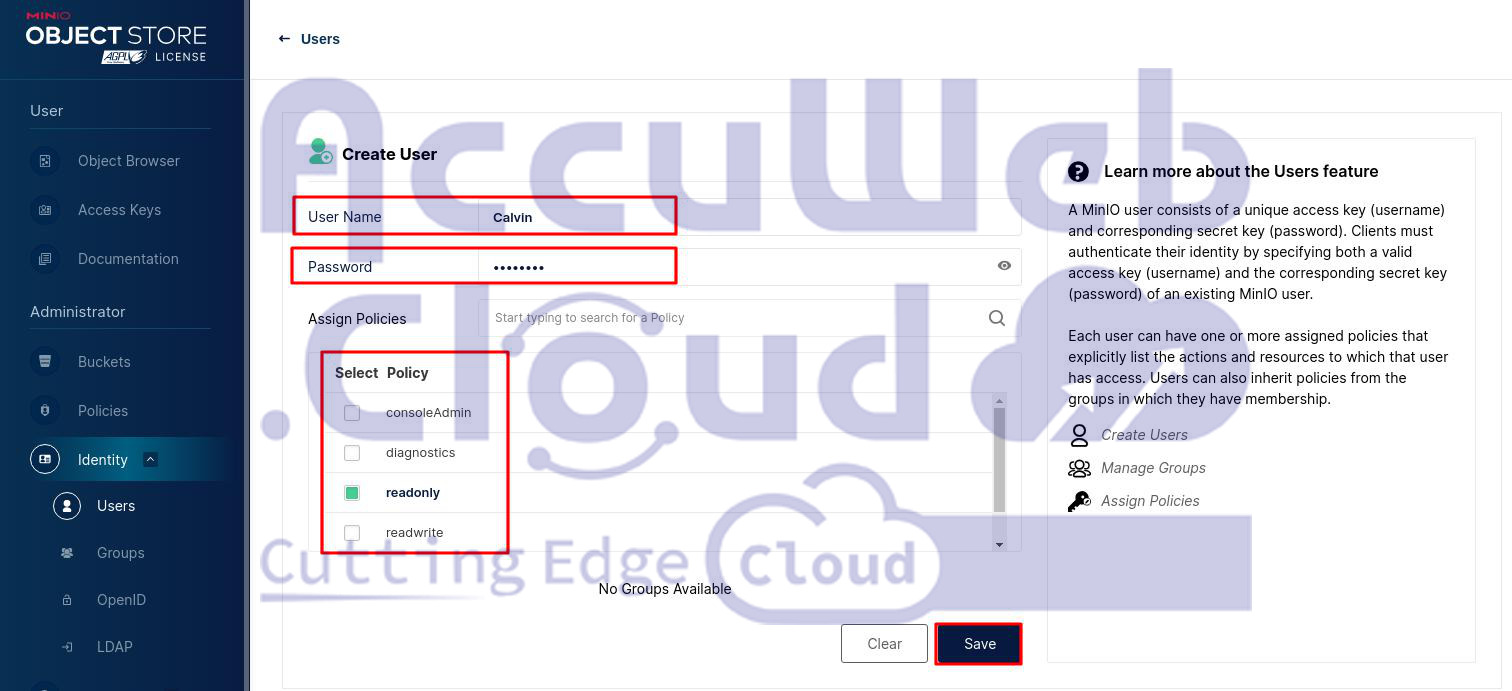
Step 2. From there, you’ll need to input the User’s name, and password, and designate the appropriate policy, permission, or role. Once done, hit Save to finalize the creation of the user.
MinIO employs a system called Policy-Based Access Control (PBAC) to specify what actions and resources an authenticated user can access. These policies lay out the permissions for individual users or groups, detailing the actions they can perform under certain conditions.
Users are limited to accessing only the resources and operations explicitly granted by the built-in role; MinIO automatically blocks access to any other resources or actions.
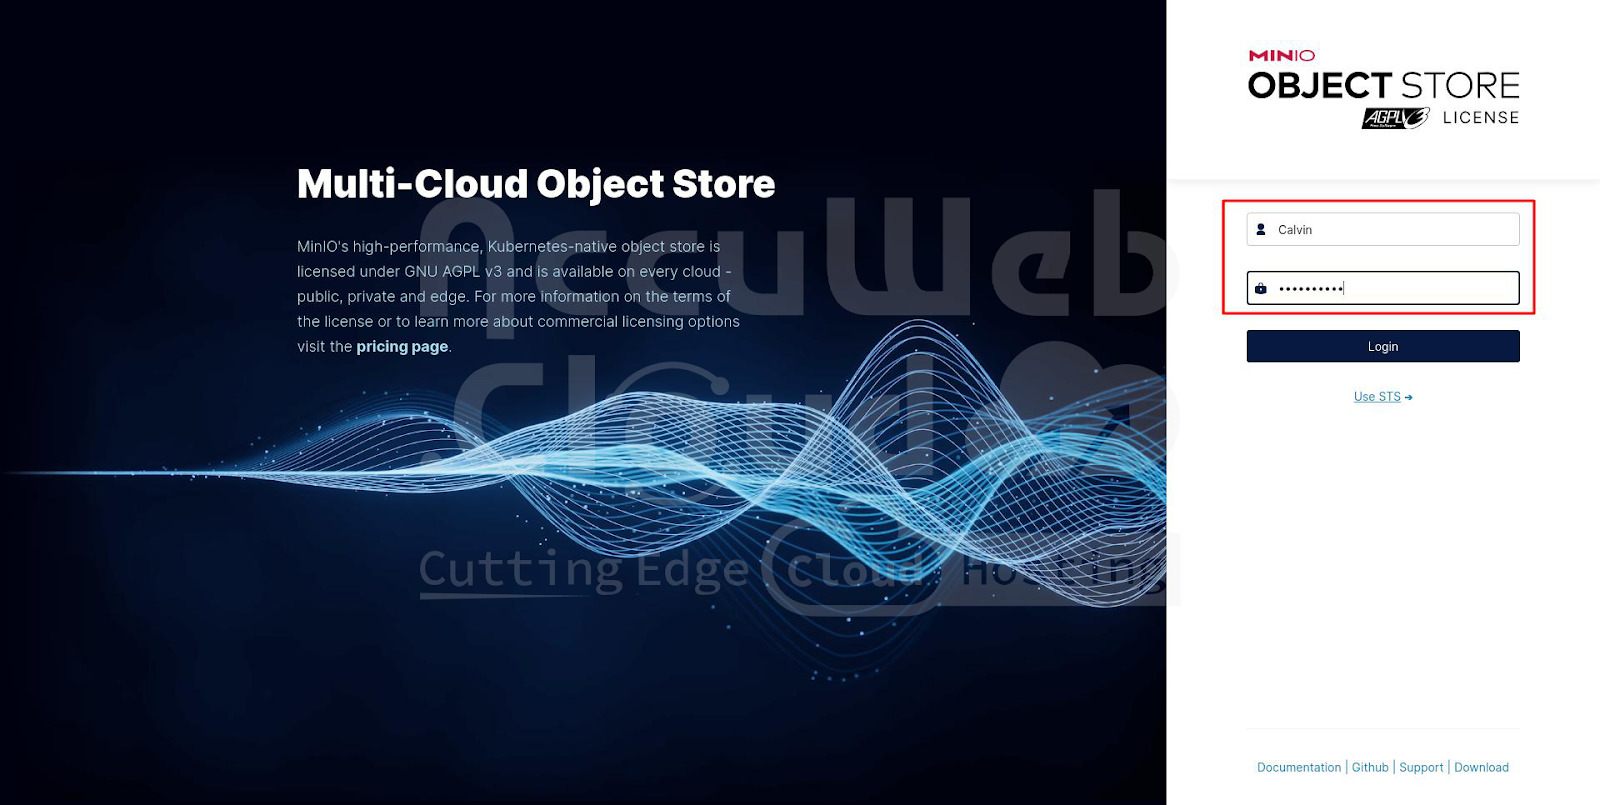
Step 3. Log out of your Admin dashboard and attempt to log in using the newly created user account.
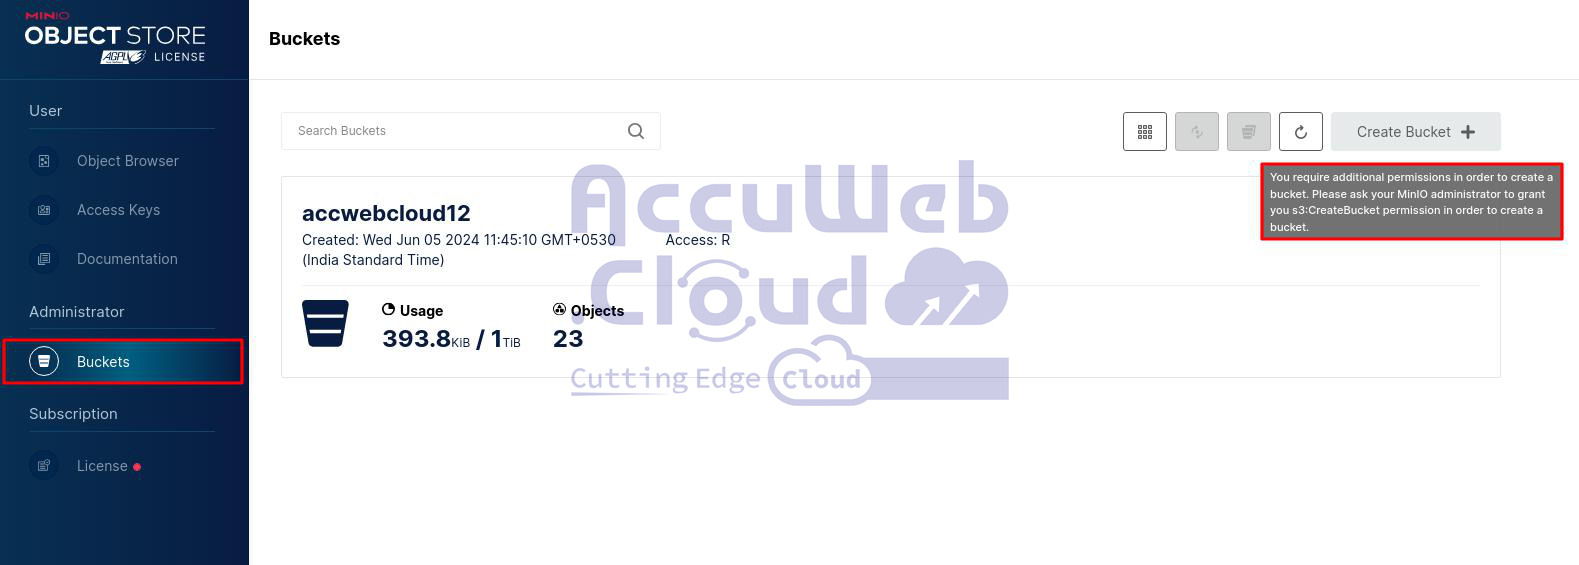
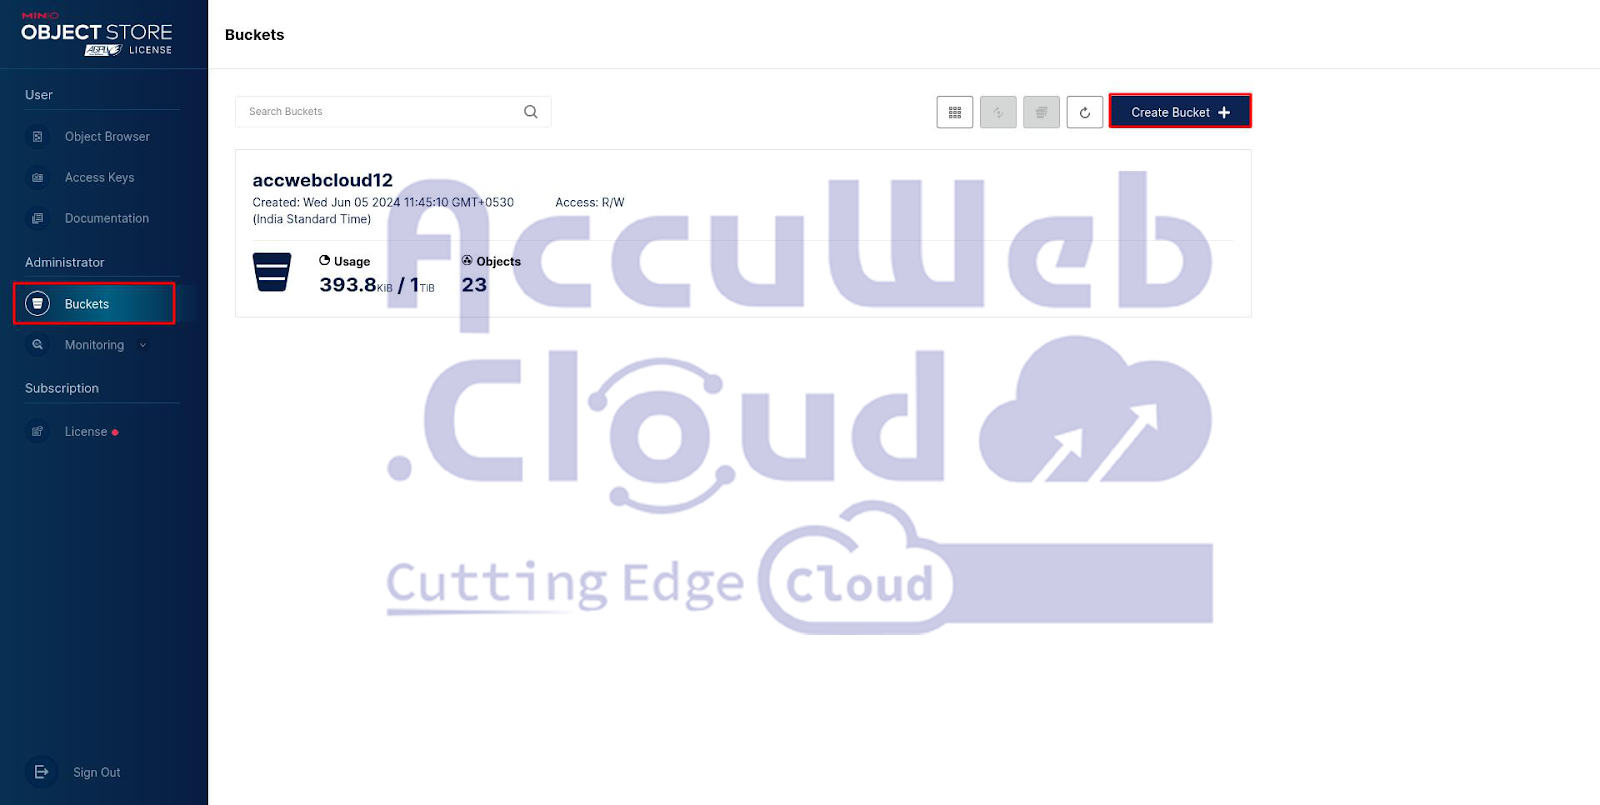
Step 4. Once logged in, go to the Bucket section and try clicking the Create Bucket button.
You’ll encounter the message mentioned above when you attempt to create a bucket. Since this user account only has read permissions, you won’t be able to perform any actions other than reading the data within the dashboard.
Step 5. Now, log back into your Admin account and create another user with read-write permissions.
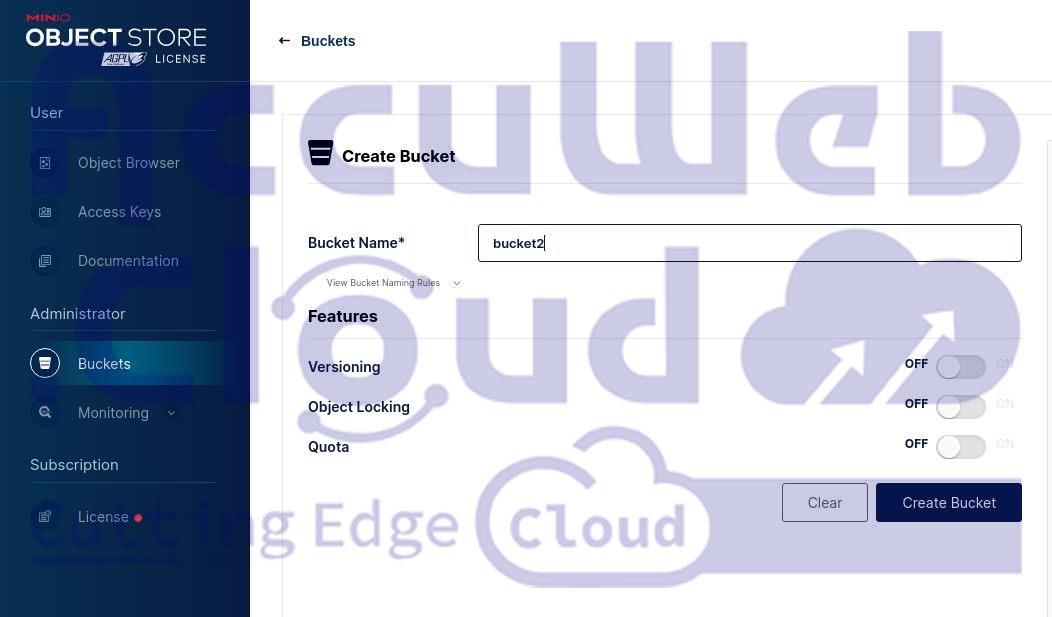
Step 6. Next, log in as this new user using the credentials you set up during its creation and attempt to create a bucket.
You’ll notice that the bucket creation is successful because this user has been granted read-write permissions.
That’s all on how you can create multiple users and assign specific permissions as per your needs.
Create Groups
A group in a MinIO Tenant can be assigned a single IAM policy, which automatically applies to all members of that group. This setup simplifies the management of user permissions within the system.
Creating groups allows you to assign IAM policies to several users simultaneously.
By belonging to a group, users automatically gain access permissions to various data and resources.
A user can be part of multiple groups.
This approach simplifies the management of shared permissions for users who have similar access needs and workloads. However, clients cannot use a group as an identity to authenticate to a MinIO deployment.
Follow the below steps to create the group and add the users to that group.
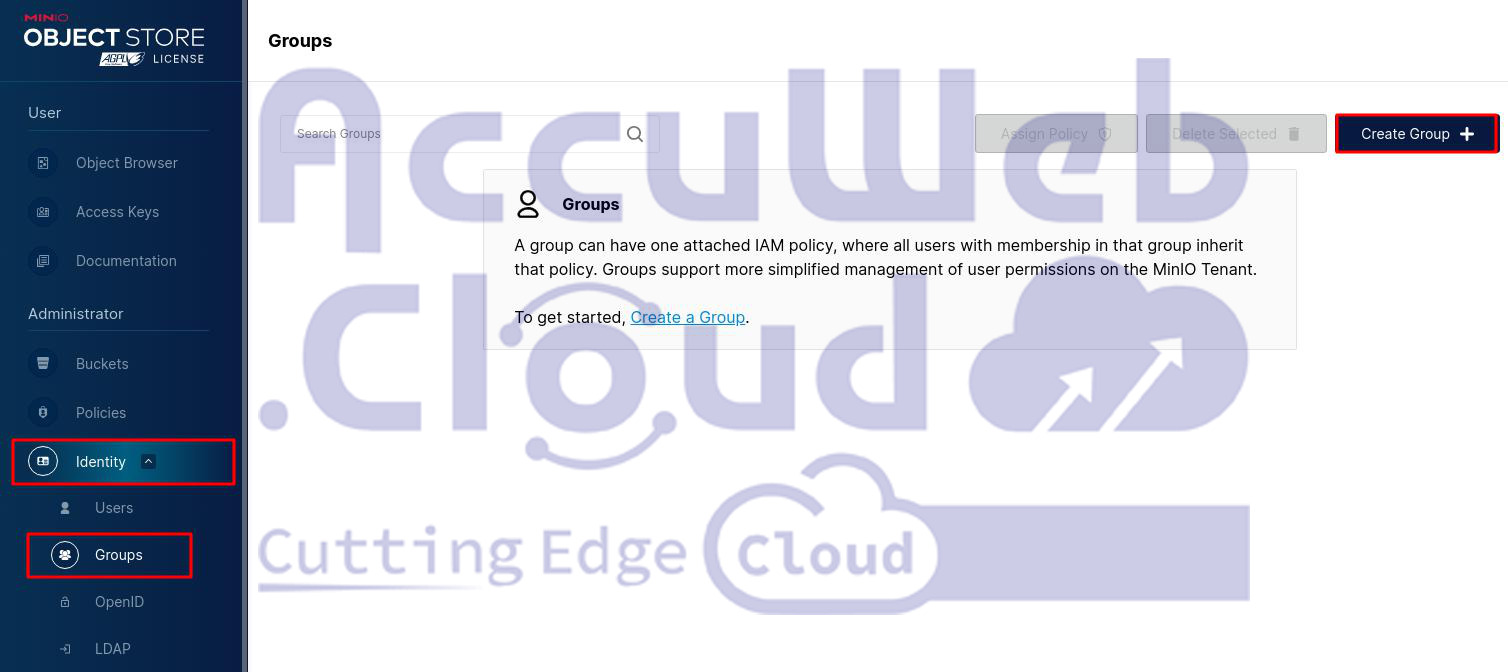
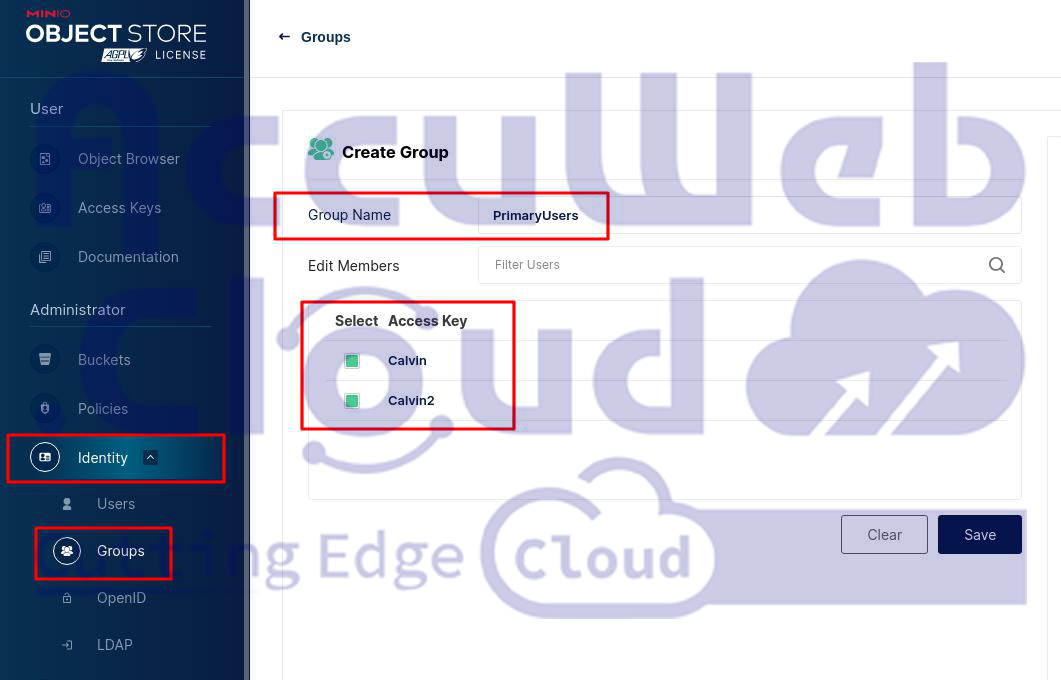
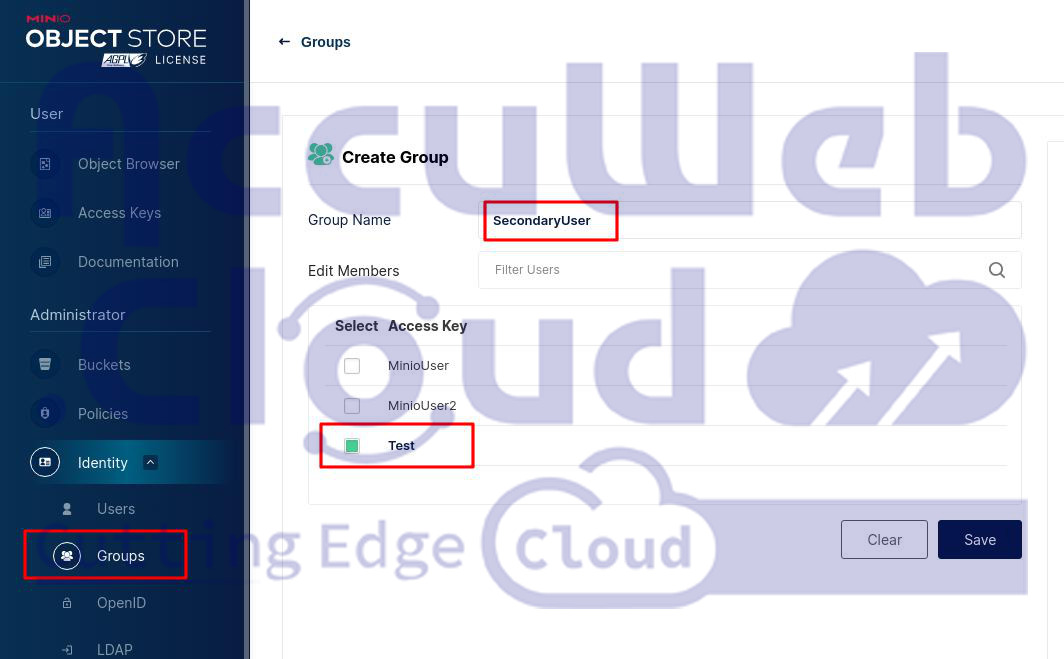
Step1. Open your Admin dashboard and navigate to the Identity tab on the right side. Click it to view the sub-options.
From the list, find and click the Group option to open the Group dashboard. Now click on the Create Group button to proceed with creating a new group.
Step 2. Specify the Group name and select Users from the displayed list to add to the new group. These users will inherit the group’s assigned policies.
Click the Save button to create the group.
To add policies to the group
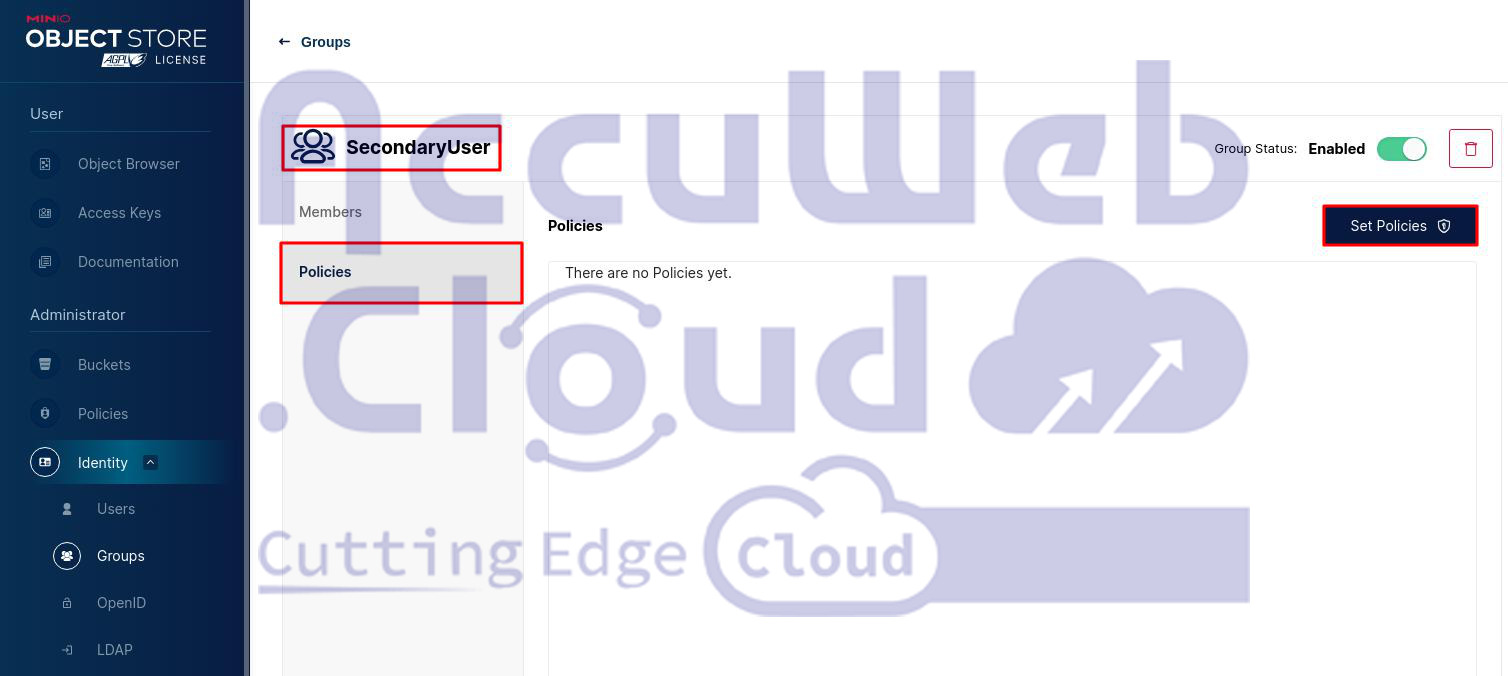
Step 1. After creating a group, you can add policies to it by selecting the group from the Groups view. In the Policy view, you can then manage the policies assigned to that group.
Step 2. To configure your group’s policies, navigate to the Group section, select your Group name, and you’ll be presented with the dashboard below.
Navigate to the Policies tab and click on the Set Policies button.
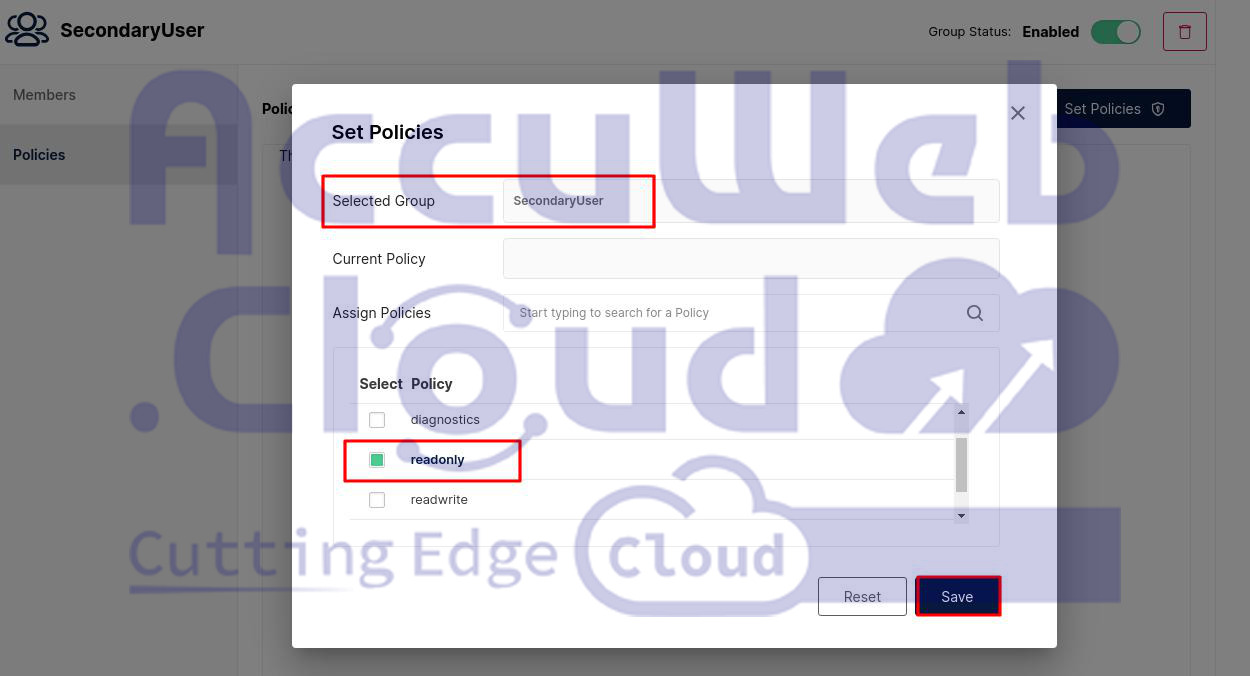
Step3. You can choose a specific policy from the provided list to assign to that group.
After choosing the policy, click the Save button to apply it to the group.
Add users to the group without assigning any Policies/Permissions
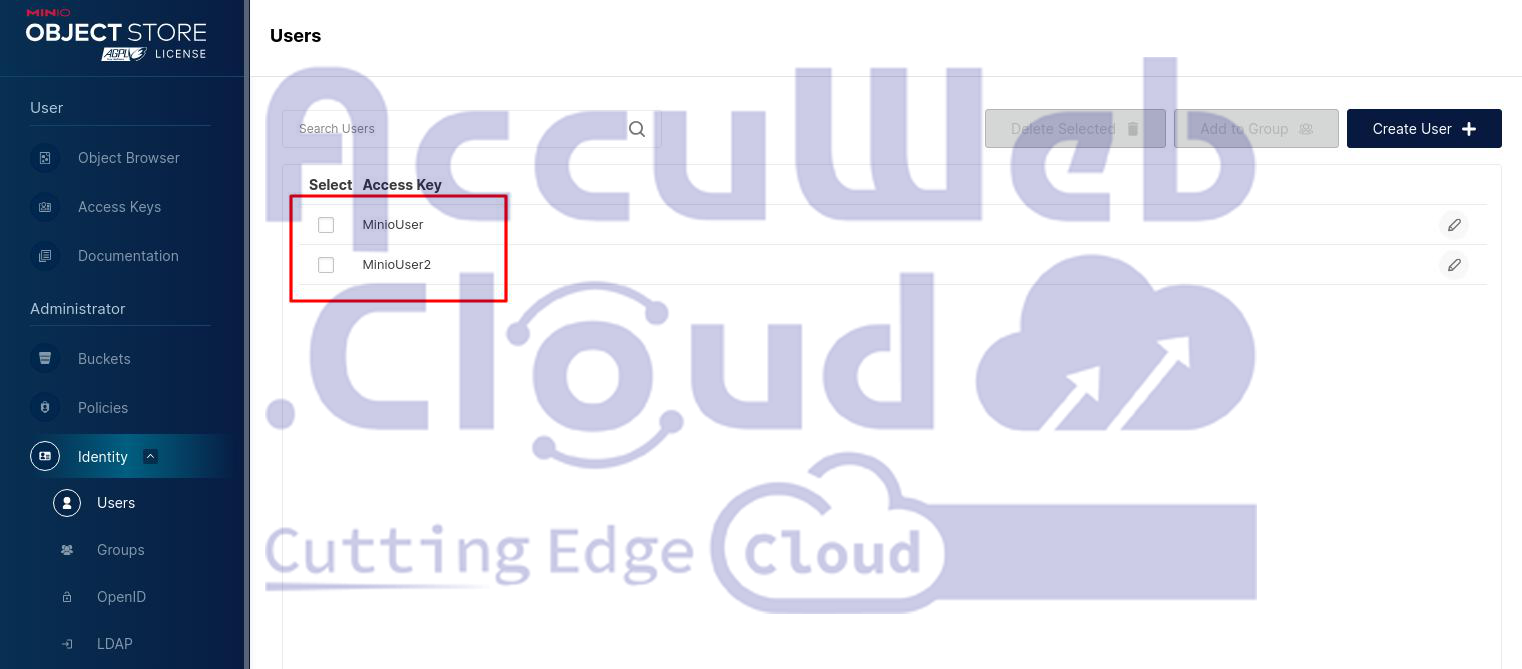
Step 1. Now, let’s create two new users without assigning any policies or permissions.
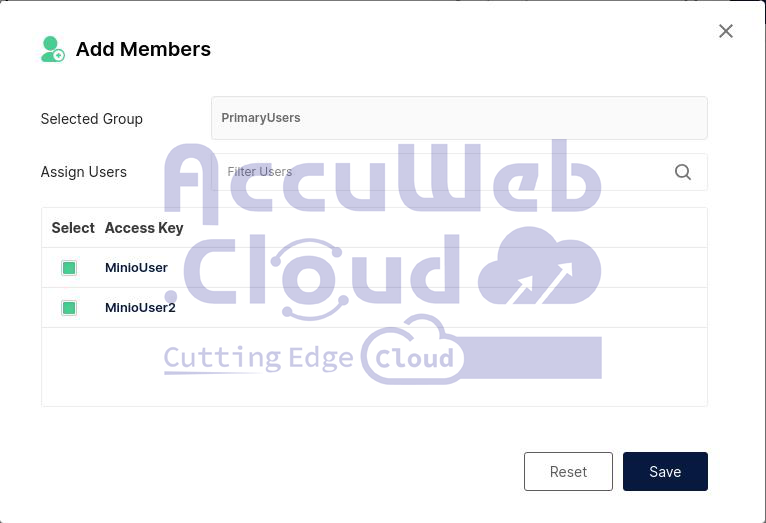
Step 2. Add these new users to the already created group (here, we have created the group named PrimaryUsers, so we add new users to this group).
Step 3. In the Group tab, switch to the Policies tab. You will notice that no policies are currently assigned to this group.
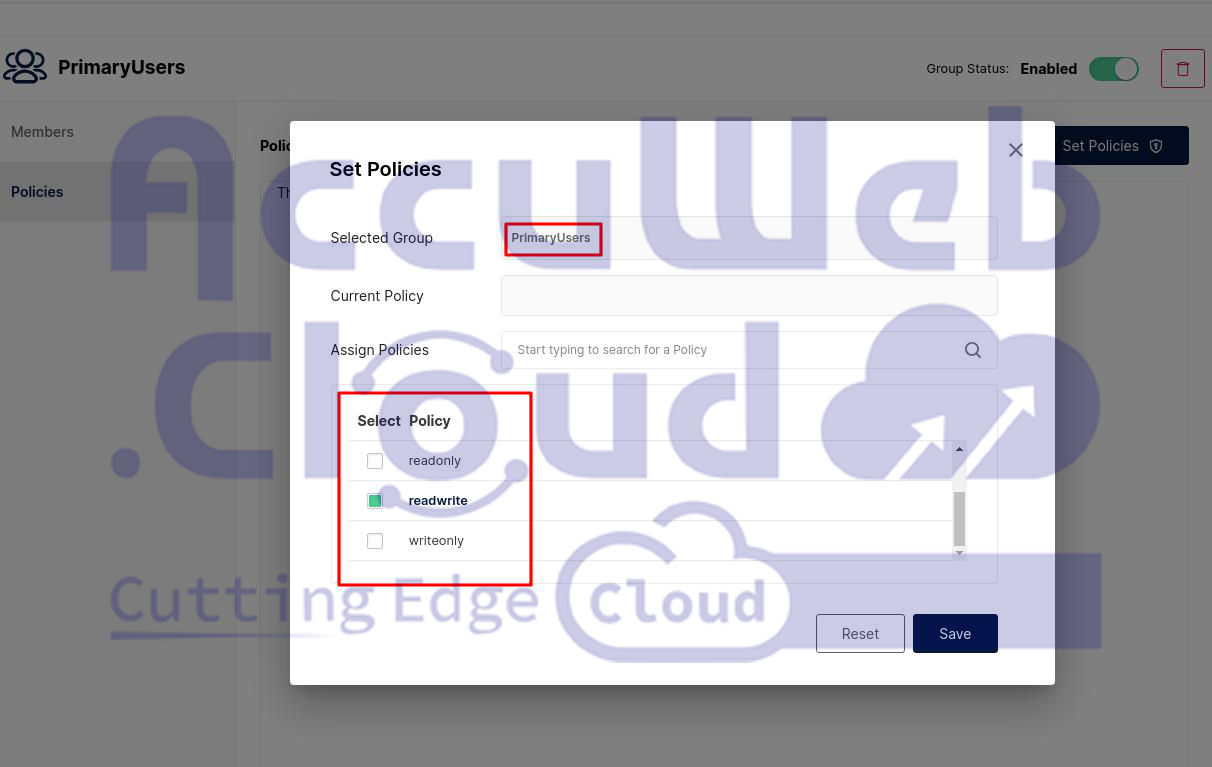
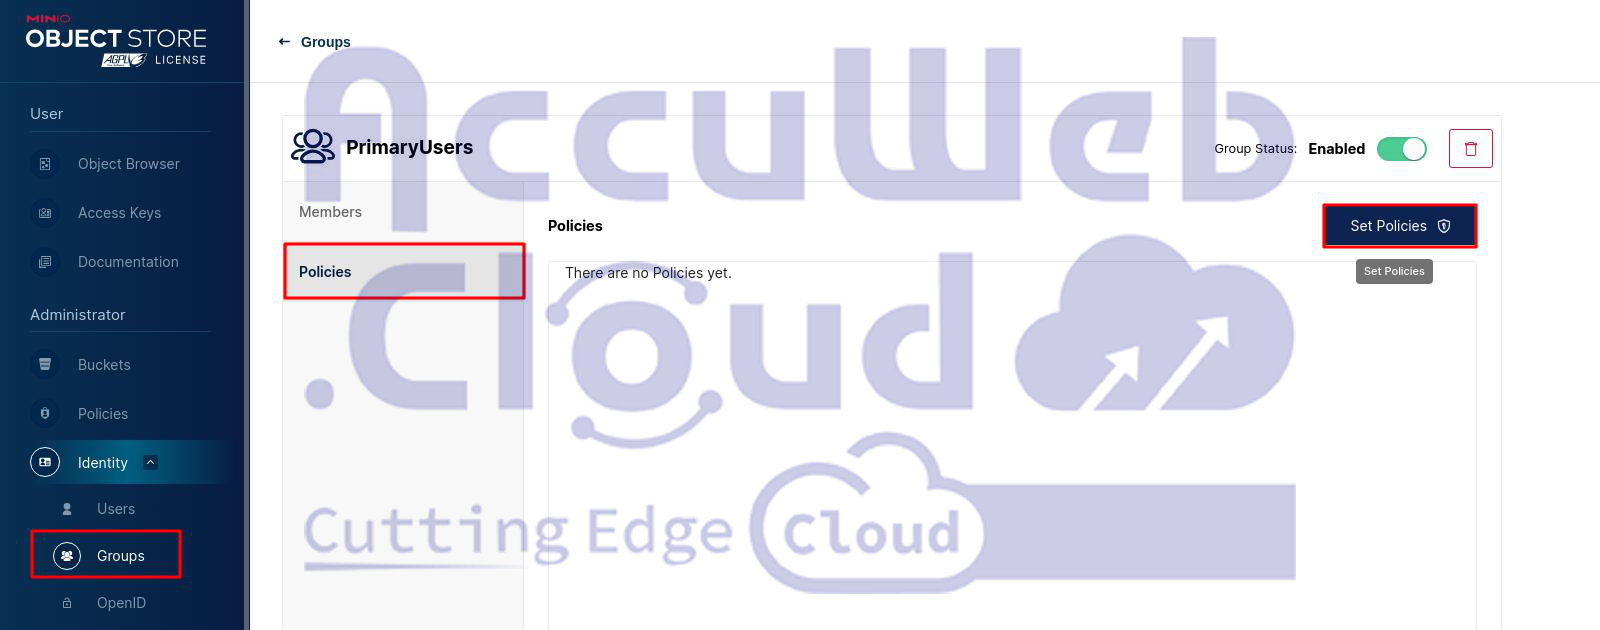 Click the Set Policies button to assign specific policies or permissions to the group.
Step 4. You will see the below window. Select the policies you need to assign to this group from the available list. Here we assign the read-write permission to this group.
Note: The policies you assign to this group will also apply to the users added to this group. Assign the permissions according to your needs.
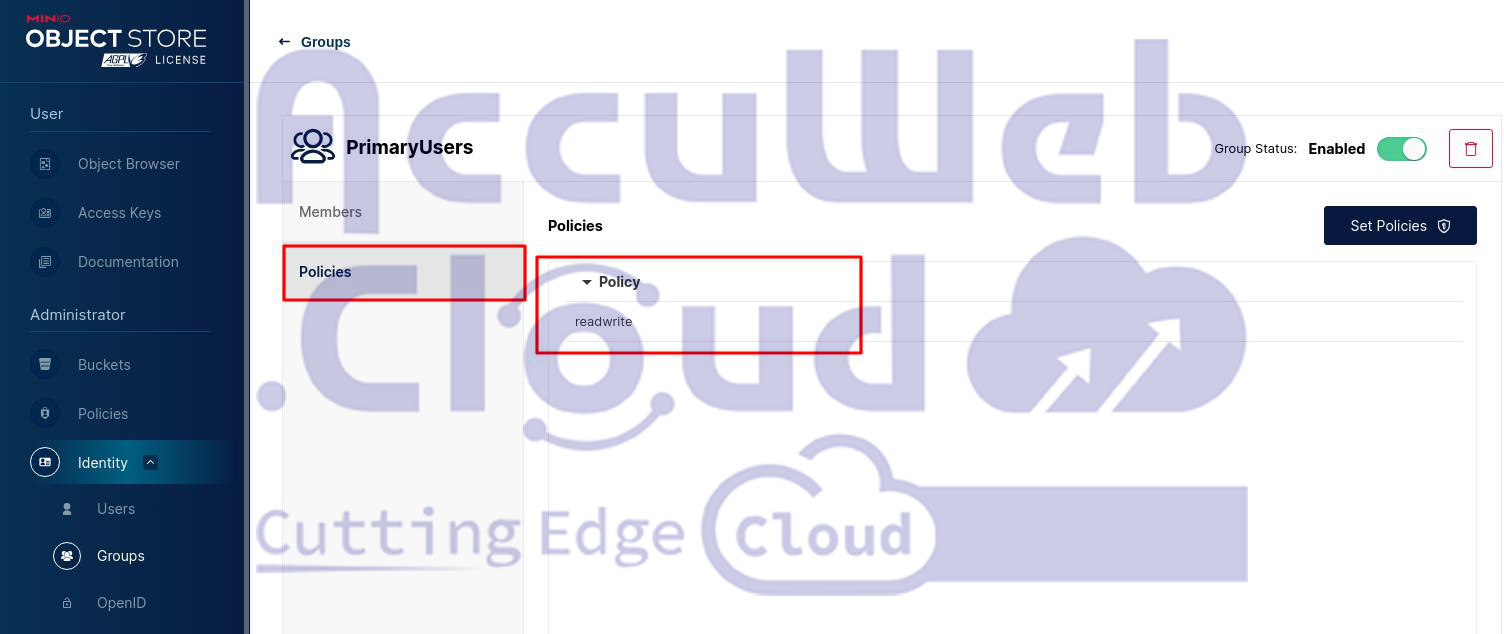
Step 5. Once you have selected the necessary policies or permissions, hit the Save button. The assigned policies will now appear in the Policies tab, as shown in the screenshot below.
Here, we’ve assigned the read-write policy to the PrimaryUser group. Consequently, this policy is also granted to the users MinioUser and MinioUser2.
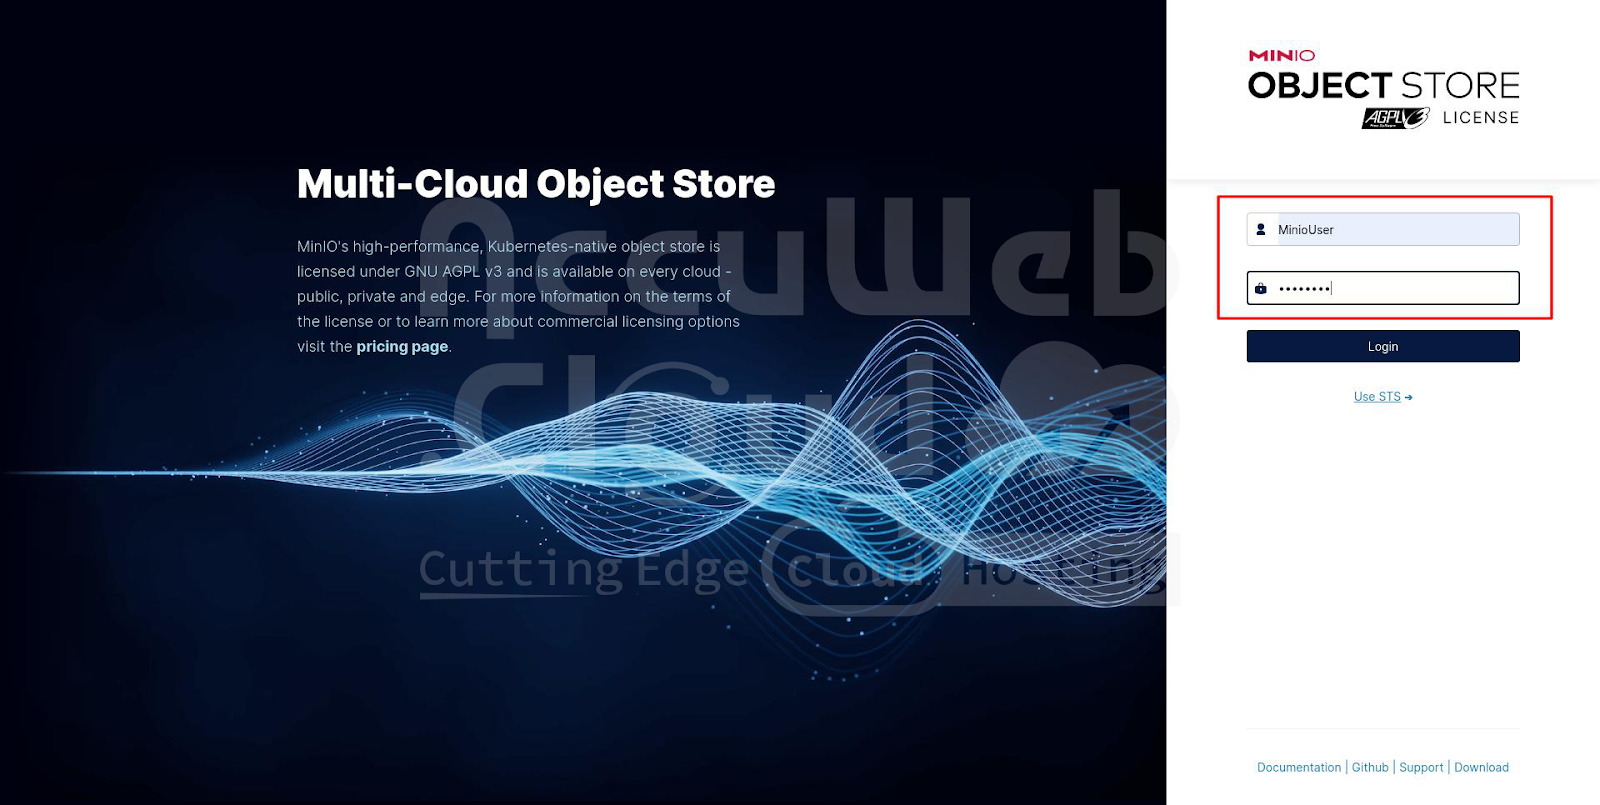
To verify this, log in as MinioUser to check if it has read-write permissions for the Minio Cluster dashboard.
Step 1. First, sign out from your Admin user account and log back in with the newly created user.
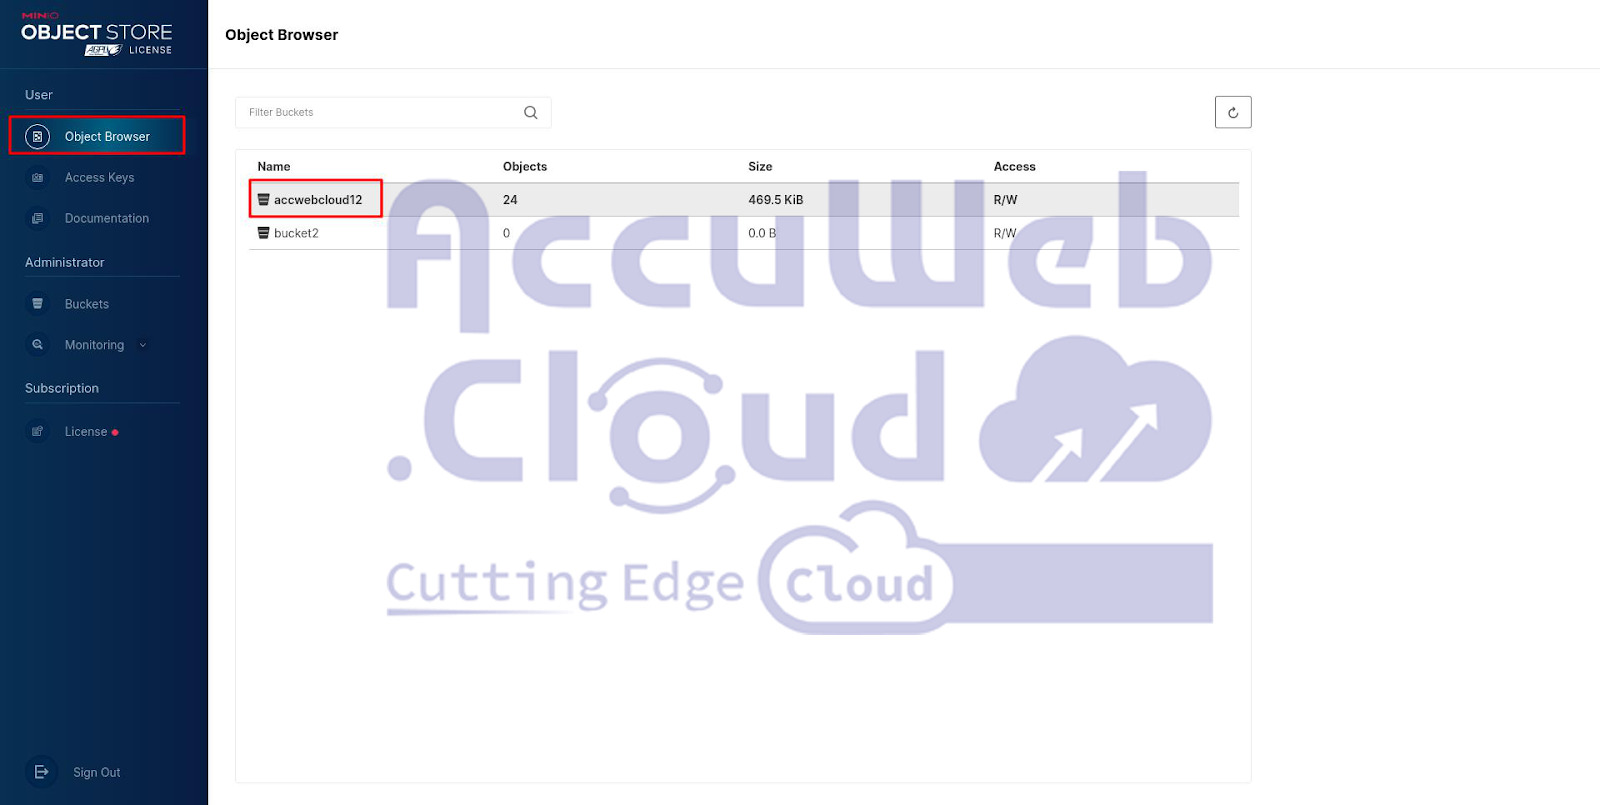
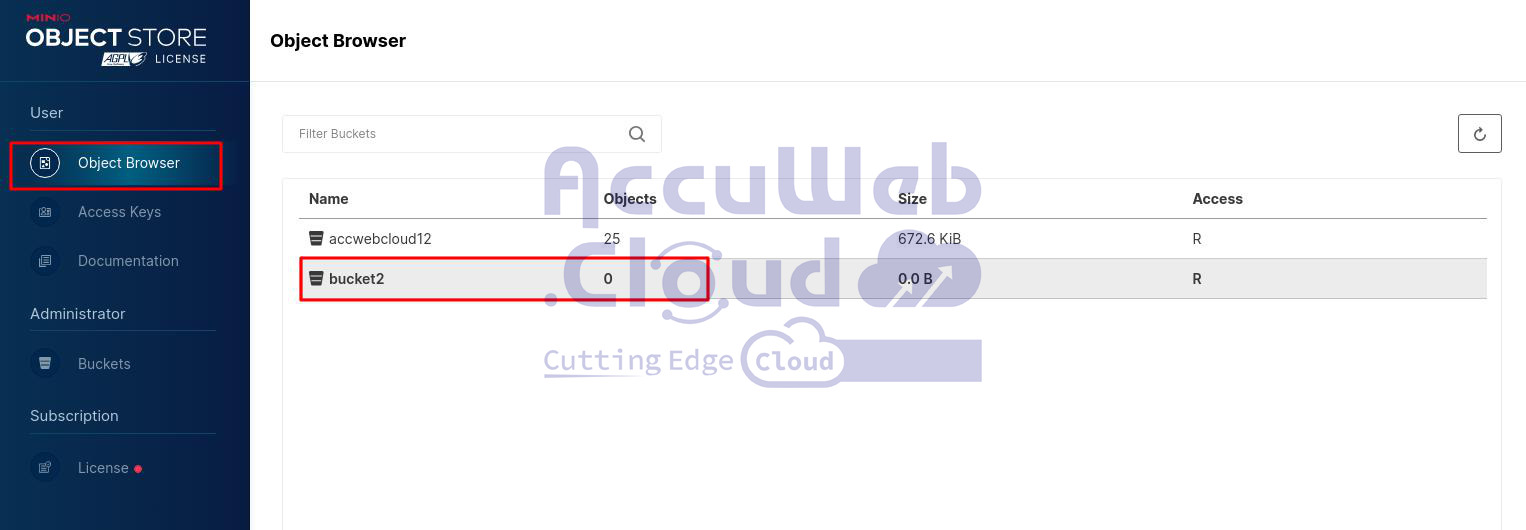
Step 2. Once logged in, navigate to the Object Browser tab on the left side of your dashboard and select one of your buckets from the list.
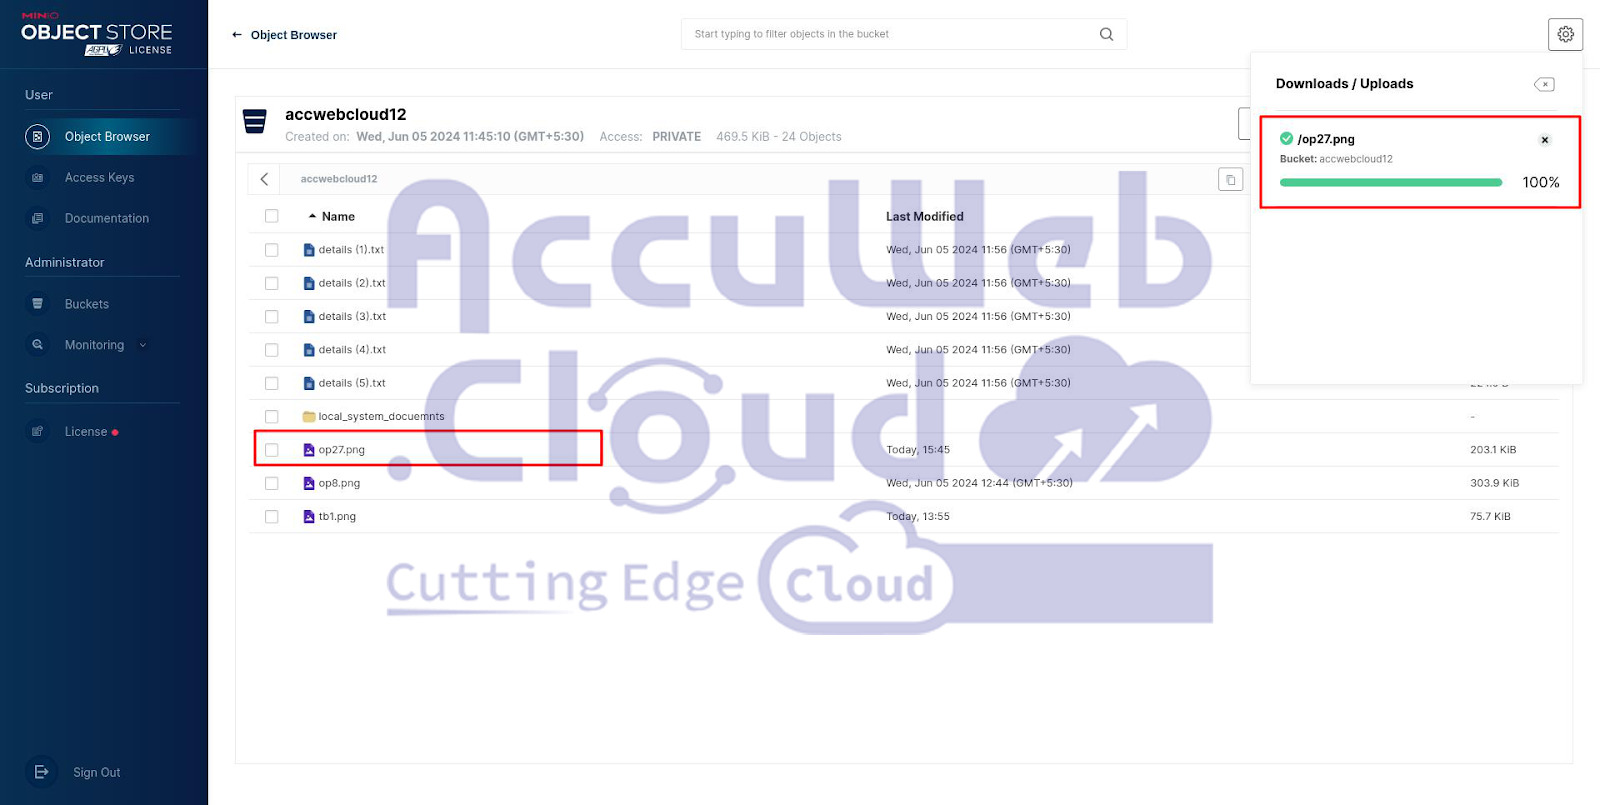
Step 3. Open the selected bucket and try uploading files to it to confirm if this user has read-write permissions.
Step 4. Since this user has a read-write policy, you should be able to upload files from your local system to the Minio cluster bucket. Select any file from your local system, and it will be uploaded to your bucket.
This confirms that both users in the PrimaryUser group have read-write permissions.
Next, let’s create another group with read-only permissions and add a new user to test if they can upload files to the bucket.
Steps1. Create a new user from your Minio Cluster admin dashboard without assigning any policy or permissions.
Step 2. Then, create a new group and add the newly created user to this group
Click the Save button to create the group.
Step 3. Open the newly created group and click on the Set Policies button to assign the Policy/Permission to this group.
Step 4. Assign the read-only policy/permission to this group and hit the Save button to apply the changes.
As the read-only policy is assigned to this group, it will also apply to the added user.
Now, log in as the newly created user to check if they can upload files to the bucket.
Step1. Sign out from your Admin user and log in again with the new user.
Step 2. Once logged in, navigate to the Object Browser tab on the left side of your dashboard and select one of your buckets from the list.
Step 3. Open the selected bucket and try uploading files to see if you can do so with read-only permissions.
So it has been verified that you can not perform any task if the user only has read-only access.
That’s the complete process of creating a group, adding users to it, and assigning specific policies to the group.


