TYPO3 Enterprise CMS Cluster
TYPO3 is a widely used CMS for websites of all sizes.
By setting up a high-availability cluster with two Apache application servers, an NGINX balancer, a Memcached instance, and two replicated MySQL databases, you can make your TYPO3 site extremely flexible, accessible, stable, and high-performing.
The Memcached node stores Apache server sessions. These sessions are backed up, so if one Apache server fails, the other can retrieve sessions from Memcached to continue serving sessions.
The NGINX balancer distributes traffic within the cluster. Additionally, MySQL database master-slave replication increases performance, data security, and fail-over capabilities.
Let’s now walk through the steps to configure your highly-available clustered TYPO3 application.
Deploying TYPO3 Application
First, let’s set up the environment and deploy the TYPO3 application.
Step 1. Log in to the AccuWeb.Cloud dashboard and click on “Create environment.”
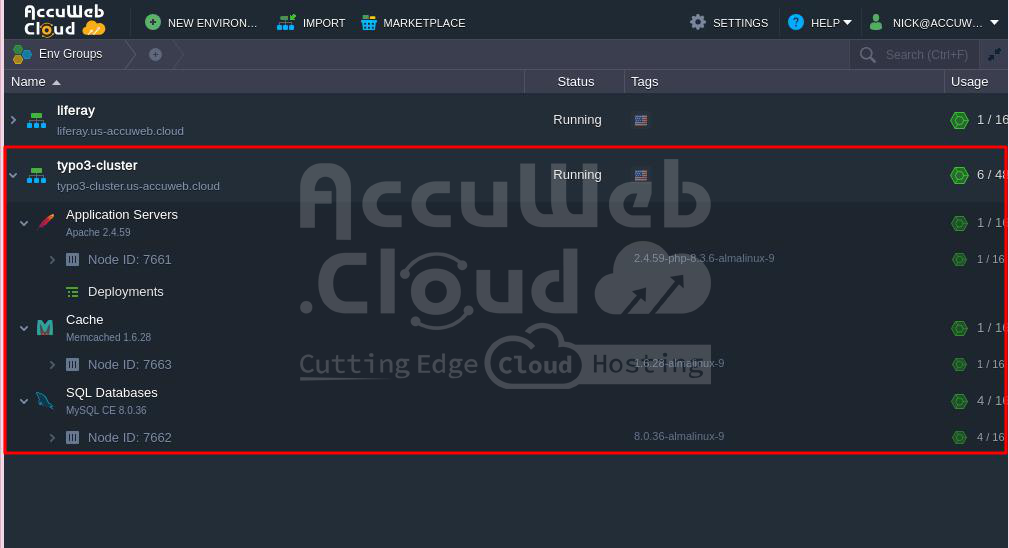
Step 2. Choose Apache for the application server, MySQL for the database, and Memcached. Set your cloudlet limits and give your environment a name (e.g., typo3-cluster). Click “Create.”
Step 3. Wait briefly for your environment to be created.
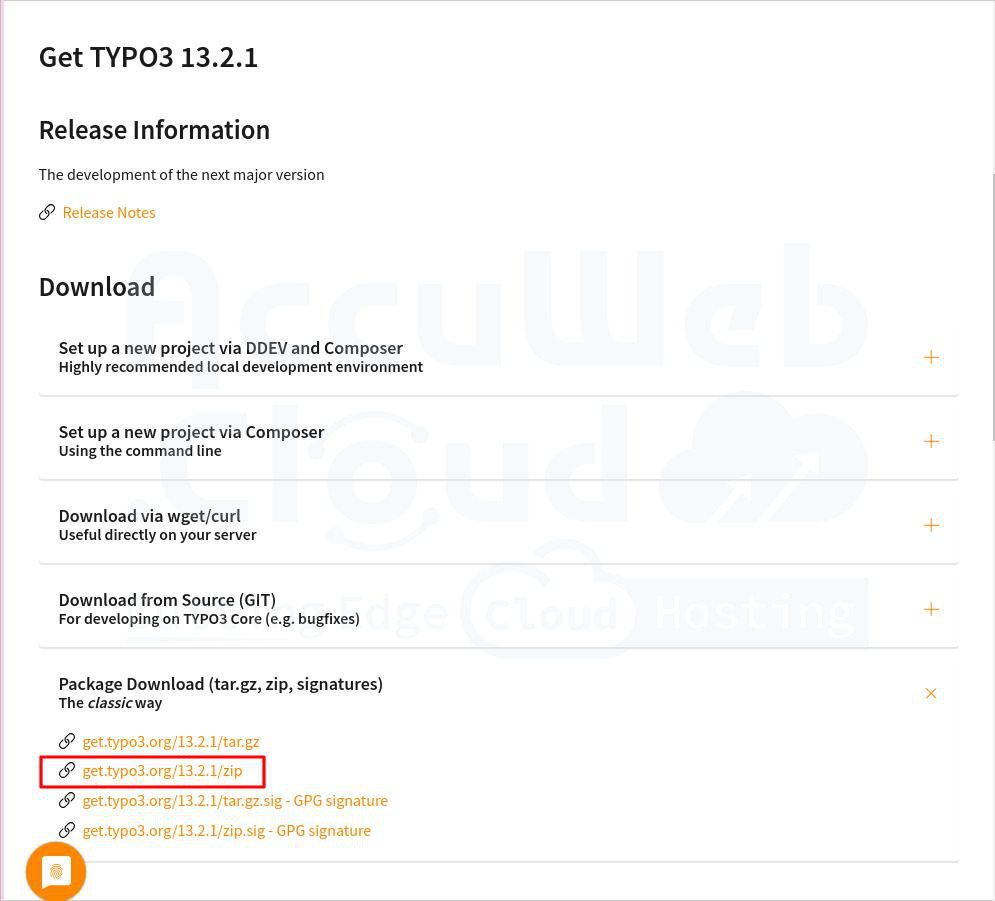
Step 4. Visit the official TYPO3 website to download the latest version as a zip package.
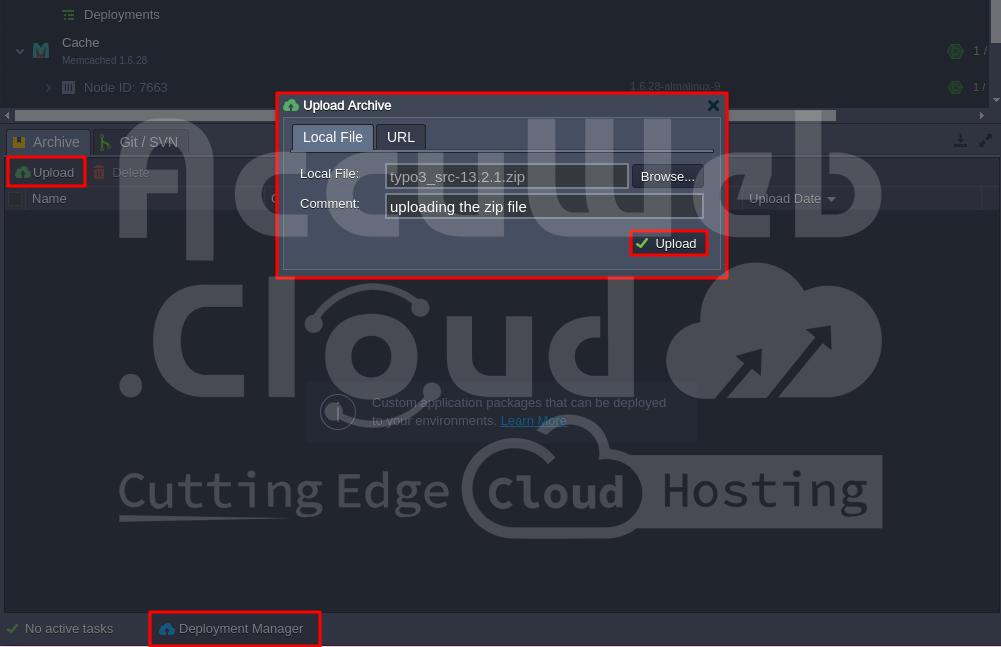
Step 5. Use the Deployment Manager to upload the downloaded package.
Step 6. Once the package is uploaded, deploy it to the environment you just created.
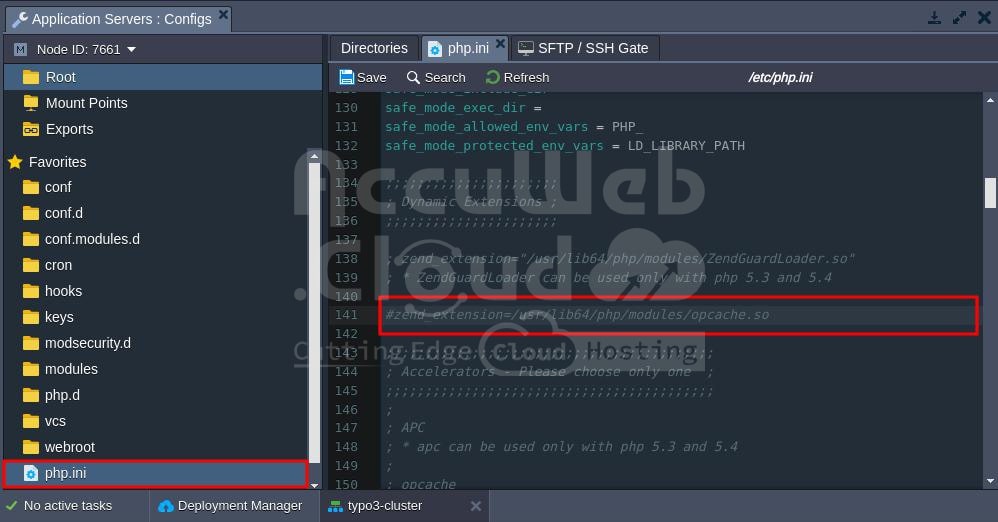
#zend_extension=/usr/lib64/php/modules/opcache.soSet Up PHP Sessions Clustering
You can ensure your PHP application stays available by setting up PHP sessions clustering in the cloud. We’ll use Memcached to manage failover for application servers.
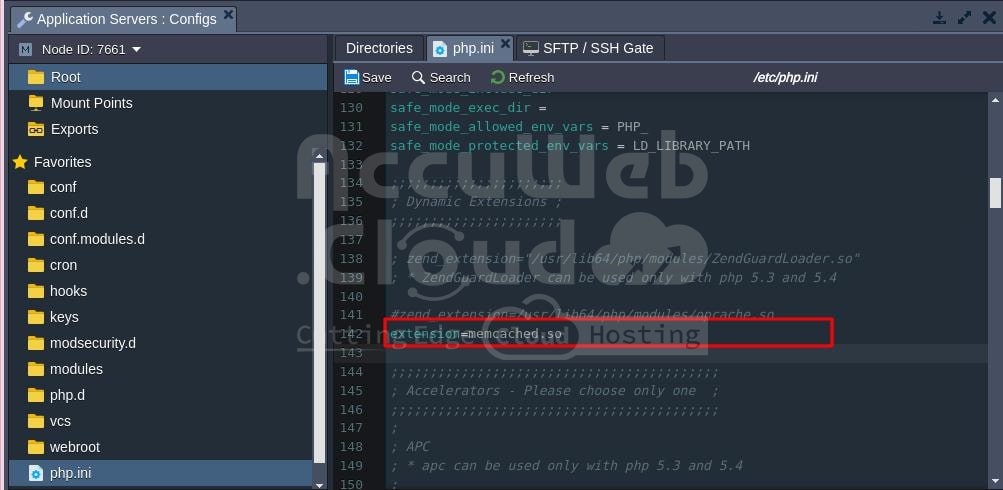
Step 1. Click on the Config button next to the Apache node. In the Config Manager, go to etc -> php.ini and enable the Memcached module by adding this line:
extension=memcached.soStep 2. To enable session support, edit the Session section in php.ini by adding these lines:
session.save_handler = memcached
session.save_path = "<memcached_server_ip>:11211"
Step 3. Save your changes and restart the Apache server to apply them.
Setting Up Database Replication
Let’s configure MySQL master-slave replication to protect your application from downtime or data loss.
MySQL in your TYPO3 environment will act as the master database. For the slave database, you’ll need to create a separate environment.
Go to the AccuWeb.Cloud dashboard and create a new environment with a MySQL node designated as the slave database. Name this environment (e.g., slave-db) and click Create.
Now, let’s configure each database:
Master Database
In your TYPO3 environment (e.g., typo-cluster), MySQL serves as the master database.
Step 1. Click on the Config button for your master database.
Step 2. Navigate to etc -> my.cnf file and uncomment and set the following properties:
server-id = 1
log-bin = mysql-bin
binlog-format=mixed
We use binlog-format=mixed to allow replication of operations involving foreign keys.
Step 3. Save the changes and restart MySQL to apply the new configuration.
Step 4. Click “Open in Browser” for the master MySQL and log in using the credentials provided via email when creating the environment.
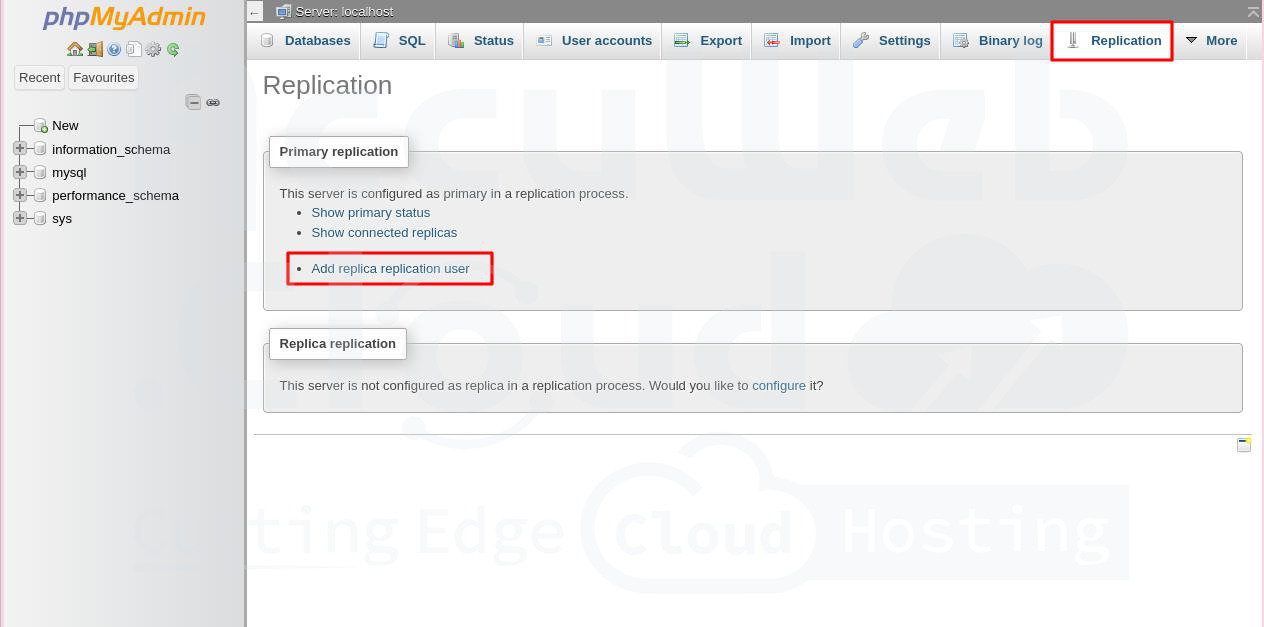
Step 5. Go to the Replication tab and click “Add replica replication user.”
Step 6. Provide a name and password for your slave replication user and click “Go.”
Your slave user is now successfully created.
Setting Up Slave Database
Now, let’s connect the master database with the slave MySQL.
Step 1. Click the Config button for your slave database.
Step 2. Navigate to the my.cnf file and add these lines:
slave-skip-errors = all
We allow the slave database to skip all errors from the master (slave-skip-errors = all) to ensure continuous operation even if errors occur on the master side. This is crucial for production environments where minor errors shouldn’t halt operations.
Step 3. Save the changes and restart your slave database server to apply the new settings.
Step 4. Click “Open in Browser” for the slave-db MySQL and log in using the credentials provided via email when creating the environment.
Step 5. Go to the Replication tab and click “Configure” for Slave replication.
Step 6. Configure your master server (enter the name, password, and host of your slave replication user). After then click on the Go button.
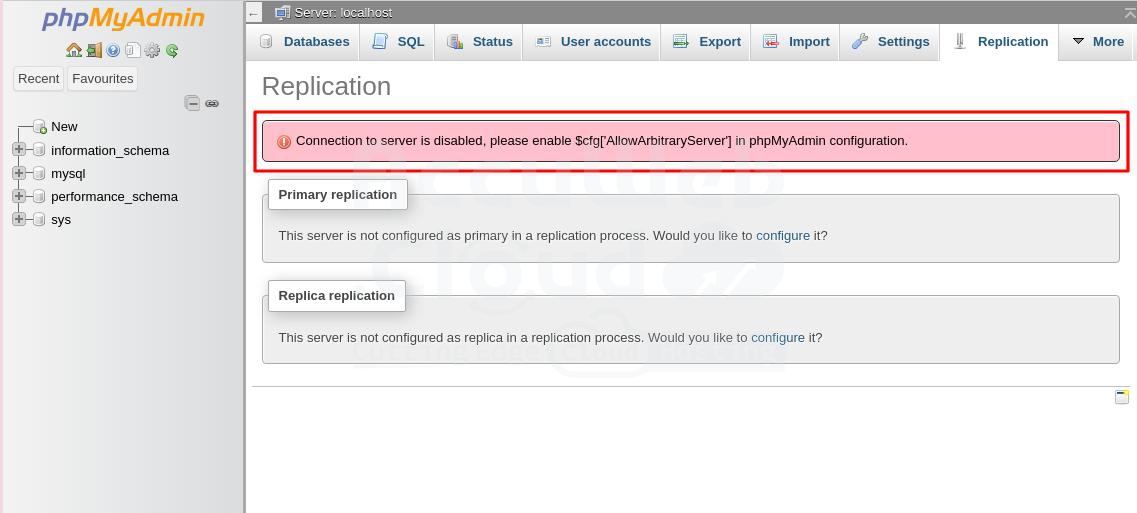
Step 7. If you get an error while setting up the Replica in phpMyAdmin, you need to enable $cfg[‘AllowArbitraryServer’].
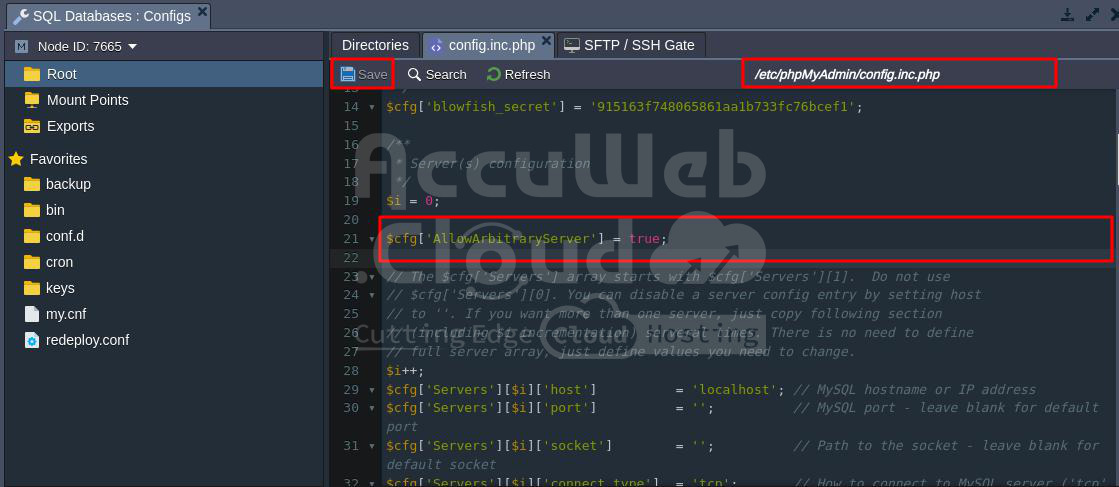
Step 8. Go to the /etc/phpMyAdmin/ directory and add the following line to the config.inc.php file:
$cfg['AllowArbitraryServer'] = true;Now your master server is configured.
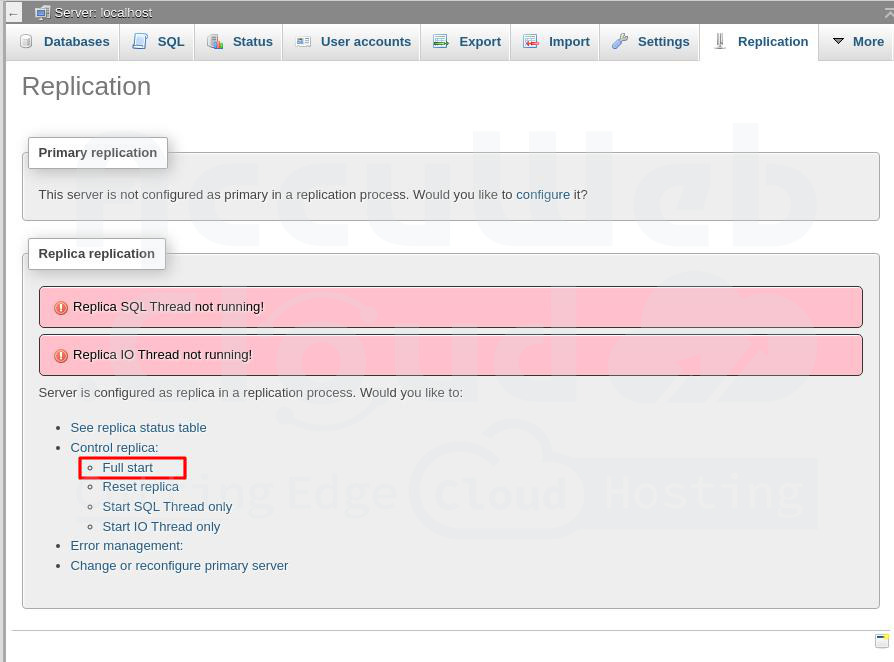
Step 7. Click on Control replica -> Full start for the slave server to activate Slave SQL and Slave IO threads.
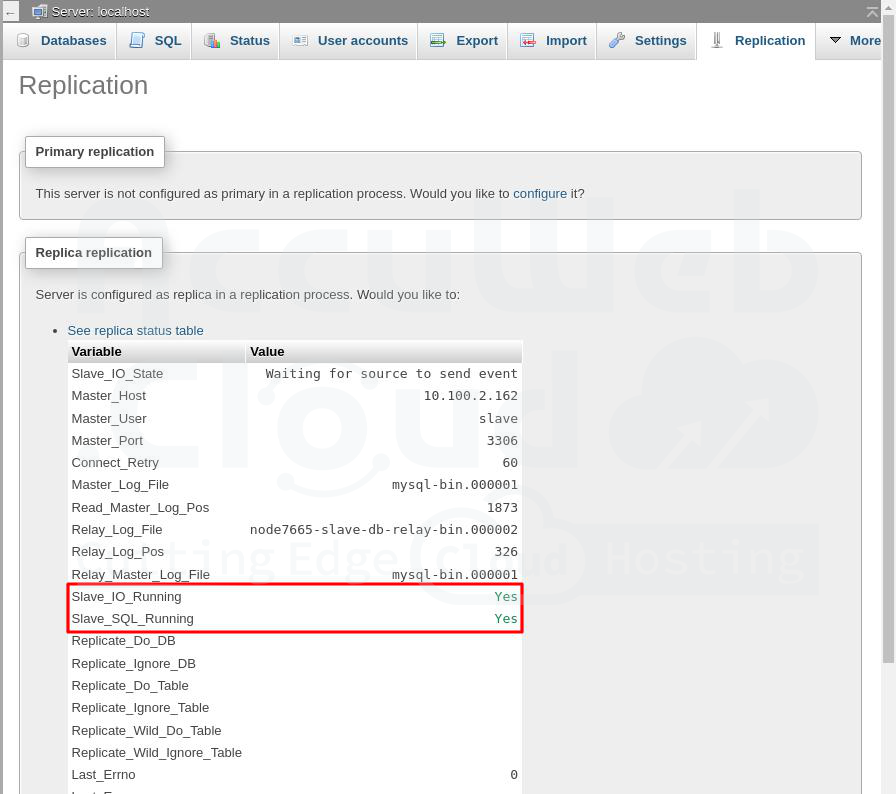
Step 8. Check the slave status table to ensure everything is working correctly.
Your replication is now set up, and all data is synchronized between the master and slave databases.
Installing TYPO3
Now let’s finish installing TYPO3.
Step 1. Go to the AccuWeb.Cloud dashboard and click “Open in browser” next to your TYPO3 environment. This will start the installation. Click “Continue.”
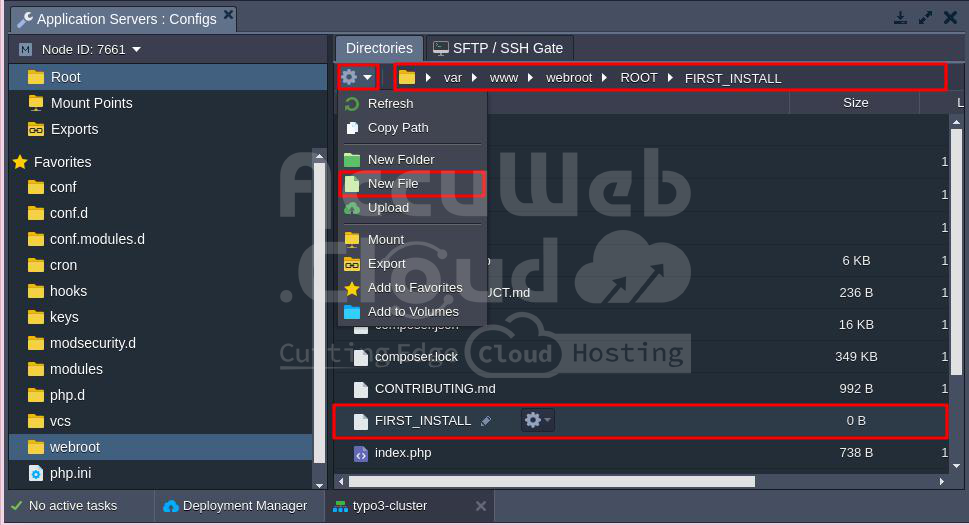
Step 2. To start the installation, create an empty file named FIRST_INSTALL in the document root of your web server.
For this example, using Apache as the web server, the document root is /var/www/webroot/ROOT/. Note that the file name is case-sensitive and will be deleted after the installation process is complete.
Step 3. Click on the Settings icon and select “New File” to create an empty file. Name this file FIRST_INSTALL as mentioned in Step 2 and press enter.
Step 4. The installation wizard will check the web server settings, PHP, and PHP extensions, identifying any issues that may prevent TYPO3 from running correctly. Any detected problems will be listed below.
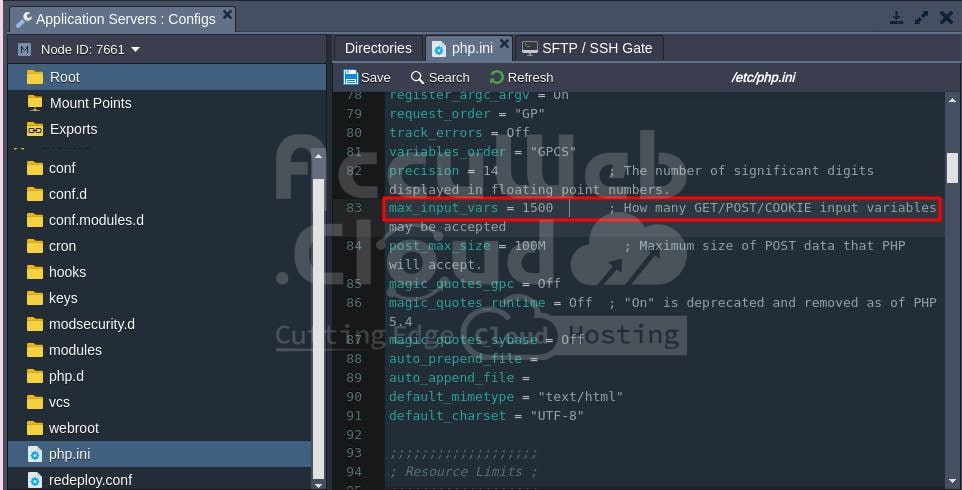
Step 5. To fix the errors, enable the PHP extensions gd and intl in the php.ini file. Then, increase the value of max_input_vars from 1000 to 1500.
Enable extension gd in php.ini file
Enable extension intl in php.ini fileIncrease the value of max_input_vars from 1000 to 1500 in the php.ini file.
Then, restart the Apache server by clicking on the Restart Nodes.
Step 6. Once these changes are made, click on “Scan environment again” to recheck the web server settings.
Step 7. If no errors are detected, you will see the message “No problem detected, continue with installation.” Click on it to proceed further.
Step 2. In the “Connect to your database host” window:
- Select the MySQL/MySQLi connection. Here, we have selected [MySQLI] Manually configured MySQL TCP/IP connection as an example.
- Enter the Username and Password you received via email when creating the environment.
- Put the database server address in the Host field.
Click “Continue.”
Step 3. At the “Select database” step, create a new database by entering a name (e.g., typo3_db) for your TYPO3 database. Click “Continue.”
Step 4. In the “Create Administrative User & Specify Site Name” window, enter your username, password, email address, and site name in the respective fields, then click the “Continue” button.
Step 5. In the “Installation Complete” window, choose a template for your website. If you want a simple starting page, select “Create empty starting page.”
If you prefer a pre-configured site template, choose “Yes, download the list of distributions.” Alternatively, you can select “Take me straight to the backend” if you want to create a custom page.
After making your choice, click the “Open the TYPO3 Backend” button to complete the installation.
Step 6. Log in to your TYPO3 website with the credentials you set during the installation.
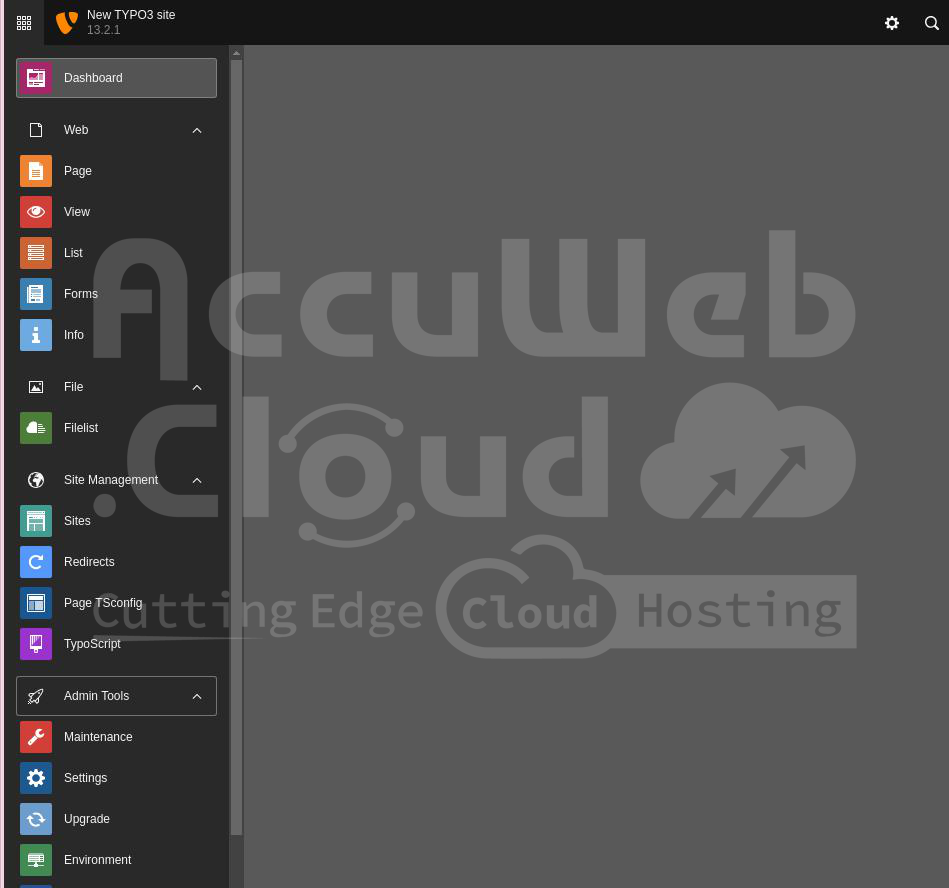
Step 7. You have successfully logged into the TYPO3 website.
Congratulations! TYPO3 has been successfully installed.
Setting Up Cluster Configuration
Once TYPO3 installation is finished, you can start configuring a highly-available cluster.
Step 1. Go to the platform dashboard and click “Change environment topology” next to your TYPO3 app environment.
Step 2. Add another Apache application server by clicking the “+” button (shown in the image). The NGINX balancer will be added automatically. Click “Apply.”
We add the second application server after installation to synchronize all data between the Apache nodes and avoid duplicating installation and configuration efforts.
You can also set up file synchronization between servers in your cluster using the File Sync instructions.
Step 3. Click “Open in Browser” to begin using your TYPO3 application.
Now, you have a highly reliable and scalable clustered environment with TYPO3.


