Solving MongoDB Atlas Database Connection Failures
This error usually occurs because of network access restrictions in MongoDB and firewall restrictions on the application server.
To fix it, you need to add the server’s IP address where your application is running to the allowed list in your MongoDB Atlas account.
Here’s how to whitelist your application server’s IP address in MongoDB Atlas:
Step 1. Log in to your MongoDB Atlas account.
Step 2. Select your project from the Projects list and click on it (e.g., Nodejs-test-project).
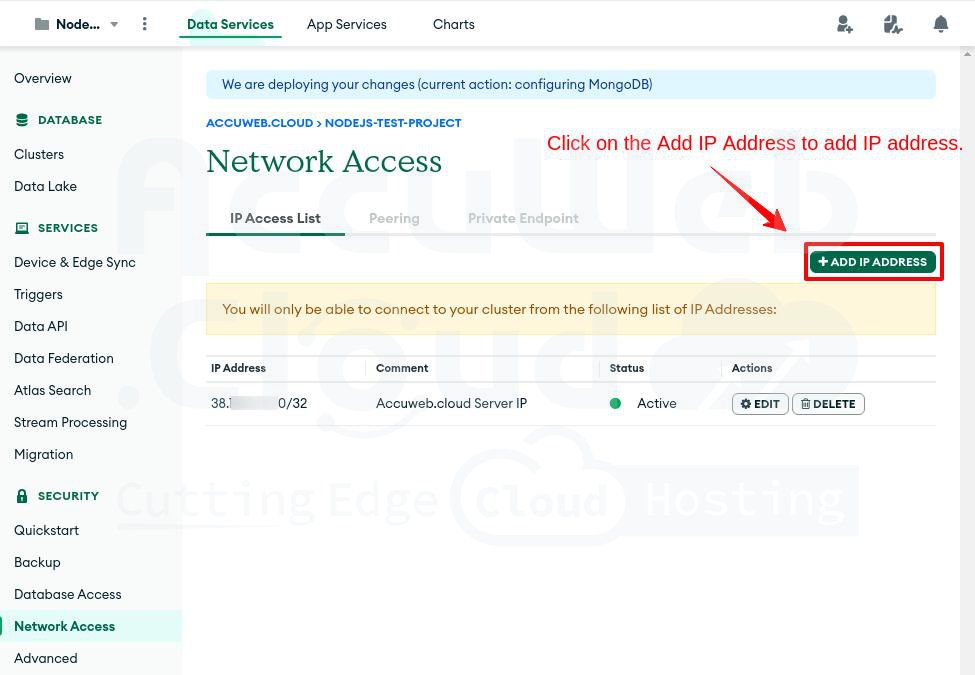
Step 3. Click on “Network Access” under the Security tab on the left.
Step 4. In the Network Access window, click on “IP Access List” to see the list of whitelisted IP addresses. Click “Add IP address” to add a new one.
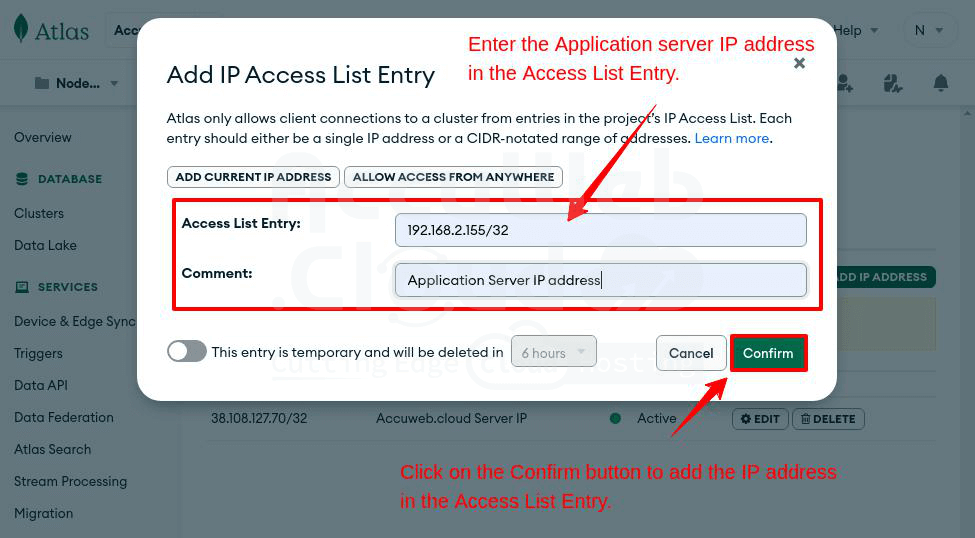
Step 5. In the Access list entry field, enter your application server’s IP address (e.g., 192.168.2.155/32).
Step 6. Add a note in the Comment field to identify the IP address easily. Click “Confirm” to add it to MongoDB Network Access.
Step 7. Once added, the IP address will appear in the IP Address List.
Congratulations! Your application server’s IP address is now whitelisted in MongoDB Atlas. You can use the same steps to whitelist your local system’s IP address.
Next, you need to allow the port number used by your application in the software firewall on your AccuWeb.Cloud account. Here’s how to do it:
Step 1. Log in to your AccuWeb.Cloud dashboard.
Step 2. Choose the environment where you want to allow the port (e.g., mynodejsapp).
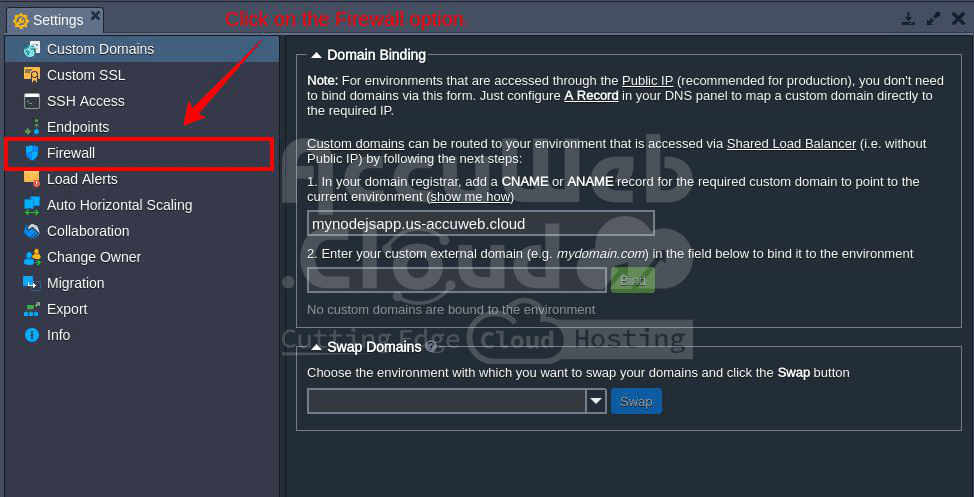
Step 3. Click on the Settings icon.
Step 4. In the Settings window, select the Firewall option.
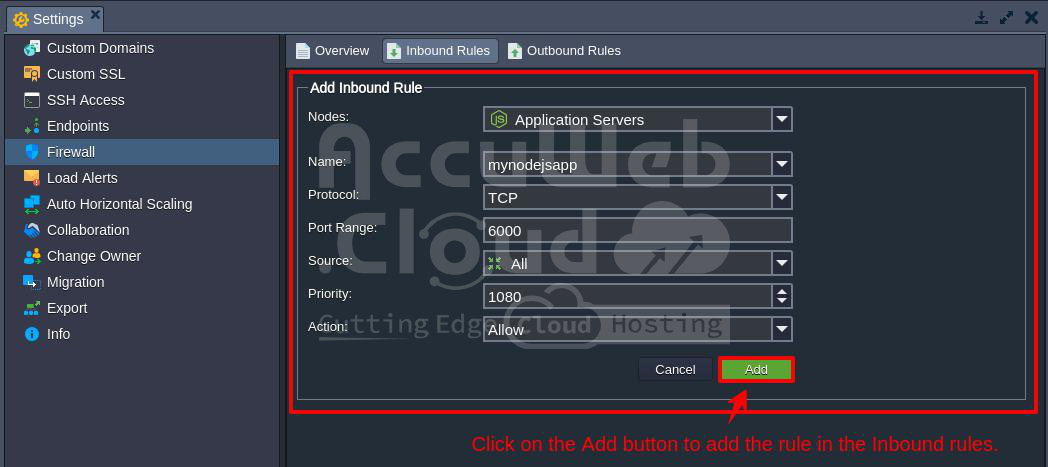
Step 5. In the Firewall window, click on “Inbound Rules,” then click the “Add” button.
Step 6. In the Add Inbound Rule window, fill in the following details:
- Nodes: Choose the server where you want to apply the rule. Here, we have selected Nodejs Application Servers as an example.
- Name: Give the rule a descriptive name.
- Protocol: Choose the type of protocol (TCP, UDP, or Both).
- Port Range: Enter the port number (e.g., 5000). Leave it blank to apply the rule to all ports.
- Source: Specify the source to filter, like a set of IP addresses or a network interface.
- Priority: Set the order in which the rule will be applied.
- Action: Select “Allow” to permit the port number in the firewall.
Step 7. After entering the details, click the “Add” button to implement the new rule.
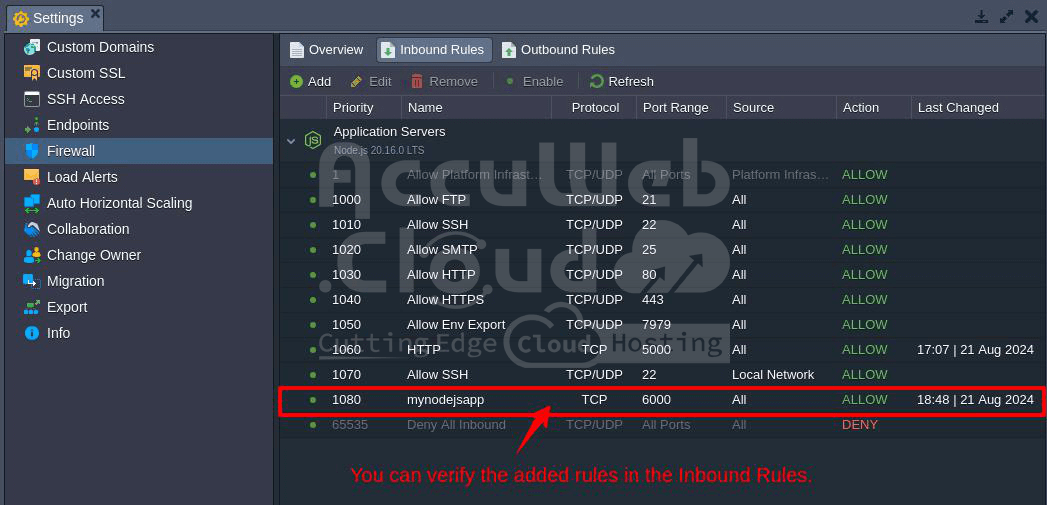
Step 8. Check the updated firewall status in the “Inbound Rules” panel to verify the new port is listed.
Once you complete these steps in MongoDB and the AccuWeb.Cloud firewall, your application should run smoothly with the MongoDB database on AccuWeb.Cloud.
That’s all.


