Set up a Diaspora cluster specifically on AccuWeb.cloud
Diaspora, a user-owned open-source distributed social network, boasts over 1 million accounts worldwide. This guide focuses on implementing a highly-available failover clustering solution for your Diaspora pod, utilizing two clusters for the app server and the database.
Although lengthy, this tutorial comprehensively addresses crucial aspects such as master-slave database replication and file synchronization across multiple application servers. These configurations are essential for boosting application performance, a critical need for high-traffic platforms like Diaspora, which serve thousands and millions of users.
Furthermore, they ensure equitable server load distribution and offer enhanced security and reliability. Let’s begin and discover how straightforward it is with the support of the platform’s guidance.
Unlock the potential of Python list iteration with this comprehensive guide. From for loops to enumerate() and list comprehensions, optimize your programming proficiency and streamline your coding tasks for efficient data manipulation.
Application Deployment
Step 1. First, sign in to the platform and then select the “Create environment” button located in the upper left corner of the dashboard.
Steps 2. Next, in the Environment topology wizard, go to the Ruby tab, and select Apache as your application server, MySQL as the database, and Redis as the data structure server. Adjust the required amount of resources for each using the cloudlet sliders, input your chosen environment name (for example, diaspora-cluster), and then click on the Create button.
Step 3. Your environment will appear on the dashboard in just a minute.
Step 4. You can now begin deploying and configuring your application. Detailed information on deploying Diaspora can be found in the platform’s Documentation. Simply follow the “How to install Diaspora* into PaaS” guide.
Database Configuration
After successfully deploying and running your Diaspora application, the next step is to adjust the database replication. To begin, create a separate environment with a slave database for our DB cluster.
Step 1. Click on the “Create environment” button and select a single MySQL instance in the opened frame. Specify the resource limits for your slave database, modify the name of the new environment (e.g., type diaspora-slave), and then click the “Create” button.]
Step 2. In a few moments, your environment will be created.
Let’s now move directly to the database configuration.
Master Database
Step 1. To begin, click on the Config icon next to your MySQL node in the diaspora-cluster environment.
server-id = 1
log-bin = mysql-bin
binlog-format=mixed
Step 2. Save the changes and then restart your MySQL server to apply them.
Step 4. Next, click “Open in browser” for your MySQL node and log in to the admin panel using the credentials you received via email earlier.
Step 5. Choose the “Add slave replication user” option within the Master replication section of the Replication tab.
Step 6. Enter the desired User name (e.g. Enter the password for your slave replication user.Then click the Go button. [diaspora MySQL user](11-database-configure-replication.png)
Step 7. Subsequently, grant replication client and replication slave privileges for the newly created user and proceed to the Go button located in the bottom right corner.
Slave Database
Now we will configure the slave database now
Step 1. To begin, select the Config icon next to the MySQL server in the diaspora-slave environment.
Step 2. Go to the my.cnf file within the etc folder and modify the following parameters
: server-id = 2 slave-skip-errors = allStep 3. Perform the following steps for the slave database, similar to those for the master database.
Save the changes to the file.
Restart your slave MySQL node.
Open it in the browser and log in using the credentials provided by the platform during the creation of the slave environment.
Step 4. Choose the “configure” link in the Slave replication section of the Replication tab.
Step 5. Provide the Username and Password for your slave replication user. Then, enter the Host of your master database (its URL without the “http://” part) and click “Go” to proceed.
Step 6. To enable replication, click on “Control slave” and then select the “Full start” option.
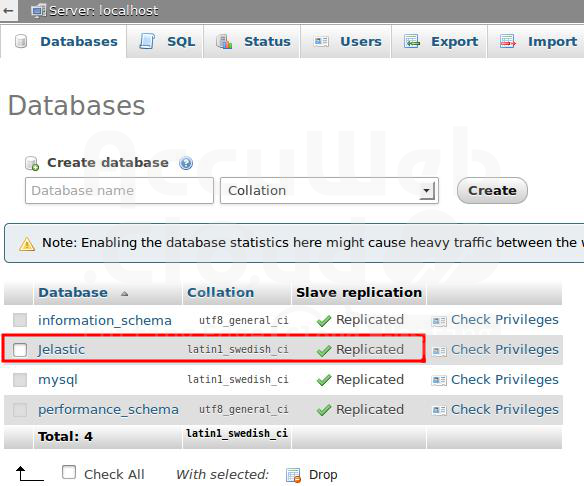
Step 7. To verify that master-slave replication works for our databases, create a new database on your master DB server by navigating to the Databases tab, specifying a new database name (e.g. AccuWeb.Cloud), and then clicking the “Create” button
Step 8. Return to your slave server’s admin panel and verify that the newly created database has appeared.
Cluster Configuration
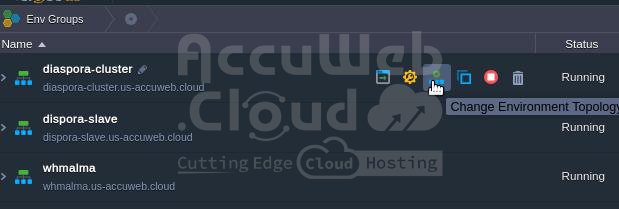
Step 1. Now that database replication is operational, it’s time to configure your cluster. To scale the number of application servers horizontally, click on the “Change Environment Topology” icon next to your diaspora-cluster environment
Step 2. Use the + and – buttons in the central wizard pane to adjust the number of Apache nodes. Set this value to a minimum of 2 nodes, and then click the “Apply” button.
Step 3. Wait for a few minutes for the new instances to be added.
File Synchronization
Once you have configured the highly-available cluster, let’s attempt to upload some files to the app server without enabling synchronization.
Step 1. Now open the diaspora application in the browser first
Step 2. Create a new user by following the embedded Diaspora wizard. Once registered, post an image to your stream.:You should see a result like this:
Step 3. Next, return to the platform dashboard and click the Config icon for Apache Ruby servers..
Go to the webroot/ROOT/public folder on both servers.You can switch between the different servers in the cluster using the corresponding drop-down list in the tools panel. Compare the contents of the public folder on each server.
Step 4. To resolve this, let’s configure file synchronization. Add the following File Synchronization JavaScript to your bookmarks by dragging it to your browser’s bookmarks bar.
Step 5. While on the platform dashboard, click on the bookmark containing our script to run it.
Step 6. In the opened frame, select the previously mentioned public folder (along with any other folders you want to synchronize) and click the Apply button.
Congratulations! You have successfully completed the Diaspora cluster configuration. You now have a robust social network that can support a large number of users and is protected against performance and reliability issues.


