Session Replication with Memcached
The platform can replicate sessions between web server instances using multicast. Alternatively, you can use Memcached for session replication.
To use Memcached for session replication, follow these steps:
Create Environment
Step 1. Log into your AccuWeb.cloud account.
Step 2. Click the Create Environment button at the top left.
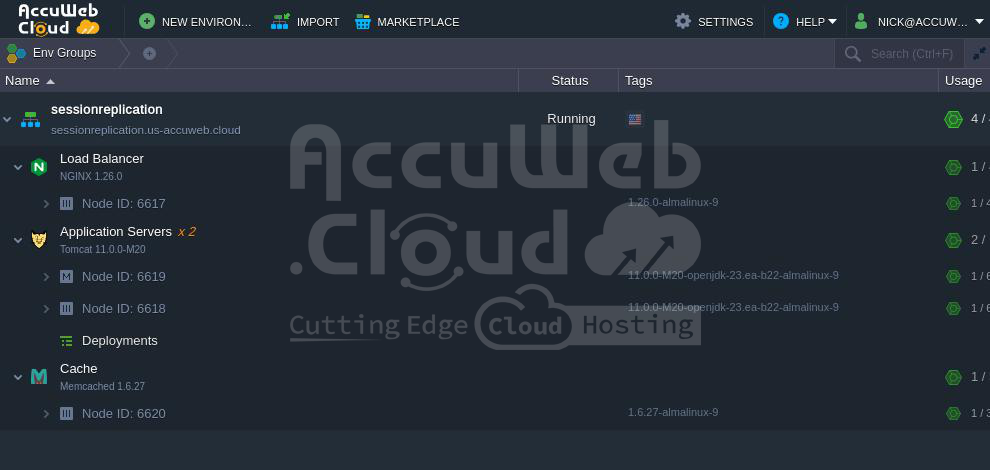
Step 3. Select two or more servers (e.g., two Tomcat instances) and a Memcached node in the Environment Topology window. Name your environment (e.g., sessionreplication). After then, click on the Create button.
Step 4. Wait a minute for your environment to be created.
Configure Application Server
Step 1. Download the following .jar files:
memcached-session-manager-1.6.2.jar
memcached-session-manager-tc7-1.6.2.jar
spymemcached-2.8.4.jar
msm-kryo-serializer-1.6.1.jar
kryo-1.03.jar
reflectasm-0.9.jar
kryo-serializers.jar
joda-time.jar
minlog-1.2.jar
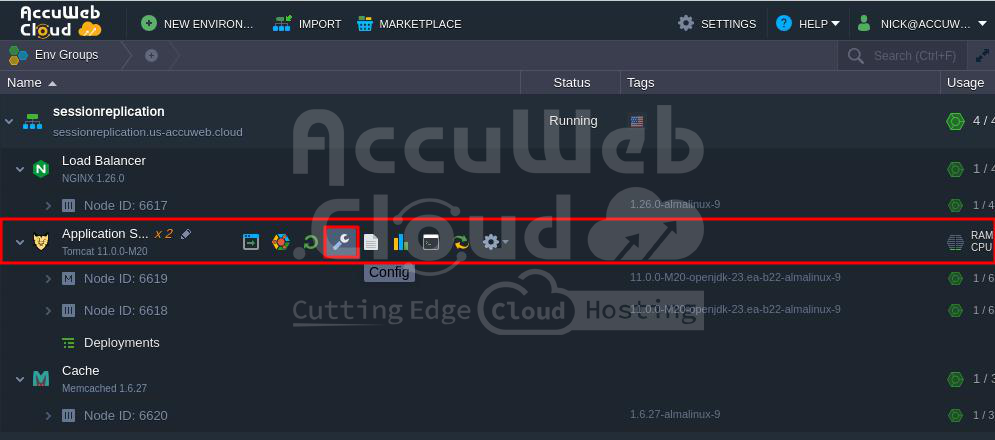
Step 2. Go to the application Server and Click the Config icon.
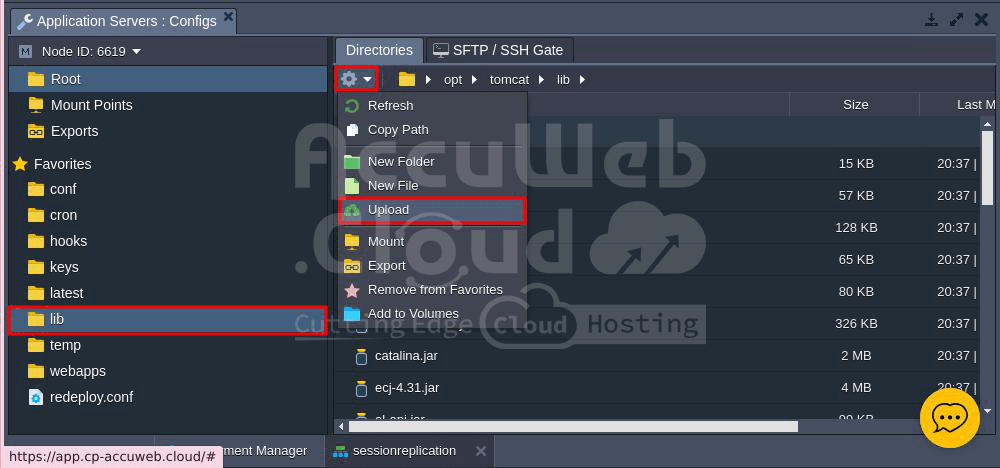
Step 3. In the new window, select the lib folder and upload the .jar files you downloaded.
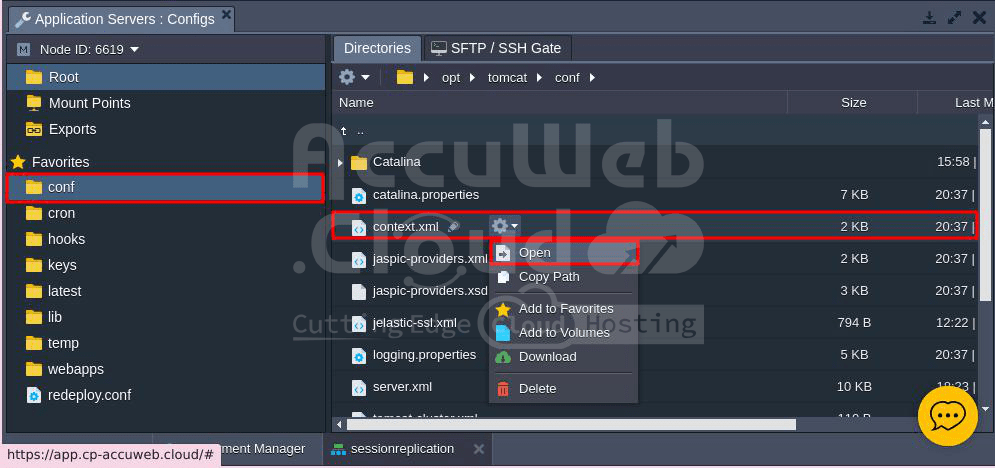
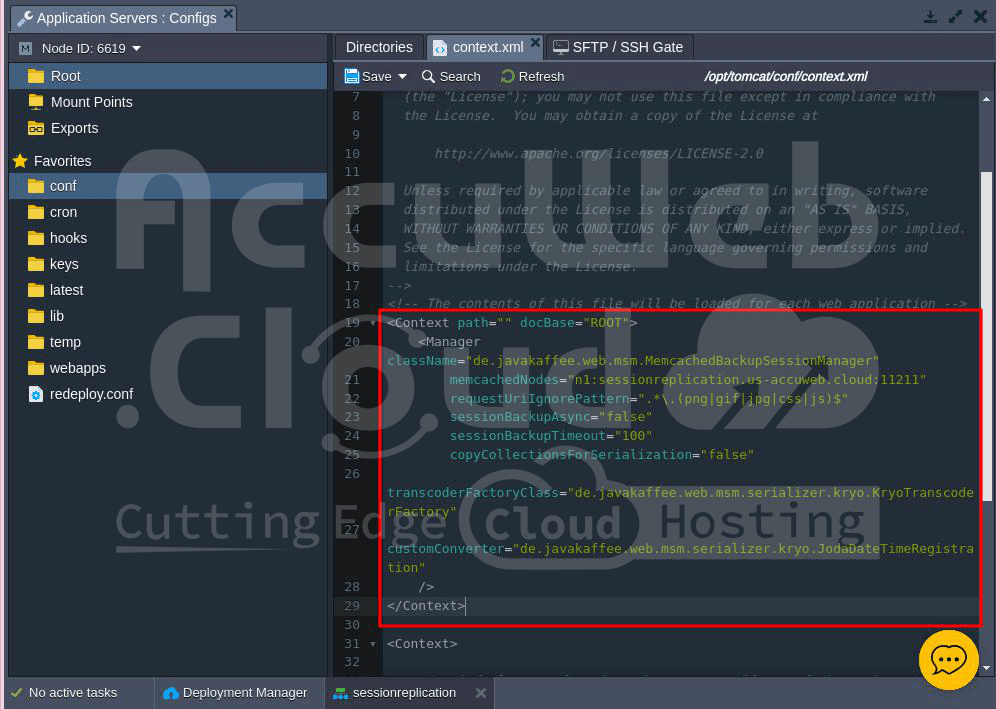
Step 4. Go to the conf folder (opt/tomcat/conf) and open the context.xml file.
Step 5. Update context.xml to include the following Manager configuration for memcached-session-manager:
<Context path="" docBase="ROOT">
<Manager className="de.javakaffee.web.msm.MemcachedBackupSessionManager"
memcachedNodes="n1:Host:11211"
requestUriIgnorePattern=".*\.(png|gif|jpg|css|js)$"
sessionBackupAsync="false"
sessionBackupTimeout="100"
copyCollectionsForSerialization="false"
transcoderFactoryClass="de.javakaffee.web.msm.serializer.kryo.KryoTranscoderFactory"
customConverter="de.javakaffee.web.msm.serializer.kryo.JodaDateTimeRegistration"
/>
</Context>
You can choose a different serialization strategy if needed. Here, Kryo is used for its speed in binary serialization.
Step 6. In the memcachedNodes string, add your memcached host and the default port (11211). For example:
n1:sessionreplication.us-accuweb.cloud:11211
To find your memcached host, add the ‘memcached-‘ prefix to your environment hostname (visible under the environment name).
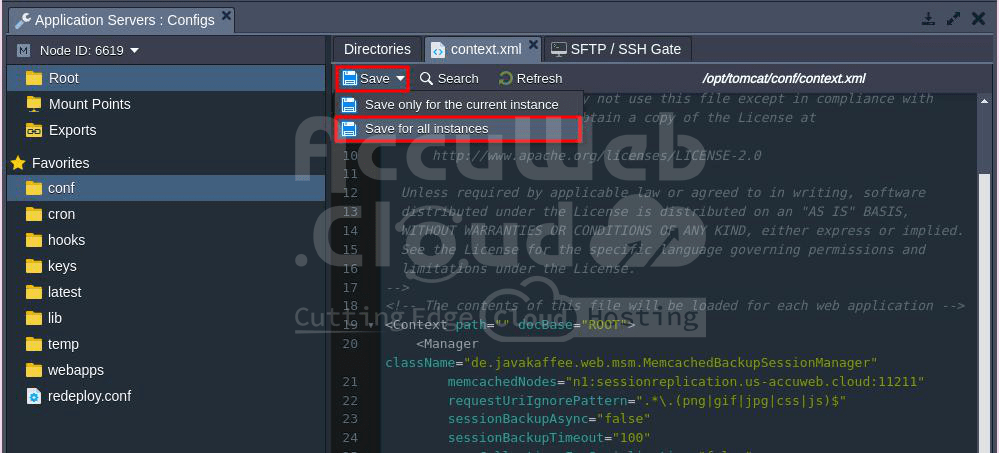
Step 7. Save your changes by clicking the Save button. Choose “Save for all instances” to apply the changes to all instances in the Tomcat application server.
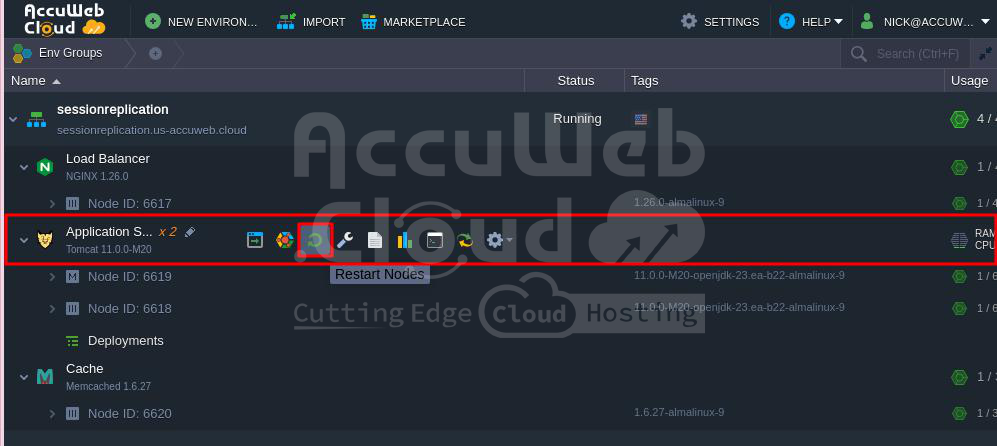
Step 8. Next, restart the Tomcat service. Click on “Restart Nodes” next to the Application Server.
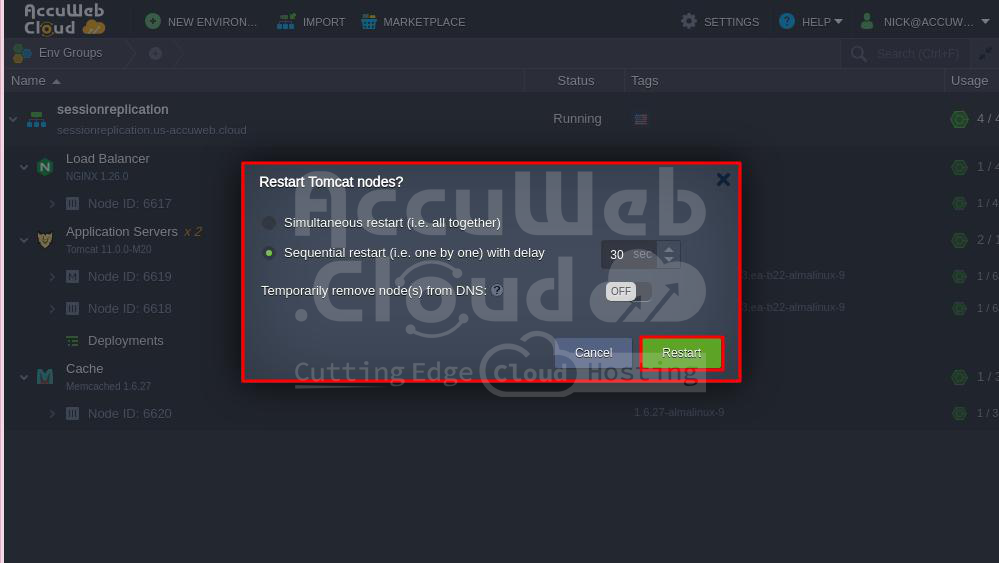
Step 9. Select your preferred option in the Restart Tomcat nodes window and click Restart to proceed.
Step 10. Once the application node servers restart successfully, you will receive a notification on the dashboard confirming that the containers in the environment have been restarted.
That’s it! Now, you have a highly available cluster using Memcached.


