Remote Access to PostgreSQL
You now can manage your databases remotely from your computer without needing to log into our dashboard. Here’s a guide specifically for PostgreSQL users:
Setting Up Your Environment
You can access your database through a public IP address or via endpoints that don’t require a public IP. Let’s explore both methods for creating your database environment.
Environment With Public IP
1. Log in to the platform.
2. Click on the New Environment button located at the top left of the dashboard.
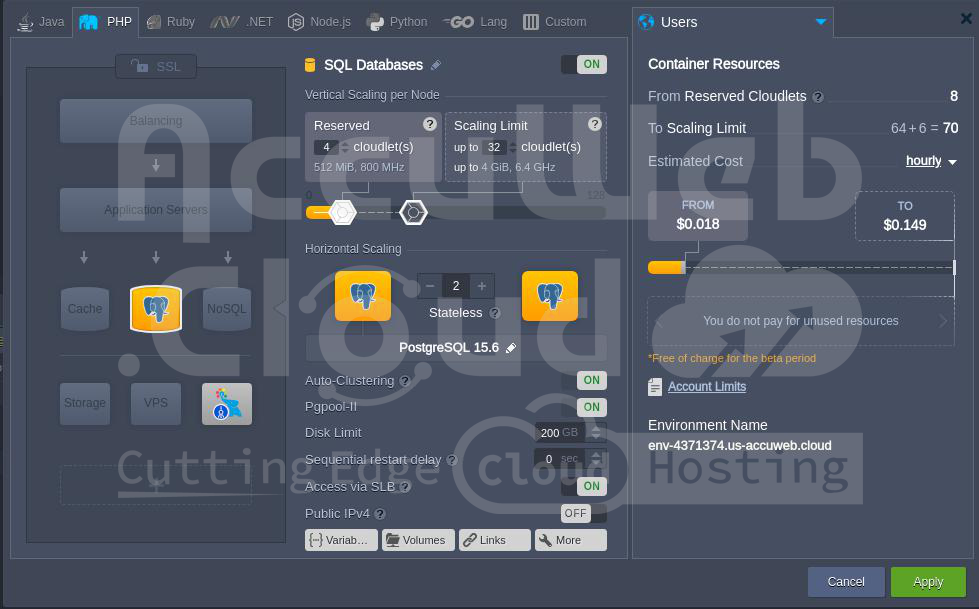
3. In the Environment Topology wizard, select PostgreSQL as your database. If you need a database cluster, enable the Auto-Clustering feature by sliding the switch to the right. Next, add a Public IPv4 address. Provide a name for your environment, such as remotepostgres, and click the Create button.
The environment setup may take around a minute.
Both nodes will have public IP addresses assigned.
Environment Without Public IP
1. Follow the same steps as above to create a clustered database environment without attaching a public IP.
2. Once your environment is ready, navigate to the Endpoints section under Settings and click Add to create a new port mapping.
3. Select the Node you want to access and the PostgreSQL service Name. The remaining parameters (Private Port, Protocol, Public Port, and Access URL) will be generated automatically.
A port mapping for the database master node might look like this.
Repeat the process for the slave node if necessary.
Remote Connection to PostgreSQL
To establish a connection to the database, you can use any desktop or web client. In this example, we’ll use pgAdmin4, a highly popular and feature-rich Open Source administration and development tool for PostgreSQL. You can find client software suitable for your platform on the download page, or deploy it by importing the corresponding pgAdmin4 manifest.
If you have a database cluster, it’s convenient to group all servers that belong to the cluster.
1. Name the group, for example, remotepostgres.
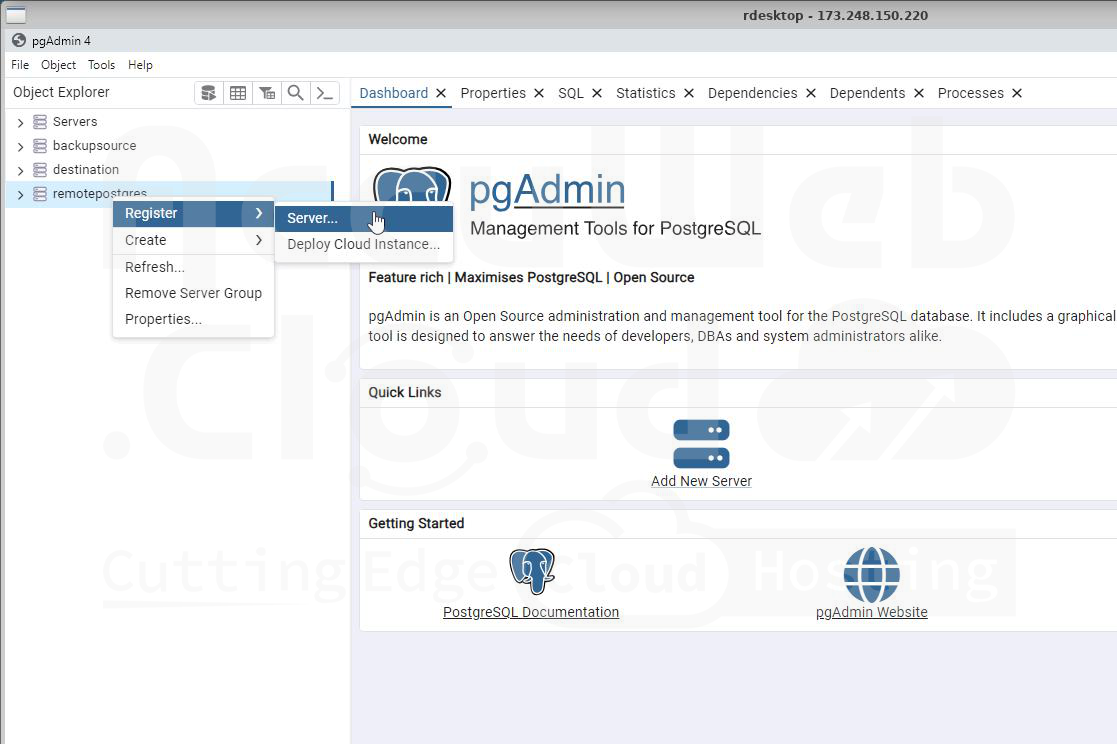
2. Add each database server to the group one by one. To add the Master database, right-click on the group (e.g., remotepostgres) and select Create > Server.
3. In the General tab, enter the server name (e.g., Master for the primary database of your cluster).
4. Specify the server access settings, based on whether your database was created with or without a public IP, as outlined earlier.
Connection to Public IP
Head over to the Connection tab, where you’ll need to input the public IP of your master database in the Host name/address field. Remember to fill in the Username and Password that you received via email when setting up your database environment.
Connection via Endpoints
Next, grab the URL and Public Port from the port mapping that was generated, and use these to configure your database server connection settings. Ensure that the Username and Password match the ones mentioned earlier.
Feel free to adjust any other specific options if you’re confident in your choices.
Once you’re done, hit Save to implement the changes. You’ll notice that the connection is successfully established.
In our example, master databases are presented as follows:
With that, PostgreSQL remote access is all set up, and you’re ready to start querying.


