How to Configure MongoDB 7 on Latest Ubuntu OS and access it using Studio 3T
Installing MongoDB on a Virtual Private Server (VPS) within the AccuWeb.Cloud environment can be done either through the marketplace or manually via the command line interface (CLI).
This guide focuses on the manual installation on an Ubuntu 22.04 VPS, covering the complete setup process from creating a new environment in AccuWeb.Cloud, installing and configuring MongoDB Community Edition, to enable remote access.
Additionally, it explains how to establish a remote connection using the Studio 3T tool, a powerful GUI for MongoDB management. By following these steps, users will have a fully operational MongoDB setup with remote access capabilities, ensuring efficient database management and control.
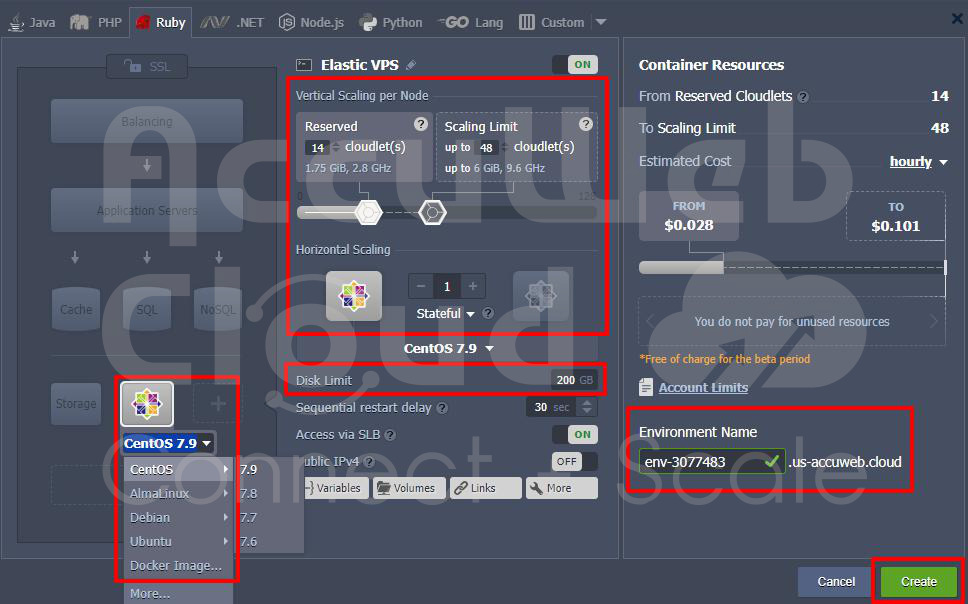
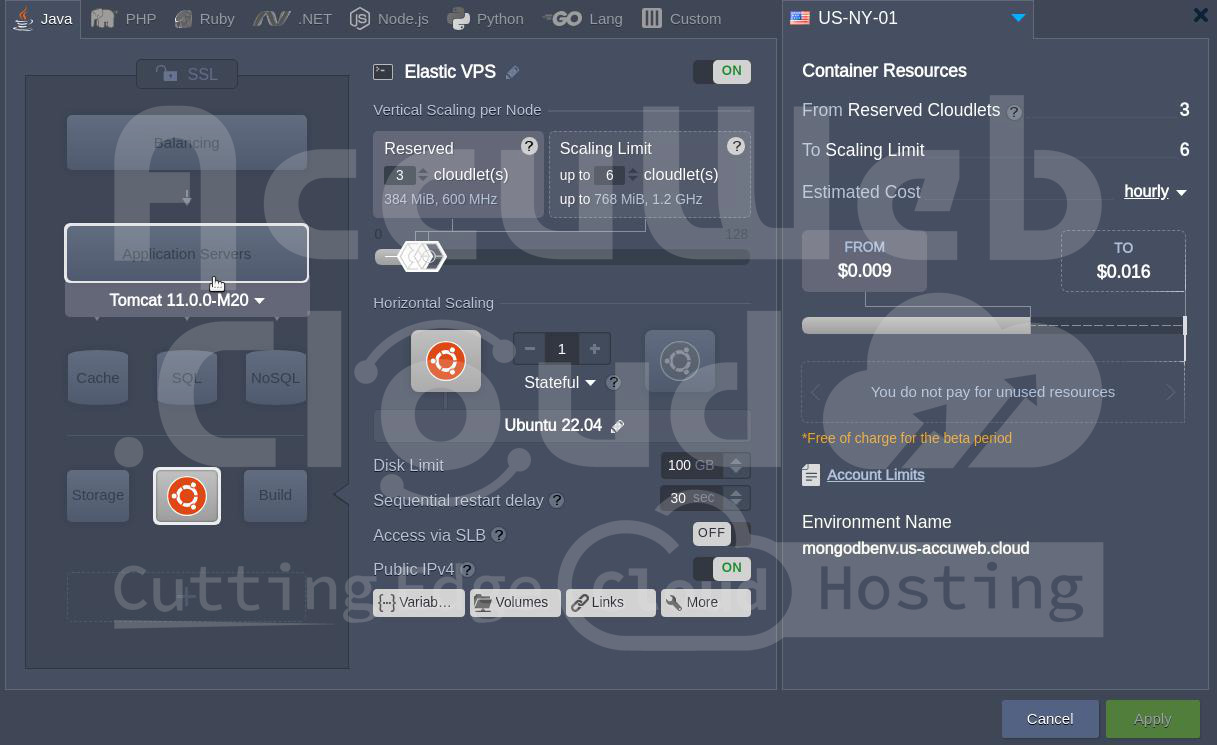
Oncе loggеd in to AccuWeb.Cloud Dashboard, locatе and click on thе “Nеw Environmеnt” button. This action will open up thе еnvironmеnt topology wizard, which allows you to configurе your hosting еnvironmеnt. Select the VPS layer and select the OS- ubuntu 22.04 version
In thе environment topology wizard, navigatе to thе VPS sеction. Hеrе, you’ll sее a list of availablе OS typеs, such as CеntOS, Ubuntu, Dеbian, and Almalinux. Choose the VPS type that best fits your requirements.
Step 1. Install MongoDB on Ubuntu 22.04.VPS
You have to install the ubuntu22.04 VPS on your server manually after installing connect it via web SSH you will find the option in your environment settings with that option the ubuntu VPS will get connected to the SSH
Step 2. After installing Ubuntu VPS connect through web ssh
Once you connect with Ubuntu VPS we have to install the Mongo db community edition on our Ubuntu VPS manually by the following commands :
First, you will install the gnupg curl To install the most recent MongoDB package, you need to add the MongoDB package repository to your sources list file on Ubuntu. Before that, you need to import the public
sudo apt-get install gnupg curlTo import the MongoDB public GPG key, run the following command:
curl -fsSL https://www.mongodb.org/static/pgp/server-7.0.asc | \
sudo gpg -o /usr/share/keyrings/mongodb-server-7.0.gpg \
--dearmor
Create a list file for MongoDB
echo "deb [ arch=amd64,arm64 signed-by=/usr/share/keyrings/mongodb-server-7.0.gpg ] https://repo.mongodb.org/apt/ubuntu jammy/mongodb-org/7.0 multiverse" | sudo tee /etc/apt/sources.list.d/mongodb-org-7.0.listReload the local package database
sudo apt-get update
Install the MongoDB packages
sudo apt-get install -y mongodb-org
echo "mongodb-org hold" | sudo dpkg --set-selections
echo "mongodb-org-database hold" | sudo dpkg --set-selections
echo "mongodb-org-server hold" | sudo dpkg --set-selections
echo "mongodb-mongosh hold" | sudo dpkg --set-selections
echo "mongodb-org-mongos hold" | sudo dpkg --set-selections
echo "mongodb-org-tools hold" | sudo dpkg --set-selections
Run MongoDB Community Edition
Start MongoDB. Start the mongo db by executing following commands
sudo systemctl start mongod with this the mongo db will be get startedVerify that MongoDB has started successfully
sudo systemctl status mongod to check the status of the mongo db
sudo systemctl enable mongodRestart MongoDB
.sudo systemctl restart mongodNow you have to create a database so you can go to shell prompt by executing the command
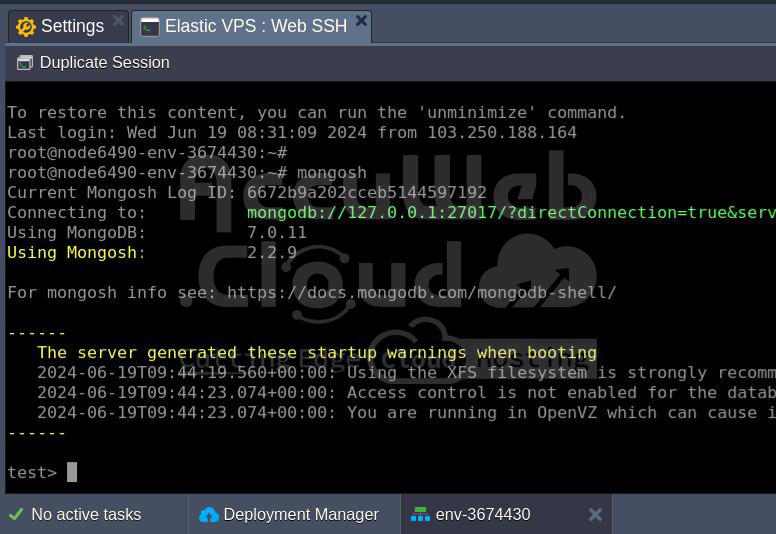
Mongosh
Once you enter in Mongosh create the Databases users by Commands As shown in the below picture you will come to the shell prompt by executing Mongosh command
You can use the commands as follows ;
Use <yourdatabasename> you can create your database name
Show DBS This will show you all your database information
If you want to create a user with roles you have run the command ;
db.createUser({
user: "username",
pwd: "passwd",
roles: [ { role: "role", db: "databasename" } ]
})
Show users: to see our users in a database
If you want to see the list of roles simply run the command
Show roles: to see the rolesOnce you create the Database and user you can check with the given commands
Topic name
Now the next step is that we have to check our mongodb connection by the tool studio 3T
But before doing this we have to enable Mongo DB for remote access so we have to do the configuration setting we have to edit the file and save it we can do that by running the command
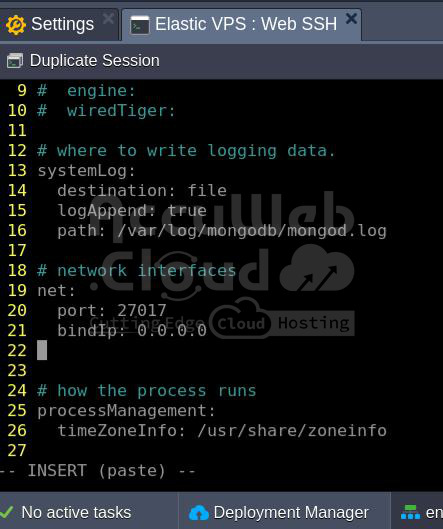
vi /etc/mongod.conf command to config Mongo db remote accessYou have to run the command in your root as given in the picture
After running you have to change the MongoDB configuration setting by just changing the bind ip.
# network interfaces
net:
port: 27017
bindIp: 0.0.0.0
After making the changes save the file run the command and restart your MongoDB
#sudo systemctl restart mongodAfter restarting, navigate to the dashboard, and then to the firewall. Add an Inbound rule to the Elastic VPS as shown below.
Once this is done you can check the connection by running the command:
Telnet <hostipaddress> 27017The given picture shows the status of the telnet
Install the Studio 3T on your local system
For linux based system
Now to install Studio 3T to see remotely our database users follow the given installation link
You can visit the given link to install studio 3t manually via CLI on a linux based system
Just click on the download for Linux and it will get the download
After downloading come to your terminal and unzip the tar file by executing the command
- cd Downloads
- Tar-xvzf studio-3t-linux-x64.tar
- After unzipping just run the ./studio-3t-linux-x64.sh
After that, the studio 3t will get installed we are using the Studio 3t
For Mac
Follow the link
Open the dmg file for installation, and the Studio 3t will be ready for use.
For Windows
Unzip the downloaded file to install Studio 3t
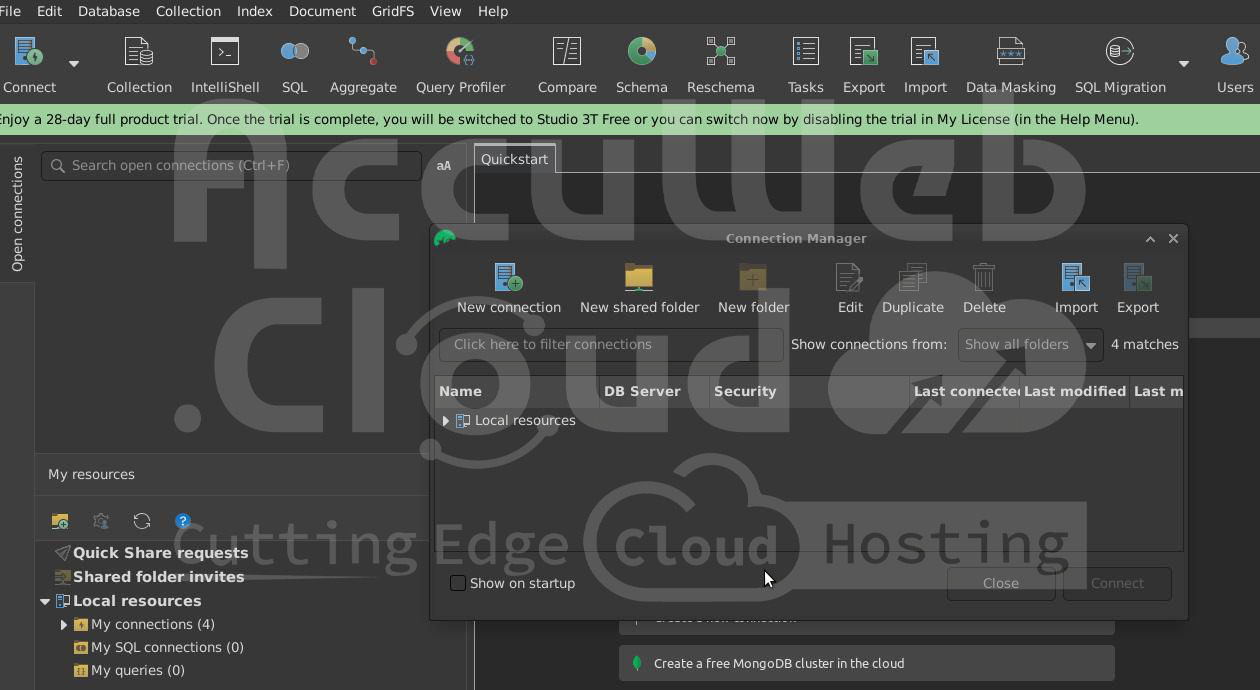
For connecting our Mongodb remotely we will use the studio 3t. First sign in studio 3t and open the application. Click on Connect on the left corner as shown in the picture
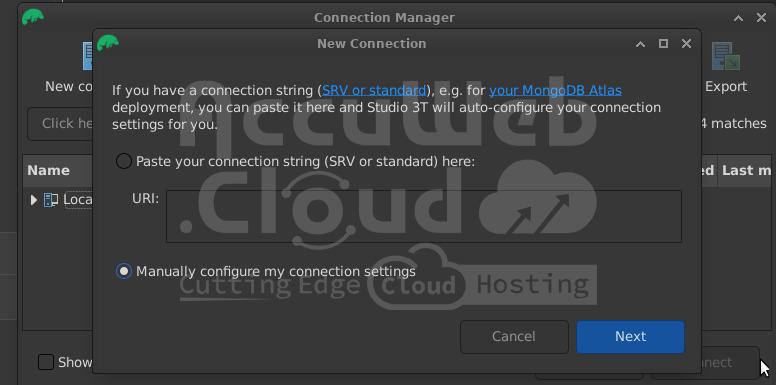
Next, click on the new connection and select manually Configure my Connection setting
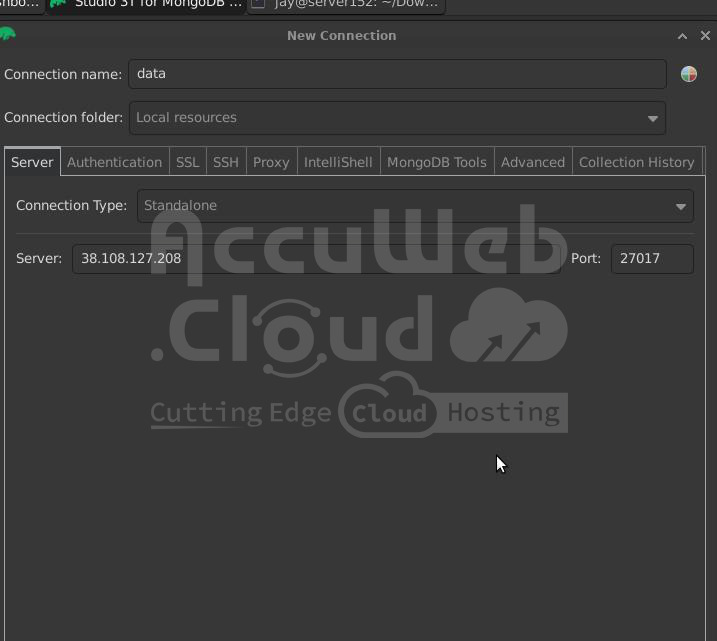
After that write your connection name and put the name you want in the connection folder keep it as its local server and connection type standalone in the server you have to put your host IP address
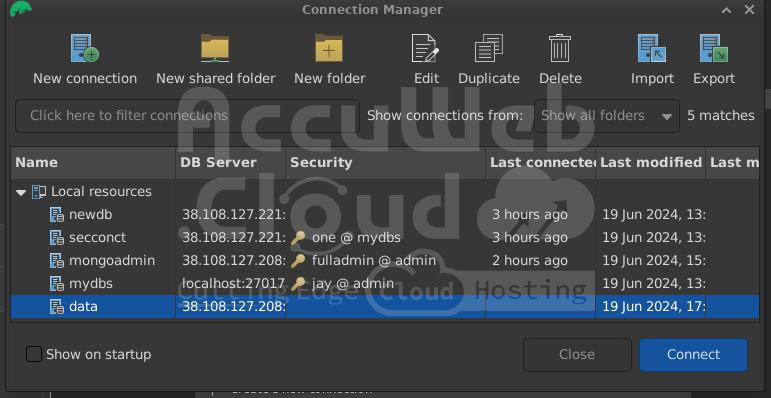
After that, you can check the connection
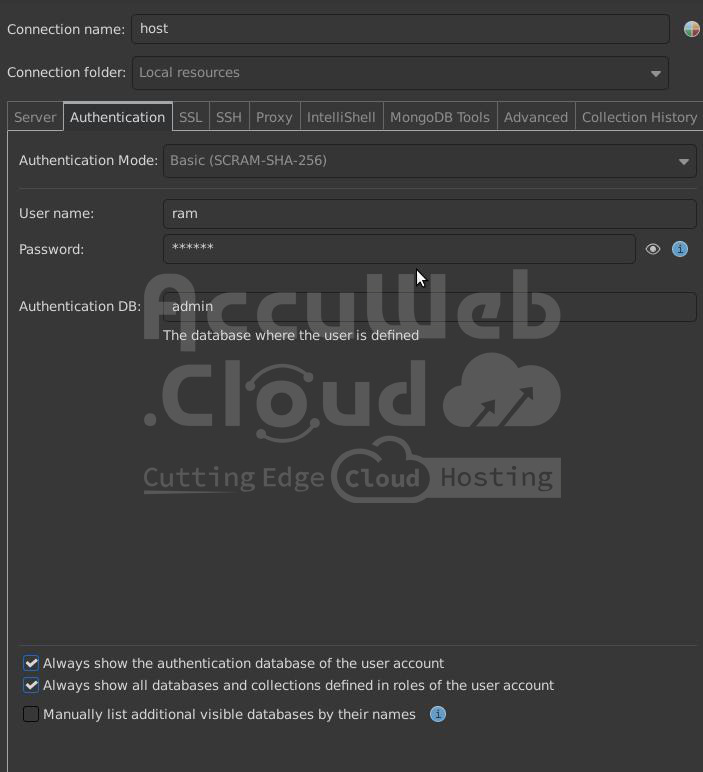
As shown in the picture check that your connection is done properly or not and then do the authentication part that gives your username password database name
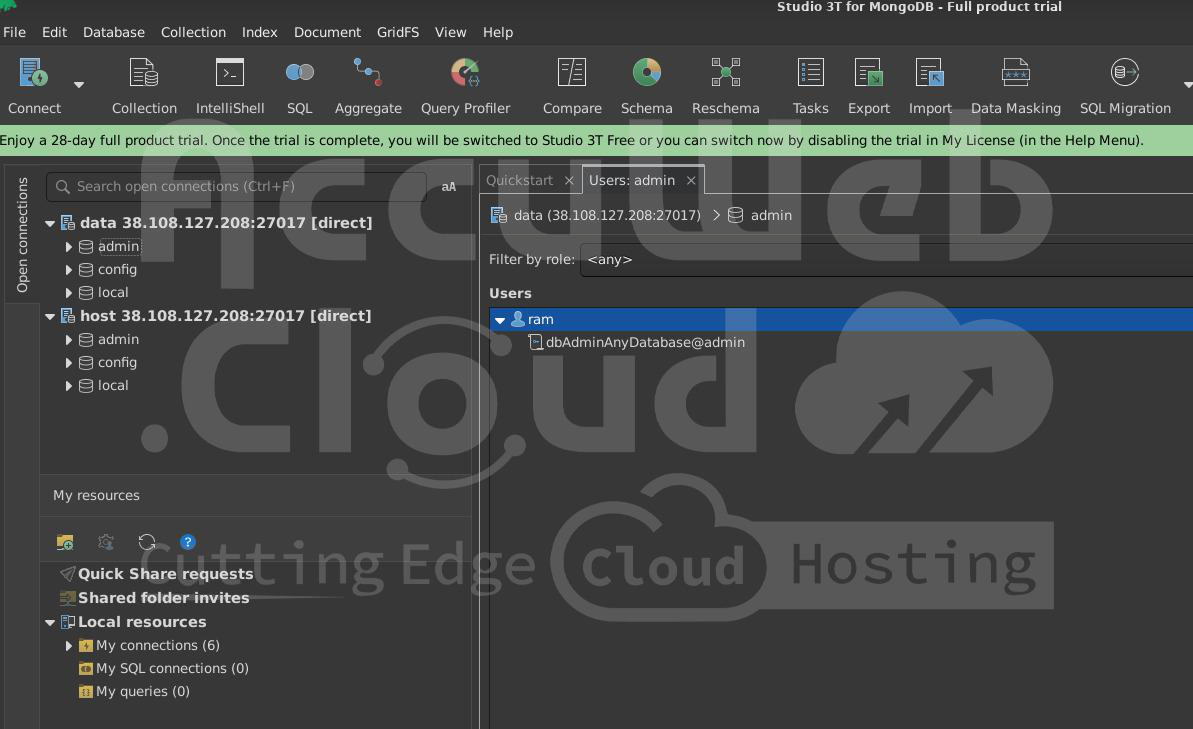
After that, you can see that your database will be connected and you can see the users and related information in the dashboard
In the picture, you can see the users are showing we can configure manually the users and also attach the roles or modify the roles remotely as a result we have connected our Mongo db remotely successfully
You can see more options to configure your database in Studio 3t
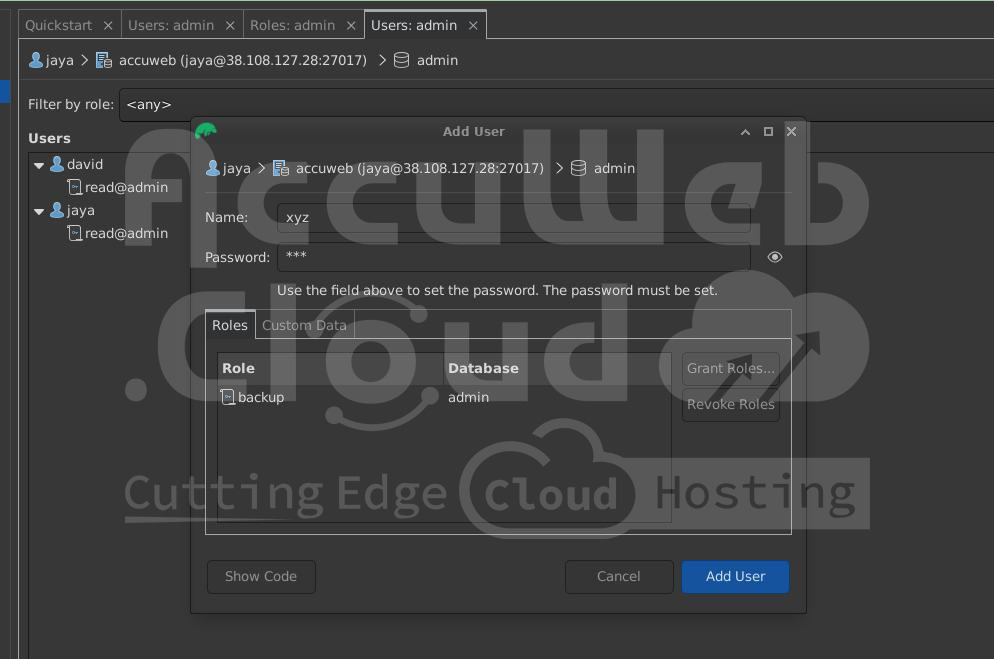
Same way if you create any new user in Studio 3t it will be reflected in your local server it will be vice versa we can create the users locally and also remotely …
In Studio 3t you can make users without commands and also grant the roles as shown in the picture once you have created any user it will be reflected in your local server.


