How to Manage Application Lifecycle?
Developing intricate applications with tailored functionalities and interfaces demands a considerable amount of time and adherence to structured methodologies to guarantee their functionality and alignment with user requirements. Even if your project isn’t on a grand scale, incorporating development and testing environments can be advantageous. These environments enable you to refine your code without any disruptions to end users. Crafting your own applications necessitates a comprehensive grasp of potential challenges spanning the entire application lifecycle, from conception to deployment.
Managing the lifecycle of applications gets simpler when we automate regular tasks like setting up environments, project building, deploying, and managing domains. A recommended approach involves aligning your test environment closely with the production setup, regularly updating the test database with production data, ensuring both environments share a single database. Additionally, we’ll explain how to utilize distinct build environments using the integrated Maven tool for all your projects.
To realize the schema above, we’ll go through the next steps:
- Create the production environment
- Create the build environment
- Build and deploy the project
- Create database environment
- Configure database connection
- Create the test environment
- Upgrade application
Create the Production Environment
1. Log in to the platform’s dashboard.
2. Set up a New environment.
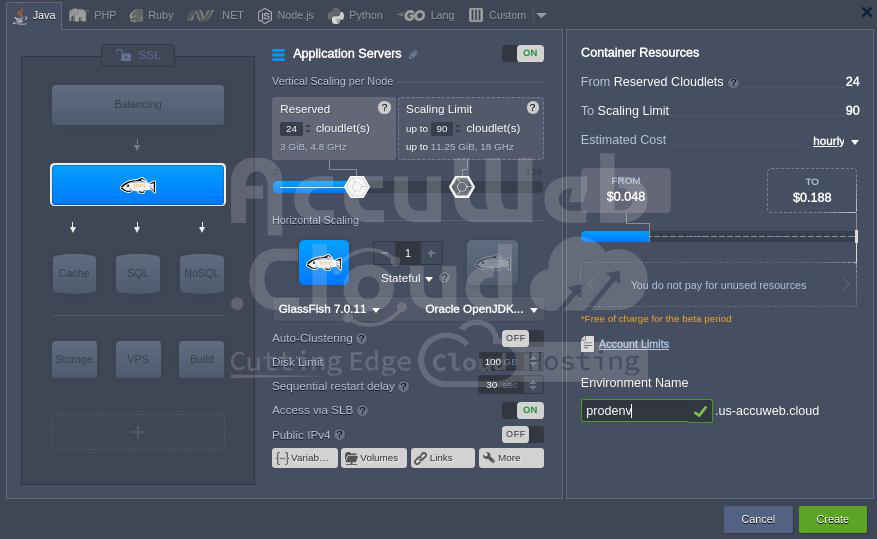
3. Choose the application server you prefer (like GlassFish), specify the cloudlets limit, and give a name to your initial environment, such as prodenv. After that, simply hit the Create button.
Give it a moment, and your setup will be ready in no time.
Create the Build Environment
Instead of the traditional method of developing projects on your own computer and then uploading them as WAR archives, you have the option to build applications directly on the platform. Notable benefits of this method include its speed, reduced time and bandwidth requirements, and ability to take use of cloud computing’s efficiency. Plus, it enables you to continue using your computer without additional strain. Moreover, the platform seamlessly integrates with your version control repositories, allowing you to pull application source code directly from them via protocols like Git or SVN.
Creating an atmosphere that is appropriate for constructing the structure is our next duty.
1. First, set up a New environment. Choose Maven as your go-to building tool, and make sure to specify the cloudlets limit and name your environment, like ‘buildenv‘ for instance. Plus, you have the flexibility to create an environment sans a compute node. No more juggling multiple building tools for different environments needed!
2. Your setup will be ready in just a few minutes.
Build and Deploy the Project
We’re ready to create our first project and put it into action for everyone to use!
1. Add your project to Maven.
2. In the below dialogue box, head over to the Git tab (or SVN) if you’re opting for Git as your go-to revision control system. Then, fill in details like your project’s name, its path, the branch you’re working on, and your repository’s login credentials. Also, don’t forget to mention the name of your Environment and the Context where you’ll be deploying your project. Finally, hit the Add button to confirm.
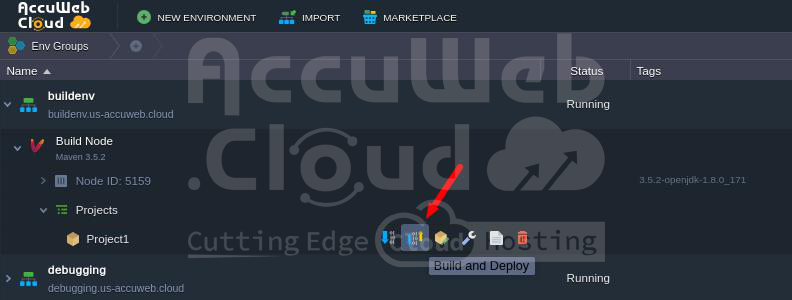
3. Simply tap on the “Build and deploy” button to get your project up and running.
Create Database Environment
Let’s build an additional environment that has a database but no computing node. You may store all of the data for your apps there.
1. To get started, just hit the ‘Create environment‘ button and choose the database you prefer, like MySQL.
2. Once your environment is up and running smoothly, simply hit the “Open in Browser” button for MySQL. You should also find an email from the platform containing your database credentials. You can utilize these login details to set up your account and access the necessary database for your application.
Configure Database Connection
1. Please press the Config button located next to the application server in your production environment.
2. When you’ve got the tab open, go ahead and make a new file called mydb.cfg in the /opt/glassfish3/temp directory. Then, add the below configurations:
host=jdbc:mysql://mysql{node_id}-{your_env_name}.{hoster_domain}/{db_name}
username={get in the email}
password={get in the email}
driver=com.mysql.jdbc.Driver3. Upload MySQL connector in the /opt/glassfish3/glassfish/domains/domain1/lib directory within GlassFish.
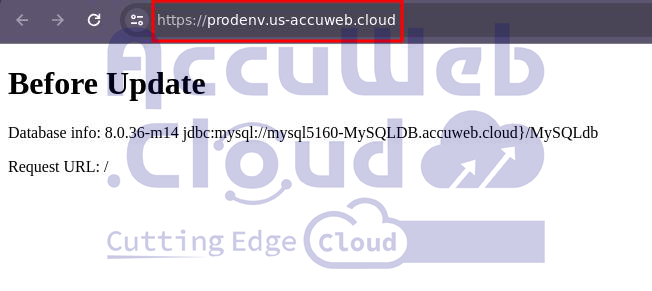
4. Give GlassFish a Restart and then pull up your app in a web browser.
5. When you use the platform, you can personalize your website’s URL by choosing your domain name instead of sticking with the default one provided by your hosting service. So, it’s a good idea to purchase a domain name specifically for your live website.
Once you have your domain, we suggest configuring it by adding a CNAME record to point to your platform. To do this, navigate to the Settings section (look for the wrench icon) for your website’s environment and connect your custom domain. As an example, let’s say your chosen URL is production.com.
Create the Test Environment
Let’s set up our test environment. You can do this by cloning your production environment. This way, you can have different versions of the environment and customize them as necessary. The duplicated environment will be just like the original, with all the data in its databases, along with the deployed “.WAR” and “.JAR packages.”
1. Clone your production setup to create an identical copy, allowing you to integrate new features and conduct thorough testing.
Upgrade Application
For instance, if you have to change something in your application:
1. Include your latest project in Maven.
2. Simply hit the ‘Build and deploy‘ button to kickstart your new project. Once done, your project should pop up exactly where you’ve set it to be.
3. Click on the Settings button to your environment, then bind the domain you purchased earlier (i.e. test.com).
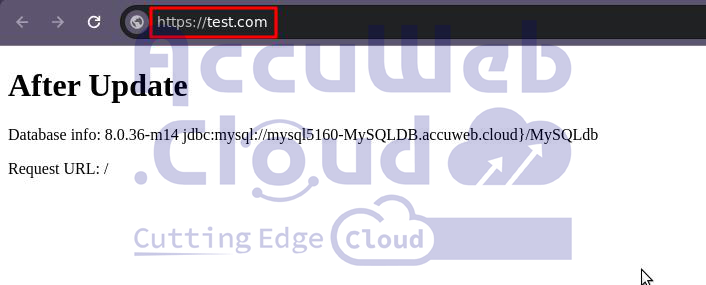
4. To view the modifications, let’s launch our newly created application in a web browser.
Once you’ve run your tests on the latest features, you can switch the domains. This useful feature ensures that your users won’t have any issues when you upgrade your programme. Simply stage your new version in a test environment, then swap the URLs with the production environment in just a few clicks.
5. Go ahead and open up the settings for one of your environments. Once you’re in there, navigate to the “Custom domains” section. From there, select the other environment that you want to swap with and hit the Swap button.
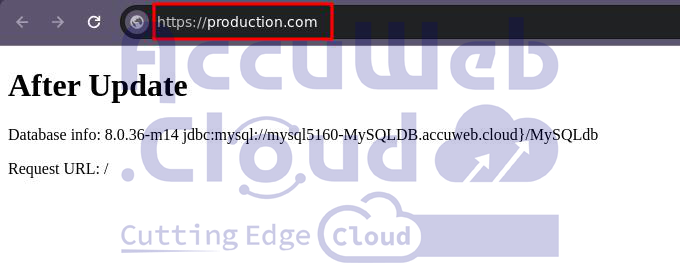
You can head over to production.com now and check out the changes made to your application.


