How to Install DokuWiki on AccuWeb.Cloud?
DokuWiki is an open-source wiki software designed for creating and managing documentation. It’s known for its simplicity, ease of use, and powerful features. DokuWiki runs on PHP and doesn’t require a database, making it a great choice for users who want a fast, straightforward wiki solution.
In this guide, we will walk you through the process of installing DokuWiki on AccuWeb.Cloud. AccuWeb.Cloud provides an intuitive and easy-to-use platform to deploy applications, and DokuWiki can be installed with just a few clicks. Now, let’s dive into the installation process.

Steps to Install DokuWiki
Step 1: The first step is to log into your AccuWeb.Cloud account. Open a web browser and navigate to AccuWeb.Cloud Login. Enter your username and password and click the Login button. After logging in, you will be taken to the AccuWeb.Cloud dashboard.
The dashboard is where you can manage your cloud services, such as servers, applications, and other resources. It provides a user-friendly interface for accessing various features.
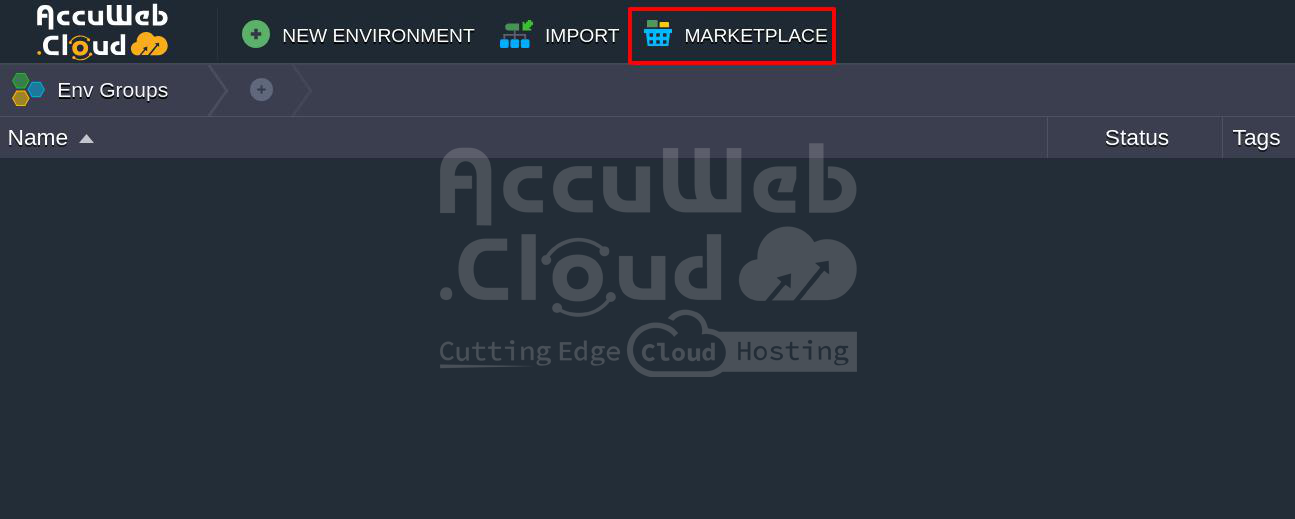
Step 2: Once you are logged in to the dashboard, you will need to navigate to the Marketplace, where various pre-configured applications are available for quick deployment. On the top side of the dashboard, locate and click on Marketplace.
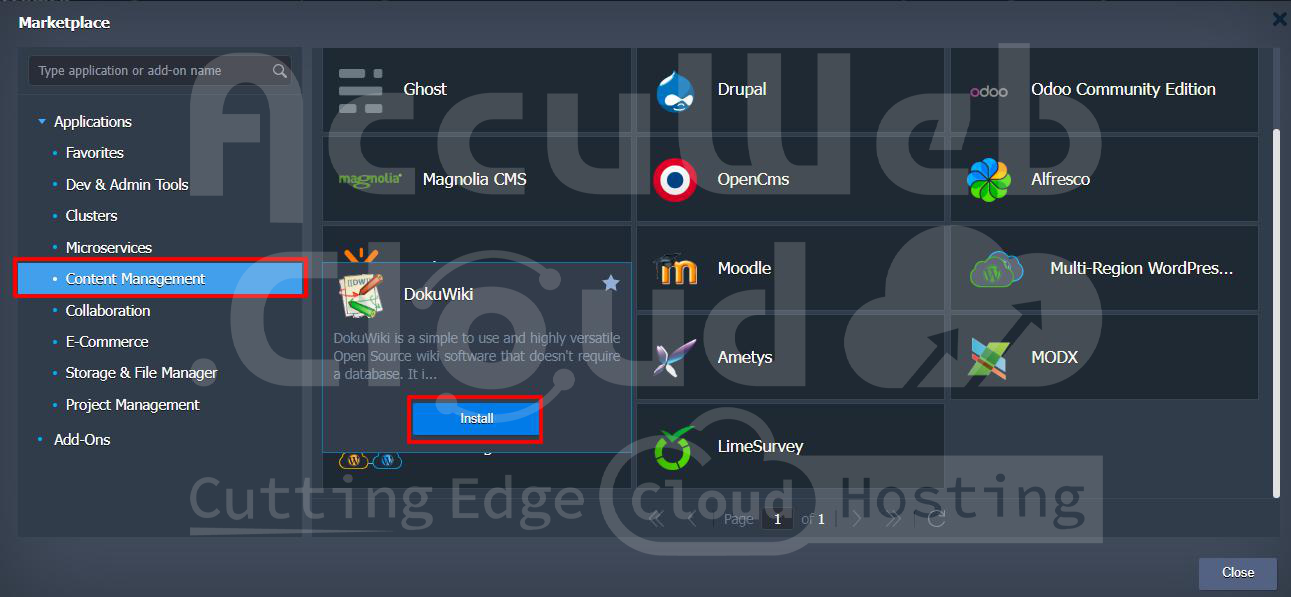
 Step 3: Go to Content Management and Find DokuWiki. AccuWeb.Cloud offers a range of applications, including several popular content management systems. DokuWiki is categorized under Content Management. In the Marketplace, scroll down to the Content Management section. Browse through the list of available content management tools and find DokuWiki. Click on the DokuWiki application box to begin the installation process.
Step 4: After clicking on the DokuWiki application box, you will be presented with a few options. To start the installation, click the Install button located under the DokuWiki box.
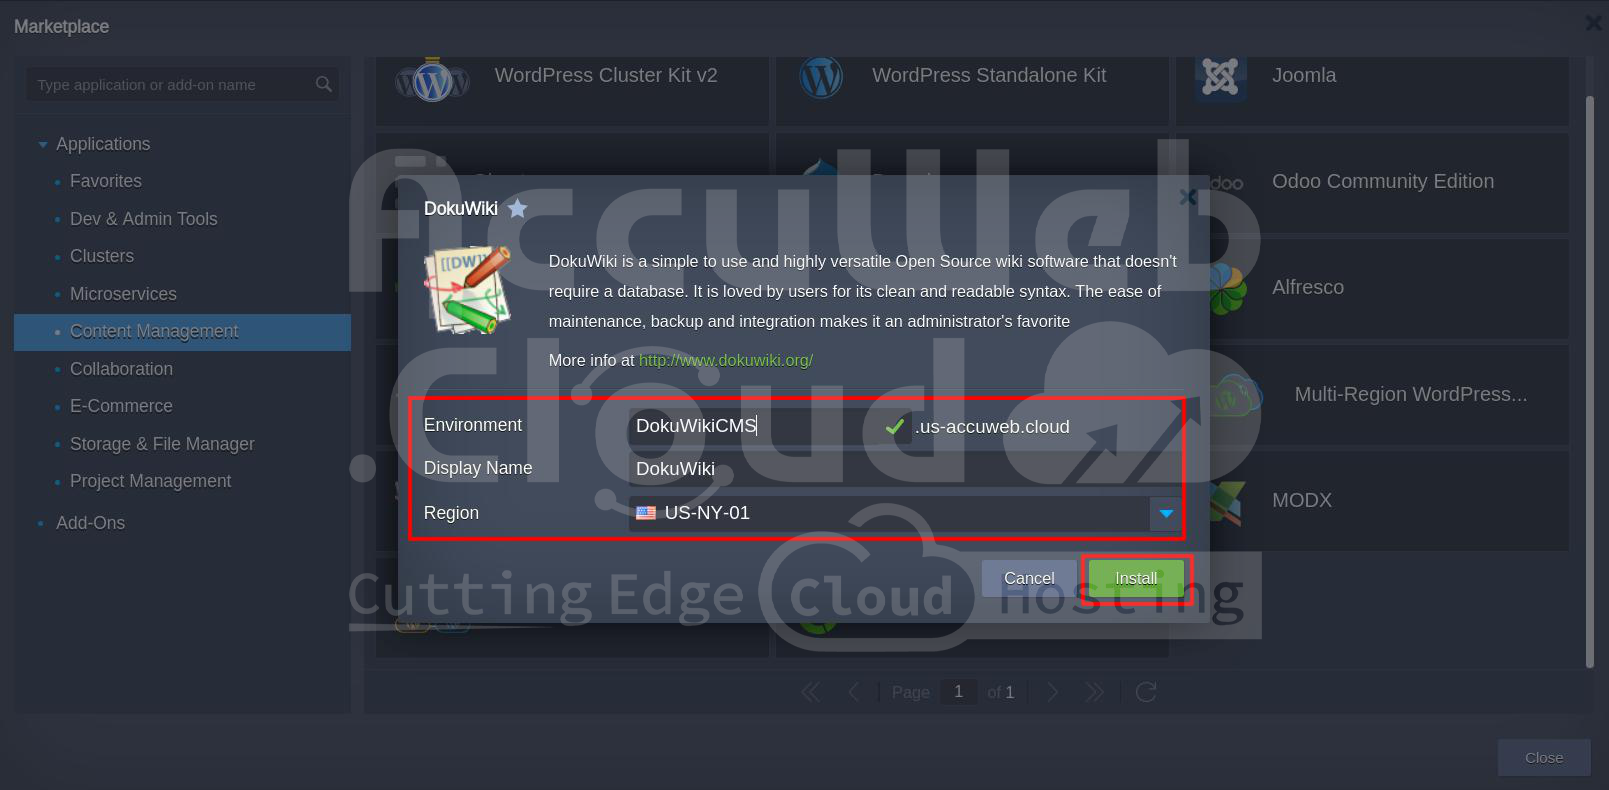
 Step 5: Once you click Install, a window will pop up, asking for some important details regarding your installation. These details include the environment settings and the region where you would like to deploy the application.
Here’s what you need to do:
- Environment: Choose the environment for your DokuWiki installation.
- Display Name: Enter a name for your DokuWiki instance. This name will help you identify it later in your AccuWeb.Cloud dashboard.
- Region: Select the cloud region where you want DokuWiki to be deployed. It’s a good practice to select the area closest to your primary user base to ensure faster access and better performance.
Once you have filled in all the required fields, click the Install button to proceed.
 Step 6: After you click the Install button, the system will start deploying DokuWiki. Depending on the cloud infrastructure and the region you’ve selected, this process may take a few minutes.
The system will display a progress bar indicating the status of the installation. A success message will appear once the installation is complete confirming that DokuWiki has been successfully deployed.
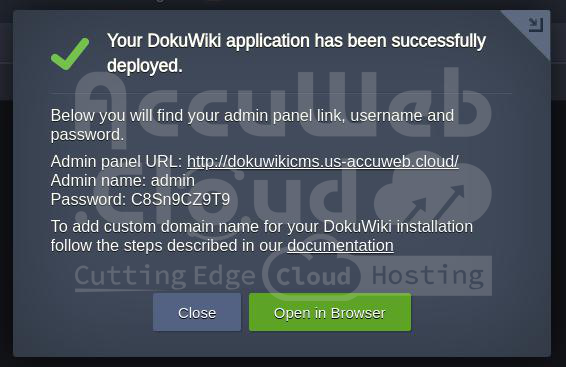 The success message will also display important details such as:
- Admin Panel URL: The link to the DokuWiki admin panel.
- Admin Name: The default administrator username for logging into the admin panel.
- Admin Password: The default password to log in as the administrator.
Make sure to keep these details secure, as they are required to access and manage your DokuWiki installation.
Step 7: Sometimes, after the installation, you might encounter an error message such as “SSL Service Unavailable”. This error typically occurs if the SSL certificate for your DokuWiki installation is not enabled by default.
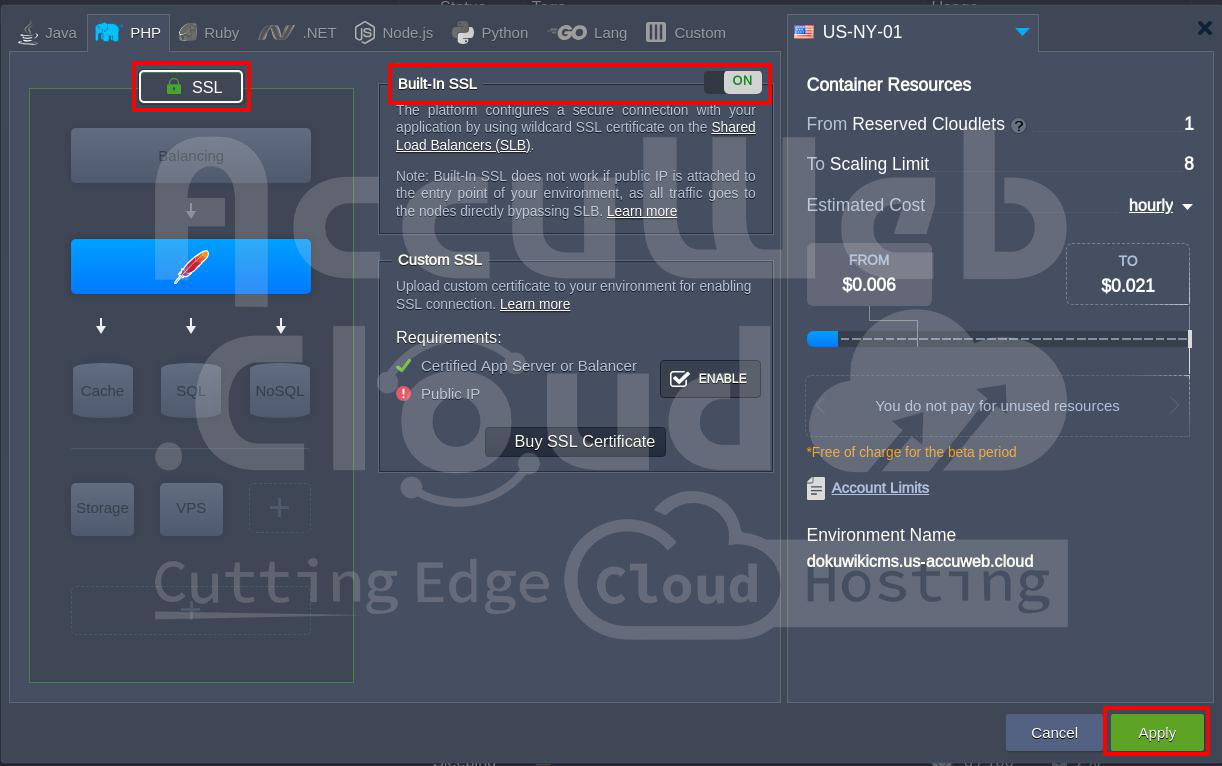
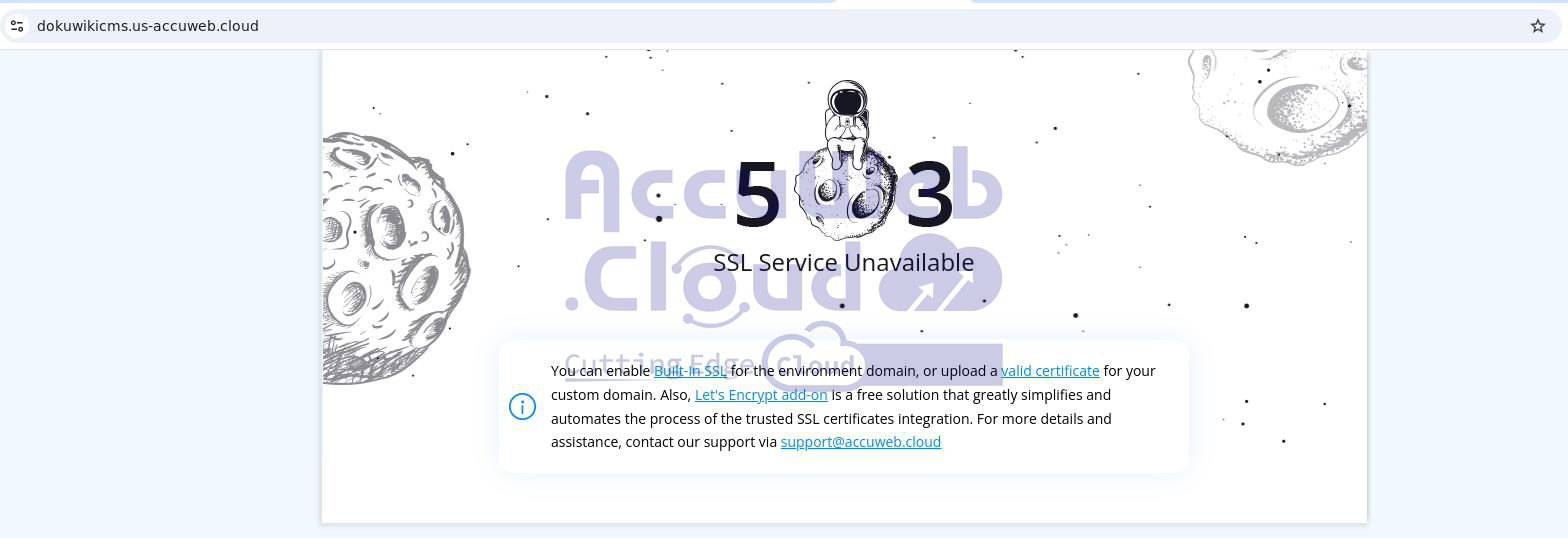 If you see this error, don’t worry! You can easily fix it by enabling SSL from the topology section of your environment settings.
Here’s how to fix it:
7.1:
-
- In the
AccuWeb.Cloud dashboard
-
- , go to the
Environment
-
- section. Look for the option to change your environment’s topology and click on
Change Environment Topology
-
- .
-
- In the topology settings, navigate to the
SSL
-
- section. You should see an option labeled
Built-in SSL
-
- .
7.3: Toggle the Built-in SSL option to enable. This will ensure that your DokuWiki application uses a secure HTTPS connection.
7.4: After enabling SSL, make sure to click the Apply button to save your changes. The system will apply the SSL settings, and the SSL error should be resolved.
Step 8: Once the installation is complete and any SSL issues are resolved, it’s time to check your new DokuWiki installation. Open a web browser and navigate to the Admin Panel URL provided in the success message. You will be redirected to the DokuWiki login page.
Enter the Admin Name and Password provided in the installation success message to log into the admin panel.
Upon successful login, you will be greeted with the default DokuWiki page. This is the main dashboard where you can begin creating and managing your wiki pages.
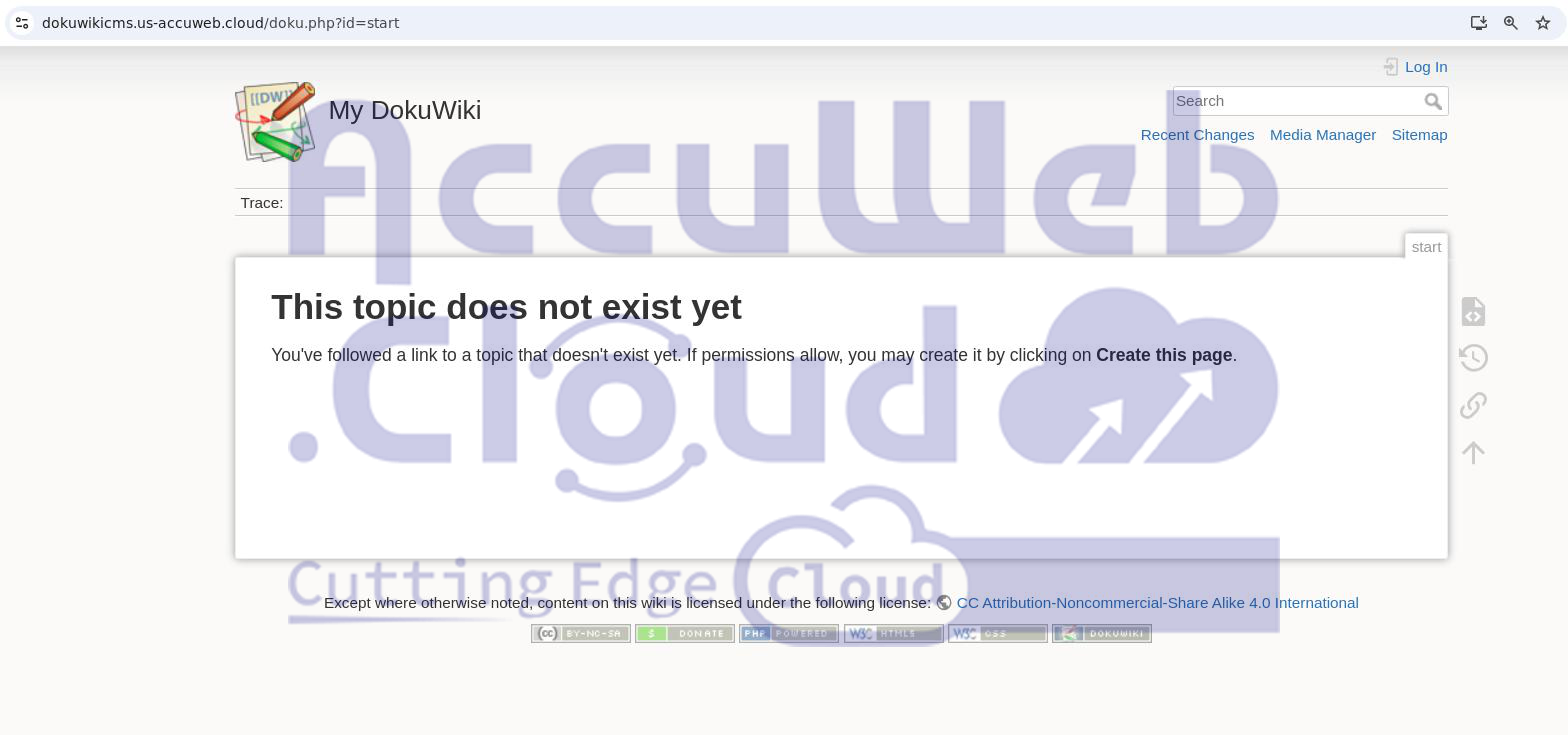 Congratulations! You have now installed DokuWiki on your AccuWeb.Cloud instance. From here, you can begin customizing your wiki, creating pages, and collaborating with other users.
Conclusion
AccuWeb.Cloud makes it easy to deploy popular applications like DokuWiki, and this installation process is designed to be straightforward and user-friendly. Whether you’re setting up a personal wiki or deploying DokuWiki for your team or organization, following the steps outlined above will ensure a smooth and hassle-free installation. Now you’re ready to start using DokuWiki for your documentation needs.


