How to Share the Environment with Other Users?
When many people work together, you can achieve a big project. But if different team members work on one account, it can cause problems like security issues. Our platform has a good feature for collaborating on accounts. This feature makes it easier to work together and manage things well, ensuring successful and efficient teamwork.
The Collaboration lets users work together easily by sharing their accounts. This means one person can share all the tools with others. It’s good because it saves resources and gives flexibility in managing things. You don’t have to make copies of everything for each person. And you can control who can do what, which works for many situations.
The primary account can access all the places where stuff is kept, whether others share it or not. It controls who can use the shared stuff and what they can do with it. But remember, this main account bears all the costs for using the shared stuff.
Collaboration members agree to share stuff with the main account. They don’t have to pay for shared stuff and can use it like their own, but the main account decides what they can do with it.
If a member has permission, they can create new places to keep stuff on the main account. However, they must follow the limits set by the main account, which pays for using these places.
Collaboration Roles & Policies
The special thing about the platform’s teamwork feature is how flexible it is. This flexibility comes from roles and rules. Here, we will share with you exactly what’s needed for each situation. This guide tells you all about setting up roles and rules.
First, let’s talk about roles and Policies.
- Policies are small sets of actions that let you do specific things.
- Roles are groups of rules that let you do a bunch of actions together.
Step 1: Log in to your AccuWeb.Cloud dashboard.
Step 2: Go to the upper right side of the screen and click on the Settings option.
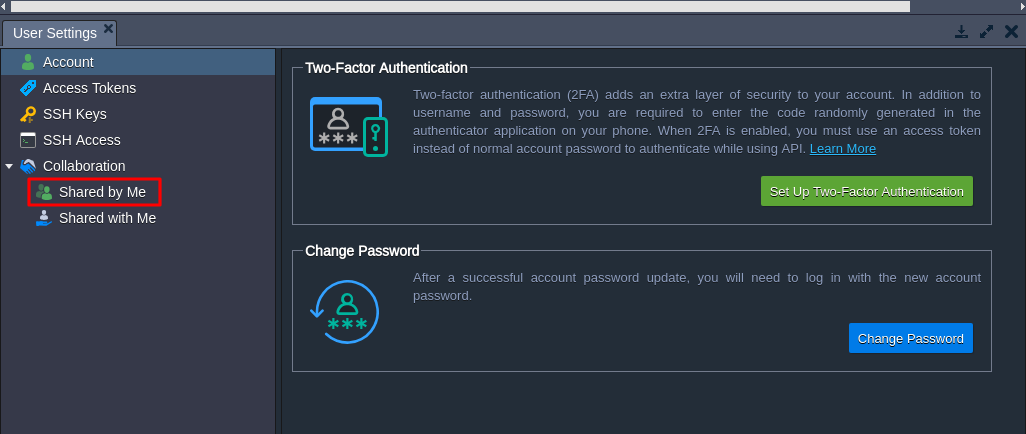
Step 3: Under the User Settings tab, go to the Collaboration and click on the Shared by Me option.
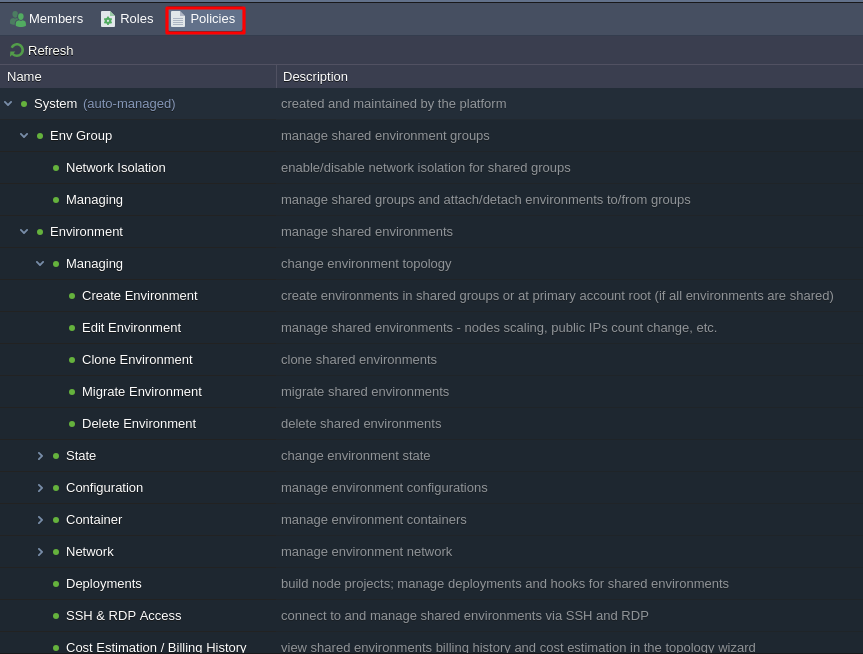
Step 4: The Policies tab shows what actions you can include in a role. The platform already has lots of standard rules to choose from, covering most teamwork situations.
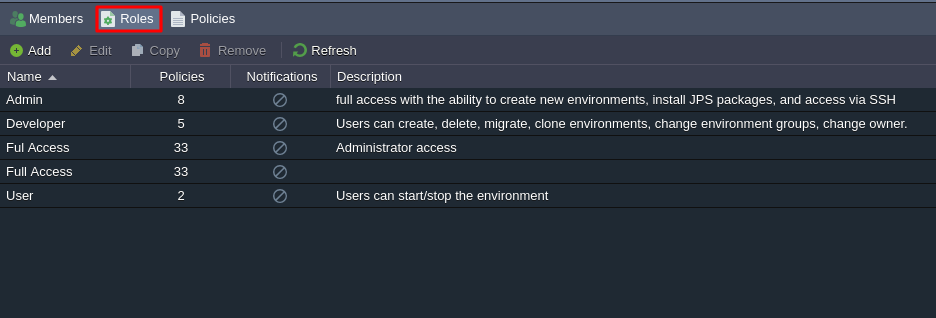
Step 5: The Roles tab lets you make custom sets of actions with only the permissions needed.
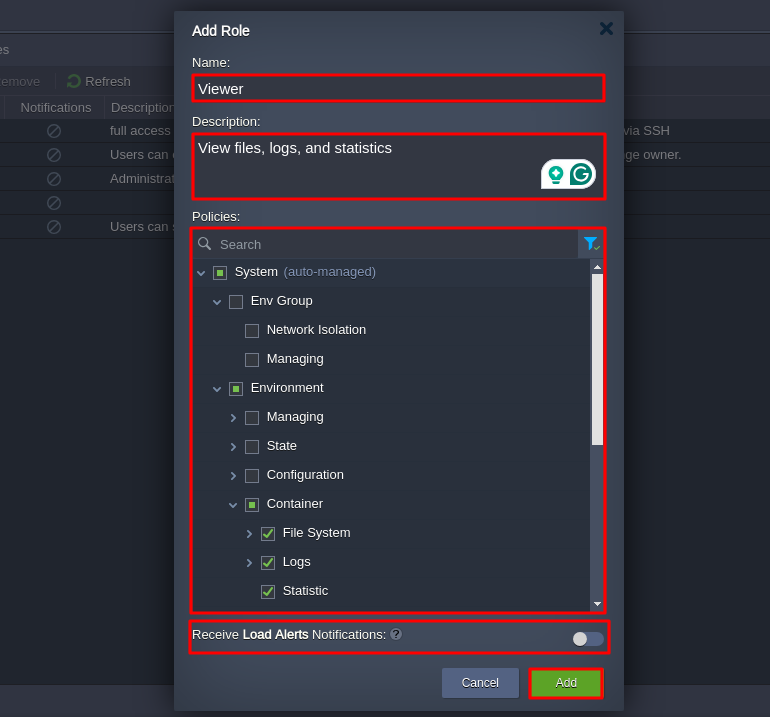
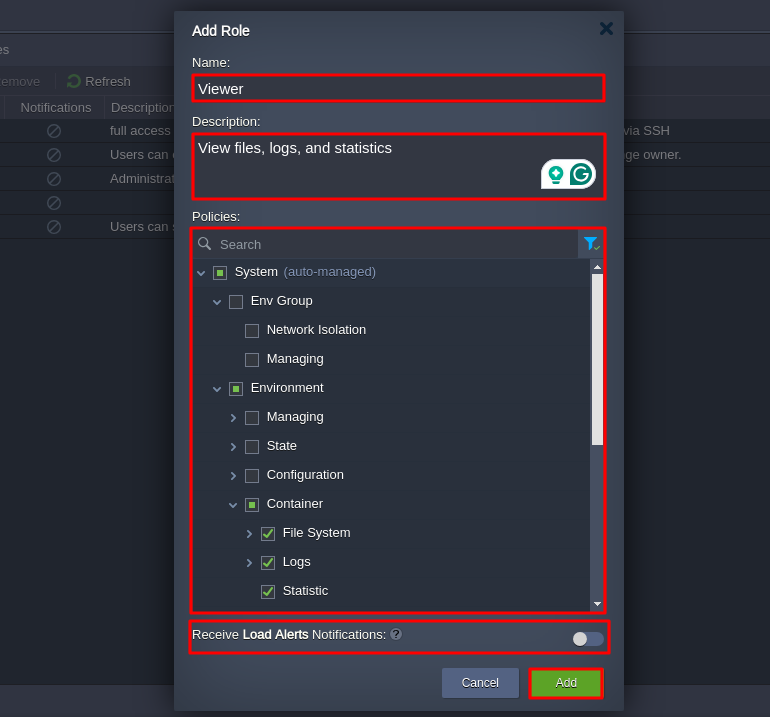
When you make, change, or copy a role, you need to give certain information. Here, we are going to add new roles so you can have more ideas about it.
- Name: Give the role a name. Here, we have entered the viewer as an example.
- Description: Write a description if you want. Here, we have entered View files, logs, and statistics.
- Rules: Pick which actions the role can do. You can search and filter to find what you need.
- Receive Load Alerts Notifications: Turn this on if you want people with this role to get notifications about shared stuff.
After that, click on the Add button to add the role. You can see that the role has been added. Roles you don’t need anymore can be deleted.
Step 4: You can make as many roles as you want. Here are some basic examples:
- Viewer – Can only look at logs and files.
- User – Can do simple stuff like start/stop environments and restart containers.
- Developer – Can do most things but with some limits, like creating, deleting, and changing environments.
- Admin – Can do everything, like make new environments and install packages. These are just examples. You can make your roles to fit what you need.
Roles Assigning Algorithm
The platform uses a special system to decide who can do what in a certain area. There are three levels of access, ranked from most important to least:
- Direct: These roles are given specifically to the environment and override any lower-level roles.
- Shared Environment Groups: These roles are a mix of roles from all groups that share the current environment. If a group doesn’t have a role set, it checks the parent group. This continues up to the main Env Groups category (the default role for all groups).
- Base: These are default roles for all shared environments. They are used only when no other roles are assigned.
Note that only the highest level of access roles are considered.
To see what you can do with shared resources, go to Settings > Shared with Me.
To see your roles for a specific shared environment, go to Settings > Collaboration.
Create Collaboration
To create your collaboration, you just need an AccuWeb.Cloud account. This account can invite other customers or users to collaborate with you. You can manage most collaboration tasks in a specific section of your account settings.
Step 1: Click the Settings button in the top-right corner of the dashboard.
Step 2: In the User Settings section that opens up, you’ll find two collaboration subsections.
- Shared by me – This is for your main account. It has three tabs: Members, Roles, and Policies.
- Members – You can manage the list of collaboration members. This includes inviting new users, suspending or removing existing ones, and customizing shared environments and groups.
- Roles – You can set up custom roles with specific actions allowed, choosing from available policies.
- Policies – You can see the actions that can be added to a role.
Then there’s Shared with me – This is for members who are collaborating with you.
Send Collaboration Invite
Step 1: Go to your main account’s “Shared by Me” section, where the environments are hosted.
If you haven’t done this before, make sure to create at least one Role in the right tab.
When adding a Role, fill in this information:
- Name: Choose a name for the role.
- Description: Optionally, write a custom description.
- Policies: Select the actions this role is allowed to do. You can search for specific actions and filter the list to see only the ones you select.
- Receive Load Alerts Notifications: Turn this on if you want members with this role to get load alert notifications for shared items.
Step 2: Click on the “Members” tab, then click the “Invite” button.
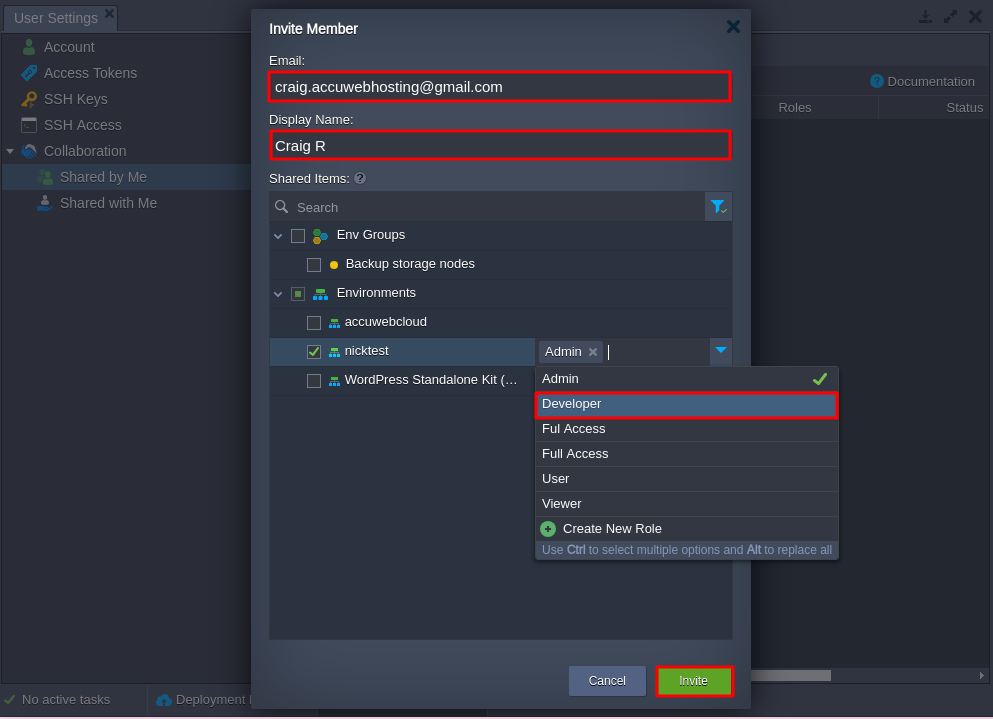
In the opened “Invite Member” dialog:
- Email – Type the email address of the user you want to invite (for example, [email protected]).
- Display Name – You can give a custom name for the invited user (optional, for example, Nick R).
- Shared Items – Select the items and categories (like environments and groups) you want to share with the member. You can change their roles or create a new role.
Step 3: Click on the Invite button to send the invitation email to the team.
Important Note:
- You can assign multiple roles to a component by holding Ctrl and selecting options. Use Alt to replace all currently selected roles.
- Each (sub-)component can have its unique roles.
- Hover over a role in the list to see a hint with all the permissions included.
- If needed, you can create a new role without closing the invite form.
- You can manage the structure of environment groups directly in the invite form. Hover over a group and click the gear icon to choose what you want to do (Add, Edit, Remove).
- To allow creating environments at the account root (without any group), share the entire Environments category with a role that has the necessary permission.
- If you need to share a single environment, you can do it from the specific environment configurations.
Step 4: The invited member will appear in the list as pending acceptance. Now, you wait for them to accept the invitation. Any changes to the invitation will be shown in the Members tab, and you’ll get an email notification about their decision.
Step 4: If needed, you can select a collaboration member to make necessary adjustments:
- Edit – With the “Edit” button, you can change shared components and permissions anytime.
- Copy – With the “Copy” button, you can share the same permissions with another user.
- Suspend/Activate – Use the “Suspend” or “Activate” button to temporarily stop or restore sharing.
- Remove – Click the “Remove” button to terminate sharing and delete information about shared components and permissions.
Accept Collaboration Invite
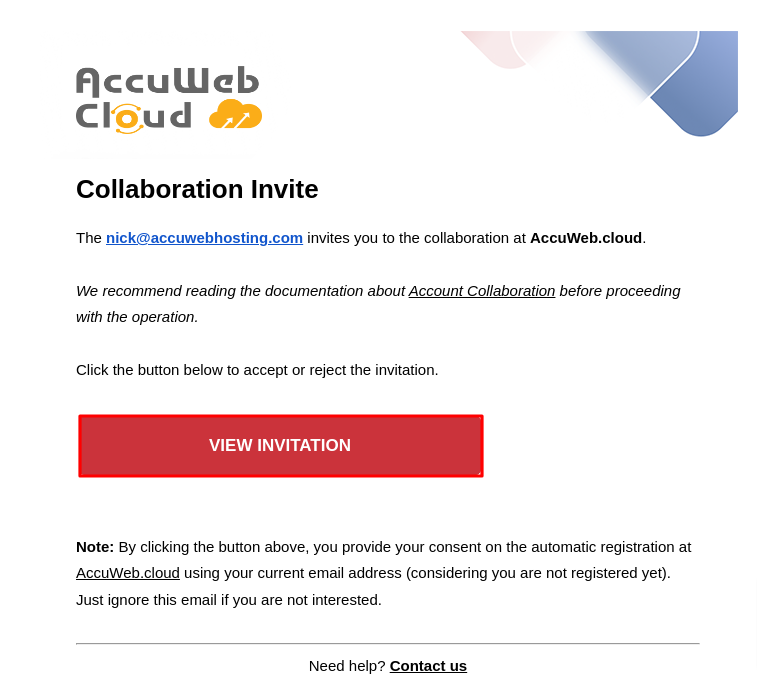
Step 1: Once the primary account owner sends you a collaboration invitation, you should check your email for it.
If you’re interested, click the “View Invitation” button.
If you’re not already registered on the platform, an account will be created for you automatically using the email address the invitation was sent to.
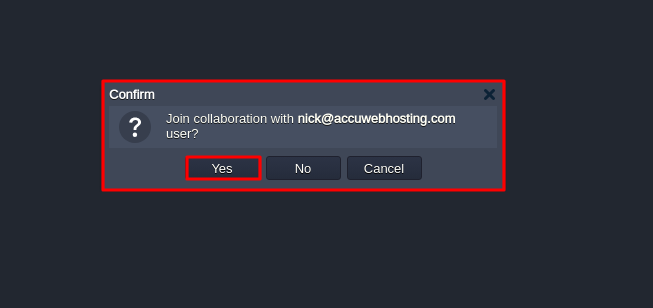
Step 2: After confirming via email, you’ll be taken to the platform dashboard. There, you’ll see a window with options to accept or reject the invitation.
You can close the window or cancel if you want to handle it later in the “Shared with Me” section under account settings.
Click “Yes” to accept the request.
Step 3: Once accepted, your dashboard will show the new shared items.
That’s it! Now, you can access all shared items with the permissions that were set.
Conclusion
In conclusion, sharing environments with other users through collaboration involves creating roles, assigning permissions, and managing access within the platform. Use the provided tools to assign appropriate roles to components, customize permissions, and efficiently manage environment groups. Remember to follow best practices to ensure secure and effective collaboration among users.


