How To Reduce Billing Of An Environment With Multiple Nodes?
There are four ways to reduce the cost of a Standalone WordPress environment.
- Reduce the cloudlet from the environment
- Detached the unnecessary public IP address from the node
- Reduce the Litespeed webserver License for the environment
- Disabled the HTTP/3 Premium CDN for the environment
1. Reduce the cloudlet from the environment
The platform offers two types of cloud resources: Reserved and Dynamic cloudlets. These can be set up for each server in the environment using the Vertical Scaling per Node wizard.
Reserved Cloudlets are booked in advance and you’re charged for them regardless of your actual resource usage.
Dynamic Cloudlets are added or removed automatically based on your application’s resource needs. They’re assigned when demand increases and removed when it decreases.
If you adjust Reserved cloudlets, you’ll see changes in the Estimated cost under “From.” Adjusting Dynamic or scaling limit cloudlets will reflect changes under “To.”
Here’s how to modify cloudlets for an environment:
Step 1: Log into your Accuweb cloud dashboard and choose the environment you want to adjust. Here, we have selected Accuwebcloud.us-accuweb.cloud as an example.
Step 2: Click the Change Environment Topology icon to view the existing setup.
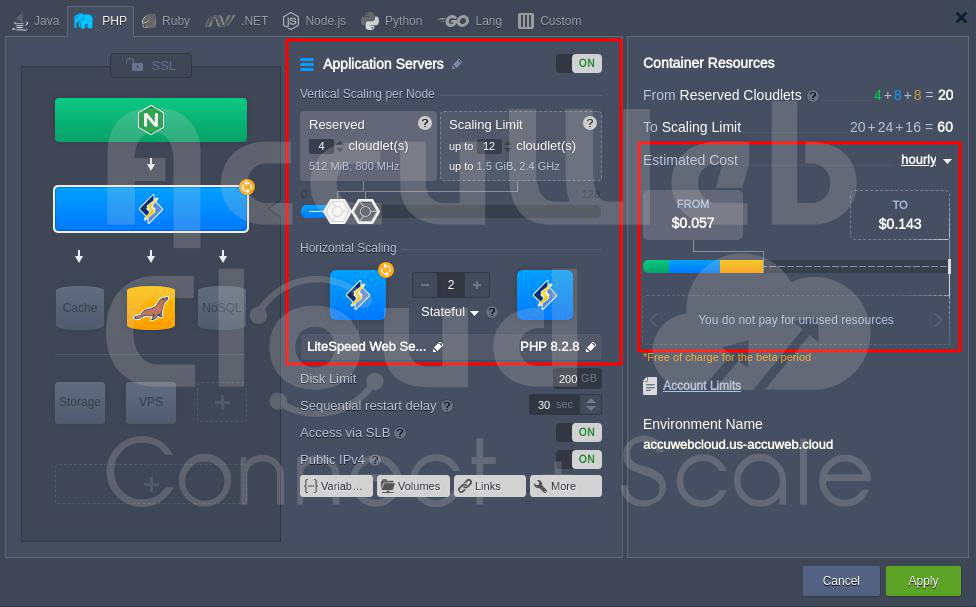
Step 3: Select the application of which cloudlets you want to modify to reduce the billing. Here, we have selected the Application server to modify the cloudlet.
You can see that right now, we have 8 cloudlets in the Reserved section and 24 cloudlets in the Scaling Limit in the Application Server. We want to modify it with 4 cloudlets in the Reserved section and 12 cloudlets in the scaling limit.

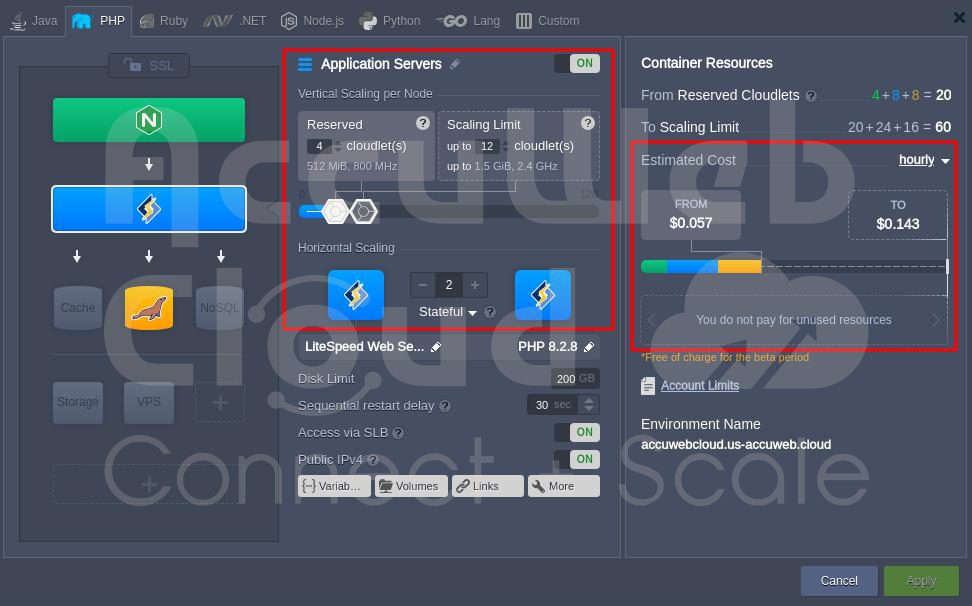
Step 3: Modify the Reserved cloudlets as needed. You’ll see cost estimates change accordingly.
You can also reduce the cloudlet of other servers or clusters, such as the load balancer, database server, and Cache server, in the same way.
Step 4: Click Apply to save the changes. In the Confirmation window, click on the Yes button to apply the changes. The process will start, and within a minute, the cloudlet adjustments will take effect.

Step 5: To check the cloudlets for the application server, go to the Environment and click Change Environment Topology. In the topology window, click the Application Server to see the modifications.
2. Remove unnecessary IP addresses from the Environment.
The public IP is paid, and you are charged for every hour you use it. When working with multiple public IPs, the first external address (both IPv4 and IPv6 types) is considered the primary one. It is used for both incoming and outgoing traffic. You can only delete it last, while the other IPs can only receive traffic.
If you have enabled multiple IP addresses in the environment, such as IP addresses for each node in the Application server and database server, you can remove them to reduce the environment’s cost.
To remove the IP address from the application server or database server or load balancer, perform the following steps.
Step 1: Log into your Accuweb cloud dashboard and choose the environment on which you want to remove the IP address.
Step 2: Select the application or cluster on which you want to remove the IP address. Here, we have selected Application Server as an example. We have two nodes, Primary and secondary, and we have enabled IP addresses on both nodes.

Step 3: Click on the arrow just before the Node ID to get the IP address.
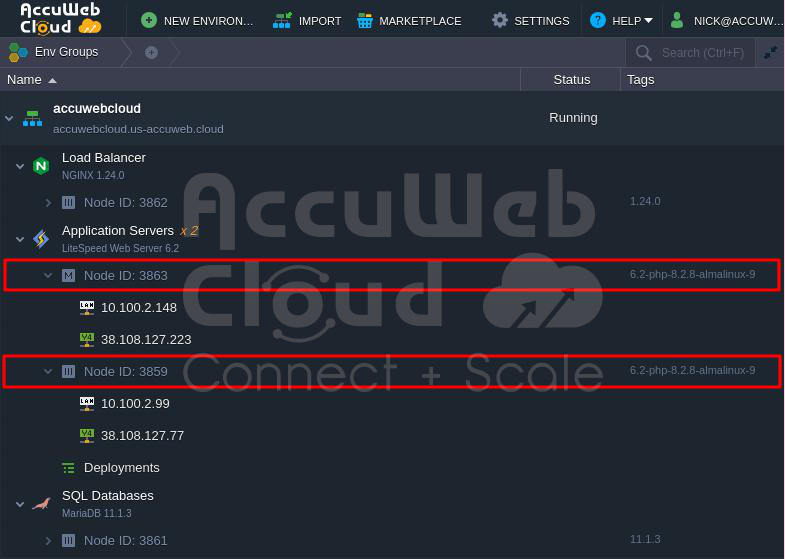
Step 4: Select the IP address and click on the Delete icon to remove the IP address for the selected node.

Step 5: In the Confirmation window, click on the Yes button to remove the IP address.

Step 6: Once the IP address is removed or detached, it will disappear, and you will only get the text Public IPv4.
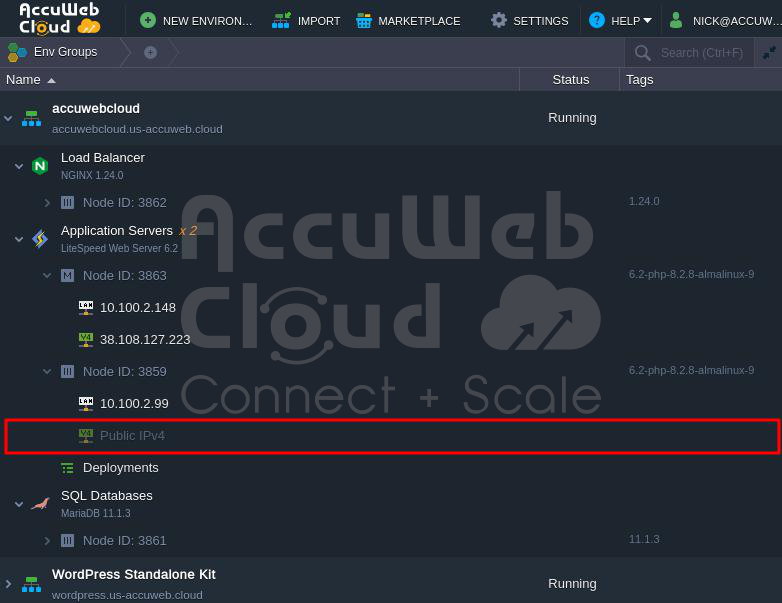
You must follow the same steps to remove the IP addresses of other nodes in the application, load balancer, or database server.
3. Reduce the Litespeed webserver License for the environment
LiteSpeed provides a flexible payment method for its web server software in AccuWeb environments. You pay for what you use based on factors like the number of CPU cores or virtual servers. This approach allows you to scale resources easily as needed. However, you can lower the environmental cost by reducing the workers and domain licenses in the LiteSpeed License Manager.
Here are the steps to reduce the LiteSpeed Webserver worker and domains for an environment:
Step 1: Choose the WordPress Standalone environment where you want to decrease the LiteSpeed Webserver worker. In this example, we selected AccuWeb.us-accuweb.cloud.
Step 2: Go to the App Server and click on the Add-Ons icon.
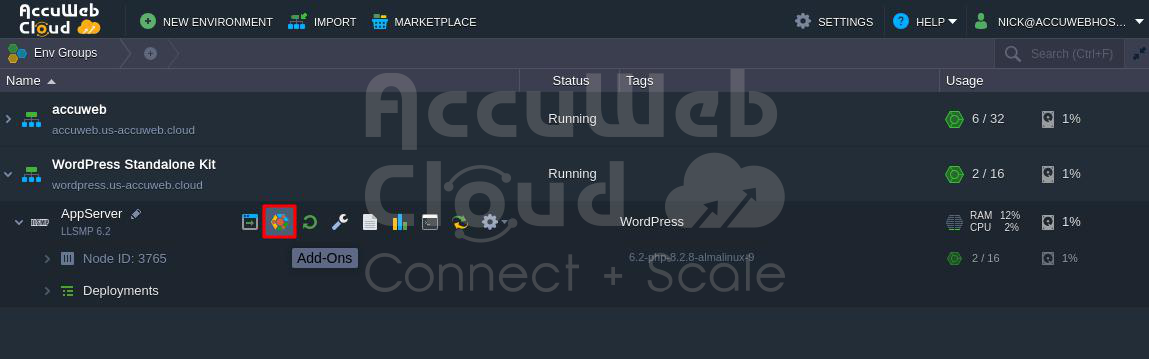
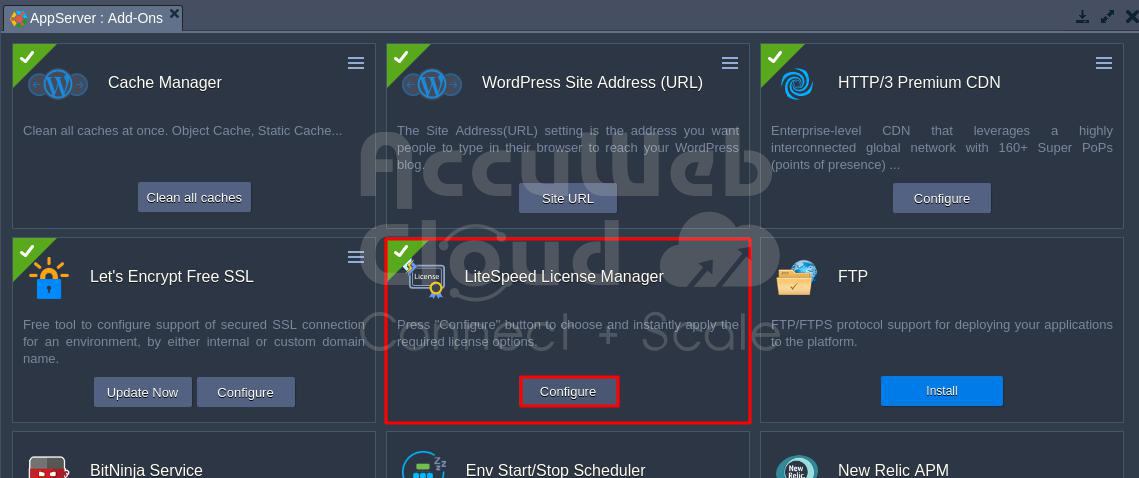
Step 3: In the AppServer Add-Ons window, go to the LiteSpeed License Manager and click on the Configure option.
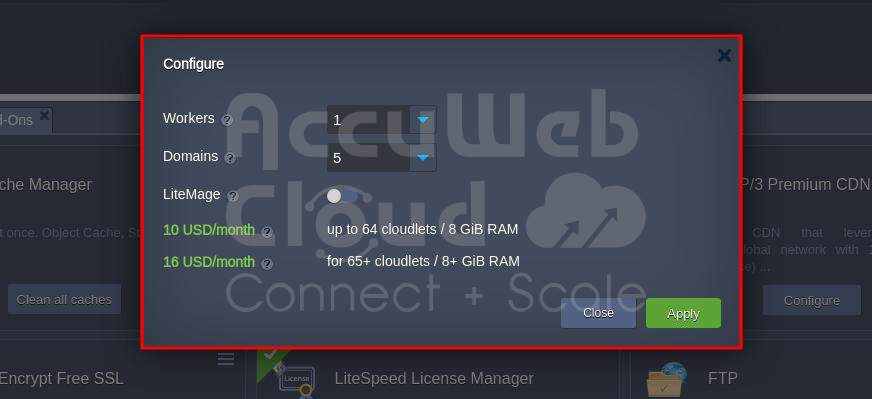
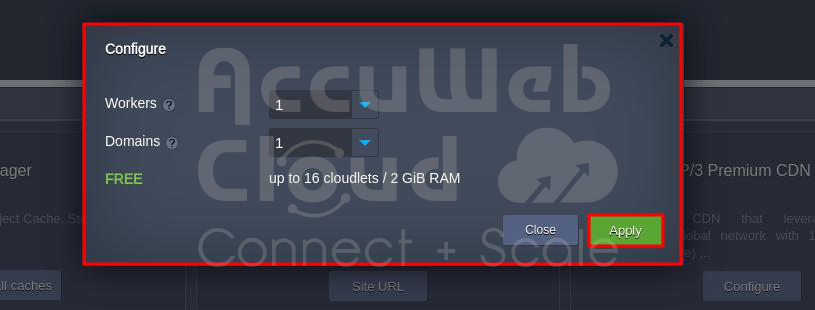
Step 4: In the Configure window, choose the Workers and domain based on your needs. If you want to host WordPress on a single domain, select one in the Domains section to reduce the cost of the LiteSpeed license.
If you plan to host WordPress on multiple domains, select 2 or more workers in the Workers field and unlimited in the Domains field. The cost will be adjusted accordingly.
Step 5: Once you’ve chosen the appropriate options in the Workers and Domains fields, click on the Apply button.
Step 6: Click on the Yes button to apply the license update in the Environment.
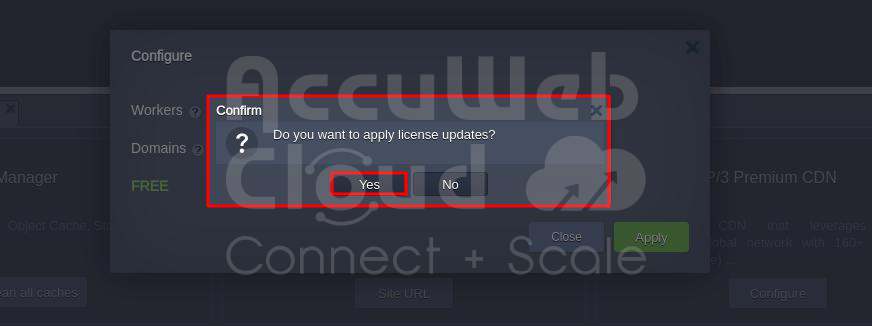
Step 7: After clicking Yes, the license will be updated in the environment, and you’ll receive a confirmation on the screen.

4. Disabled the HTTP/3 Premium CDN for the environment
AccuWeb Premium CDN is a service you have to pay for. The cost depends on your usage and can vary based on your country and chosen service providers. To lower the environmental cost, you can turn off the Premium CDN Service.
Here’s how to disable the HTTP/3 Premium CDN service:
Step 1: Pick the WordPress Standalone environment where you want to make changes. In this example, we chose AccuWeb.us-accuweb.cloud.
Step 2: Go to the App Server and click on the Add-Ons icon.

Step 3: In the AppServer Add-Ons window, find HTTP/3 Premium CDN and click on the three horizontal lines.
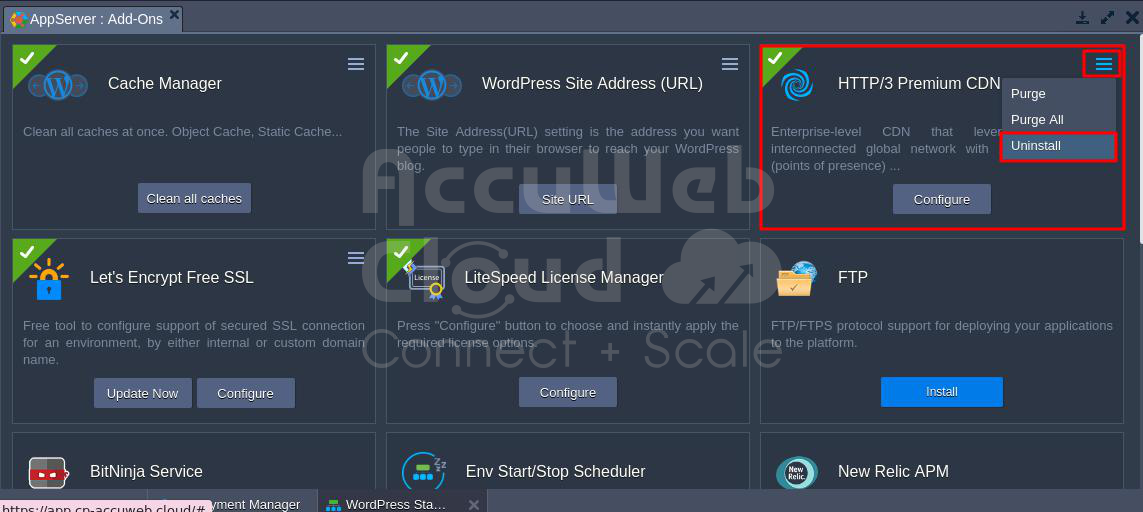
Step 4: Click Uninstall to disable the HTTP/3 Premium CDN Service.
Step 5: After clicking Uninstall, a confirmation window will appear. Click on the Yes button to uninstall and disable the Premium CDN.

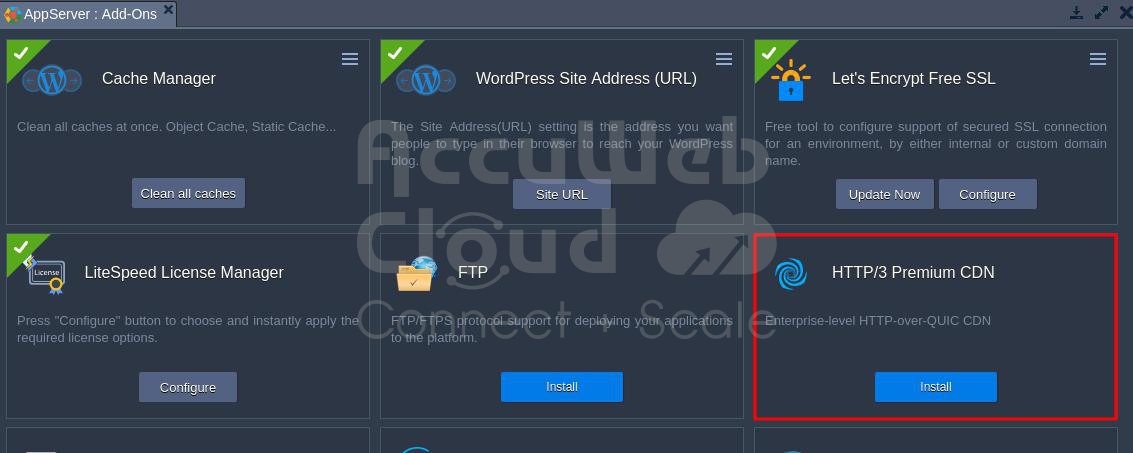
Step 6: Once uninstalled, you’ll see the option to install HTTP/3 Premium CDN service again. You can install the CDN service at any time.
Conclusion
To reduce the billing of an environment with multiple nodes, consider optimizing resource usage, scaling down underutilized instances, and leveraging cost-effective configurations. Evaluate the necessity of premium features like public IPs, and choose them judiciously based on actual requirements.
Monitor your resource usage patterns regularly, adjust scaling policies accordingly, and explore any available discounts or reserved instances provided by your cloud service provider. Adopting a proactive approach to resource management and aligning expenses with actual needs can effectively minimize the overall billing for your multi-node environment.