How to Install the Jira Ticketing System With AccuWeb.cloud?
Jira ticketing system Software is a popular tool for managing projects. It helps you organize tasks and work on software development smoothly. You can use it with your team, create task lists, and see real-time reports.
Teams use Jira Software to plan, track, and release software. You can create task lists and assign them to team members. It also gives you real-time reports and visuals to help you work better.
This article will show how to install and set up Jira Software in Jelastic PaaS. We will use official Docker images from Atlassian. You’ll also learn to use a custom domain and secure the app with an SSL certificate.
Jira Installation
Here are the steps simplified:
Step 1: Log in to your AccuWeb cloud account.
Step 2: Click “MarketPlace” at the top of the screen.

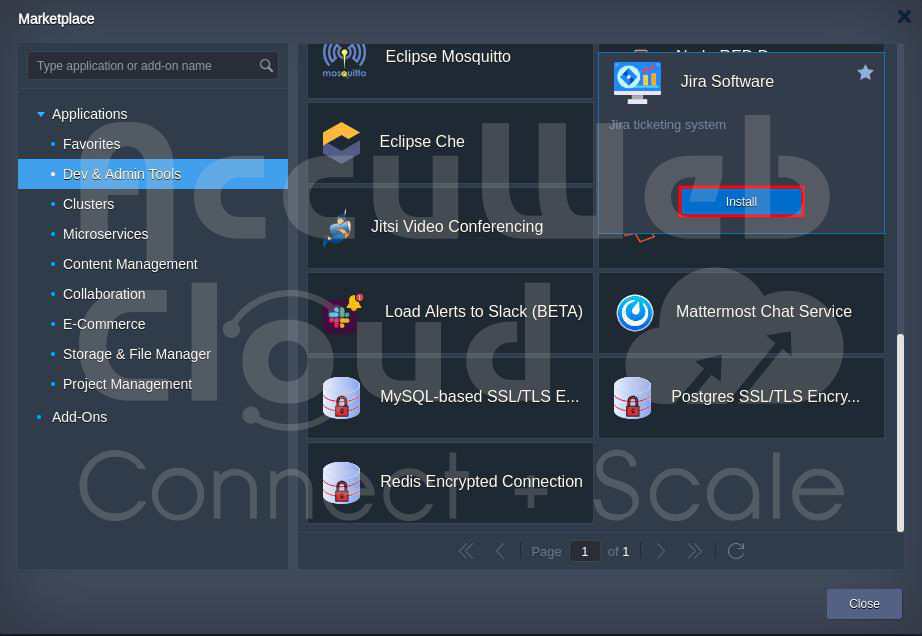
Step 3: In the Marketplace, go to “Application” and click on “Dev & Admin Tools,” then choose “Jira Software.”

Step 4: Click “Install” to install Jira Software.
Step 5: Pick the Jira version from the list in the installation window.

In the Environment field, you can enter the name you want to use to browse the Jira application. Here, we have entered accuwebtraining as an example. In the Display name, enter the name you want to display in the AccuWeb cloud environment.
Step 6: Click “Install” to start the Jira Software installation. Wait a few minutes for the installation to complete.
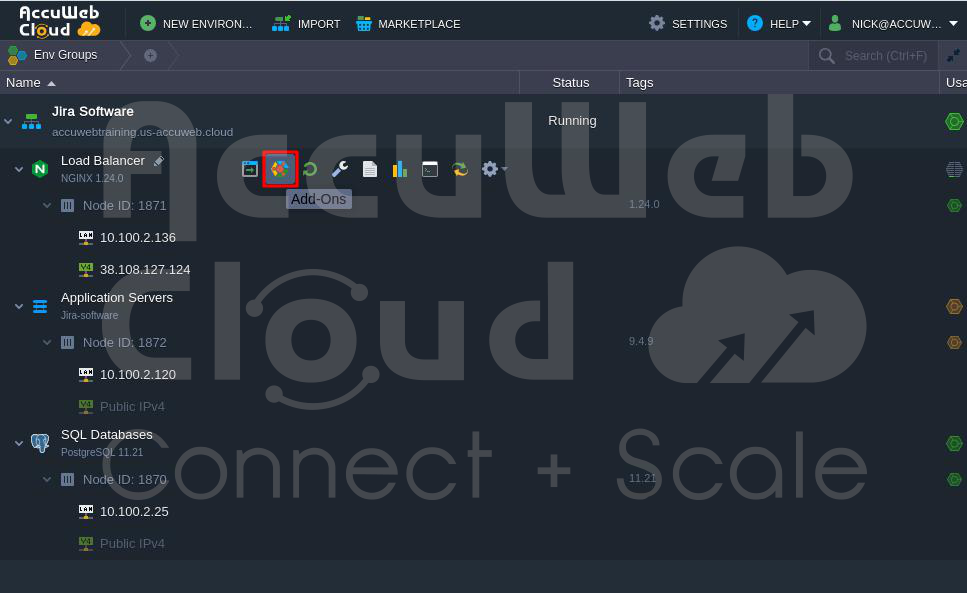
Note: After installation, three nodes are in the setup, including a load balancer with a public IP and SSL certificate. Jira uses PostgreSQL as its database.

Step 7: You’ll get a confirmation message once it’s finished. Save the login details and check your email for more info.

Step 8: Click “Open in Browser” to access Jira Software in your web browser. You’ll see a configuration page. Set it up according to your needs.

Jira Configuration:
Step 1: Change the default name “Jira” to your own in the next steps, like “Our Advanced Collaboration System.” After that, click on the Next button.

Step 2: Enter the License Key, which you get from Atlassian, in the “Your License Key” field. If you don’t have one, you can get a trial license by clicking the “generate a Jira trial license” link. Click “Next” to move forward.

Step 3: Administrator account details: You need to enter the admin account information here. Click on the Next button to move forward.

Step 4: Email configuration: If you have an SMTP server set up, you can configure it now. It can be your server or a popular service like Google or Yahoo. Just fill in the form with the required information. This is an example of mail server settings.

If you don’t have an SMTP service set up, you can skip the “Configure Email” process by clicking on the later option.

Step 5: Click “Finish” and go to the Jira Admin Settings to set things like Language and Avatar.

Step 6: Finally, the Welcome page for the dashboard appears.

Your Jira tracking system is now ready for your team to use. To move this application to a custom domain, follow the steps below.
Custom Domain Binding to Jira Environment
Step 1: Create a special record (A Record) for your custom web address and link it to the public IP address from the DNS zone. For example, here, our custom web address is jirateam.accuwebtraining.com, so to point it to the public IP address, we need to add the A record (jirateam) from the DNS zone. 
Step 2: Go to the “Add-Ons” section next to the load balancer.
Step 3: In the “Load Balancer Add-Ons” window, find “Let’s Encrypt Free SSL” and click “Configure.”

Step 4: Replace the default domain given by the platform, like “accuwebtraining.us-accuweb.cloud,” with your custom domain, such as “jirateam.accuwebtraining.com.” Then, click “Apply” to get a Let’s Encrypt SSL Certificate.

Step 5: Once the SSL certificate is issued and installed successfully, your application will restart and be ready to use with your custom web address, like https://jirateam.accuwebtraining.com.

Step 6: A pop-up window will ask you to approve updates to the base URL. Just click “Update Jira’s base URL.”

Step 7: You also need to fix a problem related to checking the health of your application due to URL differences. Click “Find out more” to go to the database re-index page.
Step 8: Jira needs a database re-index when you change application settings like the base URL. Just follow the recommendations and carry out the re-index procedure.
Conclusion:
Installing Jira ticketing system Software from the Marketplace is a clear and systematic process. Following the outlined steps, users can swiftly set up Jira Software to manage projects and enhance team collaboration. Whether configuring a custom domain or managing application settings, the installation process is designed to make Jira Software accessible and efficient for project management needs.