How to Change the WordPress Theme via phpMyAdmin?
WordPress themes are like the clothes your website wears. They determine how your site looks and feels, making them pretty important. A good theme makes your site look great and helps create a smooth and engaging experience for your visitors.
Sometimes, when plugins or themes are updated, issues may arise. If the theme code starts conflicting with other components like plugins or core WordPress, it can result in errors that prevent access to the WordPress admin area. In such situations, the only way to regain access to your WordPress admin area is to switch your WordPress theme via phpMyAdmin forcefully.
First, let’s Understand WordPress Themes:
Think of a theme as a style template for your website. It controls how your site appears to your visitors. Themes take care of colors, fonts, layout, and all the design elements that make your site unique. They help you create a website that matches your brand or personal style.
Why Themes Are Important:
- Define Your Website’s Look: Themes give your website its appearance. A good theme can make your site look professional and inviting.
- Enhance User Experience: Themes affect how easy it is for visitors to navigate your site. A well-designed theme ensures a smooth experience.
- Reflect Your Brand: Themes help you showcase your brand’s identity. Colors, fonts, and styles can all be customized to match your brand’s personality.
Let’s talk about how you can change your WordPress theme using phpMyAdmin:
Changing Your Theme via phpMyAdmin:
Review all the required steps for changing your WordPress theme using phpMyAdmin. Remember, this is a bit technical, so proceed with caution and make sure to back up your website before you start.
Step 1: Access phpMyAdmin
Log in to your web hosting account.
Find the phpMyAdmin tool. It’s usually in your hosting control panel.
Step 2: Select Your WordPress Database
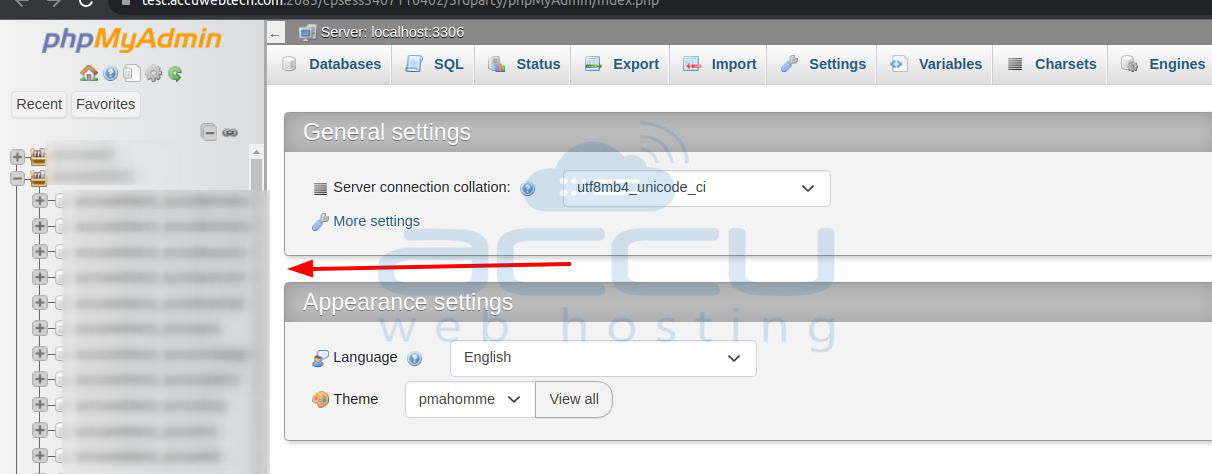
In phpMyAdmin, look for your WordPress database on the left sidebar and click on it. You can find your database name in the wp-config file.
Step 3: Locate the wp_options Table
Inside your WordPress database, find a table called “wp_options” (the table prefix ‘wp_’ may vary based on your WordPress installation).
Step 4: Edit the Theme Name
Within the “wp_options” table, search for rows named “template” and “stylesheet.”
Click on the “Edit” button (it usually looks like a pencil) next to these rows.
Step 5: Change the Theme Name
In the “option_value” field of both rows, replace the current theme’s name with the name of the new theme you want to activate. This name should match the folder name of the new theme in your “wp-content/themes” directory.
Step 6: Save Your Changes
After making the changes, click the “Go” or “Save” button to save the new theme name.
Step 7: Clear Cache
Clear the cache to see the changes if you use any caching plugins or server-side caching.
Step 8: Check Your Site
Visit your website to ensure the new theme is applied. You should see your website with the new theme if everything goes well.
Conclusion:
Changing your WordPress theme via phpMyAdmin might seem technical, but you can give your website a fresh look with these steps. Remember to be careful and back up your website before making any changes. Your website’s theme plays a significant role in how visitors perceive and interact with your site, so it’s worth getting it right.


