Horizontal Scaling options for your applications
With our platform, hosting your applications becomes very flexible. Besides automatically adjusting the size of your servers up or down (vertical scaling), you can also manually or automatically change the number of servers in your setup.
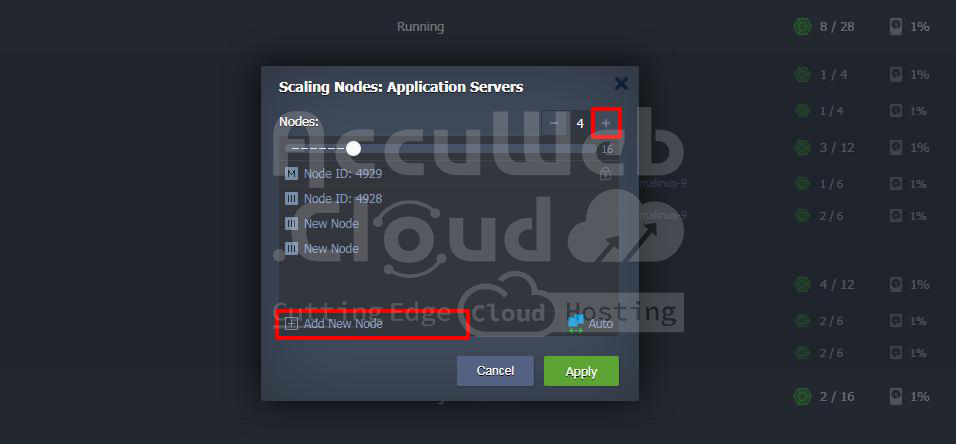
Manual scaling is easy. Open the environment settings and use the “+” and “-” buttons or type in the number of servers you want. You can also use a slider that pops up when you make changes.
Important Note
- You can set up automatic scaling based on how much traffic your applications get.
- You can use the first node you set up as a storage server for sharing data among all the servers.
- When you reduce the number of servers (scaling in), the last one you added is the first to go unless you pick a different one and remove it.
After that, you can choose how you want scaling to work from the options in the drop-down menu. For more details, check out the section below about Scaling Options and Horizontal Scaling Specific
Scaling Options
you can choose how new environments grow when you create them and modify this later using the setup tool:
- Stateless – This makes all new servers at once from a basic setup.
- Stateful – This copies the main server’s files one by one to the new servers.
The first way is quicker, but the second one copies all special setups automatically. When you make a new group of servers, all servers start at once to save time (even if you pick the stateful way, because no special setups are added yet).
If you pick the stateless way, remember that new servers won’t have some things:
- Deployments: Old projects won’t move over.
- Custom SSL: SSL setups won’t copy.
- Mount Points: Special mounts only move if you set up a special volume.
- Add-ons: The extra tools you added won’t be there.
The platform usually picks the stateful way for load balancers, application servers, and VPS stacks because it’s more reliable. But if you need to, you can change this for your servers anytime using the setup tool.
Horizontal Scaling Specifics
The most servers you can have in one group depends on your provider’s rules (usually it’s 16 servers). You can check how many you’re allowed in the Quotas & Pricing section > Account Limits
Each new server is put on a different computer to make sure they’re reliable.
Every group of servers has a name, which you can change if you want. If there’s more than one server in the group, the name shows how many there are (like “xN” where N is the number).
When you have a bunch of servers that are the same, you can control them all together. You can set them up, check their logs and stats, Restart & redeploy them.
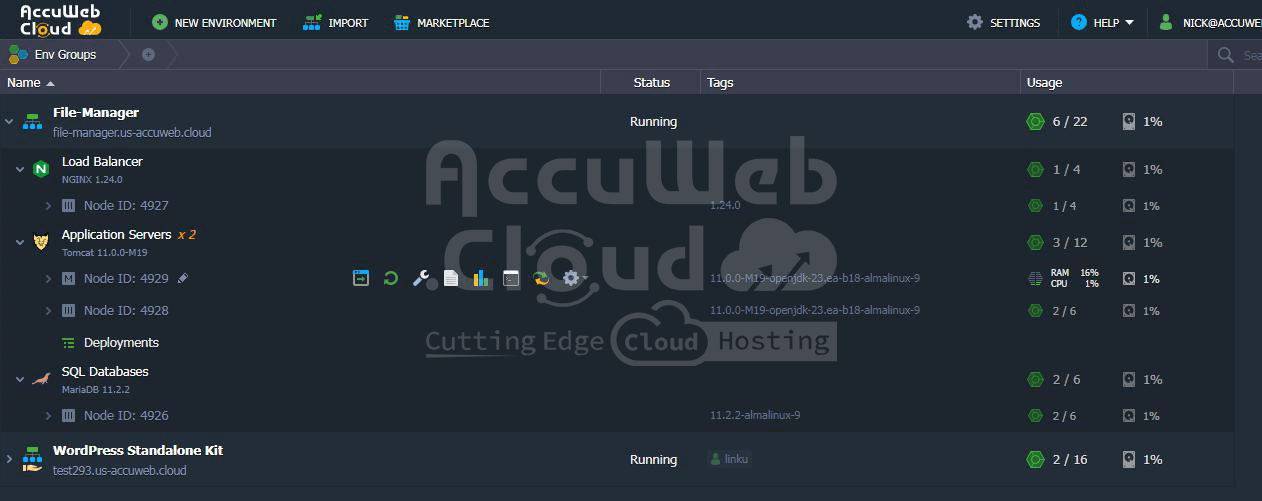
If you want to work on just one server, you can see a list of them by clicking on the group’s name. Each server is separate, with its ID. You can change its name too.
To make it easier to tell servers apart, you can give them labels. For example, you might want to call one “master” and the others “slaves” in a database group. Just click on the server’s ID and give it a new name.
- When you change how many servers you have of different types:
- Adding application servers also adds a load balancer.
- If you pick high availability for an application server, you can’t change how many load balancers you have (they’ll all go back to just one).
- Each VPS server gets its public IP address.
- You can only add Maven servers if it helps.
- Now you know how to add more servers easily and what happens when you do. You can also set up automatic scaling to handle big loads without wasting resources.
Managing Servers in a Group (Layer)
The platform makes it easy to handle servers in a group. You just say how many you want, and the platform adds or removes them for you. When you remove servers, it starts with the newest ones first.
If you want to delete a specific server, you can do it in two ways:
Go to the Horizontal Scaling section in the setup tool and click on the “Change Environment Topology” button next to the group of servers you want to change.
Use the “Scaling Nodes” form on the dashboard. You can find it by clicking “Additionally” and then “Scaling Nodes” next to the group of servers. You can also delete a specific server by clicking “Additionally” and then “Delete” next to that server on the dashboard.
In the “Scaling Nodes” window, you can:
Step 1. Add new servers by clicking the “+” or “Add New Node” buttons.
Step 2. Remove servers by clicking the “-“ or “Delete” buttons next to the server.
If you accidentally delete a server, you can undo it while you’re still setting things up. But once you’ve made changes, the server will be deleted for good.
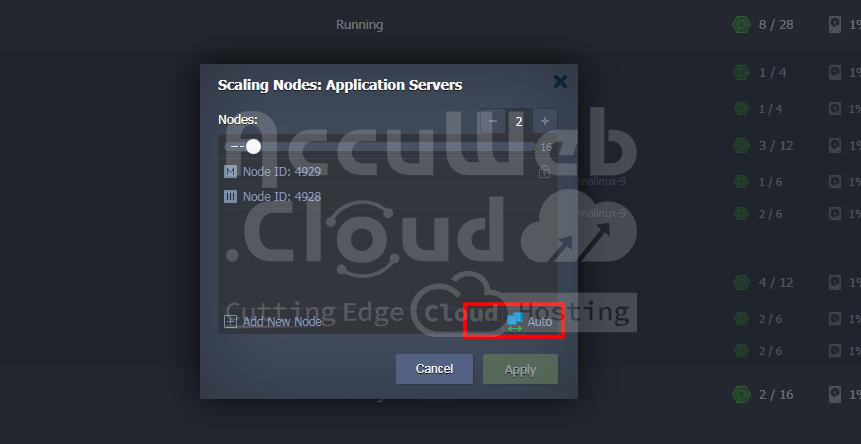
Step 3. At the bottom of the window, there’s a link to the Automatic Horizontal Scaling section.
If you make any changes in the form, you’ll need to confirm before you go to the next page.
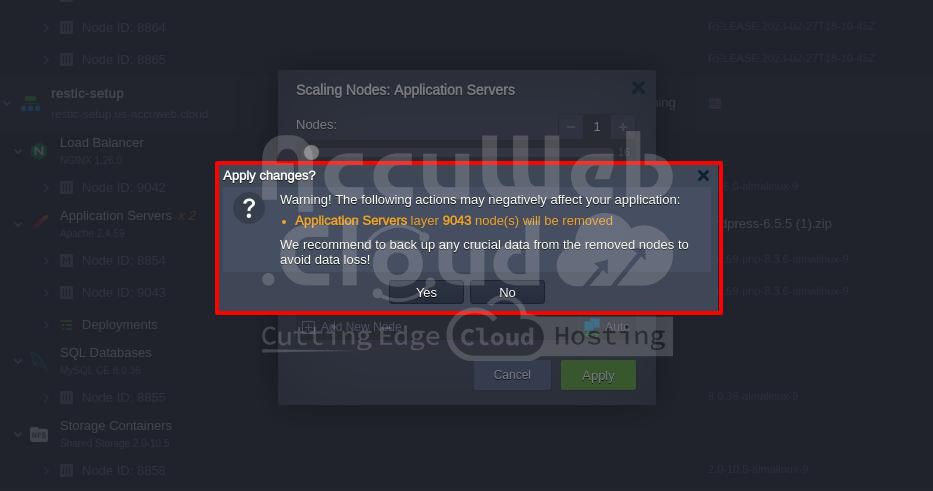
Step 4. When you apply changes, the platform will let you know if anything might cause problems. This includes restarting servers, deleting groups or individual servers, and affecting any shared files.
Before you make any changes, make sure it won’t cause problems for your applications and that you have backups of any important data from the servers you’re removing.


