Deployment Hooks
A hook, also known as a webhook, is a way to add your own code to a standard process to make changes. On a platform, this lets you run your own scripts before or after deploying an application. For example, you can set up hooks for Maven build and Golang application servers to do things before and after building your project.
Now, let’s see how to use hooks on the platform and look at some useful examples with clear instructions.
Hooks Management
Hooks are a part of the deployment process and can be found in an expandable section on the dashboard form. To manage hooks, follow these steps:
Go to the application deployment dialog using one of these options:
Deployment Manager
Deployment buttons for an application server
Step 1: In the opened frame, choose the deployment source type and expand the Hooks section.
Click either the Pre or Post button to add your code, which will run just before or immediately after deployment.
Step 2: Enter your hook code in the editor window. You can use any programming language, but make sure the right interpreter is installed on the target container.
Click Apply when done. Now you can deploy your application.
Step 3: After a successful deployment, click the Show Logs button in the dashboard notification to see detailed responses on the operations performed.
Click the Show Logs button to view the error details in the deployment action log (hooks.log file, accessible through the Logs section for the server).
Hooks Use Cases
Hooks offers many opportunities for developers to automate routine tasks and make deploying applications smoother.
For example, here are some common tasks you can automate with hooks:
Pre-deploy hooks (before deploying the application):
- Check if all requirements are met
- Install necessary software beforehand
- Prepare folders for application files
- Log important data
Post-deploy hooks (after deployment):
- Restart the application server
- Install project dependencies
- Customize the application further
- Log additional data
Here’s a simple example of creating your own log file using hooks:
Step 1: Start deploying your project using any method you prefer, like the default accu-data.zip archive from a deployment manager.
Step 2: Open the Hooks section, select the Pre hook, and add this code to the editor:
echo "$(date) - deployment start" >> ~/mylog
if ! grep -q "$(pwd)/mylog" /etc/jelastic/redeploy.conf; then
echo "$(pwd)/mylog" >> /etc/jelastic/redeploy.conf
fi
This code adds a line to the mylog file (automatically created in the home directory if it doesn’t exist) to mark the start of deployment with a timestamp. It also checks if the custom log file is listed in redeploy.conf and adds it if not, ensuring it’s retained during container redeployment.
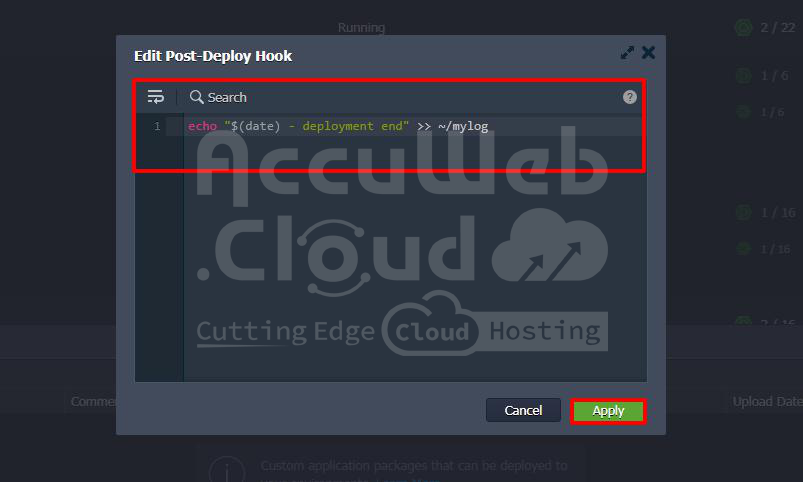
Step 3: For the Post hook, add this code:
echo "$(date) - deployment end" >> ~/mylogThis logs the end of deployment.
Step 4: Deploy your application and check both mylog and redeploy.conf files to confirm that the hooks executed successfully.
As you can see, these scripts function as expected, recording the start and end times of deployment and ensuring data integrity during redeployment.


