AccuWeb.Cloud Platform Welcome Tutorial
When you first get into the dashboard, the app starts a little welcome tutorial. In this guide, we will go through the steps to deploy your first application and give you an overview of the main features and functionalities. In just a few minutes we will complete it entirely, and provide a great starting point of using our platform.
You can manually access this tutorial at any time by going to the Help > Tutorial menu.
Let’s go over each tutorial step by step.
1. “The Benefits of PaaS,” an introduction presentation outlining the platform’s salient features, opens the session.
Hover your cursor over any position in the list to see an explanation image for that place. If you click on the point, more thorough information can be found on the corresponding documentation page.
Hovering over any point reveals the associated illustration; clicking on it will take you to the relevant documentation page.
2. See “Build Your Application Topology,” the second slide, for information on creating the topology of your application using platform components. See the “Concept & Terminology” paper for further information.
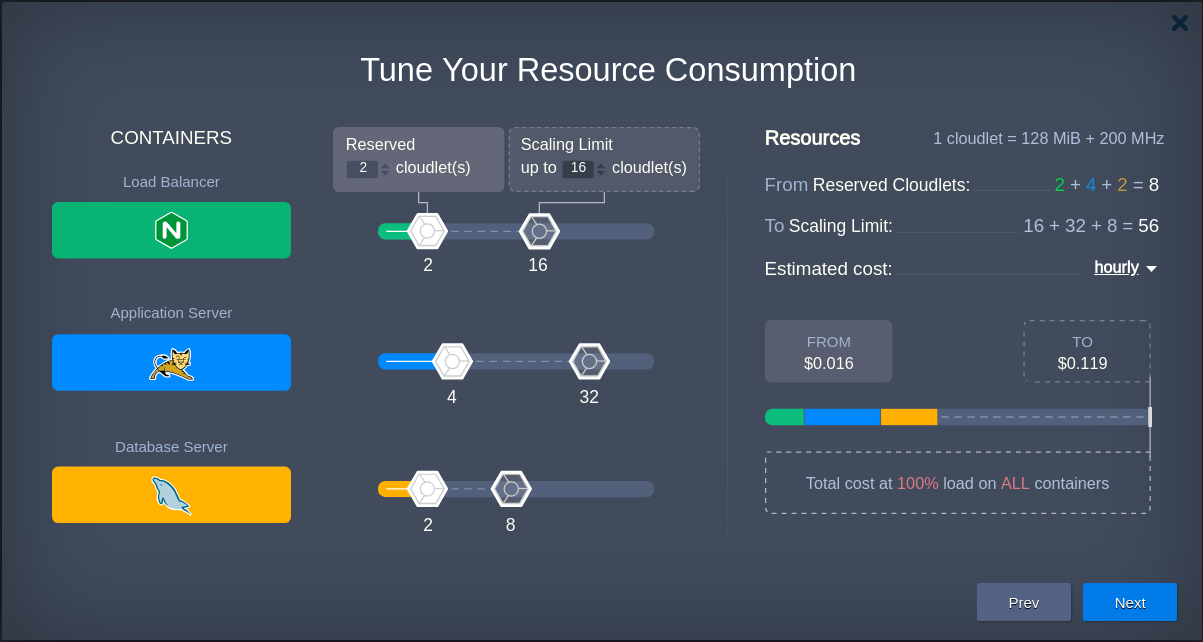
3. The “Tune Your Resource Consumption” section then goes on to show how resources are assigned to instances and describes the automatic calculation of the anticipated price.
Based on hourly, daily, and monthly prices, the platform automatically shows the expected cost for the topology that is now defined. These choices are available through the drop-down menu that is indicated in the above image.
4. In comparison to the models of other cloud vendors, the platform’s usage-based pricing model is more efficient, as explained in the last slide, “Enjoy Pricing Advantages“.
5. Upon completion of the presentation, the topology wizard launches automatically.
If necessary, you can configure your new environment using the parameters provided in the topology wizard. However, for this tutorial, no specific configurations are required, so we recommend following the hint and clicking “Create” directly.
6. Give it a moment, as your environment is set up. You can keep an eye on the status of the processes in the Tasks panel during this period.
7. The tutorial will take you immediately to the deployment manager section after the process is complete. A button that is highlighted will allow you to launch the “Hello World” application by default. To continue, click on it.
8. Select your recently created Environment from the dropdown menu in the deployment box that appears, then click the Deploy button.
9. We ask that you kindly wait while the application is deployed.
Fantastic! You are now prepared to use your first application. To view it in a new browser tab, click the underlined “Open in Browser” button.
The basic principles of hosting using the platform are covered in just a few minutes during the full tour.


