Remote File Access via WebDAV
Building a website can involve a lot of back-and-forth updating content. That’s where Web-based Distributed Authoring and Versioning (WebDAV) comes in. Think of it as a special tool that lets you edit your website files directly from your web browser, no complex setups are needed. It works by adding some features to the regular HTTP protocol (the one websites use to load pages). This makes accessing and managing your website files a breeze!
WebDAV is built on top of the existing HTTP protocol, which powers most websites. This allows applications built with WebDAV to benefit from features like strong authentication (secure logins), secure connections (SSL encryption), and caching (faster loading times). Additionally, WebDAV uses XML for communication, allowing for future expansion without breaking existing systems.
Our platform supports WebDAV, letting you create, change, copy, and move files on your server directly from your web browser. You can also manage entire directories, all through familiar HTTP/HTTPS connections. This provides free, instant, and secure access to your application files from anywhere with an internet connection.
Creating an Environment
1. Sign in to your PaaS account.
2. Once you’re on the platform dashboard, locate and click the “Create environment” button.
3. In the “Environment Topology” dialog box, select your desired application server (e.g., Tomcat 7 or 6). Next, enter a name for your environment, such as “webdavtest“.
Your environment will be created shortly, usually within just a minute.
Upload Java Package
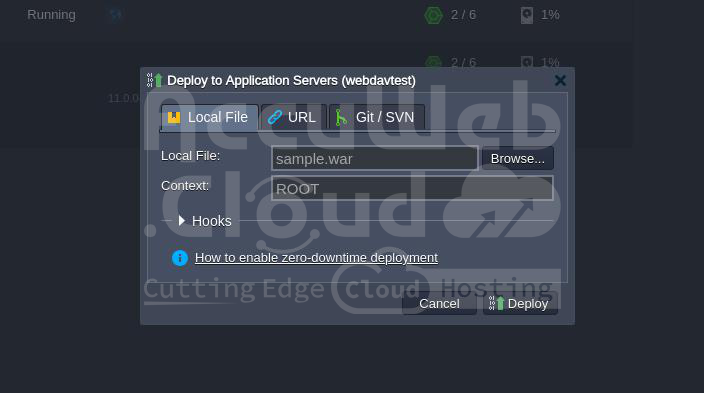
1. Go to the Deployment Manager.
2. Select your Java WAR package and initiate deployment by clicking the “Deploy” button.
Open your application in a web browser to ensure that everything is working correctly.
Configure Tomcat
Tomcat implements the WebDAV specification using the WebDAV Servlet, which is included with all standard Tomcat distributions. Follow these steps to configure and test your WebDAV connection:
1. Click the “Config” button for Tomcat.
2. Tomcat already includes a WebDAV Level 2 servlet. To enable your Tomcat WebDAV connection, add the following configuration to the `web.xml` file (located in the server directory):
<servlet>
<servlet-name>webdav</servlet-name>
<servlet-class>org.apache.catalina.servlets.WebdavServlet</servlet-class>
<init-param>
<param-name>debug</param-name>
<param-value>0</param-value>
</init-param>
<init-param>
<param-name>listings</param-name>
<param-value>true</param-value>
</init-param>
<!-- The following for read-write access -->
<init-param>
<param-name>readonly</param-name>
<param-value>false</param-value>
</init-param>
</servlet>
<servlet-mapping>
<servlet-name>webdav</servlet-name>
<url-pattern>/webdav/*</url-pattern>
</servlet-mapping>
3. Ensure that only authorized users can access WebDAV within your context. Navigate to the `tomcat-users.xml` file and create a new user with designated roles. For example:
<tomcat-users>
<user name="test" password="tomcat" roles="role1" />
</tomcat-users>
4. Define the role you have just created in the `<auth-constraint>` section of the `web.xml` file:
5. Save the changes made to the `web.xml` file and restart Tomcat to apply the configurations.
Connect to Server
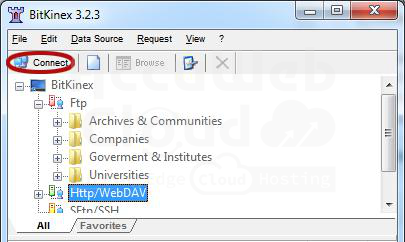
1. Create a new connection using any desktop client for WebDAV (we’ll use BitKinex as an example).
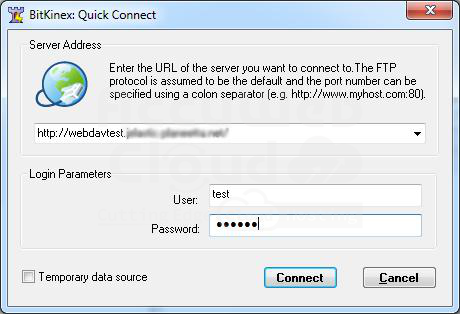
2. Enter the URL of your server (e.g., `http://{your_env_name}.{hoster_domain}/{context}/webdav`), and specify the login and password for your Tomcat user (in our case, the credentials are `test/tomcat`).
3. Once connected, you’ll find your server’s files readily accessible. You can then edit, update, and add new files as needed with ease.
Enjoy using WebDAV with AccuWeb.Cloud PaaS!


