
How to Secure SSH Access to Your VPS?
If your VPS is exposed to the internet, chances are bots are already scanning it, trying default usernames and passwords on SSH or RDP within minutes of it going live. Most successful attacks on VPS servers don’t happen because someone found a clever exploit; they happen because basic access controls were never locked down. The good news is that securing SSH doesn’t take long, and a handful of changes can shut down almost all of the common attack attempts.
Step 1: Change the Default SSH Port
Port 22 is the first thing every bot tries. Moving SSH to a non-standard port won’t stop a targeted attacker, but it filters out the vast majority of automated scans instantly.
Open the SSH config file:
sudo vi /etc/ssh/sshd_config
Find the line that says #Port 22, uncomment it, and change it to something else, for example:
Port 2222
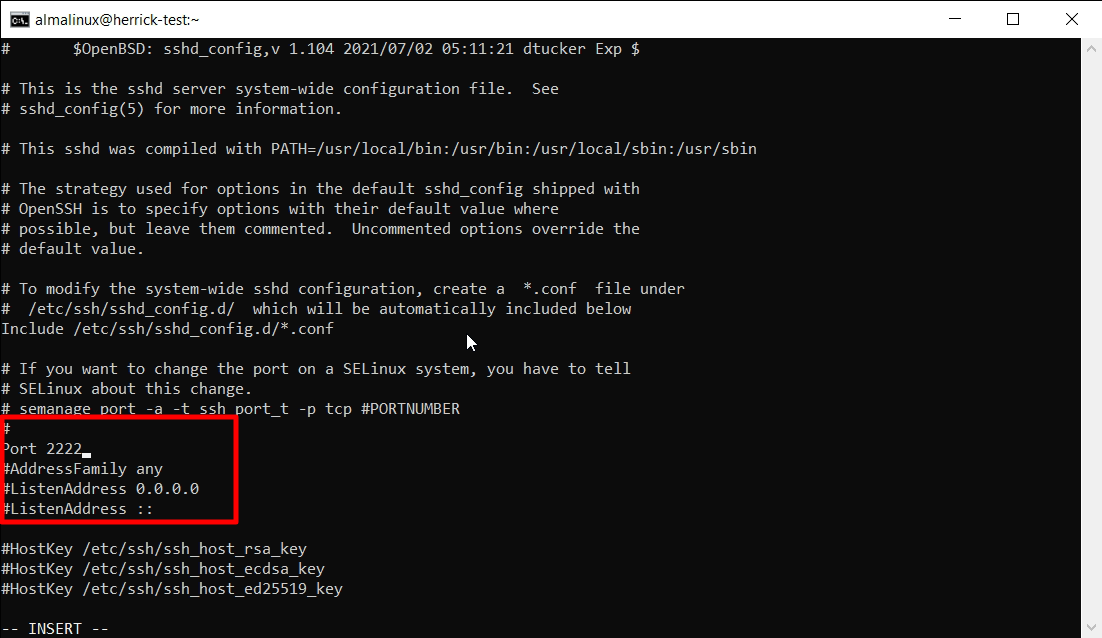
Save and exit, then restart SSH:
sudo systemctl restart sshd
Important, before you disconnect, make sure your firewall allows the new port (covered in Step 4), otherwise you’ll lock yourself out.
Step 2: Disable Root Login
Letting root log in directly over SSH is risky, if that password or key is ever compromised, the attacker has full access immediately. Instead, log in as a regular user and use sudo when you need elevated access.
In the same config file:
sudo vi /etc/ssh/sshd_config
Find this line and set it to no:
PermitRootLogin no
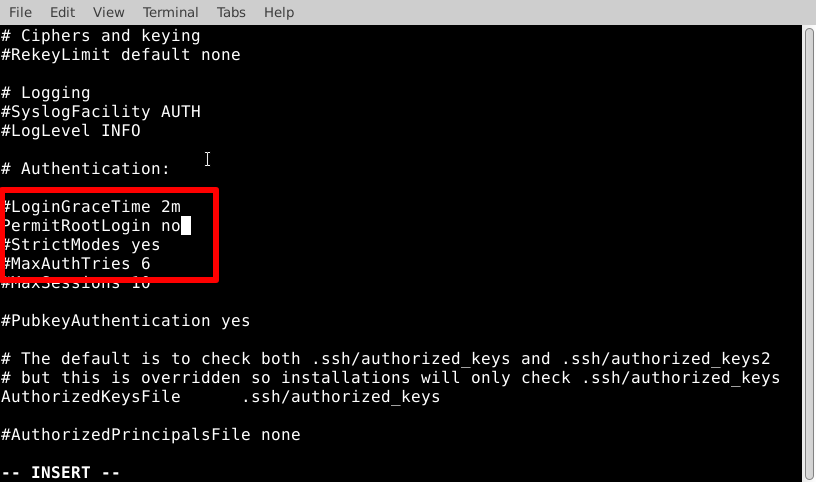
Restart SSH again:
sudo systemctl restart sshd
Make sure you have a non-root user with sudo privileges set up first. If you need to create one:
sudo adduser yourusername
sudo usermod -aG wheel yourusername
Step 3: Switch to SSH Key Authentication
Passwords can be guessed or brute-forced. SSH keys are far harder to crack and are the standard way to secure production servers.
On your local machine, generate a key pair if you don’t already have one:
ssh-keygen -t ed25519 -C “[email protected]”
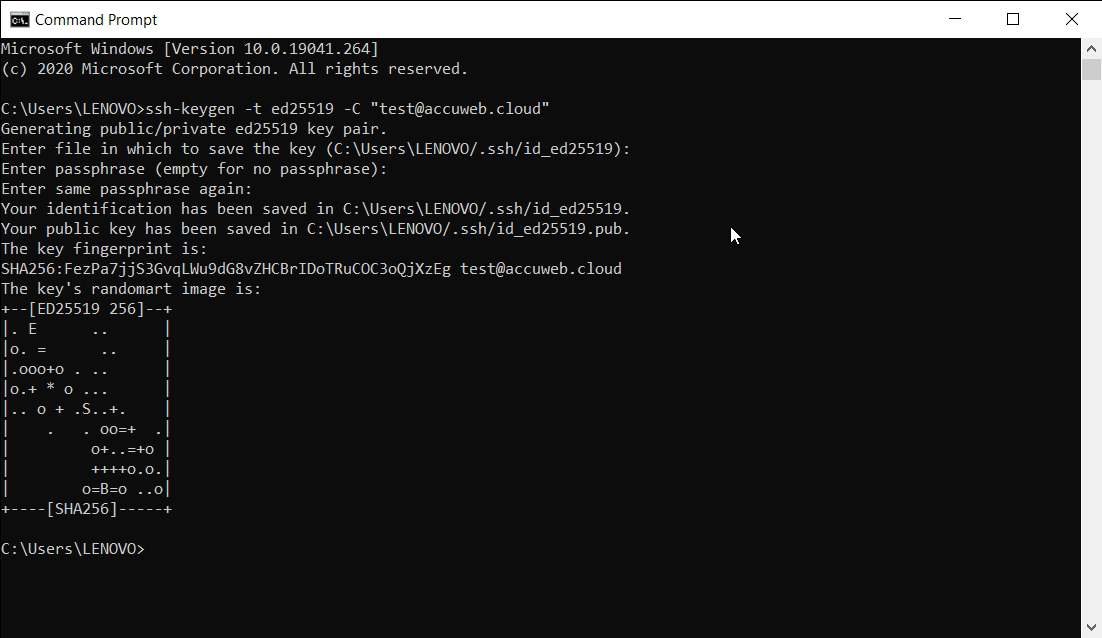
Copy your public key to the VPS:
ssh-copy-id -p 2222 yourusername@your_server_ip
Once you’ve confirmed you can log in using the key, disable password login entirely. Back in the config file:
sudo vi /etc/ssh/sshd_config
Set:
PasswordAuthentication no
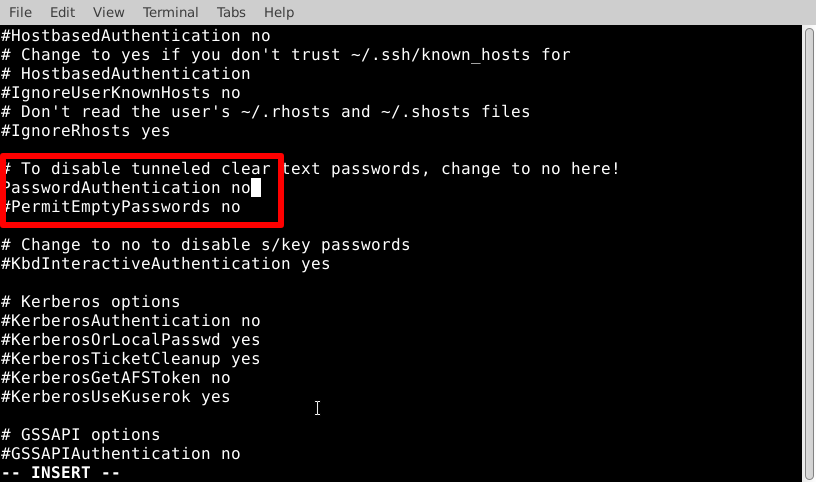
Restart SSH:
sudo systemctl restart sshd
From this point on, only devices with the correct private key can log in, no amount of password guessing will work.
Step 4: Configure the Firewall
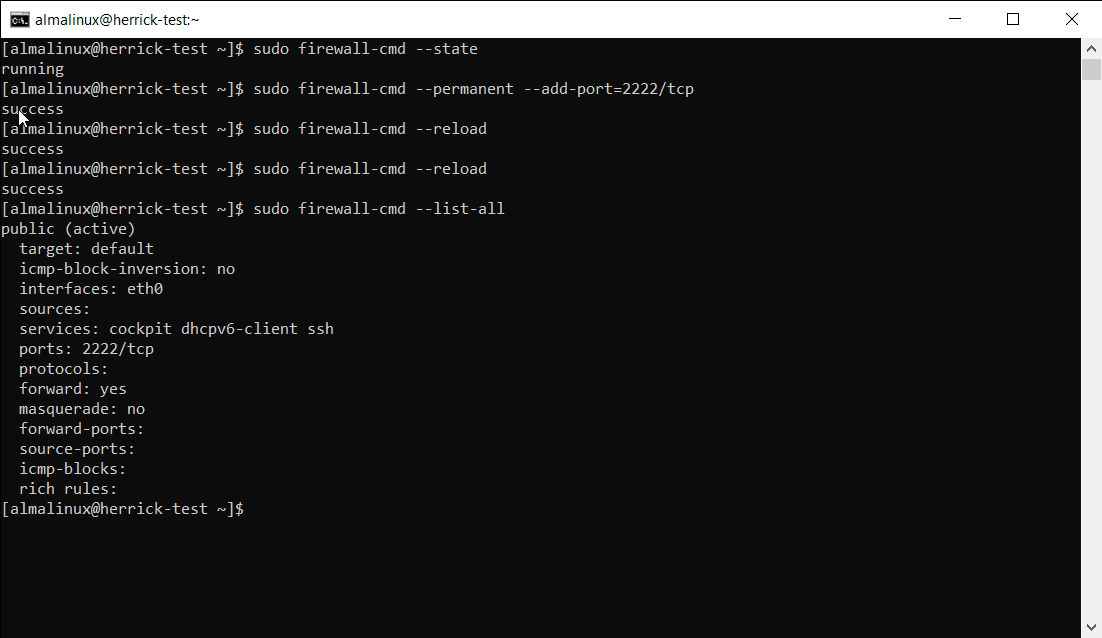
AlmaLinux uses firewalld by default. You need to allow your new SSH port and make sure nothing unnecessary is exposed.
Check current status:
sudo firewall-cmd –state
Allow the new SSH port:
sudo firewall-cmd –permanent –add-port=2222/tcp
Remove the default port 22 if it’s open:
sudo firewall-cmd –permanent –remove-service=ssh
Reload to apply changes:
sudo firewall-cmd –reload
Verify what’s currently allowed:
sudo firewall-cmd –list-all
Step 5: Install Fail2Ban
Fail2Ban automatically blocks IP addresses that show repeated failed login attempts, essentially shutting the door on brute force attacks in real time.
Install it:
sudo dnf install epel-release -y
sudo dnf install fail2ban -y
Enable and start the service:
sudo systemctl enable fail2ban
sudo systemctl start fail2ban
Create a local config so your settings survive updates:
sudo cp /etc/fail2ban/jail.conf /etc/fail2ban/jail.local
sudo vi /etc/fail2ban/jail.local
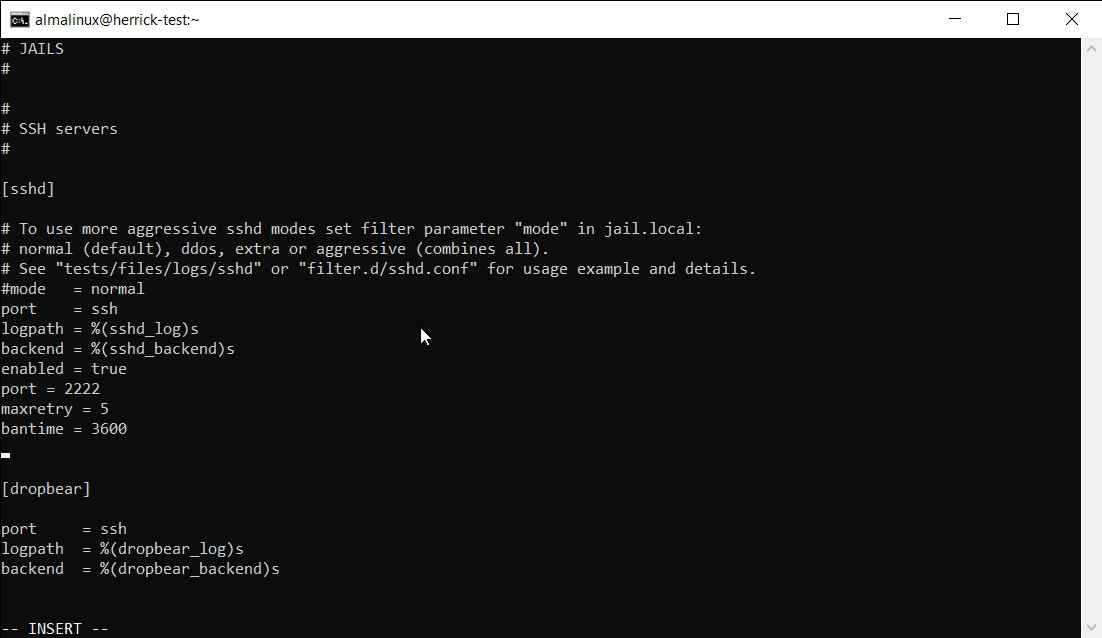
Under the [sshd] section, make sure it’s enabled and update the port to match your custom SSH port:
[sshd]
enabled = true
port = 2222
maxretry = 5
bantime = 3600
Restart Fail2Ban to apply:
sudo systemctl restart fail2ban
You can check banned IPs anytime with:
sudo fail2ban-client status sshd
Step 6: Limit Login Attempts and Idle Sessions
A couple of small additions in the SSH config go a long way.
sudo vi /etc/ssh/sshd_config
Add or update these lines:
MaxAuthTries 3
ClientAliveInterval 300
ClientAliveCountMax 2
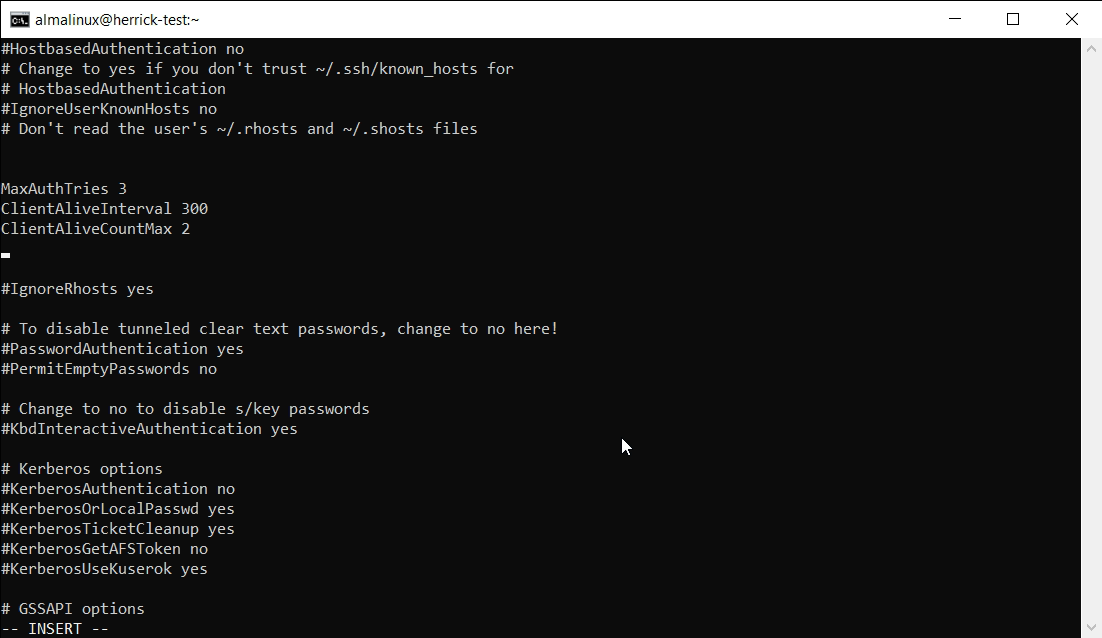
This limits how many login attempts are allowed per connection and automatically disconnects idle sessions after a few minutes of inactivity.
Restart SSH one more time:
sudo systemctl restart sshd
Conclusion
None of these steps take more than a few minutes individually, but together they close off almost every common attack path bots and attackers rely on. Changing the port, disabling root login, switching to key based authentication, and adding Fail2Ban will handle the vast majority of threats your VPS will ever face. Once these are in place, take a moment to test everything from a fresh terminal session before closing your current one, just to make sure you haven’t locked yourself out.