
How to Set Up Automatic Backups and Restore Them on Accuweb.Cloud?
Manual backups are great when you need one right before a big change, but let’s be honest, nobody remembers to take a backup every single day. That’s where scheduled backups come in handy. You set it up once, tell it how often to run, and it just takes care of itself from there, no need to remember, no need to babysit it.
Here’s how you can schedule automatic backups for your instance on Accuweb.Cloud, and how to restore your instance once you need to roll back to one.
Scheduling a Backup
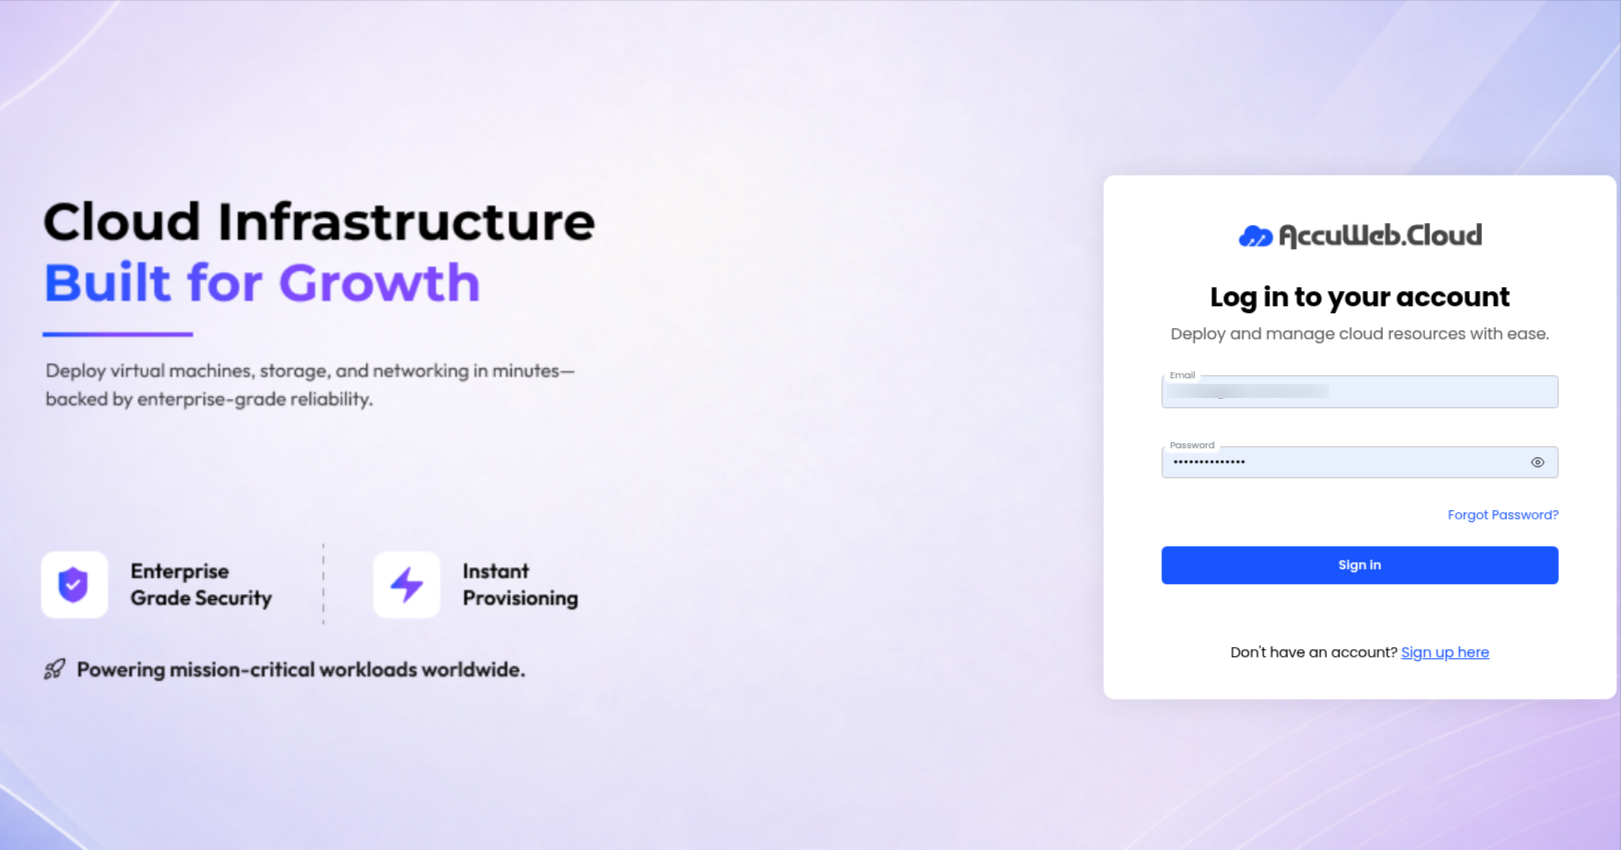
Step 1: Log in to your dashboard
Go to https://manage.accuweb.cloud/ and log in with your account credentials.
Step 2: Go to Instances
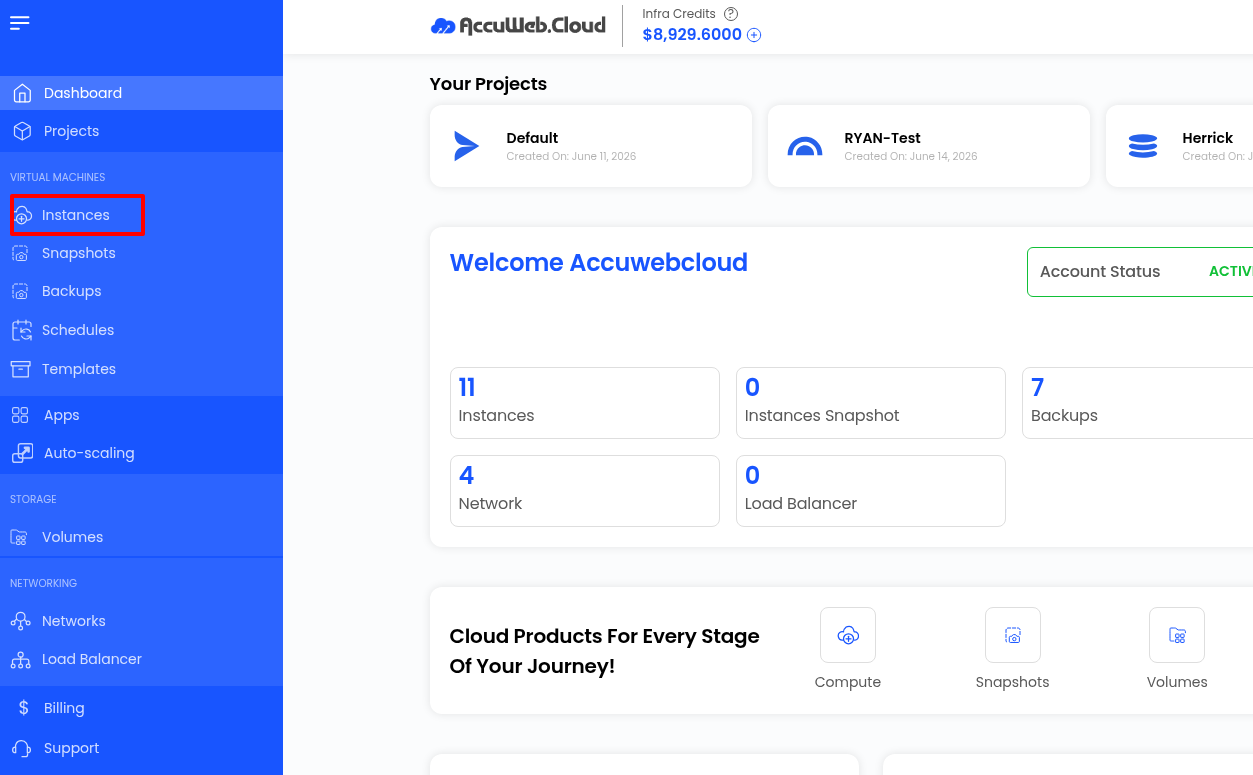
From the left-side panel of your dashboard, click on Instances.
Step 3: Select the instance
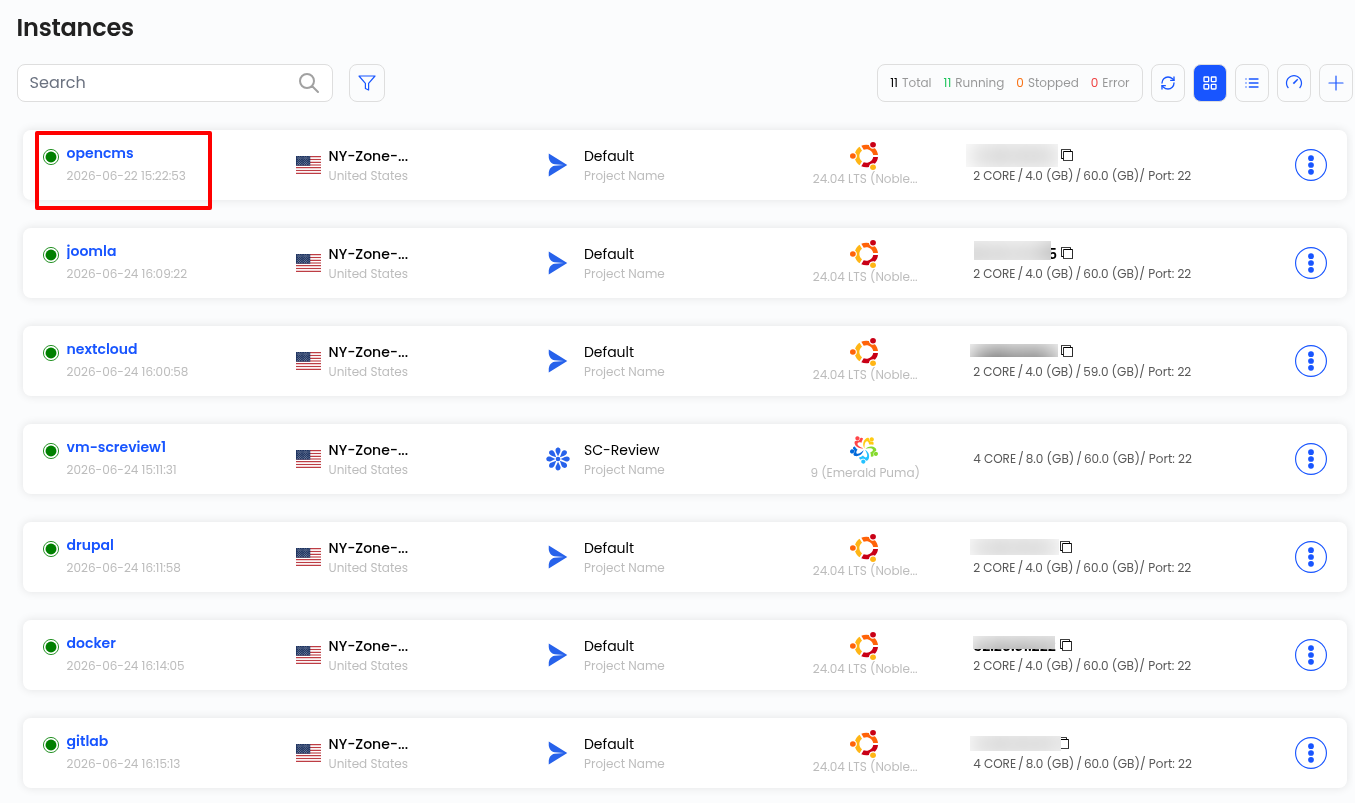
Choose the instance for which you want to set up scheduled backups from the list.
Step 4: Open the Backups tab
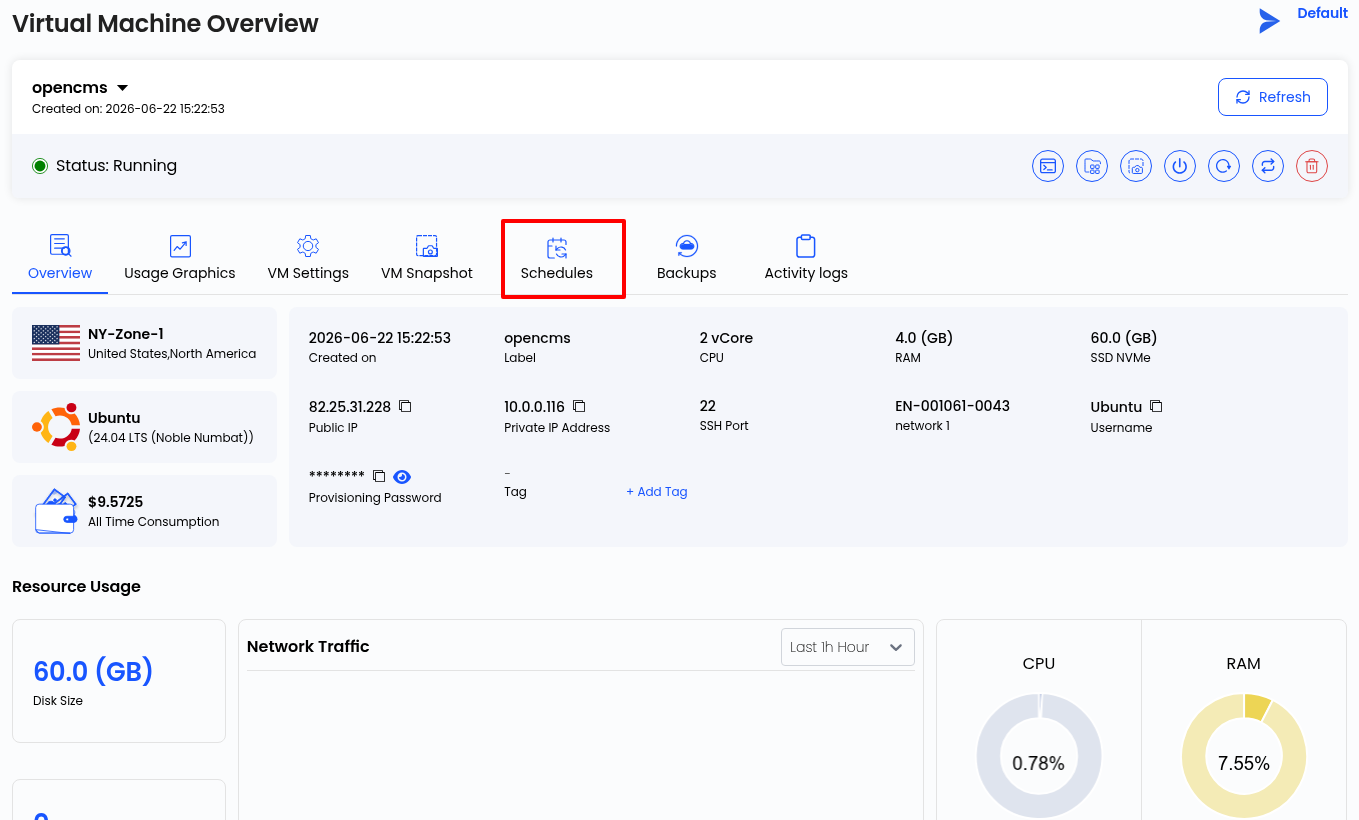
On the instance overview page, click on Schedules.
Step 5: Click on “Virtual Machine Backup Schedules”
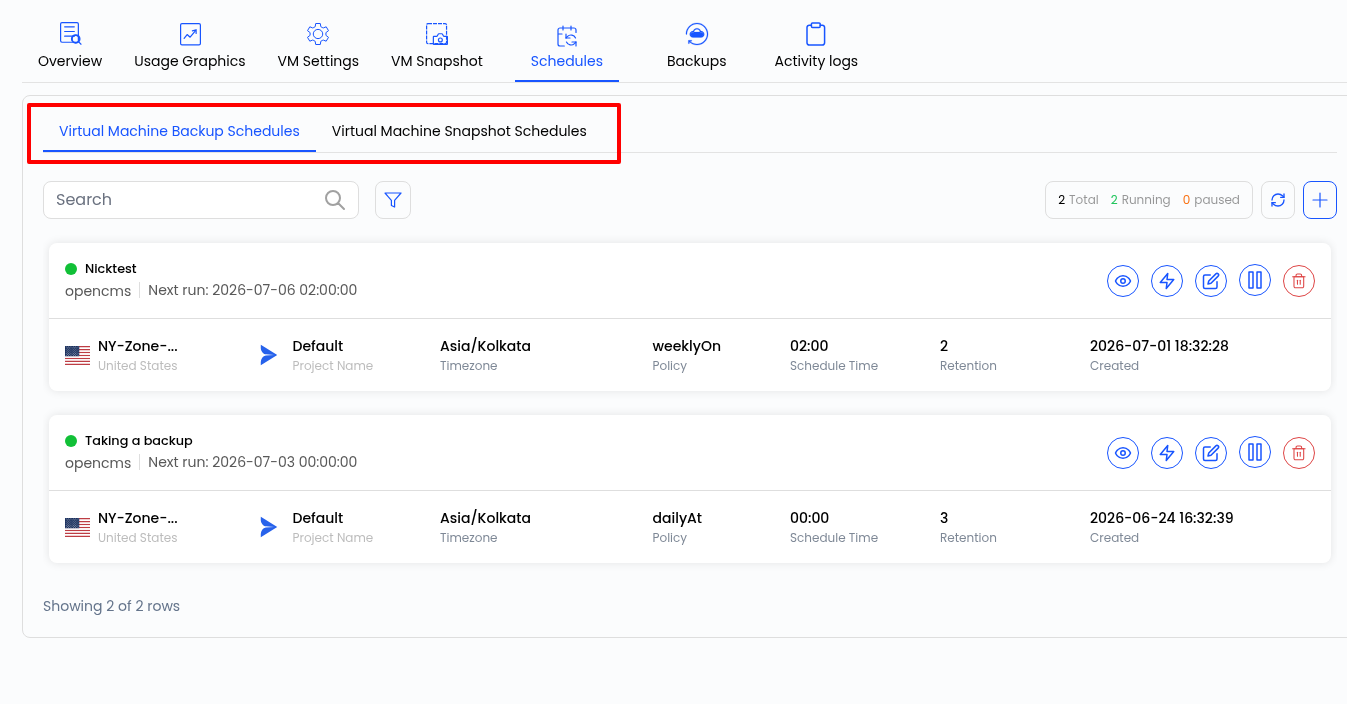
Step 6: Create a New Backup
Here, you’ll see a list of all the backups taken for this instance so far. To create a new one, click on the “+” icon.
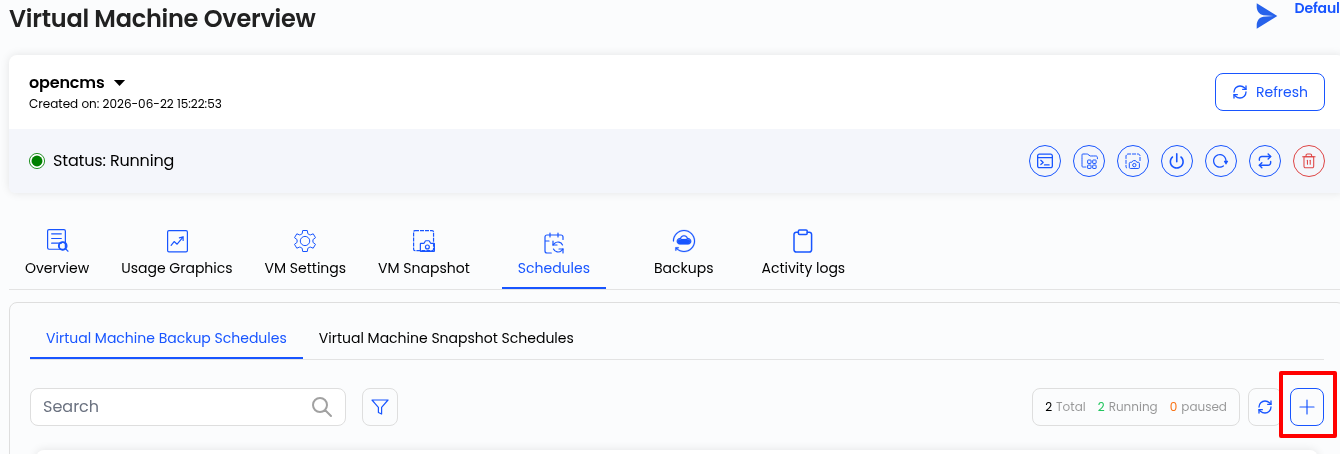
Step 7: Configure Backup Details
On the backup creation page, select the following:
- The Data Center Region where you want the backup to be created
- The Project (if you’ve created one) or select Default if no project has been assigned
- The Instance for which you want to take the backup
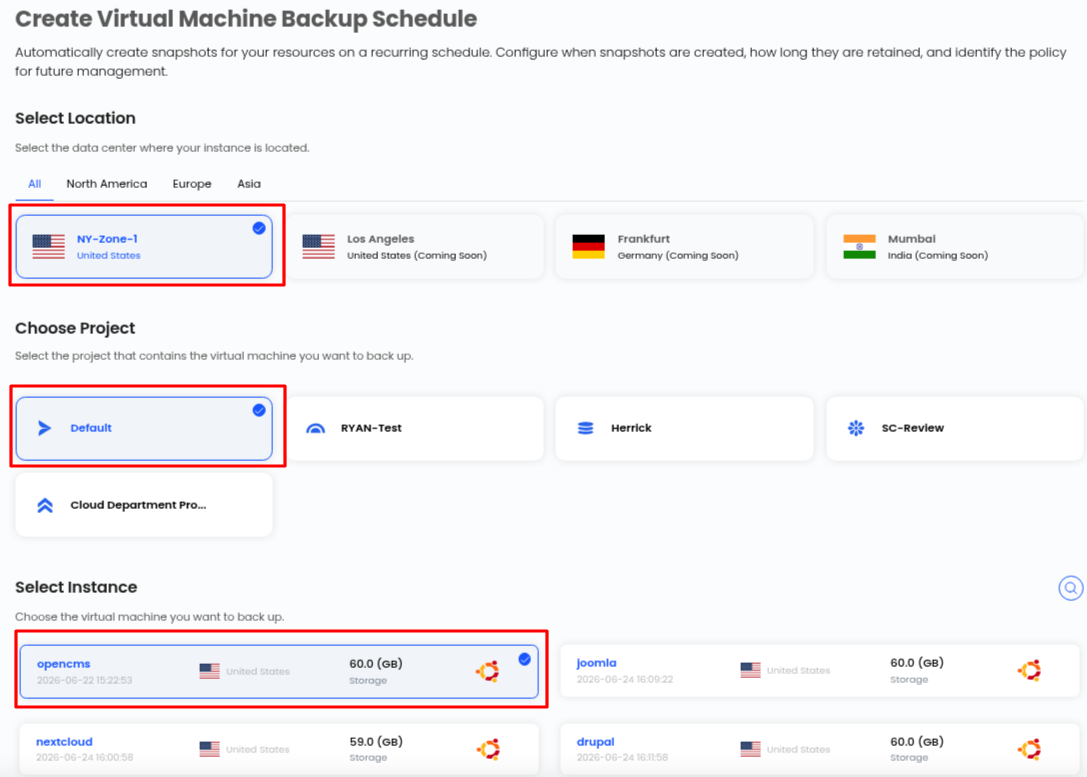
Step 8: Configure Backup Schedule
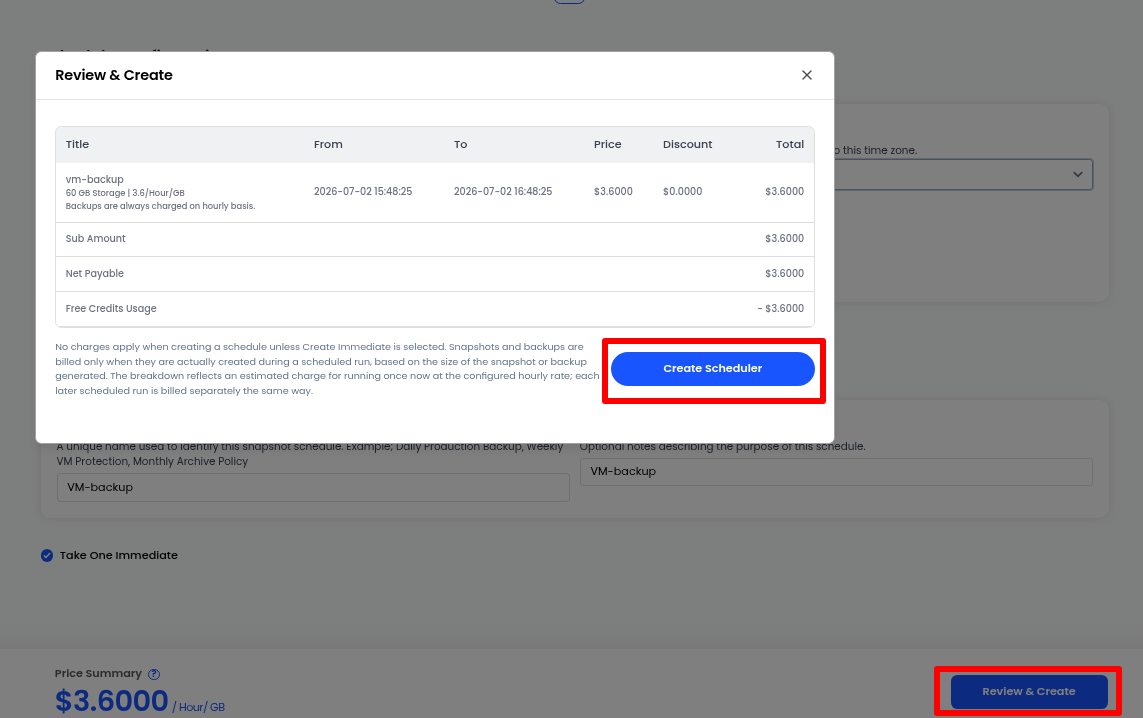
Select the Schedule Configurations like Schedule Frequency, Timezone, Max. Snapshots/Backup retention. Click on “Take one Immediate” to take one immediately backup.
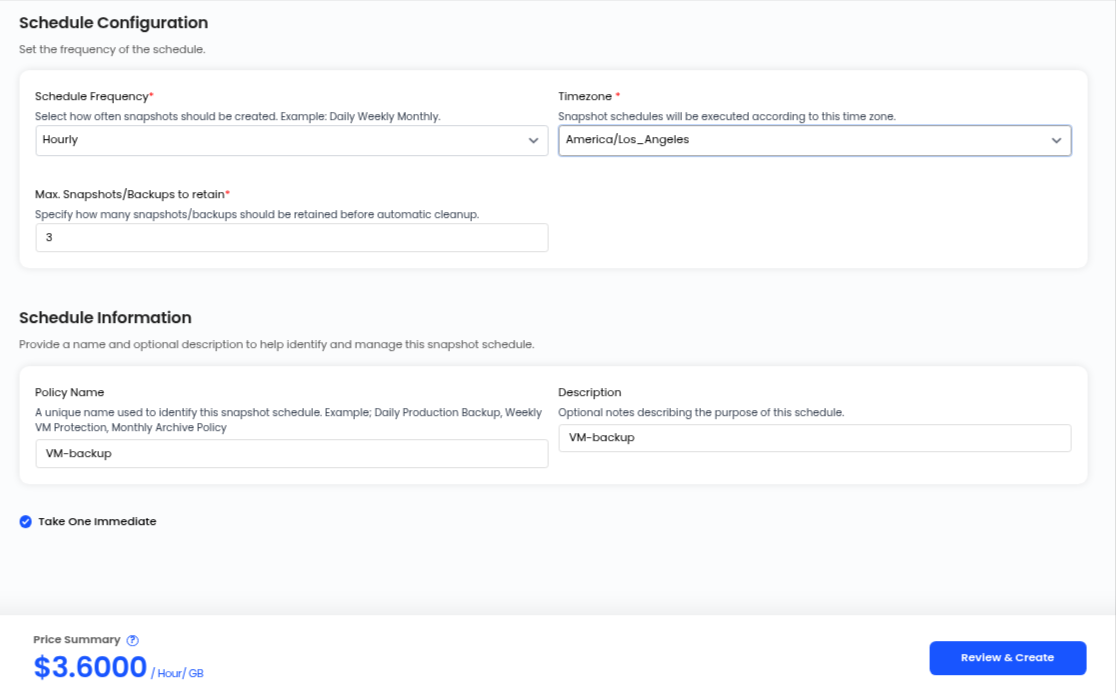
Note: Please note that if you do not select “Take One Immediately,” you will not see the Price Summary. It will be visible on the date you have scheduled.
Step 9: Click on Review & Create
Click on the Review & Create button to review your selected configuration. Once confirmed, click on the Create Scheduler button..
Step 10: Check the scheduled backup details
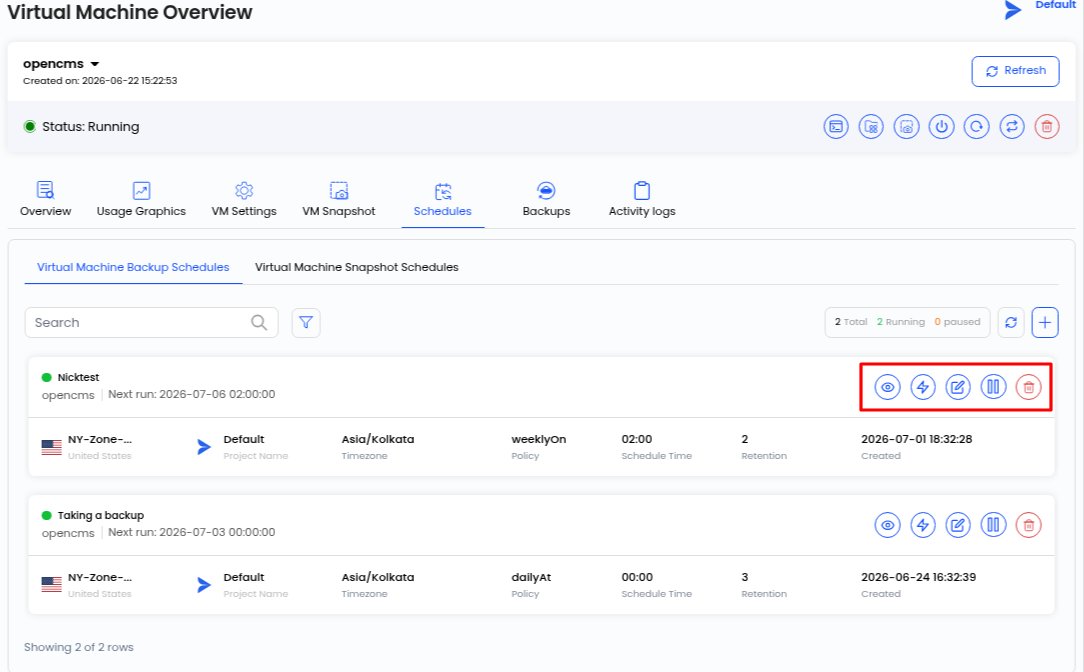
Come back to the instance overview page and click on Schedules. Here you can view schedules, edit schedules, pause schedules, and delete schedules.
Steps to Restore Your Instance from a Backup
Step 1: Shut Down the Instance
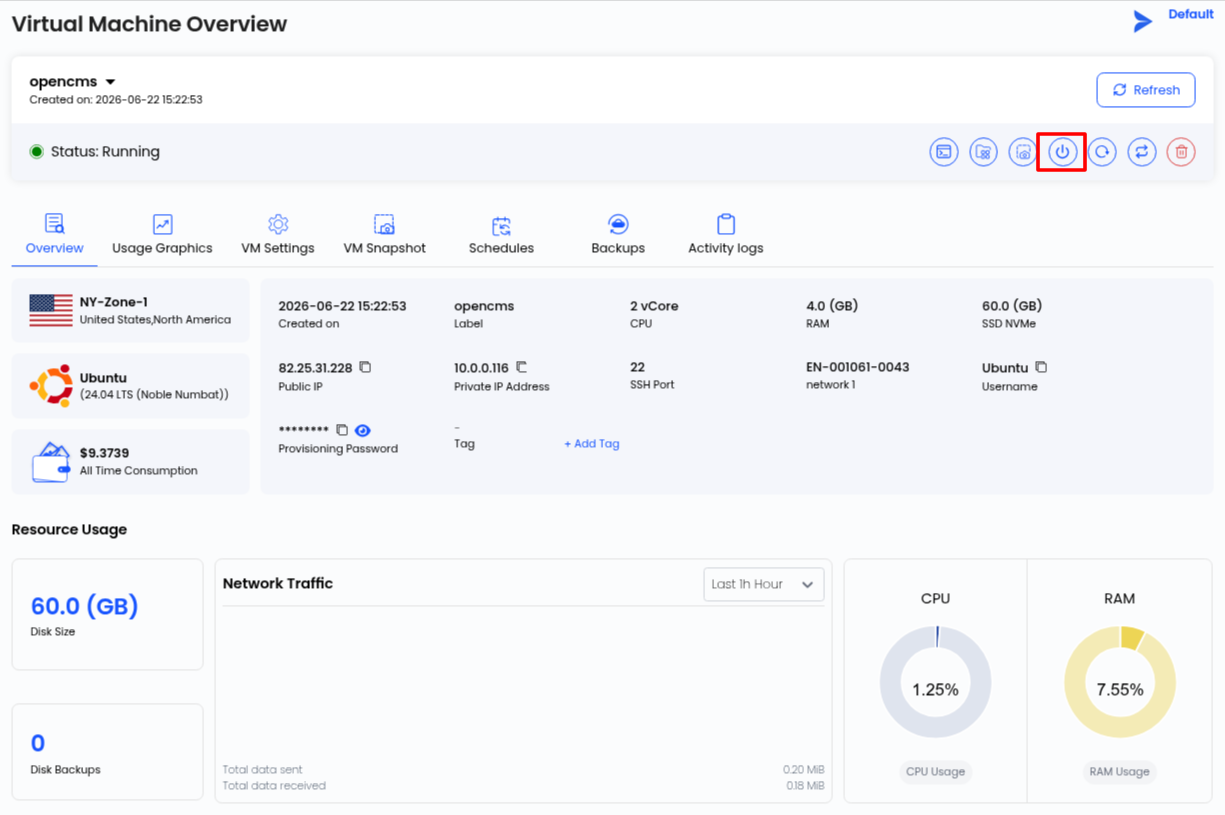
Go back to the Instance page and select the instance for which you created the backup. Before restoring, shut down the instance.
Step 2: Restore from Backup
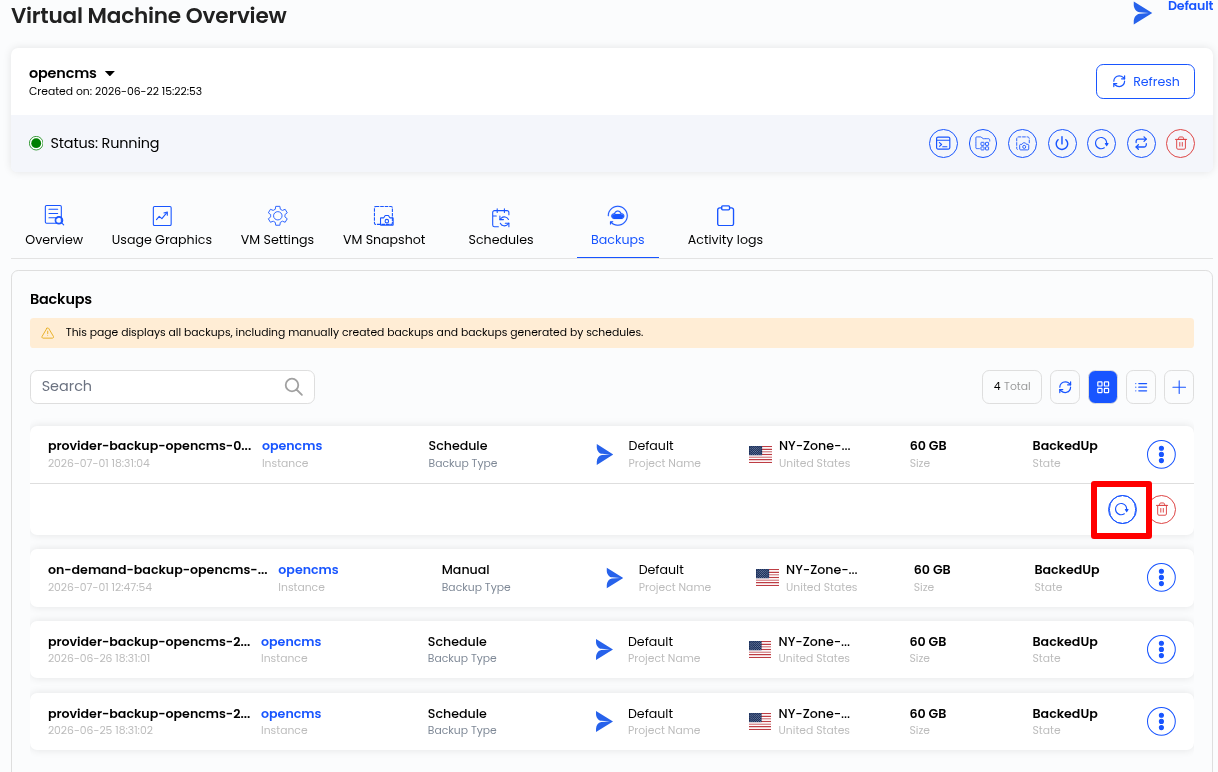
Navigate to the Backups section of the instance, where you’ll see the backup you just created. Since this backup was created by Scheduler, its type will be listed as Scheduled. Click on the Restore icon next to the backup to begin the restoration process.
Step 3: Power On the Instance
Once the restoration is complete, simply turn your instance back on. Your instance is now restored to the exact state captured in the backup.
Conclusion
Scheduled backups take the guesswork and the forgetfulness, out of protecting your data. Once it’s set up, it just runs quietly in the background, giving you a safety net without any extra effort on your end. Combine this with the occasional manual backup before major changes, and you’ve got a solid, low-maintenance backup strategy that keeps your instances safe no matter what happens.