
How to Fix Database Connection Issues?
Database connection errors can be frustrating, especially when your website or application suddenly stops working. Messages like “Error Establishing a Database Connection”, “Connection Refused”, or “Access Denied” usually indicate that your application is unable to communicate with the database server.
The good news is that most database connection problems are caused by common configuration or server issues and can often be resolved with a few troubleshooting steps. This guide walks you through the most common causes and how to fix them.
Common Causes of Database Connection Issues
Database connection problems can occur for several reasons, including:
- Incorrect database username or password
- Database service is stopped or unavailable
- Wrong database host or port
- Firewall blocking database traffic
- Database server is overloaded
- Maximum database connections reached
- Missing user permissions
Understanding the root cause is the first step toward fixing the issue.
Step 1: Verify Your Database Credentials
Start by checking the database settings used by your application.
Make sure the following details are correct:
- Database name
- Username
- Password
- Hostname
- Port number
These settings are usually stored in your application’s configuration file. For example:
- WordPress: wp-config.php
- Laravel: .env
- Django: settings.py
- Node.js applications: .env
Even a small typo in the username, password, or hostname can prevent the application from connecting.
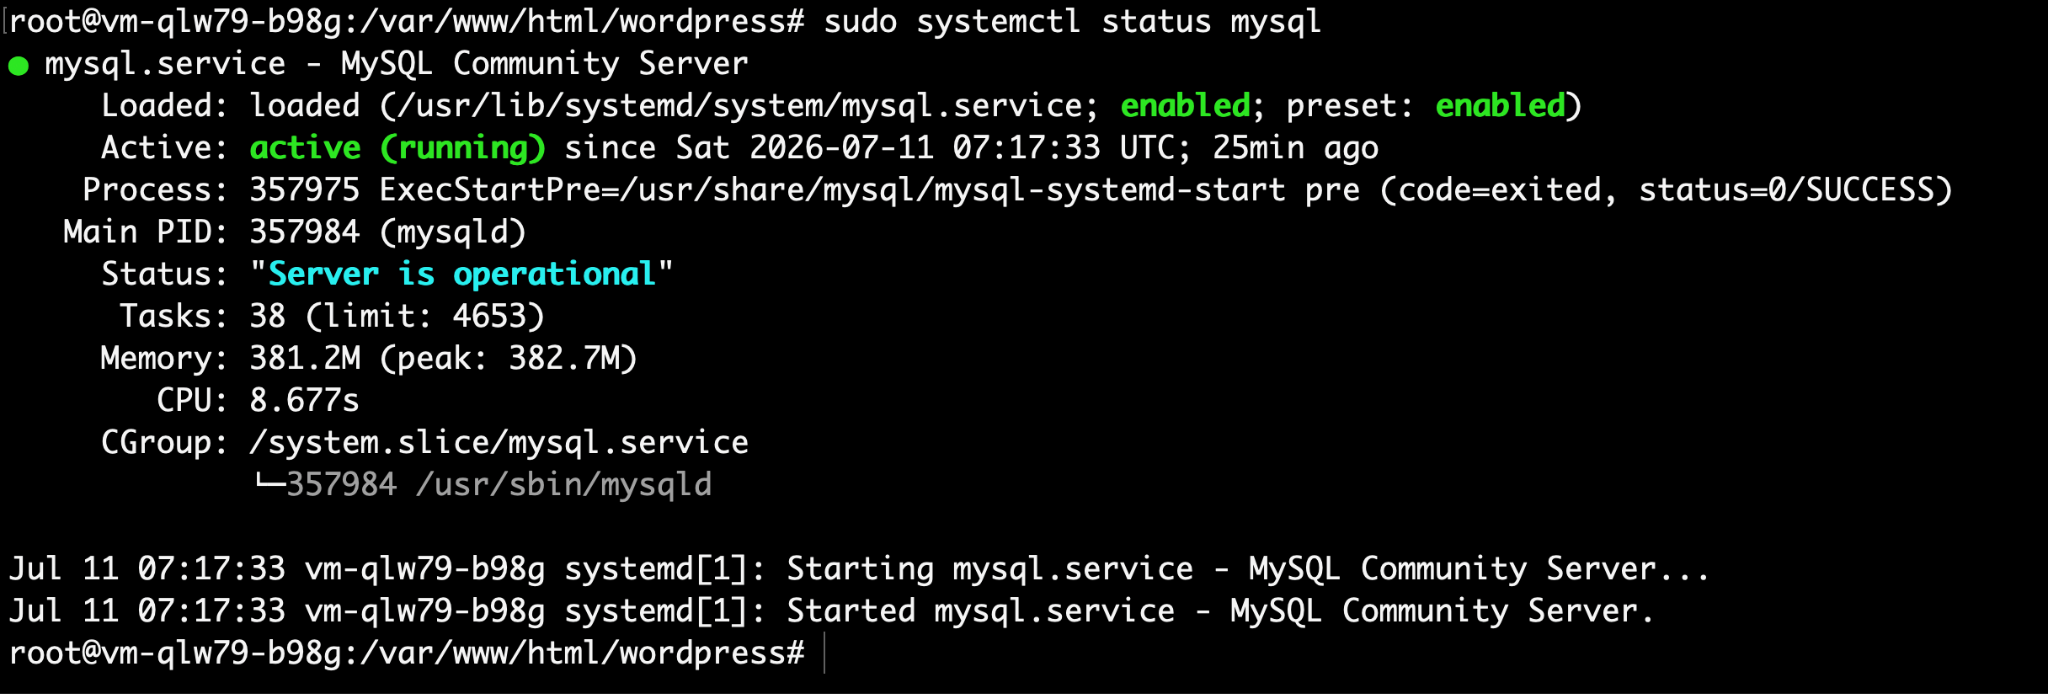
Step 2: Check Whether the Database Service Is Running
If the database server isn’t running, your application won’t be able to connect.
For MySQL:
sudo systemctl status mysql
For MariaDB:
sudo systemctl status mariadb
For PostgreSQL:
sudo systemctl status postgresql
If the service is stopped, start it and try connecting again.
Step 3: Test the Database Connection Manually
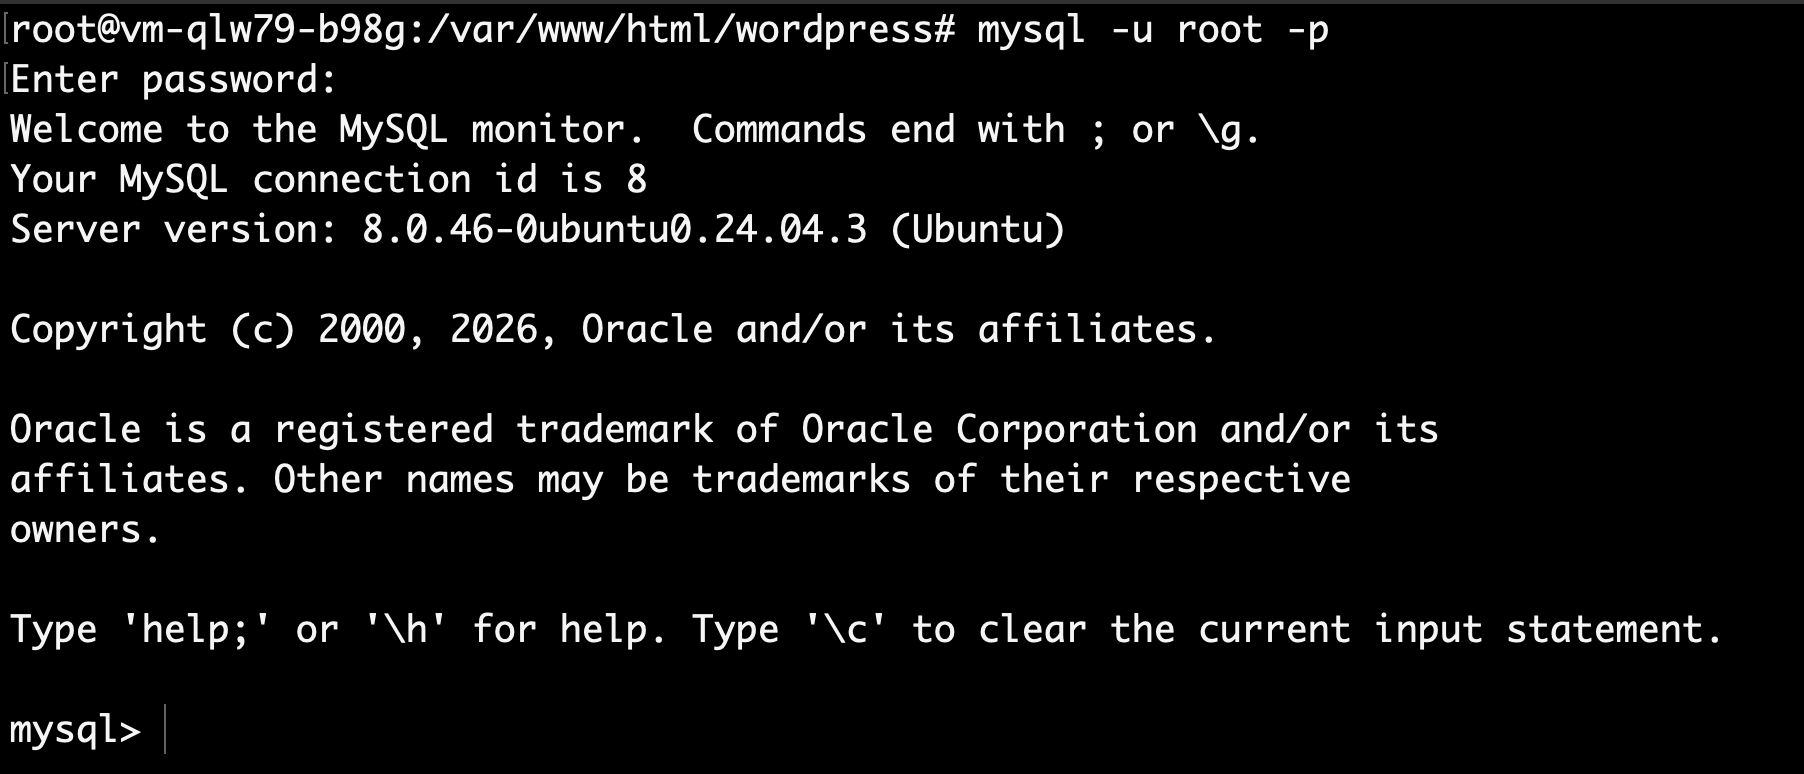
A manual connection test helps determine whether the problem is with the database server or your application.
For MySQL:
mysql -u username -p
For a remote database:
mysql -h server-ip -u username -p
For PostgreSQL:
psql -h server-ip -U username database_name
If the connection fails, the error message often points you in the right direction.
Step 4: Verify the Database Hostname
Confirm that your application is connecting to the correct database server.
Depending on your setup, the host might be:
- localhost
- 127.0.0.1
- A private IP address
- A public IP address
- A domain name
If you’re using a hostname, verify that it resolves correctly using:
ping database.example.com or nslookup database.example.com
Step 5: Confirm the Database Port
Each database uses a default port unless it’s been changed.
| Database | Default Port |
| MySQL / MariaDB | 3306 |
| PostgreSQL | 5432 |
| SQL Server | 1433 |
| MongoDB | 27017 |
To verify that the database is listening on the expected port:
ss -tulnp
Step 6: Check Firewall Settings
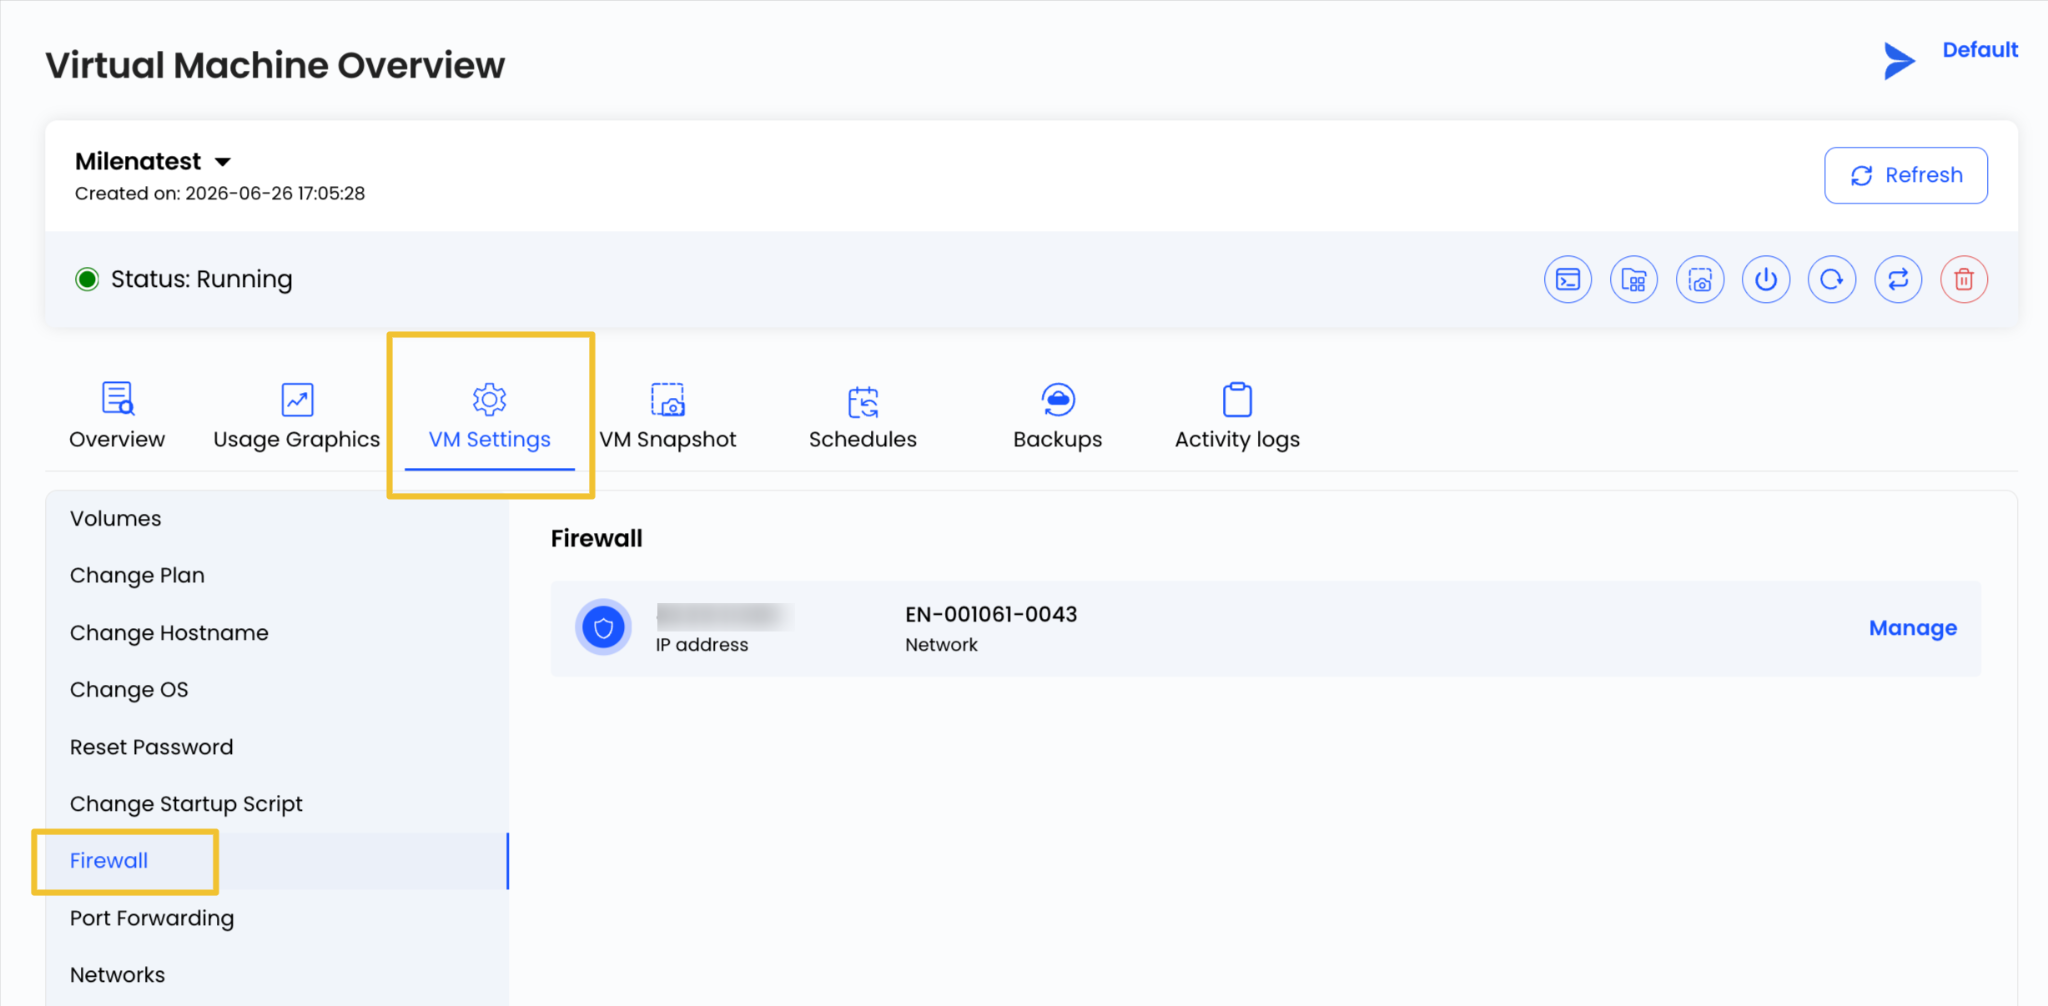
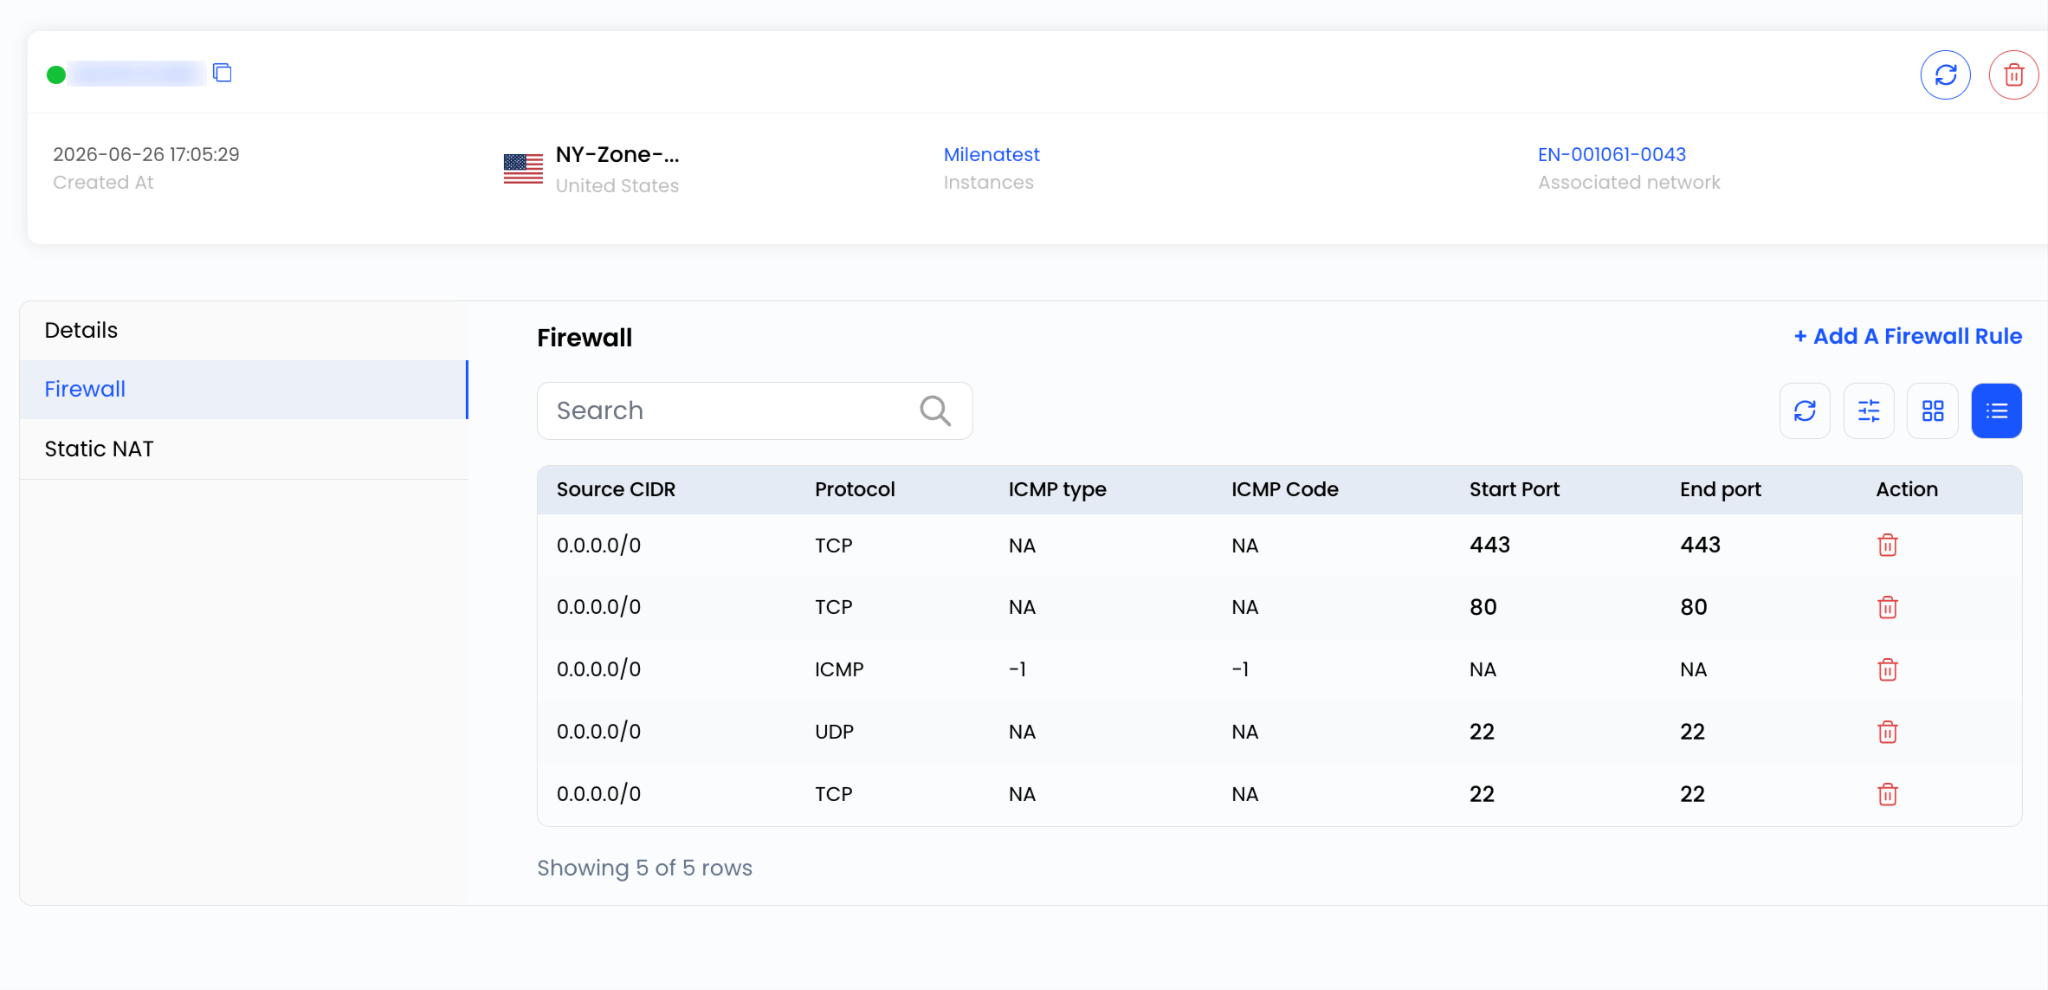
Log in to the dashboard and navigate to the instance – VM Settings and then the Firewall section from the instance management page.
Make sure the required database port is allowed in the firewall rules.
Common database ports:
- MySQL / MariaDB: 3306
- PostgreSQL: 5432
- SQL Server: 1433
- MongoDB: 27017
Step 7: Review the Database Configuration
Many database servers are configured to accept connections only from the local machine.
For MySQL, check the bind-address setting in the MySQL configuration file.
Check Current MySQL Bind Address
Open the MySQL configuration file:
For Ubuntu/Debian:
sudo nano /etc/mysql/mysql.conf.d/mysqld.cnf
For CentOS/AlmaLinux:
sudo nano /etc/my.cnf
Look for:
bind-address = 127.0.0.1
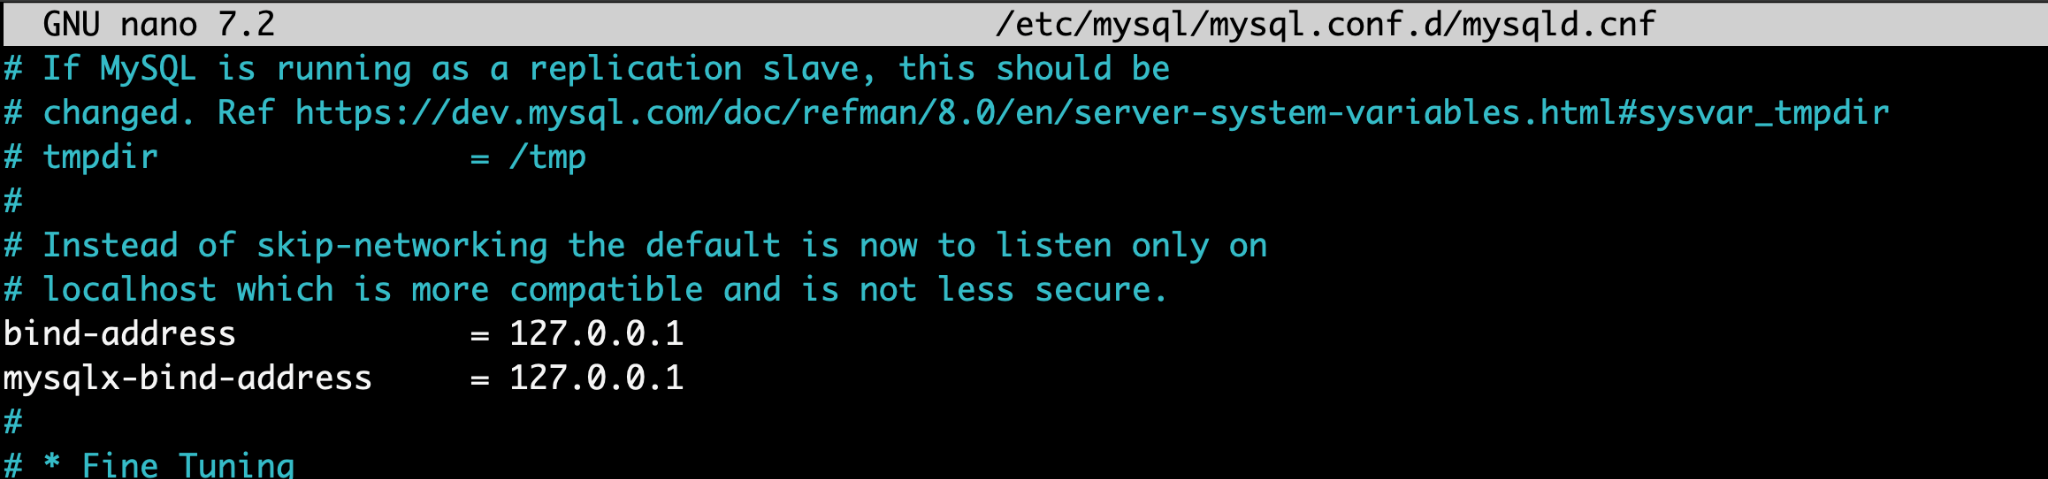
If remote access is required, update it accordingly and restart the service.
PostgreSQL Configuration
PostgreSQL uses two configuration files:
1. postgresql.conf
Controls the listening address.
Open:
sudo nano /etc/postgresql/*/main/postgresql.conf
Find:
listen_addresses = ‘localhost’
Change to:
listen_addresses = ‘*’
2. pg_hba.conf
Controls which clients are allowed.
Open:
sudo nano /etc/postgresql/*/main/pg_hba.conf
Add:
host all all 192.x.x.x/24 md5
Restart PostgreSQL:
sudo systemctl restart postgresql
Test connection:
psql -h database-server-ip -U username database_name
These files control which clients are allowed to connect and from where.
Step 8: Verify Database User Permissions
Even with the correct credentials, a user must have permission to access the database.

For MySQL, you can check the user’s privileges with:
SHOW GRANTS FOR ‘username’@’%’;
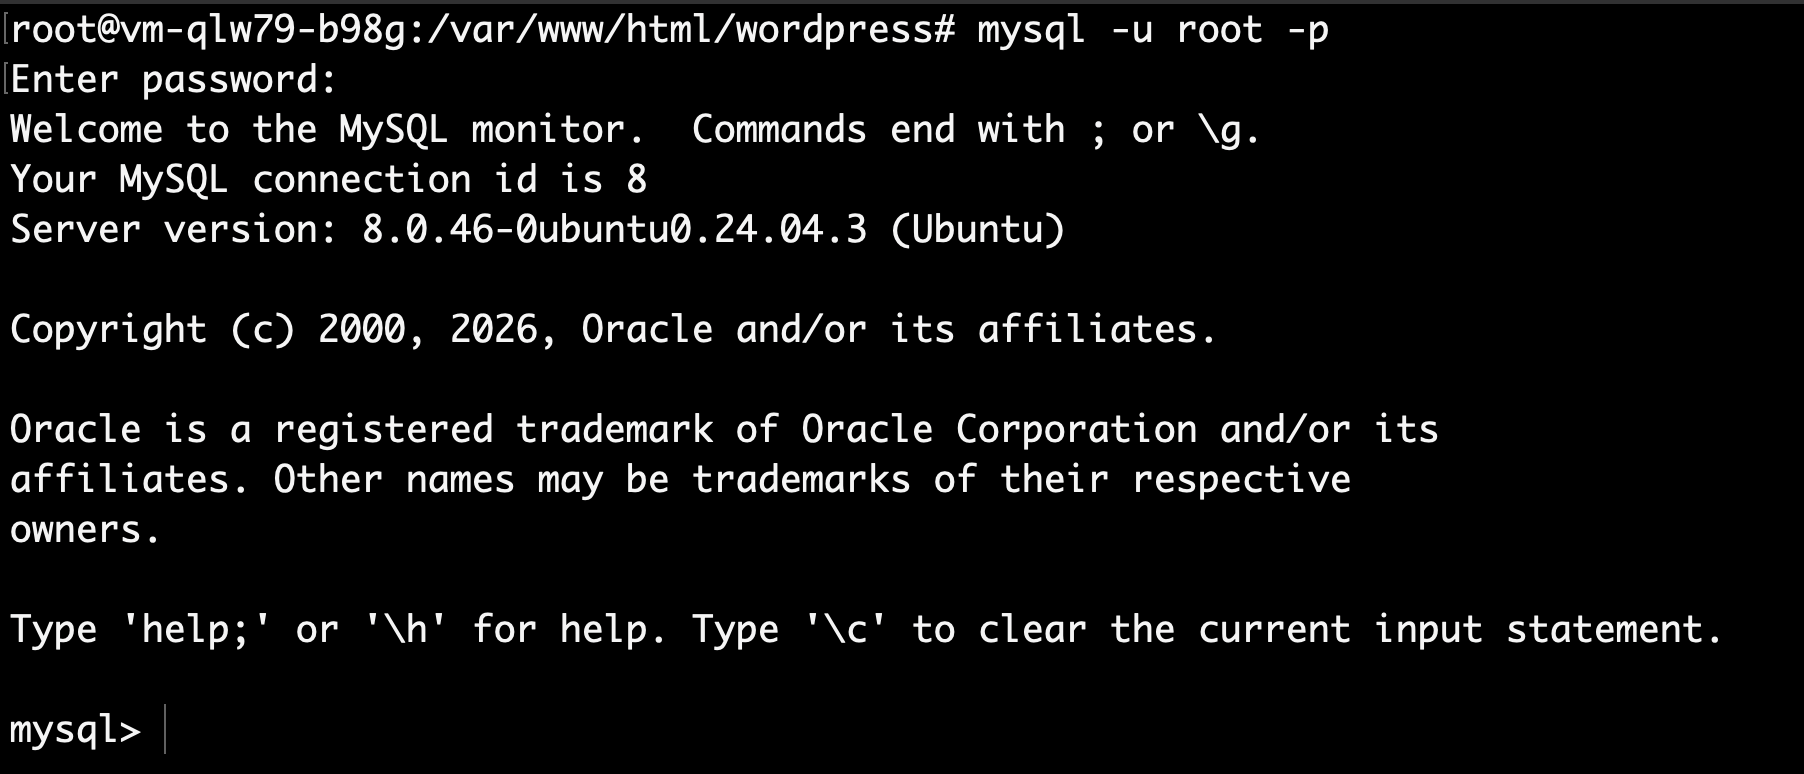
Connect to MySQL using an administrative account:
mysql -u root -p
SHOW GRANTS FOR ‘wp_user’@’localhost’;
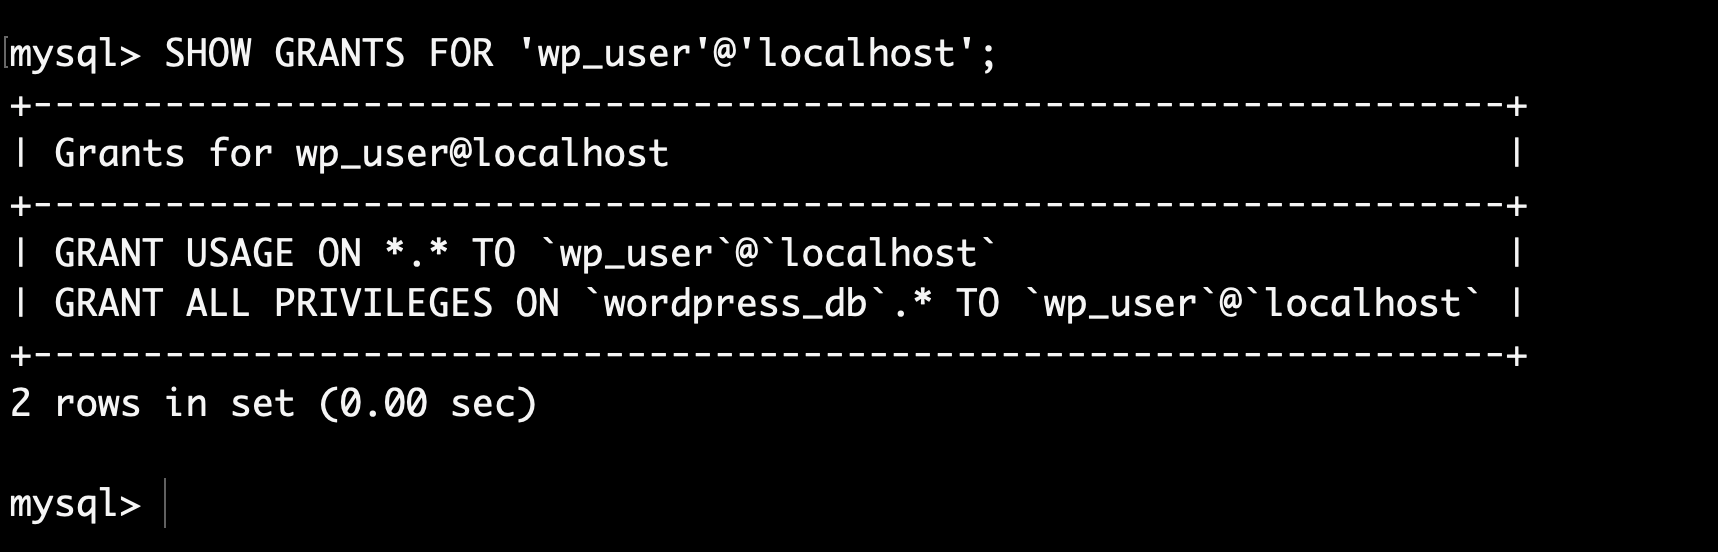
If the required permissions are missing, grant them and reload the privileges.
Step 9: Review Database Logs
Database logs often provide the fastest way to identify the problem.
For MySQL:
sudo journalctl -u mysql

For PostgreSQL:
sudo journalctl -u postgresql
Look for messages related to:
- Authentication failures
- Connection refused
- Out-of-memory errors
- Disk space issues
- Corrupted tables
Step 10: Check Server Resources
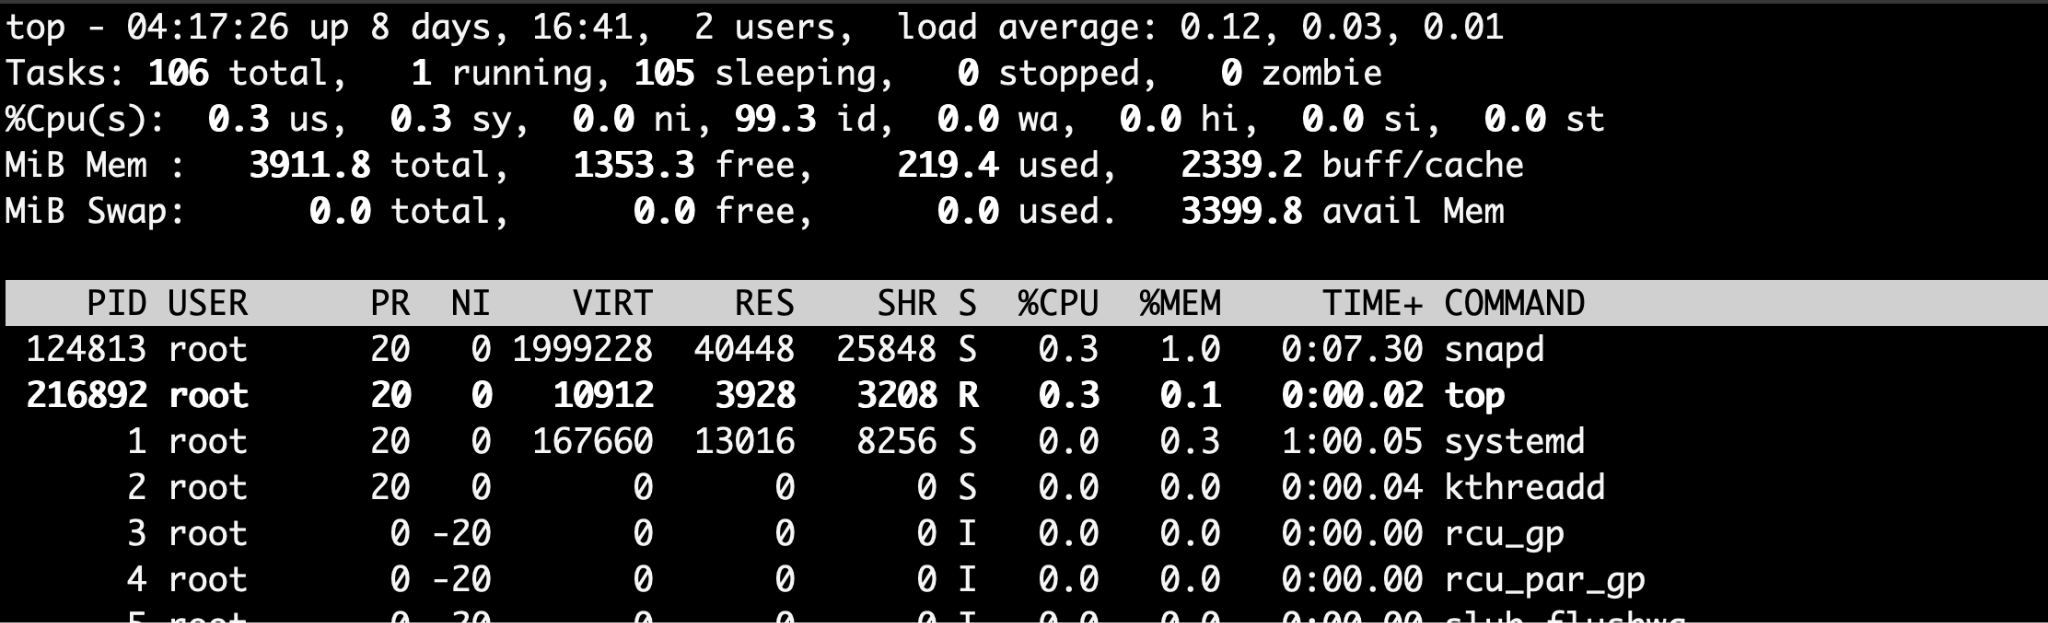
If the server is under heavy load or running out of memory, the database may stop accepting new connections.
Useful commands include:
top
free -h

df -h
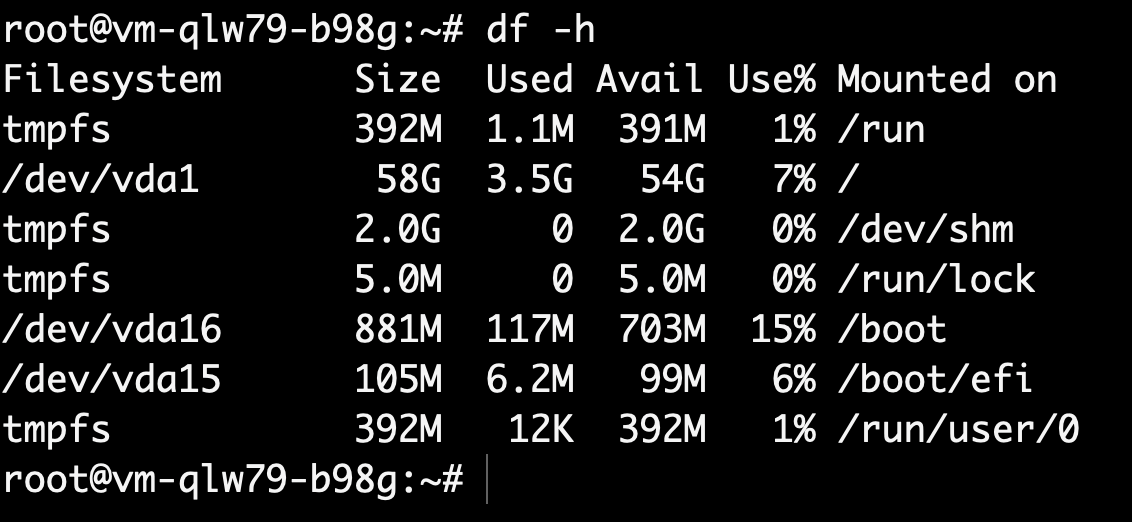
Pay attention to CPU usage, available memory, and disk space.
Step 11: Check the Maximum Connection Limit
Busy databases can reach their maximum number of allowed connections.
Connect using a MySQL administrative user:
mysql -u root -p
For MySQL:
SHOW VARIABLES LIKE ‘max_connections’;
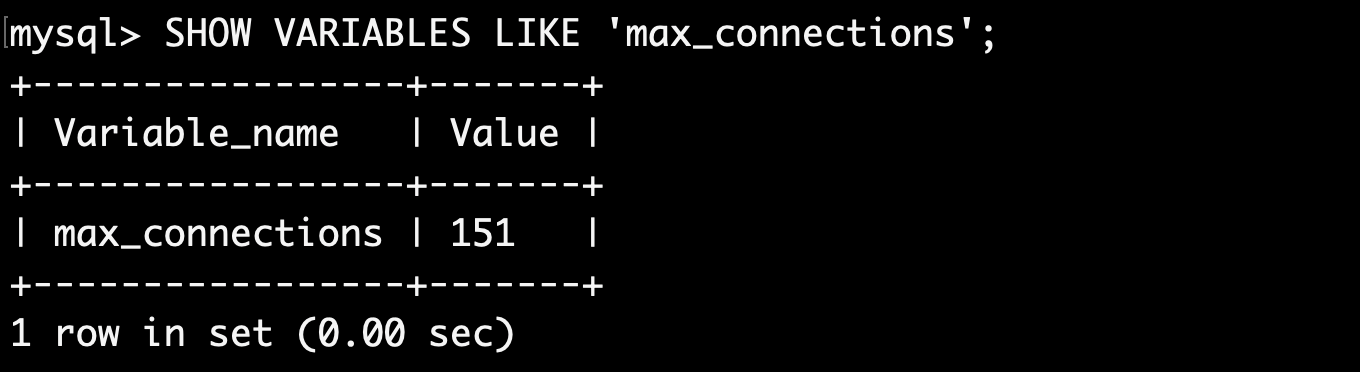
To see how many connections are currently in use:
SHOW STATUS LIKE ‘Threads_connected’;
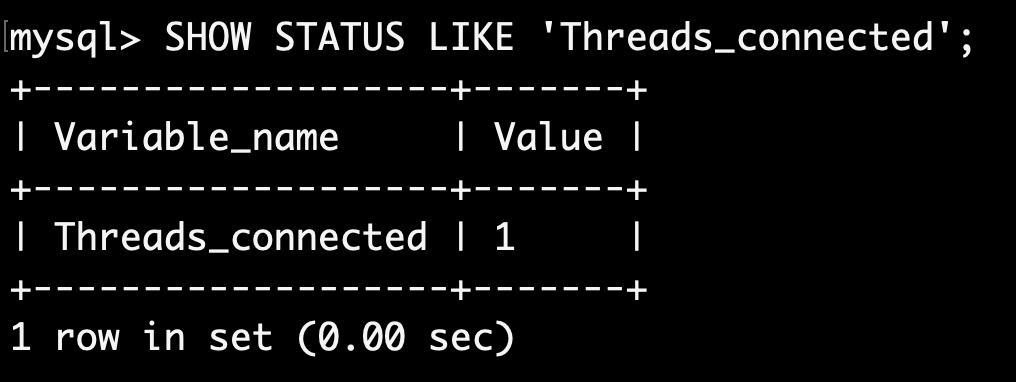
If the limit has been reached, consider increasing it or investigating long-running connections.
Step 12: Restart the Database Service
After making configuration changes, restart the database service.
For MySQL:
sudo systemctl restart mysql
For PostgreSQL:
sudo systemctl restart postgresql
Then test the connection again.

Tips to Prevent Future Database Connection Issues
Following a few best practices can help reduce the chances of connection problems:
- Use secure and accurate database credentials.
- Monitor CPU, memory, and disk usage regularly.
- Keep your database software up to date.
- Restrict database access with firewall rules.
- Review database logs periodically.
- Schedule regular database backups.
- Avoid using the root account for applications.
- Monitor connection usage on busy servers.
Conclusion
Database connection issues can happen for many reasons, but they’re often straightforward to troubleshoot once you know where to look. Start by checking the basics credentials, database service status, and connectivity—before moving on to firewall rules, permissions, and server resources.
By following the steps in this guide, you can quickly identify the cause of most database connection problems and get your application back online with minimal downtime.