
Docker No Space Left on Device: How to Free Disk Space Safely
Running out of disk space on a Docker host can cause containers to crash, deployments to fail, and the entire system to become unresponsive. The “Docker No Space Left on Device” error is a common issue that occurs when images, containers, volumes, or build caches consume all available storage.
In this guide, we will walk through how to safely diagnose disk space issues, clean up unused resources without losing important data, and configure your environment to prevent this error from happening again.
1. Check Disk Space and Inode Usage
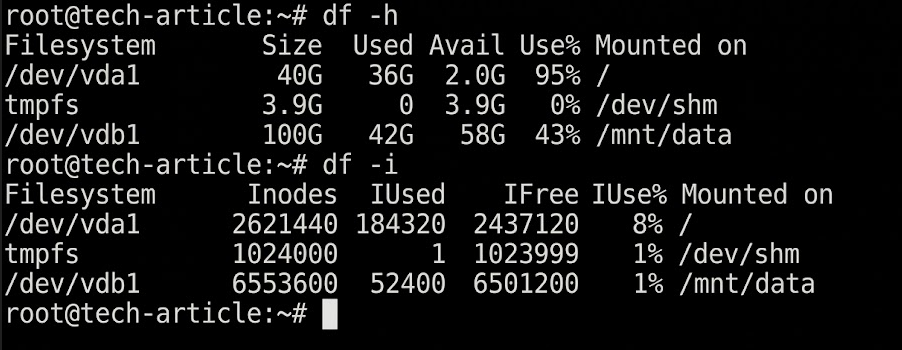
Start by checking the host filesystem.
df -hThis command shows filesystem capacity, used space, and available space.
Next, check inode usage:
df -i
docker info --format '{{.DockerRootDir}}'
The docker info command shows the directory where Docker stores its data.
If the filesystem has free disk space but its inode usage is at 100%, it cannot create more files until some inodes are freed.
2. Find Which Docker Resources Use Space
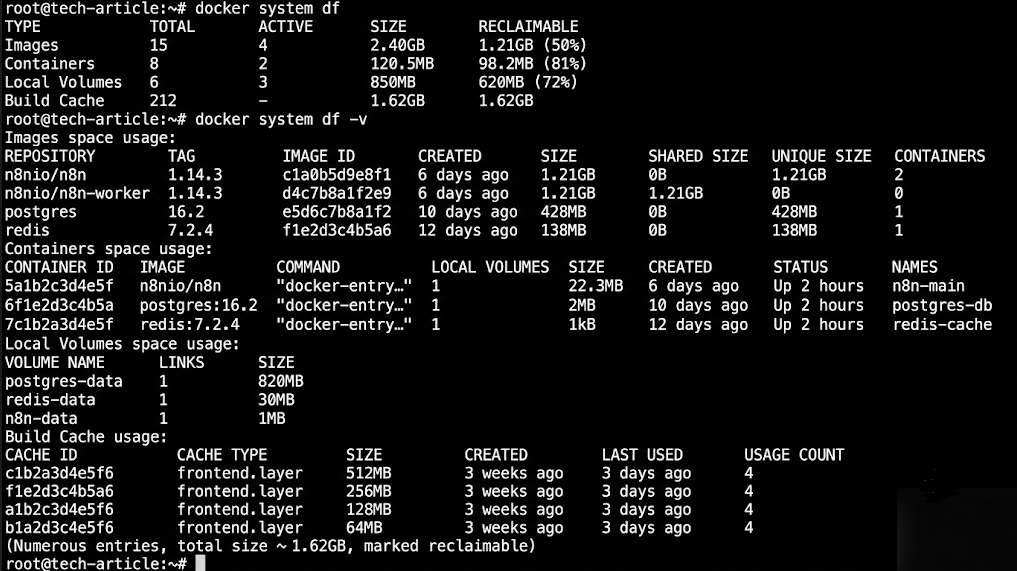
Docker provides a command to show how much space its resources use.
docker system dfFor more detail, run:
docker system df -vThe output separates images, containers, local volumes, and build cache. The detailed view also helps identify large images and other Docker objects.
You can check running and stopped containers with:
docker ps -aCheck images with:
docker image lsThese commands help you understand what exists before removing anything.
3. Clean Unused Docker Build Cache
Docker keeps build cache to make future image builds faster. Over time, unused cache can consume a large amount of disk space.
Check the current usage:
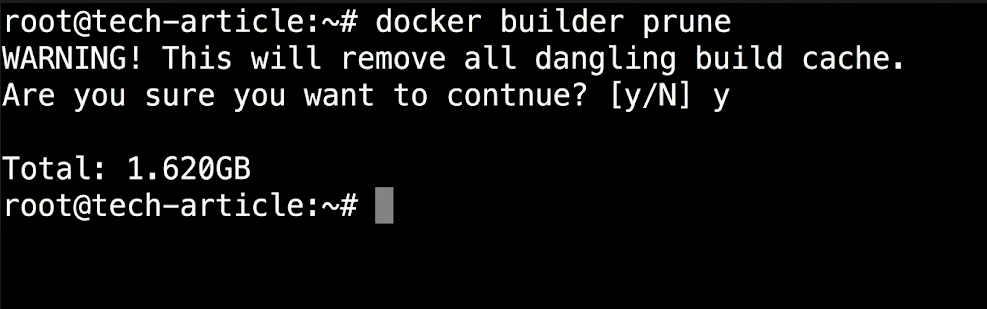
docker system dfTo remove unused build cache, run:
docker builder pruneDocker asks for confirmation before removing the cache. Review the prompt before proceeding.
To remove cache that has not been used for more than 24 hours:
docker builder prune --filter "until=24h"This can free space without removing running containers. However, later builds may take longer because Docker must rebuild layers that are no longer cached.
4. Remove Unused Docker Images
Docker images can take up considerable disk space, especially on hosts that build and deploy applications regularly.
First, list the available images:
docker image lsTo remove dangling images, run:
docker image pruneDangling images are images that are not tagged and are not referenced by a container.
To remove all images that are not associated with existing containers, use:
docker image prune -aWarning: The -a option removes more than dangling images. It can delete images you planned to use for a future deployment. Docker may need to download them again before they can be used.
Review the image list before running either command. Avoid removing images needed for planned deployments or offline recovery.
5. Remove Stopped Containers Carefully
Stopped containers can retain writable-layer data and use disk space.
List all containers:
docker ps -aIf a stopped container is no longer needed, remove that specific container:
docker rm <container_name_or_id>Replace <container_name_or_id> with the actual name or ID.
If you have reviewed all stopped containers and confirmed that none is needed, you can remove them with:
docker container pruneImportant: This command removes all stopped containers, not just old test containers. A stopped container may contain logs, temporary files, or data that has not been copied elsewhere. Check its purpose before deleting it.
Removing a container does not automatically mean that all its associated volume data is removed. Volumes need separate consideration.
6. Protect Docker Volumes and Application Data
Docker volumes often store databases, uploads, and other persistent application data. They may remain even after the container using them is removed.
List the volumes:
docker volume lsInspect a volume before making changes:
docker volume inspect <volume_name>Replace <volume_name> with the volume you want to inspect.
Do not remove a volume just because it is large or currently unused. A volume that is not attached to a running container may still contain important database records or files needed for recovery.
The following command removes unused anonymous volumes:
docker volume pruneUse it only after reviewing your volumes and confirming that the data is no longer required. Named volumes require extra care; Docker’s volume-pruning options differ depending on the command and Engine version.
Avoid docker system prune --volumes as a routine first step. Broad cleanup commands can remove resources that you expected to keep.
docker volume pruneremoves unused anonymous volumes by default.docker volume prune -aalso removes unused named volumes.
Warning: Removing volumes can permanently delete data. Verify that no required data is stored in them before proceeding.
7. Check Docker Container Logs
Container logs can also consume disk space. Check the Docker storage directory’s filesystem usage first:
sudo du -sh /var/lib/docker/containersThis is the usual location on a standard Linux installation, but Docker’s data root may be configured elsewhere.
To locate large files in the default container directory:
sudo du -ah /var/lib/docker/containers | sort -h | tail -20Review the results before changing any files. If logs are growing continuously, configure Docker’s logging driver or log rotation to prevent the issue from returning.
Do not manually delete Docker-managed files or truncate log files without confirming the logging setup. Doing so can interfere with Docker’s file handling or remove information needed for troubleshooting.
For production systems, prefer a planned log-retention policy and supported logging configuration rather than emergency deletion of unknown files.
Docker logs can consume disk space if they grow without limits. To configure log rotation, add the following settings to /etc/docker/daemon.json:
{
  "log-driver": "json-file",
  "log-opts": {
    "max-size": "10m",
    "max-file": "3"
  }
}
This configuration limits each log file to 10 MB and retains up to three files per container.
Important: These logging settings apply only to newly created containers. Existing containers must be recreated for the new logging configuration to take effect.
Before editing /etc/docker/daemon.json, check whether the file already contains other Docker settings. Preserve the existing configuration and merge the logging options instead of overwriting the file.
Restart Docker to apply the daemon configuration. Plan this carefully because restarting Docker may affect running containers. Recreate existing containers during a maintenance window to apply the new logging settings.
8. Verify That Space Has Been Recovered
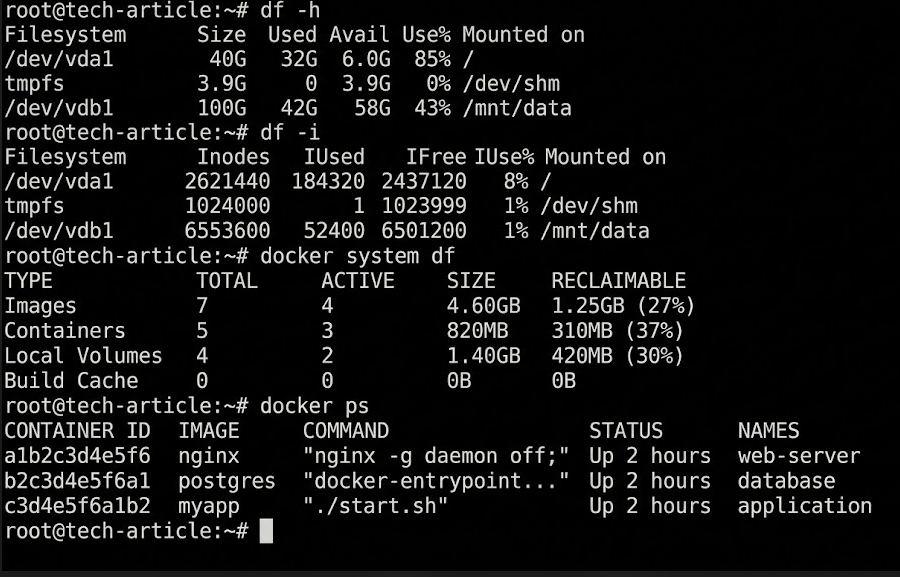
After cleanup, check the filesystem again:
df -hCheck inode usage:
df -iThen review Docker storage:
docker system dfFinally, check running containers:
docker psCompare the results with your earlier checks. Confirm that the affected application is responding normally and that its required data is available.
9. Prevent the Error From Returning
If the disk fills up repeatedly, cleanup alone is not enough. Check which workloads generate the most data and set suitable retention limits.
Consider these measures:
- Configure Docker log rotation to prevent unbounded log growth.
- Remove old build cache as part of a planned maintenance process.
- Review unused images and stopped containers regularly.
- Monitor disk capacity and inode usage.
- Keep database and application data on suitable persistent storage.
- Increase filesystem capacity if normal workload growth exceeds the available space.
For a busy Docker host, monitoring is more reliable than waiting for a failed deployment to reveal a storage problem.
10. Conclusion
When Docker runs out of disk space, start by checking disk usage, inodes, images, containers, and logs to identify the cause. Remove only unused resources, and verify volumes before deleting them to avoid data loss. Regular cleanup and log rotation can help prevent the same issue from happening again.