Deploying Your First Next.js App: Beginner’s Step-by-Step Guide
Are you new to Next.js and wondering how to launch your very first project? This beginner-friendly tutorial walks you through creating and deploying a simple “Hello World” Next.js app with every command explained so you can follow along confidently, even if it’s your first time working with React frameworks.
What is Next.js?
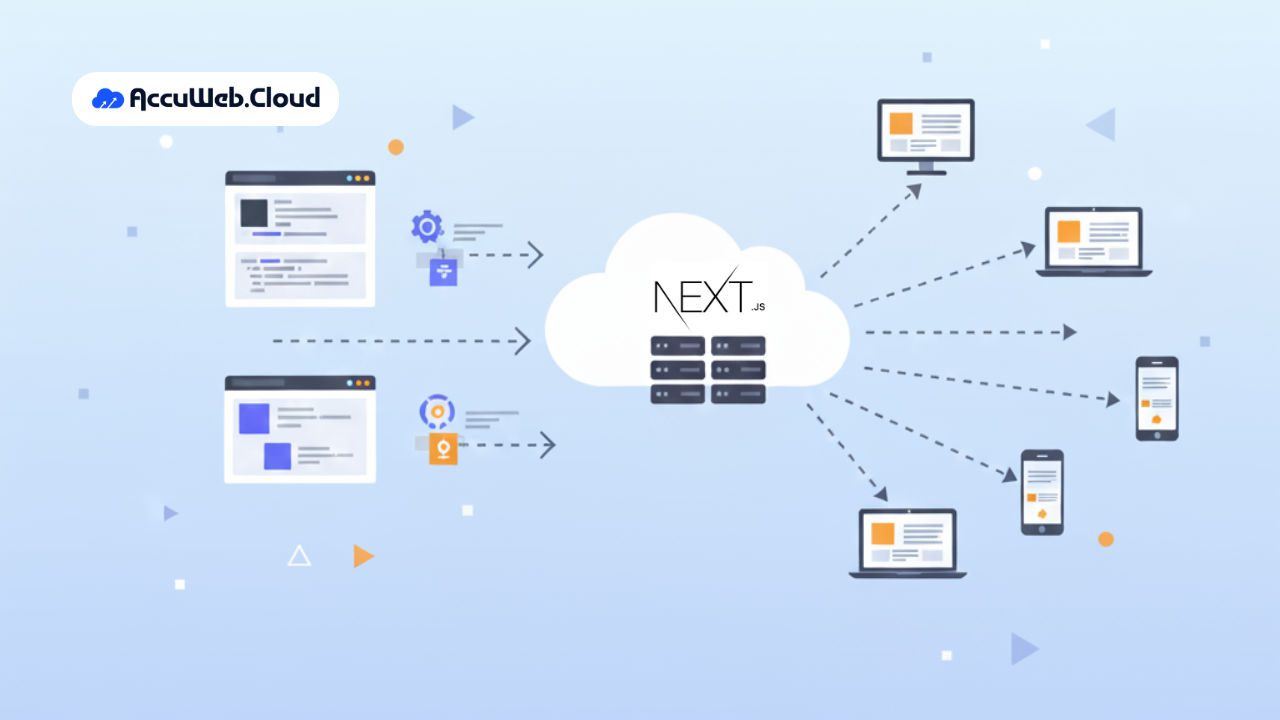
Next.js is one of the most popular React frameworks for modern web development, trusted by startups and enterprises alike. It’s designed to help developers build fast, SEO-friendly, and scalable web applications with minimal setup. Some of the core features that make Next.js stand out include:
- Server-Side Rendering (SSR) – Renders pages on the server for better SEO and faster load times.
- Static Site Generation (SSG) – Pre-builds pages for speed and performance.
- Automatic Code Splitting – Delivers only the JavaScript your page needs, improving performance.
- Built-in API Routes – Lets you add backend functionality without extra servers.
- Developer-Friendly Tools – TypeScript support, hot reloading, and easy SEO optimization.
With Next.js, you can build everything from personal portfolios and blogs to production-ready SaaS platforms & this guide will help you take your first step.
1. Prerequisites
Make sure the following tools are installed on your System/Environment/Elastic VPS before you begin:
Node.js and npm (Node Package Manager): Verify installations:
node -vnpm -vPM2 (optional, for process management): Verify installation:
pm2 -vInstall if missing:
npm install -g pm22. Setting Up a Basic Next.js Application
Let’s create a minimal “Hello World” application:
Step 2.1: Create a New Next.js Project
Run:
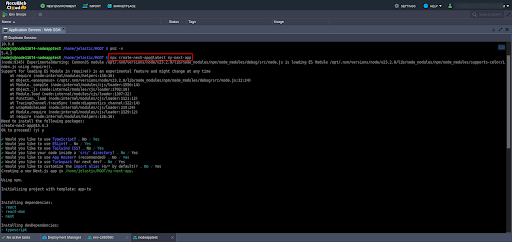
npx create-next-app@latest my-next-appThis sets up a new Next.js project named my-next-app.
Step 2.2: Navigate to the Project Directory
Move into the project folder:
cd my-next-appStep 2.3: Start the Development Server
Launch the application locally:
npm run devVisit http://localhost:3000 to see the default Next.js welcome page.
Step 2.4: Configure Firewall Ports
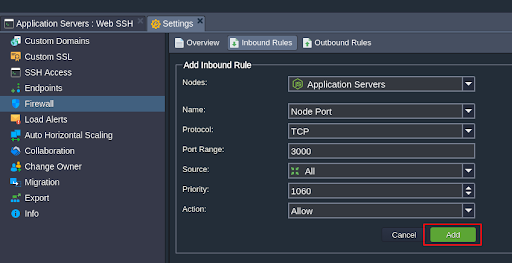
Ensure that port 3000 is open in your environment firewall for external access.
3. Customizing the Application
Modify the default page to display “Hello, World!”.
Step 3.1: Locate the Main File
Depending on your Next.js version:
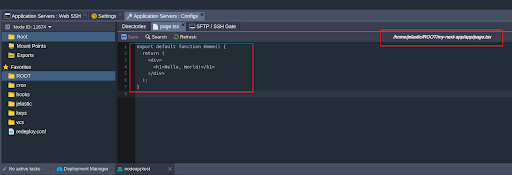
- App Router (Next.js 13+): Edit app/page.tsx.
- Pages Router: Edit pages/index.js.
Discover cost-effective solutions for cloud instances, storage, data transfer, IPs, control panels, LiteSpeed licenses, and CDN—all tailored to fit your needs.
Explore the detailed pricing options for VPS hosting and other cloud hosting services at AccuWeb.Cloud Pricing to find the best affordable option that fits your business needs.
Step 3.2: Update the File Content
Replace the existing content with:
export default function Home() {
return (
<div>
<h1>Hello, World!</h1>
</div>
);
}
Save the file and refresh your browser to see the updated page.
4. Preparing for Deployment
Step 4.1: Set the Environment to Production
Before building the application, set the environment variable to ensure it operates in production mode:
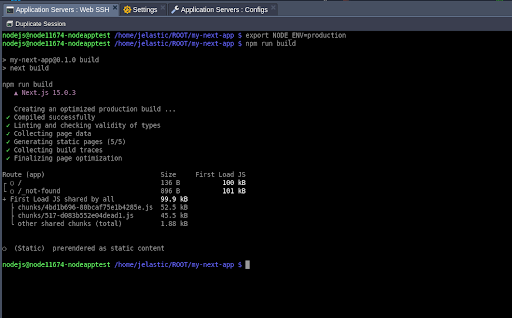
export NODE_ENV=productionExplanation: This step configures the application to run in optimized production mode, reducing unnecessary development overhead and enabling features like optimized builds and better performance.
Step 4.2: Build the Application
Run:
npm run buildThis command creates a production-ready build and stores it in the .next folder.
It compiles and prepares your application for deployment by pre-rendering pages, optimizing assets, and ensuring high performance.
Step 4.3: Start the Production Server
You can start the application in production mode manually by running:
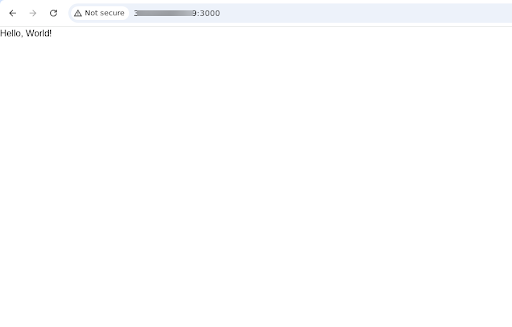
npm run startVisit your application in the browser:
http://localhost:3000
http://IP:3000
Important Notes:
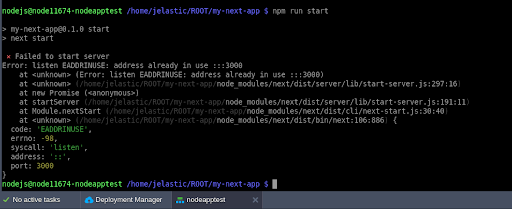
If the default port 3000 is already in use, you may encounter an error like this:
Error: listen EADDRINUSE: address already in use :::3000
- In this case:
- Stop any existing processes using port 3000. For example, if using pm2, run pm2 stop my-next-app.
Or, start the application on a different port:
PORT=3001 npm run startUsing PM2 for Deployment
For long-term process management (e.g., automatic restarts, background running), refer to the PM2 Deployment Section [7. Deploying with PM2].
5. Common Issues and Solutions
Issue: Port 3000 Already in Use
Check processes using the port:
lsof -i:3000Kill the process occupying the port:
kill -9 <PID>Or start the server on a different port:
PORT=3001 npm run startUsing PM2 for Process Management
To list running processes:
pm2 listTo stop a specific process:
pm2 stop <name>6. Additional Useful Commands
Clear Cache
npm cache clean --forceThis command clears the npm cache. Use it to resolve issues related to corrupted cache or when updating dependencies causes unexpected errors.
Reinstall Dependencies
rm -rf node_modules package-lock.json npm installThe first command removes the node_modules folder and the package-lock.json file, effectively wiping out existing dependencies. The second command reinstalls all dependencies as specified in the package.json file. This is helpful when debugging dependency-related issues.
List Installed Packages
npm listDisplays a tree view of all the installed packages and their dependencies in your project. This helps verify which modules are currently in use.
Add a Dependency
npm install <package-name>Installs a specific package and adds it to your package.json file. Replace <package-name> with the desired module, such as axios or dotenv. This ensures your application includes required external functionality.
Run Linting
npm run lintExecutes the linting process using a linter configured in your project (e.g., ESLint). Linting helps identify and fix coding errors, enforce consistent code style, and improve overall code quality.
7. Deploying with PM2
PM2 is a process manager that ensures your application runs continuously and restarts automatically on crashes or server reboots.
Step 7.1: Start the Application with PM2
Run:
pm2 start npm --name "my-next-app" -- start- –name “my-next-app”: This option assigns a custom name to the process for easier identification when managing it with process managers like PM2.
- — start: This tells PM2 to run the npm run start command, which starts the Next.js app in production mode, allowing it to serve optimized, pre-built pages.
Step 7.2: Verify the Application Status
Check running processes:
pm2 listStep 7.3: Enable Auto-Restart on Reboot
Run:
pm2 startupFollow PM2’s instructions to enable auto-start on reboot.
Step 7.4: Save PM2 Configuration
Save the current process list:
pm2 saveStep 7.5: Monitor Logs
To view real-time logs:
pm2 logs my-next-app8. Full Deployment Workflow
Here’s the complete sequence of commands to deploy and manage the application:
# Navigate to the project directory
cd /home/jelastic/ROOT/my-next-app# Set the environment to production
export NODE_ENV=production# Build the application
npm run build# Start the application with PM2
pm2 start npm --name "my-next-app" -- start# Verify process status
pm2 list# Enable auto-restart on reboot
pm2 startup# Follow on-screen instructions
# Save PM2 configuration
pm2 save# Monitor logs (optional)
pm2 logs my-next-app9. Conclusion
Congratulations! You’ve successfully created, customized, and deployed a simple “Hello World” application using Next.js. By utilizing PM2, your application is now configured to run continuously, ensuring high availability and ease of management.
With this foundational knowledge, you’re ready to explore advanced Next.js features and build scalable, high-performance web applications.
People Also Ask (And You Should Too!)
Q) Is Next.js good for beginners?
A) Yes! Next.js is beginner-friendly because it builds on React and comes with built-in features like routing, API handling, and SEO optimizations. You can start small with a “Hello World” app and scale up to full projects without extra complexity.
Q) Do I need to know React before learning Next.js?
A) Having basic React knowledge helps, but it’s not mandatory. Many beginners start directly with Next.js since it simplifies React development and provides built-in best practices.
Q) Why does my Next.js app work locally but not after deployment?
A) This usually happens due to environment variables, build errors, or missing dependencies. Make sure you run npm run build before deployment and configure .env files correctly on your hosting provider. Many beginners forget this step, which breaks apps on the server.
Q) Can I use Next.js without a backend?
A) With Static Site Generation (SSG), you can build sites that don’t need a backend at all. If you need dynamic data, you can either connect to APIs or use Next.js API routes as a lightweight backend.
Q) How do I deploy a Next.js app with a database?
A) You can connect Next.js to databases like MongoDB, PostgreSQL, or MySQL using ORMs such as Prisma. When deploying, make sure your hosting provider supports database connections and configure credentials in .env.

Jilesh Patadiya, the visionary Founder and Chief Technology Officer (CTO) behind AccuWeb.Cloud. Founder & CTO at AccuWebHosting.com. He shares his web hosting insights on the AccuWeb.Cloud blog. He mostly writes on the latest web hosting trends, WordPress, storage technologies, and Windows and Linux hosting platforms.


