Deploy Wagtail Python-Based CMS
Wagtail CMS is a straightforward and flexible content management system built on Django and designed to provide a user friendly interface for editors to create and organize website content. Published under the BSD license, Wagtail offers extensive freedom and customization options. It’s outstanding performance ensures fast page loads and efficient searches.
This guide will walk you through deploying Wagtail CMS on your AccuWeb.Cloud Python environment in four detailed steps: creating the environment, installing the application, configuring the database and running Wagtail CMS.
1. Create environment
To host Wagtail CMS, you need a Python based application server with database server. Here’s how to create a new environment with an Apache Python node:
Step 1: Begin by logging into your AccuWeb.Cloud account. Once log in, you will be directed to the main dashboard interface.
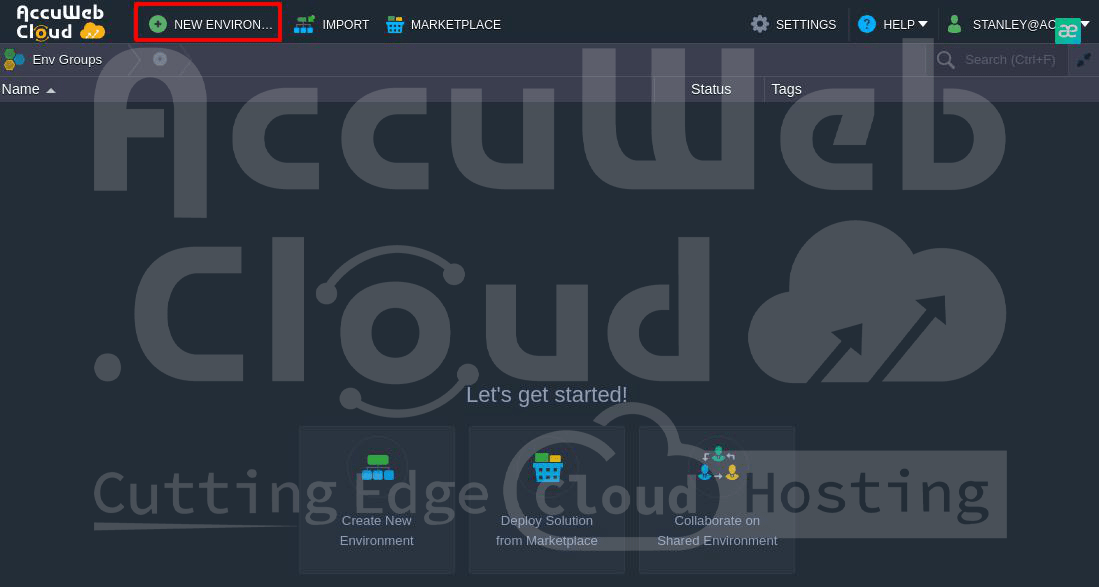
Step 2: Locate and click the “New Environment” button situated at the top of the dashboard. This will open the topology wizard, allowing you to configure your new environment.
Step 3: In the topology wizard, navigate to the Python tab. Here, the Apache Python application server will be pre selected by default. Ensure that the Python version is 3.6 or later to maintain compatibility with Wagtail CMS.
Step 4: Depending on your project’s requirements, choose a database server. You can select either MySQL or PostgreSQL. Both options are fully supported by Wagtail CMS.
Step 5: Configure Additional Settings (if necessary):
- Cloudlet Limits: Set the cloudlet limits to define the resource allocation for your environment.
- Public IP: Configure a public IP address if your project requires external access.
Step 6: Enter a unique and descriptive name to your environment for easy identification.
Step 7: After configuring all the necessary settings and click the “Create” button to initiate the creation of your new environment.
The system will begin setting up your environment. This process might take a few moments. Once completed, your new environment will appear on the dashboard and ready for further customization and deployment of Wagtail CMS.
By following these steps, you will have successfully created a new Python based environment on AccuWeb.Cloud, suitable for hosting Wagtail CMS.
2: Installing the Wagtail Application
Step 1: Use SSH to connect to your Apache application server. For convenience, we will utilize the inbuilt Web SSH tool available on the AccuWeb.Cloud dashboard.
Step 2: Running Python web applications in isolated virtual environments is a common practice. It allows you to manage project dependencies independently and without requiring administrator privileges. To create and activate a new virtual environment, execute the following commands:
virtualenv virtenv
source virtenv/bin/activate
Step 3: Download and install Wagtail CMS using the pip package manager:
pip install wagtail
pip install wagtail==1.13Step 4: Since we are installing Wagtail in the ROOT context, remove the existing default application folder:
rm -rf ROOTCreate a new Wagtail project in the ROOT directory:
wagtail start ROOT3: Configuring the Database
Step 1: Access your database admin panel using the credentials provided in the email sent after the database node creation.
Step 2: Navigate to the “User accounts” tab and click the “Add user account” link to create a new user account for Wagtail CMS.
Step 3: Specify the username and password. Ensure to check the “Create database with same name and grant all privileges” checkbox, then click “Go” at the bottom of the page.
Step 4: Open the settings/base.py file in your Wagtail project directory (/var/www/webroot/ROOT/ROOT/). Locate the DATABASES section and configure it with your database credentials:
DATABASES = {
'default': {
'ENGINE': 'django.db.backends.mysql',
'NAME': 'wagtail',
'USER': 'wagtail',
'PASSWORD': 'passw0rd',
'HOST': 'node22551-wagtail.jelastic.com',
'PORT': '3306',
}
}Update the ENGINE, NAME, USER, PASSWORD, HOST, and PORT fields as per the database and user details created in the previous step.
Step 5: Install Database Connector:
For MySQL: pip install mysqlclient
For PostgreSQL: PATH=$PATH:/usr/pgsql-9.6/bin/ pip install psycopg2
4: Running Wagtail CMS
Step 1: Enter the ROOT project directory and run the manage.py script to apply database migrations:
cd ROOT
python manage.py migrate
Step 2: Set up an admin account for the Wagtail CMS control panel:
python manage.py createsuperuserFollow the prompts to provide a username, email address, and password.
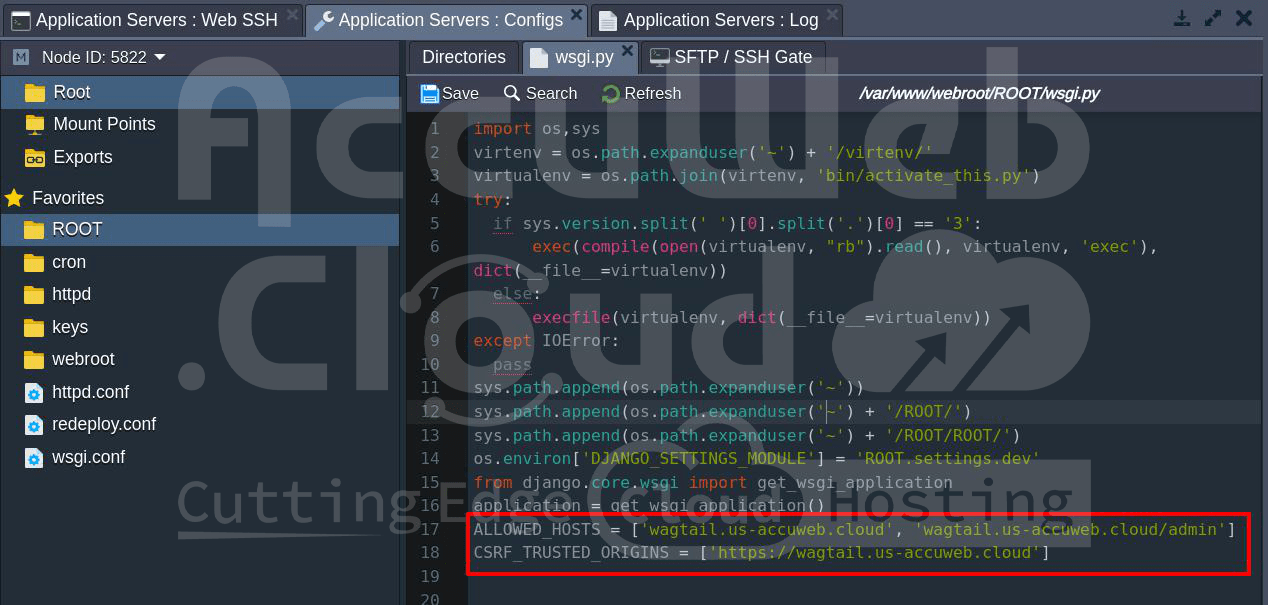
Step 3: Create and configure the wsgi.py file to run the application using mod_wsgi. Navigate to /var/www/webroot/ROOT and create a wsgi.py file with the following content:
import os,sys
virtenv = os.path.expanduser('~') + '/virtenv/'
virtualenv = os.path.join(virtenv, 'bin/activate_this.py')
try:
if sys.version.split(' ')[0].split('.')[0] == '3':
exec(compile(open(virtualenv, "rb").read(), virtualenv, 'exec'), dict(__file__=virtualenv))
else:
execfile(virtualenv, dict(__file__=virtualenv))
except IOError:
pass
sys.path.append(os.path.expanduser('~'))
sys.path.append(os.path.expanduser('~') + '/ROOT/')
sys.path.append(os.path.expanduser('~') + '/ROOT/ROOT/')
os.environ['DJANGO_SETTINGS_MODULE'] = 'ROOT.settings.dev'
from django.core.wsgi import get_wsgi_application
application = get_wsgi_application()
Save the newly created file.
Step 4: To serve static content through the Apache Python server, collect all static files:
python manage.py collectstaticThis will store all static content in the ~/ROOT/static directory.
Step 5: Ensure your domain URL is allowed by adding it to the ALLOWED_HOSTS and CSRF_TRUSTED_ORIGINS settings in /var/www/webroot/ROOT/wsgi.py:
ALLOWED_HOSTS = ['your-domain.com']
CSRF_TRUSTED_ORIGINS = ['https://your-domain.com']
Step 6: Click the “Open in Browser” button next to your environment on the AccuWeb.Cloud dashboard.
This will take you to the Wagtail CMS welcome page.
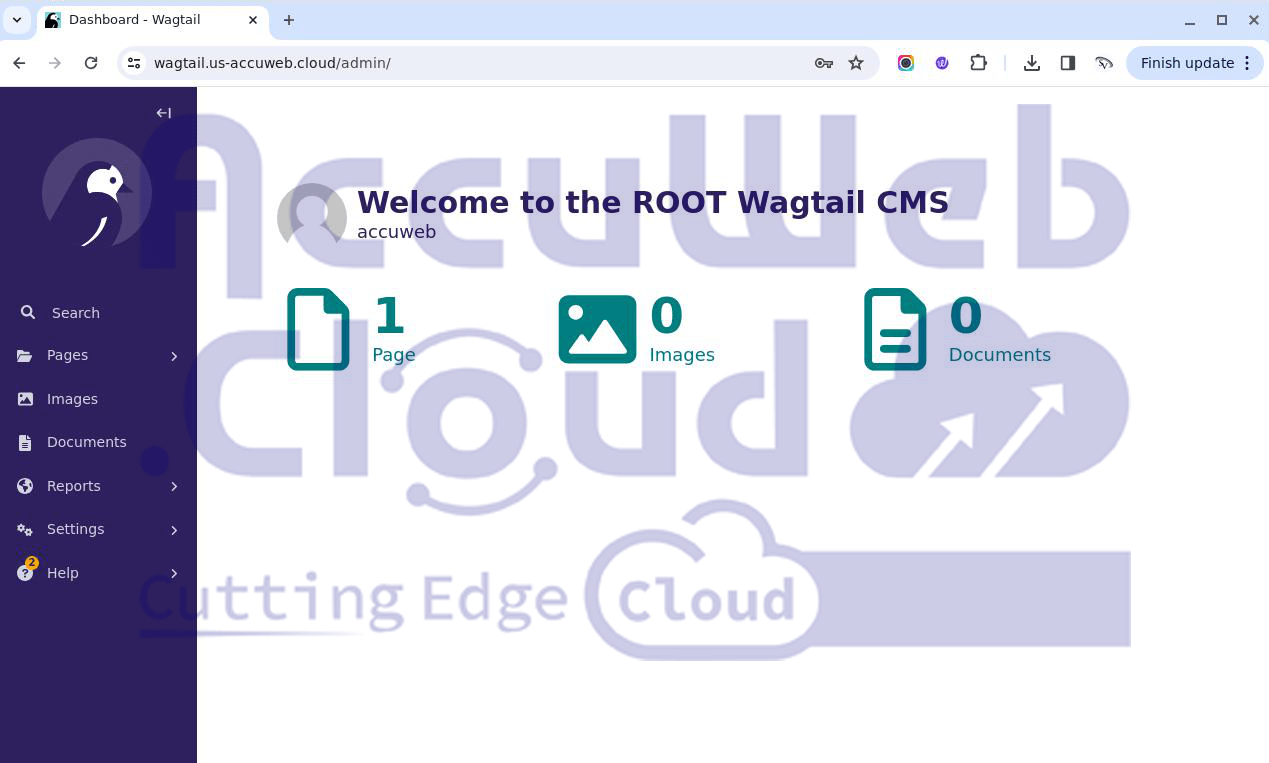
Step 7: Click the “Admin Interface” hyperlink to navigate to the admin panel. Log in using the credentials you set up during the installation process.
You can now use the Wagtail admin panel to create pages and manage content.
By following these detailed steps, you’ll have Wagtail CMS up and running on your AccuWeb.Cloud environment, ready for content creation and management.

Jilesh Patadiya, the visionary Founder and Chief Technology Officer (CTO) behind AccuWeb.Cloud. Founder & CTO at AccuWebHosting.com. He shares his web hosting insights on the AccuWeb.Cloud blog. He mostly writes on the latest web hosting trends, WordPress, storage technologies, and Windows and Linux hosting platforms.


