Complete Guide on Multi-Primary Replication in MySQL
With this platform, you can effortlessly establish two kinds of replication in MySQL – primary-secondary and primary-primary. It will help address various issues concerning performance, database backups, system failures, etc.
You can find instructions on configuring master-slave replication for your MySQL database here.
This tutorial will guide you through the configuration of MySQL’s master-master (multi-master) replication, focusing on its application in various environments. Although the process is relatively straightforward, paying close attention to some crucial details is essential.
So let’s get started!
Create Environments
You must have two or more database servers to set up replication. We will create two environments with MySQL instances for this purpose.
1. To get started, log in to the platform. Once on your dashboard, navigate to the top panel and click “Create Environment.”
2. Please utilize the topology wizard to create the following environments:
- The first master DB environment
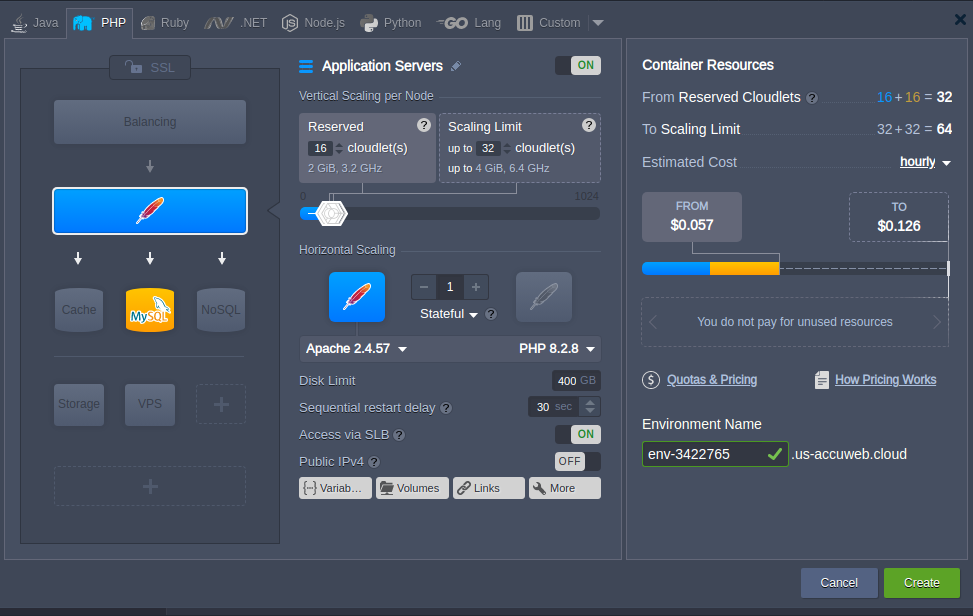
Please add the Apache application server, PHP support, and MySQL database. Remember to set the Cloudlet limits for each container. Once you’re done, give your environment a name (e.g., mysql-master-1) and click the Create button to proceed.
- The second master DB environment
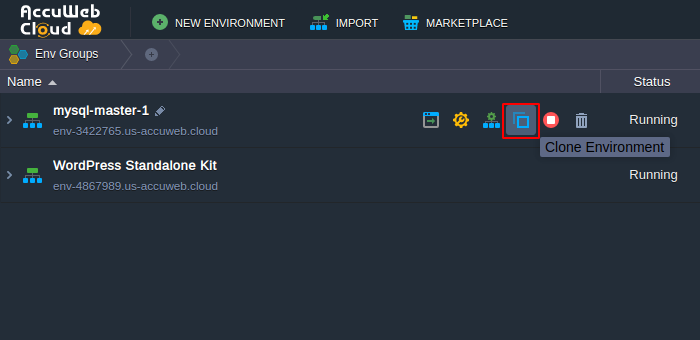
To set up a second master DB environment (master-MySQL-2), you can either follow the same steps as creating the first environment or simply clone the first environment and provide the appropriate name in the designated section.
Please note that the versions and configurations of environments may differ based on your requirements. That is also possible if you prefer a Java or Ruby application instead of PHP. However, please remember that the instructions in the article are specifically for replicating MySQL servers on this platform.
Configure the First Master DB
After installing and activating MySQL servers, it is necessary to configure them for replication.
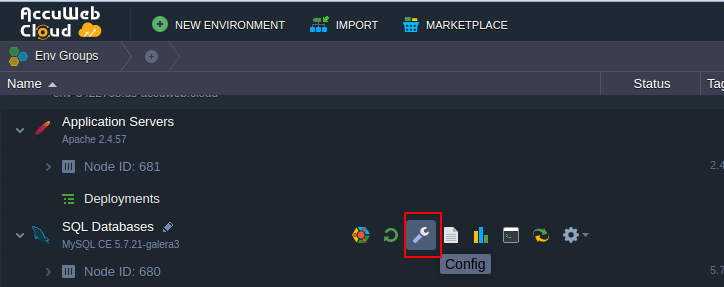
Step 1: To begin, navigate to mysql-master-1 and select the MySQL Config icon for your environment.
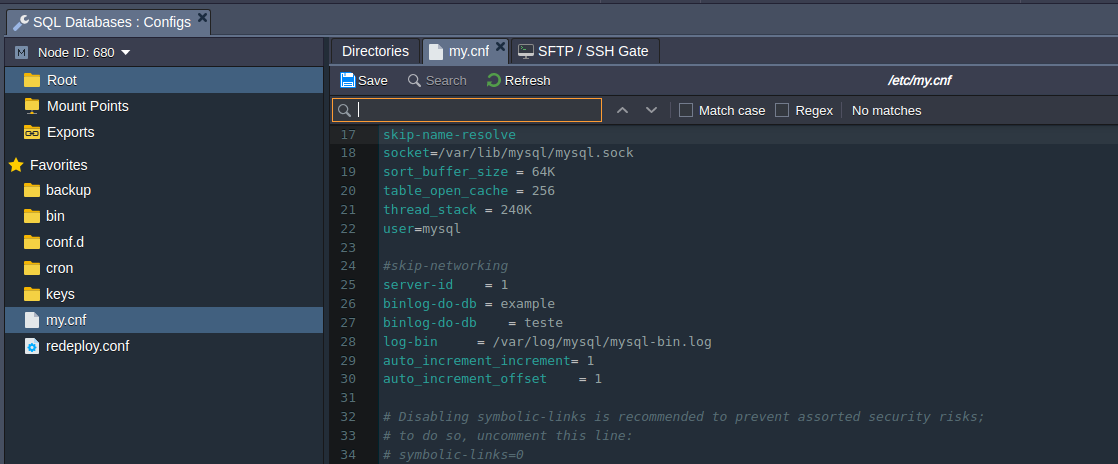
To access the Configuration Manager, follow these steps:
- Open the Configuration Manager.
- Navigate to the /etc/my.cnf file.
- Locate the #skip-networking string.
- Insert the parameters as shown below.
server-id = 1
binlog-do-db = example
binlog-do-db = teste
log-bin = /var/log/mysql/mysql-bin.log
auto_increment_increment= 1
auto_increment_offset = 1
Let’s look at what we are configuring with these options.
- The server-id is a standard option used by replication servers to identify themselves. It should be unique for each server.
- The server is instructed to limit binary logging to updates for the specified databases using “bin-log-do-db = example” and “bin-log-do-db = teste.”
Please note that these databases should still need to be created. You can add your databases once you feel confident with the Multi-Master Replication.
- MySQL’s “log-bin” setting determines whether the binary log is enabled. If an option value is provided, it serves as the base name for the log sequence.
- The setting ‘auto_increment_increment’ regulates the gap between each consecutive value in a column.
Setting the auto_increment_offset to 1 when using multi-master replication can help prevent replication conflicts. Specifically, for the master-mysql-1 server, we recommend using a value of 1, while for the master-mysql-2, we recommend using a value of 2.
When using master-to-master replication, setting both the auto_increment_increment and auto_increment_offset options is essential according to your application’s needs. We recommend setting the auto_increment_offset option to prevent replication conflicts to match the server-id parameter’s value.
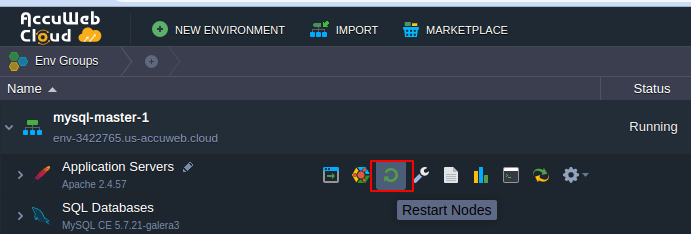
Step 2: After making modifications to the /etc/my.cnf file, click Save and restart the MySQL node in the master-mysql-1 environment, following the below steps.
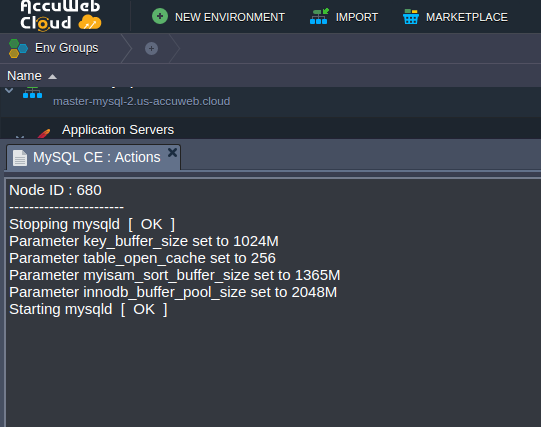
Step 3: To confirm that MySQL has been restarted successfully, go to the actions tab that opens automatically.
If an error occurs during this stage, need to repeat the procedure. If the issue persists, please contact your technical support for further assistance.
Configure the Second Master DB
1. It’s time to begin setting up the second DB server. Follow the same procedure as we did for the First Master DB.
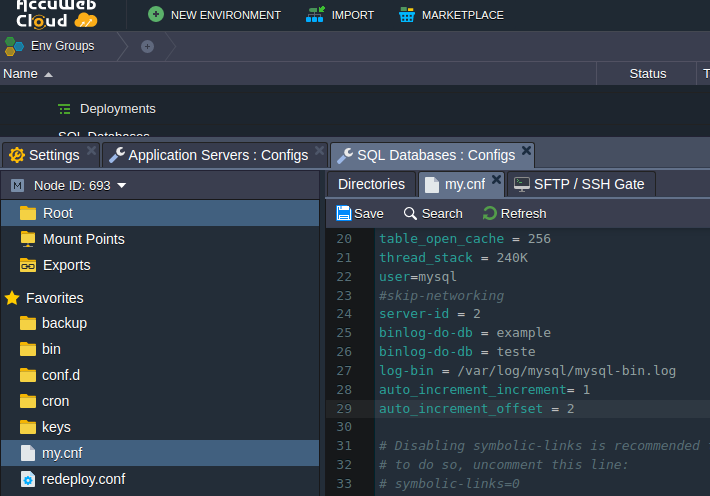
2. After creating the second master database., please navigate to the my.cnf file again and locate the #skip-networking parameter. After that, kindly paste the following lines.
server-id = 2
binlog-do-db = example
binlog-do-db = teste
log-bin = /var/log/mysql/mysql-bin.log
auto_increment_increment= 1
auto_increment_offset = 2
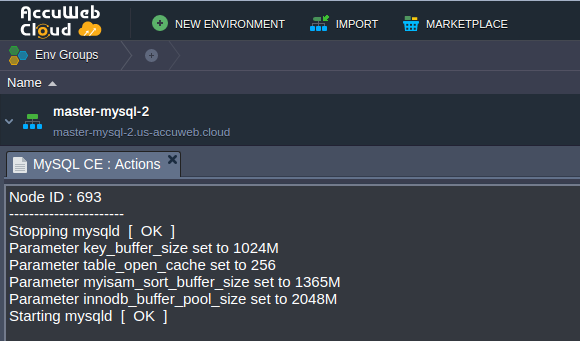
3. After making changes to the /etc/my.cnf file, save the modifications and restart the MySQL node in the master-mysql-1 environment. To confirm that the restart was successful, simply go to the actions tab that automatically opens up.
Enabling Master-Master Replication
To modify the replication, you must execute specific commands using the phpMyAdmin panel.
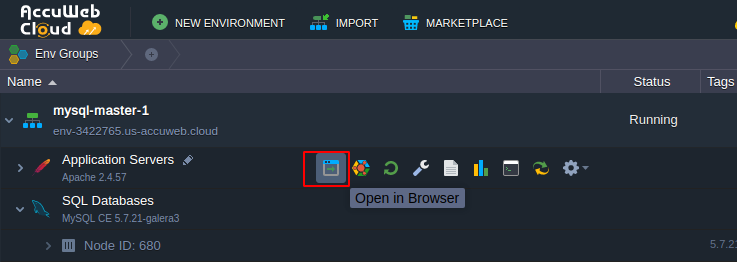
1. To access the MySQL server in the first environment (master-mysql-1), please click “Open in Browser.”
2. You will be redirected to the admin panel.
Please log in using the root user credentials.
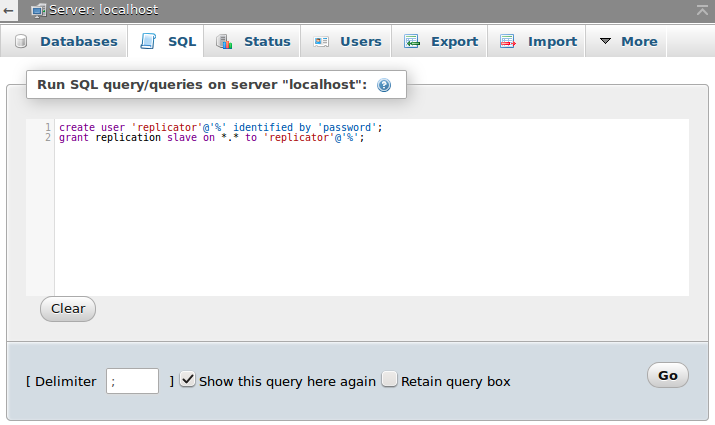
Once logged in, navigate to the SQL tab and execute the commands provided in the open window.
We have created a new user for replication and given them global permissions to perform replication operations.
Please remember the login details you provided and click the Go button below.
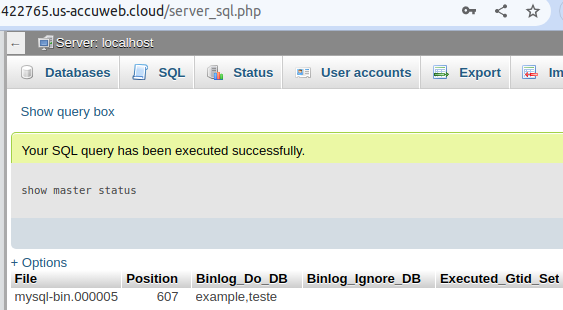
3. To ensure that the configuration is correct, run the following command:
Please remember the name of the binlog file and its position, as we will need this information for future configurations.
4. To set up the second MySQL server, replicate steps 1-3, which include creating a user with the same name and noting the log file settings.
5. It is now time to activate replication.
To do this, open the SQL tab located in the phpMyAdmin panel of the second MySQL server (which is included in the master-mysql-2 environment) and execute the following command:
STOP SLAVE;
CHANGE MASTER TO MASTER_HOST = ‘first_server_IP’, MASTER_USER = ‘replicator’, MASTER_PASSWORD = ‘password’, MASTER_LOG_FILE = ‘binlog_file_name’, MASTER_LOG_POS = binlog_file_position;
START SLAVE;
Where:
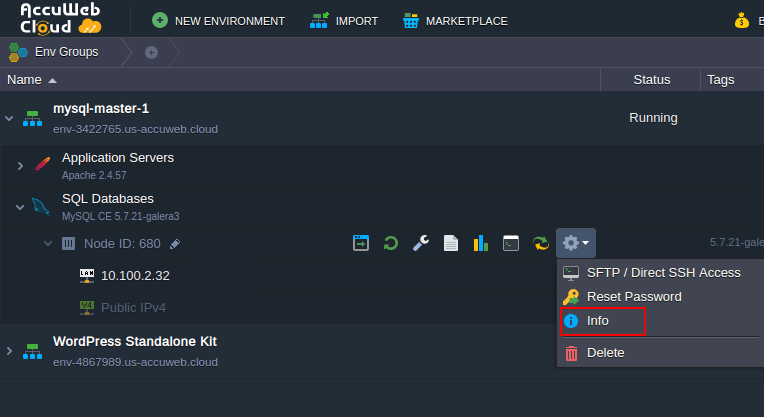
first_server_IP – To set up replication between servers hosted by different providers, you’ll need to link external IP addresses to both DB nodes and specify the internal IP address of the MySQL server in the first environment as a parameter.
password – The username you specified when creating the database user for the initial MySQL server.
binlog_file_name – Please provide the value listed under the “File” column in the status table of the initial server.
binlog_file_position – position of the binlog file from the same table
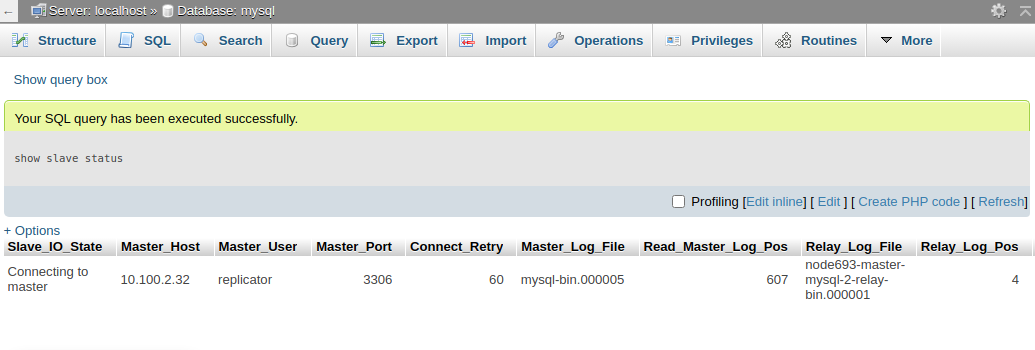
6. To verify if the commands run successfully or not, run the following:
show slave status;
7. To access the administrator panel for the MySQL node of the master-mysql-1 environment, run the same lines but replace the parameter values with the information of the second DB server.
STOP SLAVE;
CHANGE MASTER TO MASTER_HOST = ‘second_server_IP’, MASTER_USER = ‘replicator’, MASTER_PASSWORD = ‘password’, MASTER_LOG_FILE = ‘binlog_file_name’, MASTER_LOG_POS = binlog_file_position;
START SLAVE;
8. Please verify if everything was configured correctly in the same manner.
show slave status;
Congratulations! The replication feature is successfully enabled on both servers.
Testing the Replication
Lastly, let’s make sure everything is functioning perfectly.
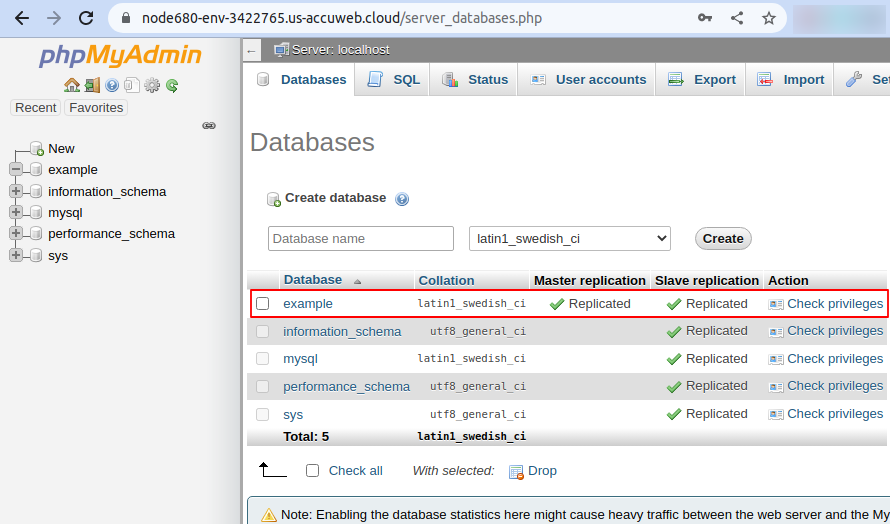
1. Log onto the first DB server & create a new example database:
As you can see, it is already marked as a replicated within the Master replication column.
2: Access the second server in your MySQL cluster and verify if the new database added or not.
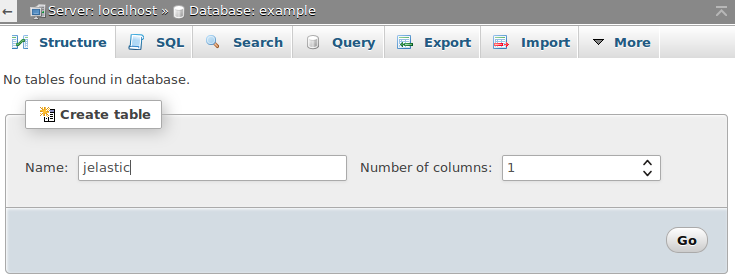
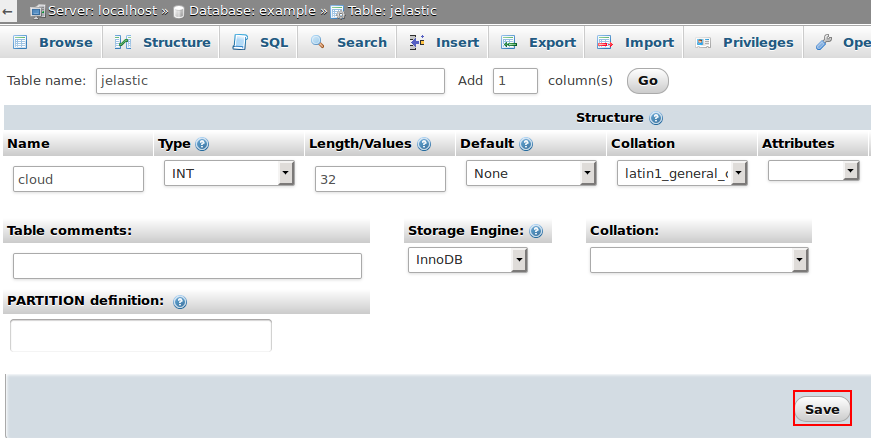
Once confirmed, select the database and create a new table with at least one column.
Please input your desired values and click on the Save button.
3. Please switch back to the admin panel of the first MySQL server and verify that the replicated example database now includes the “Jelastic” table.

