How to Configure MongoDB 7 on Latest Ubuntu OS and access it using MongoDB Compass?
Developers choose MongoDB because it is flexible, scalable, fast, and has a strong ecosystem. These features are essential for creating modern applications. You can easily set up MongoDB on your Ubuntu 22.04 LTS machine with just a few steps.
This guide will show you how to install and use MongoDB on Ubuntu 22.04, including all the commands and code you need. We will specifically look at installing the MongoDB Community Edition on Ubuntu 22.04, also known as Jammy JellyFish.
What is MongoDB?
MongoDB is a free, open-source database that works on different platforms. It is popular for creating fast and scalable applications. Unlike traditional SQL databases, MongoDB uses a flexible, document-oriented data model.
Instead of fixed tables, MongoDB stores data as BSON documents, which are binary versions of JSON-like field-value pairs. These documents can include arrays and nested sub-documents, making it easy to represent complex real-world data.
Why do Developers choose MongoDB for their applications?
MongoDB is used to build web and mobile applications that deal with a lot of fast-changing, semi-structured, or unstructured data. Its flexible data structure makes it a good choice for developers who need to build scalable applications that handle large amounts of data quickly.
The current stable version is MongoDB 7.0, released in August 2013. It is supported for both on-premise setups and MongoDB Atlas, a cloud-based database service.
Installation and configuration of MongoDB on AccuWeb.Cloud environment
Setting up MongoDB 7 on the latest Ubuntu OS on AccuWeb.Cloud involves several steps: creating your cloud instance, installing MongoDB, and configuring it correctly. Here’s a detailed guide to help you through the process:
Create Elastic VPS with Ubuntu OS in AccuWeb.Cloud Environment
To create an Elastic VPS with Ubuntu OS on the AccuWeb.Cloud platform, follow these steps:
Step 1. Login into your AccuWeb.Cloud dashboard.
Step 2. Click the “New Environment“ button at the top to open the environment setup wizard.

Step 3. Go to the VPS section at the bottom left in the wizard. Select “Ubuntu OS (Version 22.04)” from the list of options.
")
Step 4. In the Vertical Scaling per node section, set 16 cloudlets in Reserved and 32 cloudlets in Scaling Limit.
Go to the Public IPv4 and click the Off button to assign a public IP address to Ubuntu VPS. After that, click on the Create button to set Elastic VPS with Ubuntu 22.04 OS.
Important Note: By default, the system will assign 1 cloudlet to Reserved and 4 cloudlets to Scaling Limit. With this server configuration, you may face errors while installing MongoDB. A minimum of 8 cloudlets are required in the Reserved cloudlet to install MongoDB on Ubuntu 22.04.

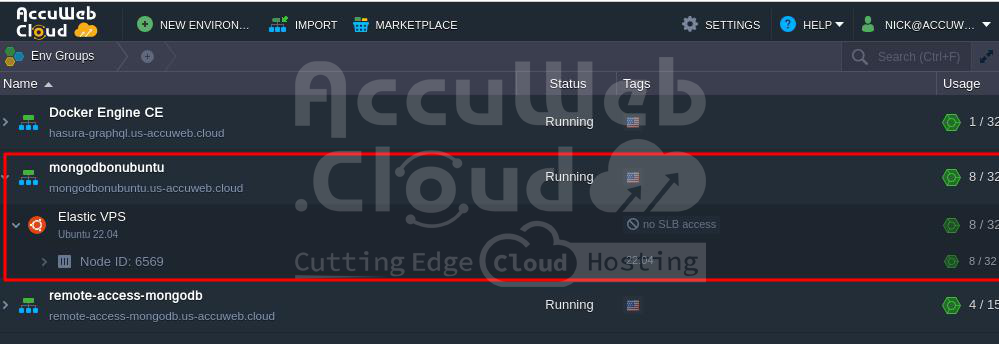
Step 5. In a few minutes, your new environment with the chosen virtual server will appear on the dashboard. You will get an email with login details, including the public IP and access URL.
Step 6. You can connect to the container either from the SSH client, such as Putty or Bitwise, with the login details sent to your registered email address or directly through the browser using the Web SSH client.
Step 7. Here, we will use a Web SSH client to connect to any container and install MongoDB. Click the “Web SSH“ button to open the terminal next to the Elastic VPS.

Step 8. Once you click on it, the web ssh will be opened just below the environment.

Following these steps, you can easily set up and access your Ubuntu VPS on the AccuWeb.Cloud platform.
Steps to Configure MongoDB 7 on the Ubuntu OS(22.04)
- Install MongoDB on Ubuntu
- Start MongoDB Service
- Create a database and users
- Secure the server
- Set up remote access, and
- Environment Firewal.
1. Install MongoDB on Ubuntu 22.04
First, install the necessary packages:
# apt install software-properties-common gnupg apt-transport-https ca-certificates -y
To install the latest MongoDB package, add its repository to Ubuntu:
# curl -fsSL https://pgp.mongodb.com/server-7.0.asc | sudo gpg -o /usr/share/keyrings/mongodb-server-7.0.gpg --dearmor
# echo "deb [ arch=amd64,arm64 signed-by=/usr/share/keyrings/mongodb-server-7.0.gpg ] https://repo.mongodb.org/apt/ubuntu jammy/mongodb-org/7.0 multiverse" | sudo tee /etc/apt/sources.list.d/mongodb-org-7.0.list
Update the package index:
# apt update
Now, install the mongodb-org package which includes MongoDB:
# apt install mongodb-org -y
To verify the MongoDB version installed, run:
# mongod --version
This command displays details including the MongoDB version, Git information, and OpenSSL version.
2. Start MongoDB service
After installing MongoDB, the MongoDB service is initially turned off. You can check this by using the following command:
# systemctl status mongod
To start the MongoDB service, use this command:
# systemctl start mongod
Check again to ensure the service is running:
# systemctl status mongod
From the output, you can verify that MongoDB is running. You can also confirm that the database is active and listening on its default port (27017) by using the following command:
# ss -pnltu | grep 27017
If everything looks good, enable MongoDB to start automatically when your system boots up:
# systemctl enable mongod
Now MongoDB is installed, running, and set to start automatically whenever your system starts up.
3. Create MongoDB Database and User
Now that MongoDB is running and set up for remote access, let’s create a database and user in MongoDB.
To access MongoDB, use this command:
# mongosh
Before entering the MongoDB shell, you’ll see details about MongoDB’s version, the MongoDB shell, and a URL for Mongosh documentation.
Above the Mongo shell prompt, a warning may appear if access control isn’t enabled for the database, restricting read and write access to data and configuration. This warning goes away once authentication is enabled.
After installation, MongoDB creates three databases by default: admin, config, and local. To list them, use:
show dbs
To create a database, type ‘use’ followed by the database name. For example, to create a database named ‘nicktest_db’:
use nicktest_db
To confirm the current database, use the ‘db’ command. Here, it will show ‘nicktest_db’.
db
MongoDB offers various shell methods to manage your database. Use ‘db.createUser’ to create a new user within a database. You’ll need to define the username, password, and roles in JSON format. Here’s how you can create a user named ‘nick’ with read and write permissions on the ‘nicktest_db’ database:
db.createUser(
{
user: "nick",
pwd: "AccU@12345",
roles: [ { role: "readWrite", db: "nicktest_db" } ]
}
)")
To list users created, use db.getUsers():
:")
Alternatively, use:
show users

To delete a user, use ‘db.dropUser’ as shown:
db.dropUser("nick", {w: "majority", wtimeout: 4000})
Confirmation should show { ok: 1 }.
4. Secure MongoDB on Ubuntu
MongoDB does not enable authentication by default. This means anyone with access to the database server can see, add, or delete data, posing a serious risk to your information. To protect MongoDB, we’ll show you how to secure it on Ubuntu 22.04.
First, start by accessing the Mongo Shell:
# mongosh
Next, connect or switch to the admin database:
use admin
Now, create an administrative user by entering these lines and pressing ENTER:
db.createUser(
{
user: "Accuadmin",
pwd: passwordPrompt(),
roles: [ { role: "userAdminAnyDatabase", db: "admin" }, "readWriteAnyDatabase" ]
}
)
Here’s what this code does:
- user: “Accuadmin” creates an administrative user named Accuadmin.
- pwd: passwordPrompt() prompts for the administrative user’s password securely.
- roles: [ { role: “userAdminAnyDatabase”, db: “admin” }, “readWriteAnyDatabase” ] grants roles to the administrative user, allowing read and write permissions across all databases.
After running the command, exit the Mongo Shell using exit or CTRL + C.

With the admin user set up, the next step is to enable authentication. Exit the Mongo Shell and edit the mongod.conf file:
# nano /etc/mongod.confScroll to the security section, uncomment it, and add authorization: enabled:
Security
authorization: enabled

Save the changes and exit the editor. Apply the configuration by restarting MongoDB:
# systemctl restart mongod
Check if MongoDB is running properly:
# systemctl status mongod
Now, log back into the Mongo Shell:
# mongosh
This time, you’ll notice that startup warnings have disappeared. However, if you try to perform any database tasks like viewing databases (show dbs), you’ll be prompted to authenticate.

To authenticate, log out of the Mongo Shell and log back in using the administrative user:
# mongosh -u Accuadmin -p --authenticationDatabase admin
Enter the administrative user’s password. Now, the authentication warnings will no longer appear. From now on, only the administrative user can access and manage the database.
To exit the shell, simply type exit.

5. Configure MongoDB for remote access
By default, MongoDB is configured to only be accessible locally on the same server where it’s installed. To enable remote access, you need to modify the main configuration file, /etc/mongod.conf, which controls MongoDB’s settings for storage, logging, networking, and process management.
To access and edit this file, use your text editor:
# nano /etc/mongod.conf
Find the section labeled network interfaces and locate the bindIp setting:
# network interfaces
net:
port: 27017
bindIp: 127.0.0.1
By default, MongoDB is bound to 127.0.0.1, which is the loopback address, restricting connections to the local server only.
To allow remote access, add a comma followed by the IP address of your MongoDB server:
bindIp: 127.0.0.1, mongo-server-ip
After making this change, save the file and exit your text editor. To apply the configuration changes, restart MongoDB:
# systemctl restart mongod
6. Allow the Port number in the Firewall (IPtables) and Environment firewall
By default, the IPtables firewall is enabled on AccuWeb.Cloud Elastic VPS. You need to allow incoming connections to port 27017 from the remote machine.
# iptables -A INPUT -p tcp --dport 27017 -j ACCEPT")
Changes made with IPtables are not saved after a reboot unless you save them. To save the current rules, use this command:
# iptables-save > /etc/iptables/rules.v4M
After allowing the port number in the IPTables firewall, you also need to allow it in the environment firewall.
To do this, log in to the AccuWeb.Cloud dashboard and choose the environment where you want to allow the port number. Click on the Settings icon.

In the Settings window that opens, go to the firewall section and select the Inbound Rules tab.

Click the Add button to create a new firewall rule.

In the Add Inbound rule window, fill in the following details. After then, click on the Add button.
- Nodes: Elastic VPS
- Name: MongoDB
- Protocol: TCP
- Port Range: 27017
- Source: All
- Priority: Assigned automatically
- Action: Allow

After clicking the Add button, the rule will be added and displayed in the Inbound Rules list under MongoDB.

Now, MongoDB is configured to accept remote connections from the specified IP address.
How to Connect MongoDB with MongoDB Compass
1. Allow Remote Connections to MongoDB
You first need to allow remote connections to connect MongoDB with MongoDB Compass. Edit the MongoDB configuration file /etc/mongod.conf. Find the bindIp parameter and set it to 0.0.0.0 to allow all IP addresses or specify your server’s IP address.

After editing the file, restart the MongoDB service:
# systemctl restart mongod
2. Open MongoDB Compass
Open MongoDB Compass on your local system. If you don’t have it installed, download and install it first.
3. Create a New Connection
Click on “New Connection.” If you have the MongoDB connection string, enter it in the URL field and click “Connect.”

If you don’t have the connection string, click on “Advanced Connection Options,” then go to the “General” tab. Select “MongoDB” and enter your server’s IP address and port number in the “Host” field.

4. Enter Authentication Details
Next, click on the “Authentication” tab. Select “Username/Password” as the authentication method. Enter the database username in the “Username” field and the password in the “Password” field. Enter the database name in the “Authentication Database” field. Then click “Connect.”

5. View Databases
If the connection is successful, you will see a list of all the databases in the “Databases” section of MongoDB Compass.

Conclusion
In conclusion, setting up MongoDB 7 on the latest Ubuntu OS involves installing MongoDB, adjusting firewall settings for remote access, and optionally using MongoDB Compass for easy database management. This setup ensures a strong, flexible, and secure environment for your MongoDB instances, offering great performance and accessibility.